


Likes
Comments
Share

@DogDoctorOfficial
Follow
💚 Amnesia Haze Auto by Zamnesia – Pheno A
Week 5 | The Elegant Stretch Before the Storm
Welcome back to another chapter of the 8×8 Adventure!
Every week these ladies remind me why phenotype hunting is such an exciting journey.
Today’s spotlight belongs to Amnesia Haze Auto – Pheno A, a plant that’s beginning to reveal the classic characteristics many growers hope to see from an Amnesia Haze.
Tall…
Graceful…
Open…
And now officially beginning her flowering journey.
While many of her neighbours are building dense canopies, this lady has chosen elegance, creating a beautifully structured framework that should allow every future flower to enjoy plenty of light and airflow.
⸻
🌱 The 12/12 From Seed Adventure
For anyone discovering this diary for the first time, welcome!
This entire project is being grown using my favourite experiment: 12/12 From Seed.
From the day these seeds germinated, they have lived under a 12 hours on / 12 hours off lighting schedule.
The goal isn’t simply producing smaller plants.
It’s about discovering how different genetics and different phenotypes naturally express themselves under identical conditions.
Every plant shares:
• The same grow room
• The same environmental conditions
• The same lighting
• The same nutrition
• The same training philosophy
• The same care
Only the genetics decide how each individual develops.
Amnesia Haze Auto Pheno A is already showing a wonderfully classic sativa-style expression.
⸻
🌿 Stretching With Purpose
At approximately 75 cm, she’s among the taller ladies in the room and continues displaying excellent vertical growth.
Rather than producing a dense bush, she’s built long internodal spacing with beautifully stacked branches reaching confidently toward the light.
Those longer distances between nodes might look sparse now, but for flowering they’re actually a huge advantage.
Each future bud site has room to breathe.
Each branch receives excellent light penetration.
Each cola has space to develop without excessive crowding.
Sometimes less density early on creates better flowers later.
⸻
🌸 Flowering Has Officially Begun
This week marks an exciting transition.
Fresh white pistils are now appearing across every growing tip, confirming that flowering has officially begun.
Although she’s entering bloom, she’s still carrying plenty of vegetative momentum.
This is completely normal.
During this transition period the plant continues stretching while simultaneously beginning flower production.
Because of that, her feeding program still reflects both stages of growth.
She’s no longer purely vegetative.
But she’s not yet fully flowering either.
She’s standing right in the middle of one of the most important phases of her life cycle.
⸻
🍃 Gentle Leaf Tucking Instead of Heavy Defoliation
Training this week remained very gentle.
Rather than removing healthy leaves, large fan leaves were carefully tucked beneath developing branches to expose additional flowering sites.
Leaf tucking is one of my favourite techniques during this stage because it increases light penetration while allowing the plant to keep all of her valuable solar panels.
Healthy leaves continue producing energy.
Hidden branches receive more light.
The canopy stays open.
It’s a simple technique, but one that often delivers excellent results.
⸻
💧 Feeding Through the Transition
Since the room currently contains plants at slightly different stages of development, the feeding program reflects that transition.
Instead of switching immediately to a full flowering recipe, the plants are currently receiving a carefully balanced combination of vegetative and flowering nutrients.
Current nutrition includes:
• Plagron Terra Grow
• Plagron Terra Bloom
• Power Buds
• Sugar Royal
• Power Roots
• Pure Zym
• pH adjustment using pH Plus and Lemon Kick
This balanced approach allows the plants to continue supporting vigorous green growth while simultaneously providing the phosphorus, potassium, enzymes and biological support needed as flowers begin to develop.
It’s all about easing them smoothly into bloom rather than making an abrupt change.
⸻
🌡️ A Stable Environment
One advantage of documenting every phenotype separately is that each plant shares the exact same controlled environment.
Current room conditions include:
• Day temperature: 31.1°C
• Night temperature: 25°C
• Relative humidity: 72%
• Solution temperature: 21.6°C
• Root zone temperature: 21°C
• CO₂ concentration: 636 ppm
Keeping these parameters consistent allows each phenotype to express its true genetic potential without environmental fluctuations becoming part of the equation.
⸻
📸 This Week’s Gallery
The photographs this week beautifully capture the beginning of her transformation.
The full-plant portraits highlight her elegant sativa structure, with long branches and an impressive central leader dominating the canopy.
The close-up images reveal clusters of fresh white pistils emerging from nearly every node, confirming that flowering has truly begun.
One of my favourite details is the clean spacing between branches.
Rather than competing for light, every future cola has its own place to develop.
The healthy green foliage, strong stems and open architecture suggest this lady is preparing for an exciting flowering stretch over the coming weeks.
⸻
🔮 Looking Ahead
Over the next two weeks I expect this Amnesia Haze to continue stretching before gradually shifting her energy toward building flowers.
If she follows the classic Amnesia Haze profile, those long internodes should soon begin filling with elegant, elongated buds covered in bright white pistils.
The framework is already there.
Now it’s time for the flowers to write the next chapter.
I can’t wait to watch her evolve.
⸻
💚 Thank You
Thank you so much for following another chapter of this 8×8 Adventure.
Watching every phenotype develop its own personality while sharing the exact same environment continues to be one of the most rewarding parts of this project.
A huge thank you to:
💚 GrowDiaries for providing an incredible platform where growers from around the world can learn, inspire one another, and document every stage of their journeys.
Zamnesia for providing the genetics that make this phenotype hunt possible.
🌱 Plagron for supplying the nutrition supporting these plants from seed to harvest.
💡 Future of Grow LED for delivering the consistent light powering every day of this grow.
🌿 TrolMaster for helping maintain a stable environment where each phenotype can express its full genetic potential.
And finally, Growers Love and thank you to everyone following these diaries, leaving comments, sharing knowledge and joining me on this adventure.
Every plant has its own story, and Amnesia Haze Auto Pheno A is only just beginning to tell hers. The stretch is underway, the first flowers are forming, and the best is still to come. 💚🌿


Likes
2
Share


@Mr_nugs_lover_David
Follow
Una cepa bastante fácil de cultivar,yo al preparar un súper soil a base de guano,ácidos humicos,bacterias,mi suero de lactobacillus casero,algas marinas y humus,tan solo regue con agua por lo que no tengo mucho trabajo en ese sentido,ademas tampoco le aplique ninguna técnica de entrenamiento cosa que me gustaría hacer si tengo oprtunidad de volver a cultivar esta cepa, sin embargo vi que empezó la floración siendo pequeña de tamaño,término dando una excelente porra central y algunos cogollos bajeros con los que me fui haciendo algunas infusiones con leche entera y también con aceite de oliva para no tener que recurrir al mercado negro y poder asi añadir mis canabinoides a mi sistema para poder mejorar mi lumbalgia y descansar mejor. El aroma es sencillamente exquisito,ha sido todo un placer cultivar esta cepa,lo malo es que es muy poco para mi ya que soy un usuario que necesita una buena reserva de cogollos potentes sobre todo a nivel físico que me ayuden a lo largo del año.muchas gracias y espero que os haya gustado mi trabajo, paz compañeros Canabicos! 💚✌️❤️💛🌱

Likes
15
Share


@BushDoctor740
Follow
These healthy girls are starting to flower now and looking beautiful.Im going to do a bit more training and some defoliation to get more light penetrating down below.Se7000 still set at 50 percent light intensity raised to the ceiling of the tent and they seem to be really happy with it.Just about 2 more weeks I’ll start adding the Plagron Green Sensation along with another top dressing of Gaia green power bloom.
Likes
16
Share


@Chubbs
Follow
420Fastbuds
FBT2310/Week5
What up grow fam. Sorry for the late weekly update but was having some technical difficulties. This week has been eventful to say the least. My heater went out letting my Temps drop to high 40'f for a night or two and wow did the plants tell me they're angry. Definitely starting to bounce back but just goes to show the reselants of Fastbuds genetics. I lollipoped and did one more defoliation this week so hopefully flower stage will be smooth sailing. All in all Happy Growing


Likes
22
Share


@CanarianGrow92
Follow
Wonderful tangerine smell, all strains are looking and smelling more or less the same, some buds are a bit bigger and some other showed some more stretching when we switched to flower but in general wonderful strain, lets see if the buds taste as good as they smell 😜
Week 4 already! We start to see a small nutrients deficiency, time to add some more organic stuff, i didn't applied too much so it seems it was food for 4 weeks, great as i dont want to give too much nutrients, I heard that organic nutrients gives a better taste and avoid salt accumulation in the roots, i always have been a typical grower using bottles but lets see, at the moment very happy, buds are looking good, i do need to add some sugars I think 🤔

Likes
18
Share


@JLive3asy420
Follow
P1 top is 14 in from light majority of bud sights are 17”
P2 is the tallest and it is in the net which is 15” from the light
P3 top is 13” from the light and majority of bud sights are 17”
P4 top is 16” from light and majority of bud sites are 20” from light
P5 top is 17” from the light majority of bud sites are 19” from light

Likes
74
Share


@Hou_Stone
Follow
👨🚀🍀❄️
👋C'est parti, la floraison commence ce 24/09. On dirait que mon topping se transforme en FIMing. La plus part des plantes ont des nœuds supérieurs supplémentaire qui pousse mais ils ont l'air faible. Je vais voir ce que ça donne 🤔.
Je fais un peu de défoliation sur les nœuds inférieur.🤔
J'ai ajouté environ 25gr de poudre BioBloom par pot de 8L soit environ 3gr/L.
J'arrose chaque pot avec environ 1.5L tout les 5 jours. J'ajoute du biohenhanceur 1 fois sur 2
Intensité de la FC3000: 90%
Ventilation : 2 ventilateur oscillant ( ON 12/24H) + Extracteur pouces mars hydro power : 2/10 (24h/24h)
Venez me voir sur Instagram ! 🤩
https://www.instagram.com/hou_stone420/


Likes
6
Share


@GrowzWithZee
Follow
She's just caked. Incredible. Followed by sweet smells around the room. Shes a small beauty!
Likes
4
Share


@Trinidad
Follow
Day 32. Plants have begun preflower. Things are progressing nicely. 1 plant still struggling. Defoliation applied to keep things tidy in growtent. Still there is quite alot of growing to be done so hopefully everything fits. 😀
Likes
3
Share


@natta98
Follow
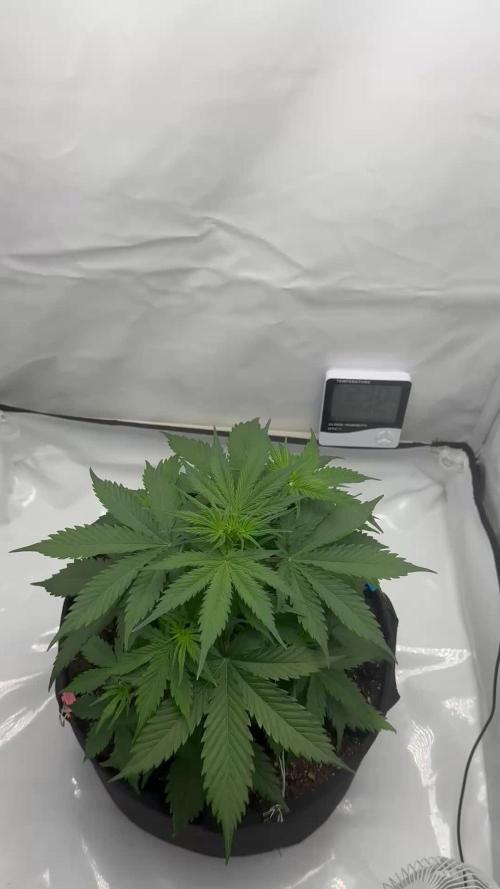
semana tranquila me olvide de anotar cuando regue, flora booster no me acuerdo, y 06/07 riego con agua, una de las plantas ya se esta comiendo todos los nutrientes disponibles, mientras que la otra todavia sigue teniendo reservas, cada vez mas resinosas, la planta que se esta comiendo todos los nutrientes ya manifiesta en algunas partes tricomas color ambar, aunque esperare 2 semanas mas para ver si la corto o no



Likes
4
Share


@Bear_Grows_Green
Follow
02/05 day 29 flower and holy shit things are popping. The smells are strong of tropical fruit punch on the run when I open the tent it smells of over ripe or slightly fermented fruit yummy. Stacking and filling out awesome! They got water and fed today.
02/09 got watered with bio phos, and bio catalyst 7 gallons total water. Terp check on them all. #1 straight tropical fruit punch very loud strongest and most unique terps in the tent. #2 slightly gassy pretty generic smell I feel I've smelled a million times before. #3 slight gas and fruit punch but subtle nothing impressive. #4 2nd strongest terps on the tent a even mix of gas and tropical fruit punch. I'm gonna have a hard time letting go of #1 or #4 honestly so they are both getting ran again next round for fresh frozen and will be kept around at least til I try the end rosin.
02/11 got watered 10.5 gallons with supplemental stuff in last 3.5 gallons last day of week 5.
Likes
6
Share


@Canna96
Follow
Hey now, I hope everyone is having a great weekend, it was a good week for the ladies in the 5X5, they are all starting to stack flowers and really starting to distinguish their own smells. The Bubble Runtz has the most indica dominant looking colas and smells absolutely amazing. The Sundae Driver is looking like she is gonna have the fattest colas and be the biggest producer. I am really hoping I get the red phenotype of the Red Hot Cookies, and both the Green Crack and Durban Nights are showing the most Sativa characteristics and looking great.
I now have the Medic Grow Light cranked up to 100% in F1 mode and am also using the UV/IR for 30 minutes per day prior to lights out. I am running a 12/12 cycle and feeding the same mix of GH nutrients which include Silica, CalMag, MaxiBloom, and Bloom Booster, with additional food grade Hydrogen Peroxide in the reservoir to keep algea growth to a minimum. I mix one 5 gallon bucket of nutes per day and clean my reservoir once per week. My pump is set to auto feed the plants every 5 hours after lights on, and I have a gravity self draining runoff setup I built.
Not much to do from here on out, just keep the reservoir clean and full, a little defoliation, and 5 minutes per day to mix a bucket of nutes.I hope they get fat in the next few weeks and then I have about 7 people lined up to help me trim, I will throw everyone two zips for the help. hoping to do the wet trim in a day.
I hope everyone has a great rest of your weekend, Thanks for stopping by, Stay Safe and Blaze On!!! 💪
Website: https://medicgrow.com/
https://growdiaries.com/grower/medicgrowled

Likes
9
Share


@YD_59
Follow
one of the plants is flowering and the buds on it look nice so far but like said last week, it also has some seeds/pollen sacs, so I'm hoping there'll still be some buds on it by harvest, the other two haven't started flowering much yet, I've only taken videos because I don't have a light and I couldn't see what I was taking a photo of
Likes
37
Share


@Aedaone
Follow
The temperatures, humidity, height, and watering volume(if measured) in grow conditions are all averaged for the week. The pH is soil pH. Any watering done by me is well water which is 7.6 pH and 50° F. Coop Poop, Feather Meal, and Soluble Kelp are ml/gallon of soil top dressed. Everything else listed in nutrients is ml/gallon of water fed to plants without checking the solution Ph.
Day 1 we had a high temperature of 73°. It was sunny, cool, and a dry 35% humidity. The girls are super happy. I'm adding 100ml coop poop top dressed to each pot today. About midweek I'll hit them with potassium.
Day 2 we had a high temperature of 74°F. I watered about 5 gallons of well water. The nights are super cool and the pm is coming back.
Day 3 we had a high temperature of 79°F with clear sunny skies. The temperature at night has been pretty low. Last night 41°F and tonight 44°F.
Day 4 we had a high temperature of 84°F with sunny skies. The humidity is tipping back up but still below 80%. These girls are doing great. They are getting about 2 hours less sunshine than the other fastbuds I'm growing. It's definitely keeping these girls behind and affecting production. I treated with biofungicide today.
Day 5 we had a high temperature of 87°F with partly cloudy skies. I watered about 5 gallons.
Day 6 we had a high temperature of 80°F. Skies were cloudy and we have a hurricane now tropical depression about to hit. I watered about 5 gallons. No rain yet.
Day 7 we had a high temperature of 72°F. Skies were overcast and there was a drizzling mist all day. Humidity was 110% for at least 24 hours. The girls seemed to be fine. There's more rain in the forecast and I'm hoping we miss it.
This week was a success. The girls really started smelling loud and very citrus. Like really orangy smelling tang. These really have an awesome nose. The weather is being a little bit tuff. Other than that a great week.


Likes
181
Share


@GODSGIFT_2005_JM
Follow
🍼Greenhouse Feeding BioGrow & Bio Bloom
🌱GARDEN OF GREEN SEEDS
⛺️MARSHYDRO
The ⛺️ has a small door 🚪 on the sides which is useful for mid section groom room work. 🤩
☀️ by VIPARSPECTRA (models: P2000 & XS 2000)
