


Likes
Comments
Share

@Schafe1001
Follow
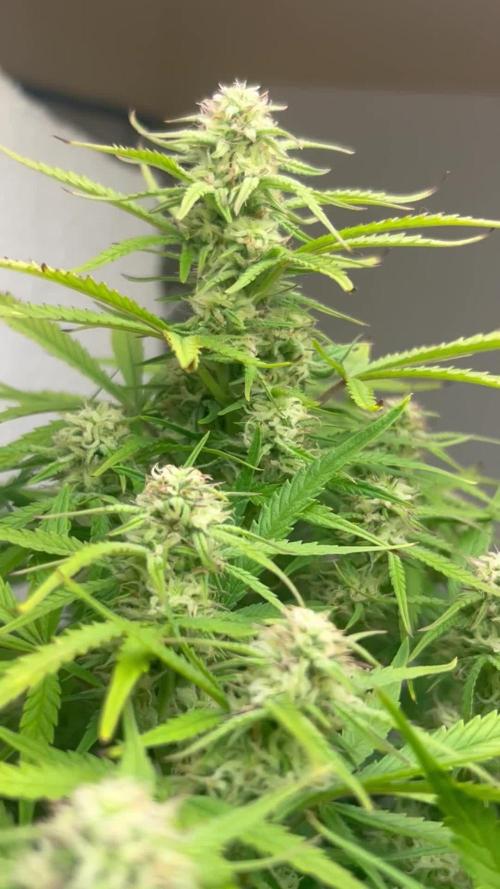
Time stands still lol 😂 for the analog kid 👶
But BIG time things are happening in the Garden.
I gots to go see RUSH 😆


Likes
75
Share


@DogDoctorOfficial
Follow
Week 6: Nurturing the Monstrous Beauty of Panty Punch Auto
As we embark on Week 6 of our cultivation journey with Panty Punch Auto, it's time to reflect on the remarkable evolution of this botanical marvel, from a tiny seed to the towering giant adorned with lush foliage and bountiful buds. In this report, we delve deep into the intricate fixings, sticks, and bendings that have shaped her growth, alongside an exploration of the revolutionary TrolMaster technology, with a special focus on the unveiling of the Tent-X controller.
From the earliest days of her life, Panty Punch Auto has been a testament to resilience and determination. Through meticulous care and strategic interventions, we've guided her growth, ensuring she thrives in our grow space. Fixings sticks have been instrumental in supporting her weighty branches, while gentle bendings have encouraged optimal light exposure and airflow, resulting in a robust plant with an abundance of branches and buds.
At the heart of our environmental control strategy lies the TrolMaster system, a game-changer in precision cultivation. This week, we're thrilled to introduce the Tent-X controller, a cutting-edge addition to our arsenal of tools. In an unboxing video, we'll unveil the Tent-X controller and explore its myriad features, including its integration with the Lumatek Zeus using the LMA-14 interface.
The Tent-X controller represents a paradigm shift in grow environment management, offering unparalleled control and flexibility. With its advanced capabilities, we can fine-tune every aspect of our grow space, from temperature and humidity to lighting schedules and CO2 levels. The LMA-14 interface acts as a bridge between the Tent-X controller and the Lumatek Zeus, enabling seamless communication and synchronization for optimal plant growth and development.
But the innovation doesn't stop there. The Tent-X controller comes equipped with a 3-in-1 sensor, providing real-time monitoring of temperature, humidity, and light intensity. This invaluable tool allows us to maintain the ideal growing conditions for Panty Punch Auto, ensuring she thrives in her environment.
As we marvel at the extraordinary progress of Panty Punch Auto, it's essential to express our gratitude to those who have made this journey possible. A heartfelt thank you to TrolMaster for providing the revolutionary Tent-X controller, to Aptus Holland for their unwavering support and exceptional nutrients, to Grow Diaries for the platform that connects us with fellow growers, and to the vibrant community for their endless encouragement and inspiration.
In conclusion, Week 6 marks another milestone in the cultivation of Panty Punch Auto, a testament to the power of innovation, dedication, and community. As we continue to nurture her growth, let us anticipate the wonders yet to come and celebrate the beauty of this monstrous plant.
Stay tuned for more updates as we witness the ongoing evolution of Panty Punch Auto and explore the boundless possibilities of modern cultivation techniques. Together, we'll continue to push the boundaries of what's possible and cultivate excellence in every leaf and bud.
#PantyPunchAutoAdventure #RootsAndFruits #TrolMasterControl #GrowDiariesCommunity #CultivationExcellence
Genetics - Panty Punch Auto - https://seedstockers.com/
Plant nutrition - Aptus Holland - https://aptus-holland.com
LED Photons - Lumatek - https://lumatek-lighting.com
Controls - Trol Master - https://www.trolmaster.eu/
Watering - myself
Love and attention - Me, myself and i
As always thank you all for stopping by, for the love and for it all , this journey of mine wold just not be the same without you guys, the love and support is very much appreciated and i fell honored and blessed with you all in my life, With true love comes happiness. Always believe in your self and always do things expecting nothing and with an open heart , be a giver and the universe will give back to you in ways you could not even imagine so
More info, the ocasional give-away and exclusive updates from all my adventures can be found - links in the profile description
Friendly reminder all you see here is pure research and for educational purposes only
Growers Love To you All 💚 💚 💚

Likes
83
Share


@Grey_Wolf
Follow
Chance Of A Lifetime
Greenhouse Seeds Wonder Pie
Week 7
18th June 2020
Okay so I will start off with the good part of the week so as not to shock you too much.....
Last week I mentioned how I needed to "feed" the Living soil I'm growing in and this week I got stuck into it
I did a run of worm tea straight from my worm farm.
I then filled the bucket with rainwater and added in some Blackstrap Molasses (Vid 1)
Then in went some Greenhouse Feeding "Enhancer"
and Seaweed solution
Then once that was all mixed in I added some "Dr Greenthumbs High Tea" and threw in a few airstones and starting the bubbling process which will take aprox 48 hours.
The Purpose of this Byodynamic "TEA" that I'm brewing is to provide essential microbial feeds to the living organisms within my soil in the form of natural sugars and starches etc.
I also chopped up a fresh piece of Aloe vera and let it soak in a bit of water for a few days that I was planning on feeding to the Girls............
Now for the Part that is both upsetting to me and to be honest very bloody Disapointing!! 😠
Two of the three Wonder Pie Plants have Lots of Male Balls developing and are Fucking useless hermoprodites 💩
The 3rd Plant so far has no sign of Pollen sacks developing but if it Does then all of my hard work to date will be for Zip because I will be pulling it up just like I did to the other two 😢
So there you have it 7 weeks of Good growth not to mention Energy costs etc down the drain for those two plants and if the third one goes Hermie too I'll be out of the Running
to win that trip to Amsterdam 😢
Because the other Female plant I have growing in the same tent (Dinafem Cheese) has not shown any signs of Hermie traits I'm putting this one down to
VERY unstable and unreliable genetics so if you are growing this strain Wonder Pie keep a good eye on it once flowering has been initiated as I got lucky and saw them early
but if left to grow unnoticed just one rogue pollen sack could seed your entire crop with unusable hermophroditic shit seeds .
Just in case I get lucky and the final plant stays Fully Female , I went ahead and added in 30grams of the Bio Bloom Mix to her soil and watered it in .
Well thats my story for the week Not the one I was wanting to tell but shit happens and it happens to me on a regular basis 😖
If I dont update again from here you will know that it went hermie and got destroyed . Thanks to all who have followed and liked so far I really appreciate it.
Good luck everyone If I dont make it past this point

Likes
19
Share


@Ensign420
Follow
Introduction - Week 09 Summary -
Ensign's log, stardate 100906.68,
Overall a pretty good grow week!
Started the week off by increasing the light's intensity. Also raised it up a bit.
Most of the week was basic growth checkups and humidifier refilling.
Mid week, increased the light's intensity a bit more. Also did a top soil drench of organic fertilizer along with a simple defoliation.
Towards the end of the week, decided to give both girls a large bottom watering. Also did a mini defoliation again.
Now that both reservoirs are full with about 2 gallons, shouldn't need to water for a while.
Next week will be the big 12/12 flip!
Steady as she grows Ensign. Engage! 🖖
[START OF WEEK 09]
==========================================================
WEEK 09 - Full Veg Wk4
04/17/23 → 04/23/23
This Week's Estimated Goals
----------------------------------------------------------------------------------------------
DLI: 39 mol/m2/d
PPFD: 600 μmol/m2/s
VPD: 0.5-1.0 kPa
This Week's Meter Readings & Averages
----------------------------------------------------------------------------------------------
DLI: 40.05 mol/m2/d
PPFD: 618 μmol/m2/s
VPD: 1.04 kPa
Soil %: [25.9, 37.3, 32.0, 34.7]
==========================================================
Day 01 - Monday - 04/17/23 - Total Days: 063
-----------------------------------
Daily Averages
- Temps: 77.8°F [25.4°C]
- Humidity: 68.6%
- VPD: 1.00 kPa
- Soil %: [19, 28, 30, 28]
-----------------------------------
- [09:23]: Quick morning checkup!
--- Looking great my ladies!
--- EB1 is continuing to explode with growth!
--- Refilled the humidifier with distilled water and Hydrogen Peroxide (~20mL).
- [22:25]: Evening my girls!
--- Growing along nicely!
--- The top of the canopy is clearly filling in with top sites.
--- Refilled the humidifier with distilled water and Hydrogen Peroxide (~20mL).
--- Looking at the lower leaves, plan to do another fertilizer feeding soon.
Day 02 - Tuesday - 04/18/23 - Total Days: 064
-----------------------------------
Daily Averages
- Temps: 78.4°F [25.8°C]
- Humidity: 67.4%
- VPD: 1.05 kPa
- Soil %: [31, 34, 33, 35]
-----------------------------------
- [09:17]: Good morning my ladies!
--- Growing along very nicely!
--- Refilled the humidifier with distilled water and Hydrogen Peroxide (~20mL).
--- Getting a bit droopy, so plan to top water (or better known as soil drenching) tonight!
- [16:03]: Good evening my queens!
--- Wow! Looking great ladies!
--- Top growth is looking very nice!
--- Hmm. A bit of yellowing is still developing on the lower leaves.
--- Regardless, canopy growth is still spreading out quite nicely!
--- With this being the last week of 18/6 veg, these girls are bushing out quite nicely!
--- After flipping the light schedule from 18/6 to 12/12, some cannabis plants will double in size.
--- Starting to get a bit nervous (well more stoked than nervous) about the growth spurt these ladies may undergo (also known as the 'stretch phase').
- [16:19]: Took PPFD readings.
--- EB1 was around 476 μmol/m2/s which gives a DLI of 30.84 mol/m2/d
--- EB2 was around 449 μmol/m2/s which gives a DLI of 29.1 mol/m2/d
--- Decided to increase the intensity of the grow light. Going for a PPFD goal of 500.
--- Will also most likely need to raise it up a bit.
- [16:27]: Within the AC Infinity App,
--- Adjusted the 'Vegetative [18/6]' Schedule for the grow light.
--- Increased the MAX from 3 to 4
--- The FC-6500 is now utilizing around 327.3W from 261.9W (at intensity 4 out of 10)
- [16:33]: Raised the grow light up a bit.
--- Took new PPFD readings.
--- EB1 was around 528 μmol/m2/s which gives a DLI of 34.21 mol/m2/d
--- EB2 was around 499 μmol/m2/s which gives a DLI of 32.34 mol/m2/d
--- Great!
- [16:48]: Took a general light distance reading for EB1.
--- She's now about 16.25" from the grow light.
--- Plan to do final height and distance readings at the end of the week.
--- Okay! Now for the soil!
- [16:53]: Checked the Ecowitt soil moisture sensor data:
--- 20% - [CH01 EB1 - grow bag]
--- 28% - [CH02 EB1]
--- 30% - [CH03 EB2 - grow bag]
--- 28% - [CH04 EB2]
--- Soil moisture is drying around EB1.
--- EB2 soil seems to be 10% more hydrated.
--- Now for the basic meter.
- [16:58]: Using the soil moisture probe, took readings for each EarthBox.
--- Soil moisture levels for EB1 was at 5.5 out of 10
--- Top soil both looked and felt dry.
--- Soil moisture levels for EB2 was at 3 out of 10
--- Top soil looks hydrated but felt dry.
--- Fascinating. 🖖
--- A huge contrast in moisture data.
--- Based on the basic meter, both girls have drank quite a bit. Yet the Ecowitt sensors have not really changed much at all.
- [17:09]: Rotated both EarthBoxes 180 degrees.
--- Checked the fill tube for each EarthBox.
--- Both fill tubes are now pretty dry!
--- With the current soil moisture levels, decided to continue on with the top soil drenching.
--- Don't frack this up Ensign!
- [17:21]: Filled a pitcher with 5 cups of distilled water.
--- Then filled a measuring cup with 2 cups of distilled water.
--- Added 1/32tsp + 1/64tsp + Half 1/64tsp of Quillaja Saponaria Extract
--- Added 1/16tsp + 1/32tsp + 1/64tsp of:
------ Horticultural Aloe
------ Big 6 Micronutrients [+ Humic Acid]
--- Added 1/8tsp + 1/16tsp + 1/32tsp of:
------ Mycrobe Complete
------ Recharge
--- Added 1/4tsp + 1/8tsp + 1/16tsp of:
------ Pure Protein Dry [Organic Fish Aminos]
--- Added 2mL of Bio-Catalyst Enzyme Elixer
--- Added 5.25mL of Yah-Whey
--- Mixed the solution and poured everything straight into the pitcher to mix with the 5 cups of distilled water from earlier (now 7 cups).
--- Poured 3.5 cups of the mixed solution into a spray bottle.
- [17:54]: Rotated the EarthBoxes 90 degrees. EB2 is now facing the front.
--- Before watering, going to defoliate a bit.
- [17:58]: Using a pair of trimmers, I gently clipped away lower yellowing leaves.
--- Removed a few of the larger fan leaves which were covering top sites.
--- To help to further promote top growth, also removed more lower nodes.
--- Time to top soil drench!
--- Also going to top dress a bit of gnarly barley!
- [18:27]: Gently removed the rear moisture meter before pealing back the plastic much cover.
--- Now for the top dressing.
- [18:30]: Sprinkled 1/4cup of Gnarly Barley onto the top soil.
--- Tried to stay towards the back.
--- Using my fingers, I gently tilled the topdressing into the top soil.
--- Also tried to work in all of the trimmings from the defoliation.
- [18:42]: Misted the top soil for EB2.
--- Made sure to spray the area with the Grow Dots, but did not spray the grow bag.
--- Sprayed the whole top soil, but focused more on the back area.
--- Placed the mulch cover back along with the rear moisture sensor.
- [18:59]: Rotated the EarthBoxes 180 degrees.
--- Now for EB1,
--- Using a pair of trimmers, I gently clipped away yellowing leaves.
--- Also removed the larger fan leaves covering top sites.
- [19:20]: Gently removed the rear moisture meter.
--- Then pealed back the plastic much cover.
- [19:24]: Sprinkled 1/4cup of Gnarly Barley onto the top soil.
--- Again, tried to stay towards the back. Also sprinkled a bit around the grow bag.
--- Using my fingers, I gently tilled the topdressing into the top soil.
--- Also tilled in the trimmings from the defoliation.
- [19:45]: Using the rest of the solution (~3.5cups), misted the top soil for EB1.
--- Made sure to spray the Grow Dots, but did not spray the grow bag.
--- Tried to spray the solution evenly.
- [19:47]: Placed the mulch cover back along with the rear moisture sensor.
--- Rotated the EarthBoxes back to the default configuration.
--- Refilled the humidifier with distilled water and Hydrogen Peroxide (~20mL).
- [20:12]: Misted the top growth with a bit of distilled water.
--- Really hope I didn't over-water.
--- Going to let the water soak in a bit before checking the moisture levels.
--- Okay!
- [21:31]: Checked the Ecowitt soil moisture sensor data:
--- 31% - [CH01 EB1 - grow bag]
--- 44% - [CH02 EB1]
--- 33% - [CH03 EB2 - grow bag]
--- 35% - [CH04 EB2]
--- As expected, soil moisture overall is higher.
--- Will continue to check moisture levels as the soil dries out.
Day 03 - Wednesday - 04/19/23 - Total Days: 065
-----------------------------------
Daily Averages
- Temps: 77.8°F [25.4°C]
- Humidity: 67.7%
- VPD: 1.02 kPa
- Soil %: [28, 41, 33, 36]
-----------------------------------
- [09:25]: Morning my ladies!
--- Quick humidifier refill and growth check!
--- Nice! Growth is continuing to bush out!
--- Refilled the humidifier with distilled water and Hydrogen Peroxide (~20mL).
- [+02:40]: Late night checkup!
--- Looking good girls!
--- Ladies are looking nice and perky!
--- The top canopy is already filling in quite nicely!
--- Refilled the humidifier with distilled water and Hydrogen Peroxide (~20mL).
--- Oh yea,
--- Happy 420!
--- [*smokes a bowl]
Day 04 - Thursday - 04/20/23 - Total Days: 066
-----------------------------------
Daily Averages
- Temps: 79.1°F [26.2°C]
- Humidity: 68.5%
- VPD: 1.04 kPa
- Soil %: [27, 40, 32, 36]
-----------------------------------
- [09:37]: Morning my beauties!
--- Quick checkup and refill!
--- Growing along and looking great!
--- Refilled the humidifier with distilled water and Hydrogen Peroxide (~20mL).
--- HAPPY 420!
--- [*smokes a few bowls]
--- Recently been considering how I bottom water my EarthBoxes.
--- Usually I never fill the reservoir more than 8-9 cups of water at a time.
--- But now planning on doing a larger bottom watering (2-3 gallons or 32-48 cups).
--- My main concern of course is over-watering.
--- Since all I have is distilled water, will most likely add a bit of CalMag and Agisil along with a bit of Yah-Whey.
--- For now gonna wait a bit for the top soil to dry up a bit more.
- [20:46]: Evening checkup!
--- Wow looking good girls!
--- Both are bushing out nicely!
- [21:39]: Took PPFD readings.
--- EB1 was around 527 μmol/m2/s which gives a DLI of 34.15 mol/m2/d
--- EB2 was around 509 μmol/m2/s which gives a DLI of 32.98 mol/m2/d
--- Since the 12/12 flip is starting next week, plan to increase the PPFD even more closer to 600 μmol/m2/s.
--- Going to further increase the light's intensity.
- [21:48]: Within the AC Infinity App,
--- Adjusted the 'Vegetative [18/6]' Schedule for the grow light.
--- Increased the MAX from 4 to 5
--- The FC-6500 is now drawing around 386.2W from 327.3W (at intensity 5 out of 10)
--- Took new PPFD readings.
--- EB1 was around 618 μmol/m2/s which gives a DLI of 40.05 mol/m2/d
--- EB2 was around 595 μmol/m2/s which gives a DLI of 38.56 mol/m2/d
- [10:07]: Took a light distance reading for EB1.
--- She's now about 16" from the grow light.
- [22:16]: Checked the Ecowitt soil moisture sensor data:
--- 27% - [CH01 EB1 - grow bag]
--- 40% - [CH02 EB1]
--- 32% - [CH03 EB2 - grow bag]
--- 36% - [CH04 EB2]
--- Soil moisture is drier around EB1's grow bag. EB2 seems to be at a higher level than the back.
--- Now for the basic meter.
- [22:21]: Using the soil moisture probe, took readings for each EarthBox.
--- Soil moisture levels for EB1 was at 7.5 out of 10
--- Top soil looked pretty hydrated.
--- Soil moisture levels for EB2 was at 5.8 out of 10
--- Top soil was also looking pretty hydrated.
- [22:33]: Rotated both EarthBoxes 180 degrees.
--- Checked the fill tube for each EarthBox.
--- Both fill tubes were pretty dry.
--- With the current soil moisture levels, decided to not water anything.
--- Plan to do a large bottom watering soon. Probably tomorrow or Saturday.
- [22:43]: Rotated the EarthBoxes back to the default configuration.
--- Misted the top growth of both plants with distilled water.
--- Refilled the humidifier with distilled water and Hydrogen Peroxide (~20mL).
Day 05 - Friday - 04/21/23 - Total Days: 067
-----------------------------------
Daily Averages
- Temps: 78.8°F [26.0°C]
- Humidity: 68.4%
- VPD: 1.04 kPa
- Soil %: [26, 40, 32, 36]
-----------------------------------
- [09:20]: Quick morning checkup and refill!
--- Growth looks
--- Refilled the humidifier with distilled water and Hydrogen Peroxide (~20mL).
--- Not much to do today. Gonna be a simple grow day!
- [23:36]: Evening my girls!
--- Growth is looking great!
--- EB1 continues to dominate the tent! EB2 is also filling in nicely!
--- Refilled the humidifier with distilled water and Hydrogen Peroxide (~20mL).
Day 06 - Saturday - 04/22/23 - Total Days: 068
-----------------------------------
Daily Averages
- Temps: 79.9°F [26.6°C]
- Humidity: 69.7%
- VPD: 1.04 kPa
- Soil %: [25, 39, 32, 36]
-----------------------------------
- [07:02]: Early morning checkup!
--- Girls are looking pretty good!
--- Refilled the humidifier with distilled water and Hydrogen Peroxide (~20mL).
--- Plan to bottom water tonight!
- [21:16]: Evening checkup!
--- Nice! Looking great ladies!
--- There are a few leaves on EB1, but overall growth is healthy and perky.
- [21:26]: Checked the Ecowitt soil moisture sensor data:
--- 25% - [CH01 EB1 - grow bag]
--- 39% - [CH02 EB1]
--- 32% - [CH03 EB2 - grow bag]
--- 36% - [CH04 EB2]
--- Soil moisture is drier around EB1's grow bag. EB2 seems to be at a higher level than the back.
--- Now for the basic meter.
- [21:30]: Using the soil moisture probe, took readings for each EarthBox.
--- Soil moisture levels for EB1 was at 6.5 out of 10
--- Top soil looked pretty hydrated. There was even a bit of bokashi fuzz growth. Nice!
--- Soil moisture levels for EB2 was at 4.1 out of 10
--- Top soil was also looking hydrated, but with no bokashi growth.
--- Okay! Going to attempt a large bottom watering.
--- Before I water, going to defoliate a bit more.
- [21:38]: Using a pair of trimmers, I defoliated both girls.
--- Clipped off a few of the larger fan leaves that were covering tops.
--- Overall, did not defoliate much. Less than a solo cup of leaves.
--- Mainly focused on yellowing or damaged growth.
--- Tucked the trimmings under the mulch covers.
- [22:03]: Rotated the EarthBoxes 180 degrees.
--- Okay! Time to give this a go!
--- Going to give each EarthBox a full 2 gallons of distilled water.
--- Going to also add some probiotics and beneficial anaerobic microbes.
--- Don't frack this up Ensign.
--- Okay! Starting with EB2,
- [22:15]: Poured 2 cups out of one of the gallons into a measuring cup.
--- Added 60mL (2oz) of Yah-Whey.
--- Mixed and poured the solution straight into the fill tube.
--- Then poured the rest of the gallon along with another full gallon of distilled water into the fill tube.
- [22:27]: Repeated the exact same process with EB1.
--- Poured 2 gallons of distilled water along with 60mL of Yah-Whey into the reservoir.
--- Great! Now both EarthBoxes are the fullest they have ever been.
- [22:36]: Rotated the EarthBoxes back to the default configuration.
--- Oops. Some water did spill out while rotating the EarthBoxes.
--- Next time, will wait a bit longer for the water to soak in first.
--- Refilled the humidifier with distilled water and Hydrogen Peroxide (~20mL).
Day 07 - Sunday - 04/23/23 - Total Days: 069
-----------------------------------
Daily Averages
- Temps: 80.2°F [26.8°C]
- Humidity: 69.9%
- VPD: 1.04 kPa
- Soil %: [25, 39, 32, 36]
-----------------------------------
- [07:19]: Morning my ladies!
--- Growing along nicely!
--- Although some of the growth is looking a bit droopy.
--- Refilled the humidifier with distilled water and Hydrogen Peroxide (~20mL).
- [21:24]: Night checkup and refill!
--- Looking good girls!
--- Growth has started perking up again. Nice!
- [21:27]: Took end of week height readings.
--- EB1 is about 18.5" tall.
--- EB2 is about 16.5" tall.
--- EB1 was about 16" away from the grow light.
--- EB2 was about 18" away from the grow light.
--- Growth is taller for both, but overall still about the same height.
--- But lots of lower growth so not too worried.
--- Refilled the humidifier with distilled water and Hydrogen Peroxide (~20mL).
--- Wow what a week!
--- Next week begins the flip to a 12/12 light cycle.
--- Curious to see if these girls will stretch or not.
[END OF WEEK 09]




Likes
8
Share


@emeraldlabs
Follow
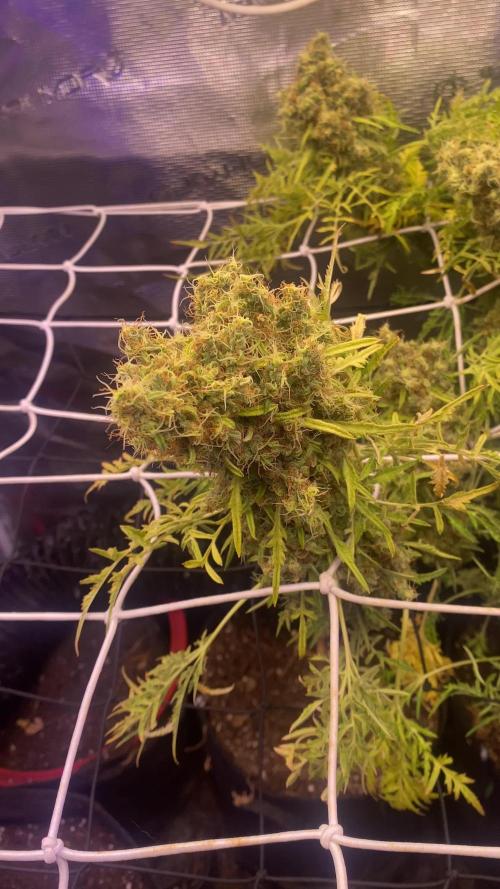
Alright, fair to say we are transitioning to flower. Will continue LST, spacing out the colas. Minor defoliation this week, removing growth at base. Runoff EC still pretty high, will hold off on feeding additional nutes for a bit longer.
Video/photos taken 28 days after breaking soil.

Likes
17
Share


@BudBrewerz
Follow
Very dense buds, the most dense I ever had .... I think .... They are ubersticky and have a super intense sweet smell (that covers the entire house by now 🤭👃) Really happy with this one... Could be one of my best outcomes in a very long time... Could be forever
Likes
60
Share


@BOMbolenath
Follow
The girl is progressing well. She is receiving around 25 DLI of light.
I did a topping.


Likes
4
Share
@Ensign420
Follow
|»» LOG DISCLAIMER: Not intended as a grow guide. Grow log entries are usually posted 3 weeks later and are for my learning reference. ««|
Introduction - Week 16 Summary -
Ensign's log, stardate 17547.8,
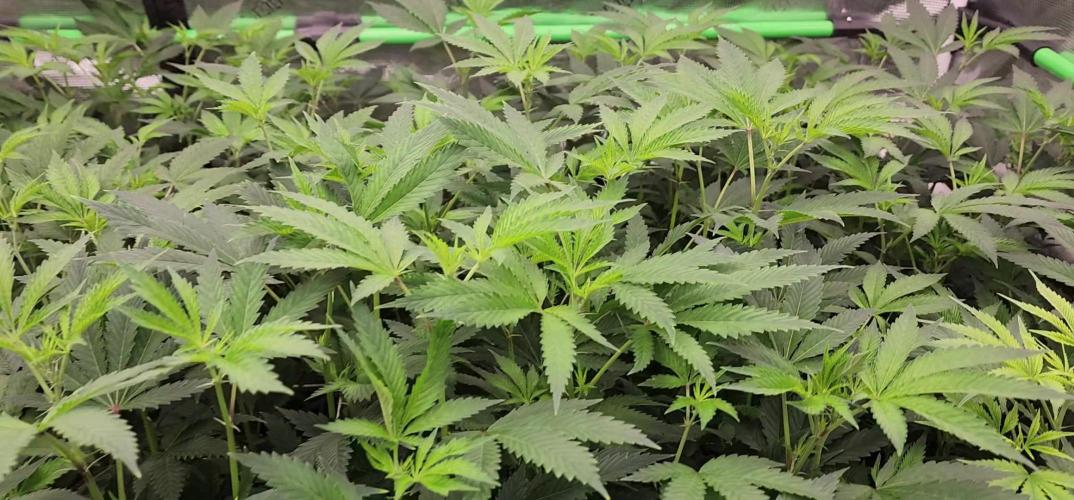
Wow what a great week in the garden!
By the end of the week, the main tent has pretty much doubled in size! Upgraded the scrog frame and now have a second layer of netting about 14in above the original netting which is already filling in and looking incredible! The tent’s floor slightly flooded, but fixed it. Also trying Stash Blend for the first time!
As for the veg tent. To preserve the genetics, started the mother plant cycling process and took more clone cuttings (which were rooting in Coco Coins by the end of the week). To make more room, also bonsaied all mother plants.
The stretch is starting to slowing down and next week begins the first week of bloom!
Ca-Caw! Let’s go! Onwards Ensign!
[START OF WEEK 16]
==========================================================
---------- [ 4x4 MAIN TENT ] ----------
Heady OG BX1 #1 [Round4 ~Wk9] - WEEK 16 - Pre-Bloom [Stretch Wk2]
TKO [Round2 ~Wk14] - WEEK 16 - Pre-Bloom [Stretch Wk2]
----------- [ 3x3 VEG TENT ] ------------
Garlic Budder OG#1 - WEEK 09 - Full Veg
Garlic Budder OG#2 - WEEK 09 - Full Veg
Gorilla Goat #1 - WEEK 09 - Full Veg
Gorilla Goat #2 - WEEK 09 - Full Veg
08/04/25 → 08/10/25
This Week's Estimated Goals
----------------------------------------------------------------------------------------------
DLI: ~13 mol/m²/d
PPFD: ~300 μmol/m²/s
VPD: ~1.0 kPa
This Week's Meter Readings & Averages
----------------------------------------------------------------------------------------------
Light On/Off: 19:00 - 07:00 | Wattage: ~326.5W [LV04]
Distance From Canopy: ~31”, 27”
DLI: ~15.60 mol/m²/d
PPFD: ~361 μmol/m²/s
VPD: ~0.69 kPa
Soil %: [40.7, 47.0, 38.1, 56.6, 41.9, 42.7, 42.9, 43.9]
==========================================================
Day 01 - Monday - 08/04/25 - Total Days: 113
-----------------------------------
Daily Averages ~[+01:00]
- Temps: 83.6°F [28.7°C]
- Humidity: 83.6%
- VPD: 0.66 kPa
- Soil %: [49, 37, 45, 60, 44, 43, 43, 45]
-----------------------------------
- [+00:14]: Night check on the 4x4 tent.
--- Holy Cannoli! Wow! These girls are in full stretch!
--- Both cultivars have grown beyond the netting and have stretched beyond the (green) Vivosun’s CFM bars! Heady is a bit low on the left, but the canopy is pretty even and perky!
--- Ca-Caw! Let’s go cuddies!
--- Heady OG (BX1 #1) is starting off shorter than TKO, but am pretty confident that she’ll catch up.
--- TKO is looking incredibly healthy! She’s the larger plant, but also in the smaller 20-gallon pot. Well she is 5 weeks older than Heady OG so makes sense. Regardless of the growth difference, absolutely stoked for this grow cycle!!
- [+12:19]: Checked the Ecowitt soil moisture sensor data:
------------------ [ 4x4 MAIN TENT ] ---------------
------ 46% - [CH01 FT » G30 - Heady OG BX1 #1]
------ 37% - [CH02 FB » G30 - Heady OG BX1 #1]
------ 48% - [CH03 BT » G20 - TKO]
------ 62% - [CH04 BB » G20 - TKO]
------------------ [ 3x3 VEG TENT ] ----------------
------ 41% - [CH05 BL » GR7 - Garlic Budder OG#1]
------ 44% - [CH06 BR » GR7 - Garlic Budder OG#2]
------ 40% - [CH07 FL » GR7 - Gorilla Goat #1]
------ 50% - [CH08 FR » GR7 - Gorilla Goat #2]
--------- Veg: 38% - 45% | Flower: 45% - 55%
--------- General: 30% [Dry] «| 45 - 60% [Moist] |» 70% [Wet]
- [+00:14]: Checked the 3x3 veg tent.
--- Ooo yea! The veg garden is looking incredible!
--- All mamma plants are looking bushed out and beautiful!
- [+00:37]: Super-cropped and bend the canopy down a bit.
--- Lowered the canopy down a few inches. Really need to defoliate soon. The top growth is bushing out and getting really thick!
--- Clones are also looking incredible and both are rotting along beautifully! Heady is going to make it and she is looking great!
- [+00:38]: The cuttings are looking good for the most part. One is looking pretty droopy (damnit Ensign).
--- Misted the cups with RO water.
--- Think the RH may not be consistent enough and the cups might be drying out too quickly.
- [+00:41]: Checked the humidifiers.
--- Tanks are still full and no leaks found.
--- Another day done!
--- Okay! Since growth is raging upwards, decided to upgrade the scrog frame and plan to add a second layer tomorrow.
--- Ahh yea! This grow is turning out to be an epic one!
Day 02 - Tuesday - 08/05/25 - Total Days: 114
-----------------------------------
Daily Averages ~[+01:00]
- Temps: 83.3°F [28.5°C]
- Humidity: 83.3%
- VPD: 0.67 kPa
- Soil %: [49, 38, 47, 62, 41, 43, 43, 45]
-----------------------------------
- [16:25]: Evening check on the 3x3 veg tent.
--- Ooo yea! The clones are looking incredible!
--- The cuttings still seem to be struggling.
--- Hmm.
- [16:27]: Misted the cups with RO water.
--- Made a slight modification and wrapped the top of both cups with plastic wrap.
--- Cut a slit from the middle to the edge. Misted the cup through the slit with RO water (2-3 sprays each).
--- Then gently slipped the cups over each cutting.
--- Also slightly misted each Coco Coin with RO water.
--- Great! This should hopefully make a better seal and will keep the RH higher. I think.
--- Anyways!
--- The mother garden is vegging along beautifully!
--- Growth is getting really bushy and need to do a heavy defoliation soon.
- [16:56]: Checked the Ecowitt soil moisture sensor data:
------------------ [ 4x4 MAIN TENT ] ---------------
------ 48% - [CH01 FT » G30 - Heady OG BX1 #1]
------ 36% - [CH02 FB » G30 - Heady OG BX1 #1]
------ 47% - [CH03 BT » G20 - TKO]
------ 61% - [CH04 BB » G20 - TKO]
------------------ [ 3x3 VEG TENT ] ----------------
------ 41% - [CH05 BL » GR7 - Garlic Budder OG#1]
------ 43% - [CH06 BR » GR7 - Garlic Budder OG#2]
------ 41% - [CH07 FL » GR7 - Gorilla Goat #1]
------ 49% - [CH08 FR » GR7 - Gorilla Goat #2]
--------- Veg: 38% - 45% | Flower: 45% - 55%
--------- General: 30% [Dry] «| 45 - 60% [Moist] |» 70% [Wet]
- [19:03]: Night check on the 4x4 tent.
--- Ooo yea! Wow these girls are stretching!
--- Growth has clearly grown since the last checkup and getting taller!
--- Ca-Caw! Let’s go ladies!
- [19:14]: Wait. Uh-Oh!
--- The tent seemed to have flooded slightly.. DAMNIT ENSIGN!
------ [» A FEW HOURS LATER.. «]
--- Okay! Think I figured out why the tent flooded and how to fix it.
--- The main reason was the new soil sensor which was probably not in proper contact with the soil.
--- Fixed this by re-seating the unit. Also adjusted the drip ring a bit.
--- Also poured about a cup of water straight onto new sensor. This should make the surrounding soil wetter and will hopefully fix the dry pocket. I think.
--- For added redundancy, added additional trigger conditions to both Ecowitt WittFlows (TKO and Heady OG).
- [23:45]: Adjusted the watering triggers for the auto-watering system for TKO.
--- Changed the ON trigger from:
--------- When CH3 soil moisture is under 45%
------------ Updated to:
--------------- When CH3 soil moisture is UNDER 45%
--------------- AND When CH4 soil moisture is UNDER 50%
--- Changed the OFF trigger from:
--------- When CH3 soil moisture is OVER 50%
------------ Updated to:
--------------- When CH3 soil moisture is OVER 50%
--------------- OR When CH3 soil moisture is OVER 50%
--- Applied similar watering triggers for Heady OG.
--- Changed the ON trigger from:
--------- When CH1 soil moisture is under 45%
------------ Updated to:
--------------- When CH1 soil moisture is UNDER 45%
--------------- AND When CH2 soil moisture is UNDER 50%
--- Changed the OFF trigger from:
--------- When CH1 soil moisture is OVER 50%
------------ Updated to:
--------------- When CH1 soil moisture is OVER 50%
--------------- OR When CH2 soil moisture is OVER 50%
--- Will check back daily to make sure the flooding has completely stopped.
--- Well that pushed everything back a bit.
--- Okay! Anyways,
- [23:57]: Time to both build and install the second frame and netting. Let’s go!
--- Got four 1in PVC corner fittings (local Lowes) along with four 1in PVC pipes (10ft long each). Also got more self-tapping screws.
--- For the netting, using mason string. Usually use the braided nylon, but the twisted variant is a lot cheaper.
--- To build the frame, I cut the 1in PVC pipes down to two different lengths:
------ [» x2 @ 42.5in «] – Front / Back
------ [» x2 @ 44in «] – Left / Right
--- This makes the frame slightly thinner from left to right.
--- Saving the extra piping for future projects.
- [+04:04]: Okay! The new frame is built and looking sturdy!
--- Did not use any glue and simply dry fitted each component.
--- For easier fitting, smoothed the ends of each pipe with sand paper.
--- Also marked each pipe to indicate the front, back, left, and right sides.
--- For the fittings, used corner fittings and have open slot facing downwards. This way I can add the legs.
--- After the frame was built, marked and drilled screws about 3in apart (self-tapping). Made sure to mirror the screw spacing on the opposite side.
--- Time to weave the netting!
- [+04:06]: Using some mason string,
--- Started at one corner and strung all the horizontal lines.
--- Double-wrapped each screw.
--- After the horizontal lines were strung, continued and wrapped the vertical lines.
- [+04:44]: Now that the frame is built and the netting fully weaved, time to install the frame!
--- First the support poles. Cut and sanded more 1in PVC piping.
------ [» x4 @ 14in «] – Vertical Support
- [17:56]: Installed the back support poles before the front ones.
--- Temporarily removed the front CFM bar and had to raise the fan up a bit (was not easy, but got it done).
--- Once the support poles were installed, gently set the new frame on top.
- [+06:07]: Done and wow she’s a beauty!
--- Well that took a bit longer than anticipated (also the flooding did not help), but glad the frame fit perfectly and the netting looks great!
- [+06:12]: Checked the humidifiers.
--- Tanks are still full and no leaks found.
--- Ooo yea! What a day!
Day 03 - Wednesday - 08/06/25 - Total Days: 115
-----------------------------------
Daily Averages ~[+01:00]
- Temps: 83.9°F [28.8°C]
- Humidity: 83.1%
- VPD: 0.69 kPa
- Soil %: [42, 54, 43, 60, 42, 43, 43, 45]
-----------------------------------
- [+00:17]: Night check on the 4x4 tent.
--- Ca-Caw!! Let’s go cuddies! Growth is looking beautiful and green!
--- The second layer of scrog netting was not the easiest to install, but wow the garden is looking incredible!
--- Both Heady OG and TKO are still stretching upwards with new nodes branching out everywhere!
--- The canopy hasn’t reached the top net yet but hoping a few will make it.
--- Regardless, absolutely hyped for this flower cycle!
- [+00:23]: Checked the 3x3 veg tent.
--- Looking beautiful in the veg garden!
--- Wow the mothers have bushed out and have reached the grow light!
- [+00:32]: Super-cropped and lowered the canopy
--- The canopy is getting really thick! Plan to do a pretty heavy defoliation tomorrow.
--- Clones look great and stoked that both Heady OG and TKO seem to be rooting along in the cups. Need to check the weights. Let’s go!
- [+00:37]: Here are the starting initial watering ranges:
------ Heady OG BX1 » 261.4g → 301.2g
------ TKO » 240.9g → 301.4g
--------- General Solo Range: [Dry] «| [Initial Cup Weight] + ~55-100g |» [Wet]
--- All cups were last watered 5 days ago.
- [+00:37]: Took the starting weight of both clones before watering,
------ Heady OG BX1 weighed 250.4g
------ TKO weighed 240.9g
--- Oops! Probably should have watered earlier, sorry ladies!
--- Stoked that Heady OG is clearly going to make it! Also good to know the soil dryback can be at least 10g from the initial pre-saturated weight.
--- Anyways!
--- While on a scale,
--- Gently misted the straw mulch of both cups with RO water.
--- Focused on the straw and sprayed as evenly as possible.
--- Misted 10-20 sprays. Waited a moment, then misted again.
--- Made sure to reference the watering weights.
--- Repeated this process for both cups.
--- There was no runoff.
- [+01:08]: Took the saturated weight of both clones after watering,
------ Heady OG BX1 » 335.5g
------ TKO » 345.1g
--- Marked the final wet weight on the back of each cup. Also marked the watering date on the front.
--- Placed both phenos back into the tent.
--- Cuttings are looking better!
--- Glad that the slight modification to the cups helped to keep the moisture in (covered both with plastic wrap).
--- Gently removed both cups and re-misted each with RO water (~2 mists).
--- Carefully placed the cups back onto the cuttings.
- [+01:21]: Checked the Ecowitt soil moisture sensor data:
------------------ [ 4x4 MAIN TENT ] ---------------
------ 34% - [CH01 FT » G30 - Heady OG BX1 #1]
------ 52% - [CH02 FB » G30 - Heady OG BX1 #1]
------ 39% - [CH03 BT » G20 - TKO]
------ 58% - [CH04 BB » G20 - TKO]
------------------ [ 3x3 VEG TENT ] ----------------
------ 44% - [CH05 BL » GR7 - Garlic Budder OG#1]
------ 47% - [CH06 BR » GR7 - Garlic Budder OG#2]
------ 41% - [CH07 FL » GR7 - Gorilla Goat #1]
------ 46% - [CH08 FR » GR7 - Gorilla Goat #2]
--------- Veg: 38% - 45% | Flower: 45% - 55%
--------- General: 30% [Dry] «| 45 - 60% [Moist] |» 70% [Wet]
- [+01:23]: Checked the humidifiers.
--- Tanks are still full and no leaks found.
Day 04 - Thursday - 08/07/25 - Total Days: 116
-----------------------------------
Daily Averages ~[+01:00]
- Temps: 84.9°F [29.4°C]
- Humidity: 82.0%
- VPD: 0.75 kPa
- Soil %: [32, 51, 37, 57, 42, 43, 43, 45]
-----------------------------------
- [09:42]: Quickly checked on the propagation dome (in the 3x3 veg tent).
--- Nice! Clones are both looking great!
--- Heady OG is clearly recovering and looking better!
--- Wow! TKO is looking incredibly healthy! Top growth has perky leaves with a few nodal growth sites starting to stretch. As far as cloning, she has been healthiest with no issues the entire way!
--- Both Heady OG cuttings are looking beautiful and should be rooting. Plan to check for roots in a few days.
--- Plan to do a pretty heave defoliation today.
--- Also going to start the mother plant cloning process.
- [17:12]: Evening check on the 3x3 veg tent.
--- Mother garden is looking beautiful and the canopy is bushy with growth!
--- Both Heady OG and TKO clones also look green and healthy!
--- My main focus for today is the veg garden and the preservation of the genetics .
--- Lots of work to do and time to also start the mother cycling process!
--- This time, going to do a pretty heavy defoliation!
--- Going to pretty much bonsai each mother while taking a few clones to preserve the genetics.
--- Let’s go Ensign!
- [17:58]: Filled a measuring cup with 1.5 cups of RO water.
------ Added 1/8tsp of Horticultural Aloe
--- Mixed the solution and poured it straight into a clear solo cup.
--- Repeated this process until 4 cups were filled.
- [18:05]: Also marked each cup with the corresponding mother plant name.
--- Time to defoliate and take the clone cuttings!
- [18:07]: Using a pair of trimmers (AC Infinity),
--- Bonsaied each mother plant. Removed over 75% of overall growth leaving several branches and nodes.
- [19:44]: Done and wow what a difference!
--- Pretty much removed all growth leaving a few nodal growth sites to heal.
--- This is my first time going this heavy and am hoping that they recover.
--- If this bonsai defoliation heals up with healthy growth, this can also be an alternative to a full plant cycling.
--- Anyways!
- [19:46]: To preserve the genetics, made sure to cut clone cuttings from each mother plant.
--- To ensure successful rooting, took several cuttings.
--- Made sure to clean each cutting by trimming most of the branches off leaving the top one or two nodes.
--- Did not cut any leaf fingers and made sure to cut the tip of the stalk (about 45°) before placing into the cup of aloe solution.
- [19:55]: Placed the fresh cuttings into the 3x3 veg tent.
--- Have each cup resting on top of the corresponding mother plant.
--- Okay! Let the two-day soak begin!
- [20:00]: Mulched the trimmings in a paper bag.
--- Since the bottom of the paper bags tend to decompose, have the bag in a used BuildASoil soil bag which should not decompose (these are meant for soil).
--- Also added a bit of Kashi Blend and worm castings to the bottom of the bag.
--- Back to the Heady OG cuttings!
--- Gently removed the cups and misted the inside of each with RO water (~2 mists each).
- [20:02]: Carefully placed the new cups onto the cuttings.
--- Great! Plan to check for roots soon.
- [20:08]: Checked the Ecowitt soil moisture sensor data:
------------------ [ 4x4 MAIN TENT ] ---------------
------ 31% - [CH01 FT » G30 - Heady OG BX1 #1]
------ 51% - [CH02 FB » G30 - Heady OG BX1 #1]
------ 35% - [CH03 BT » G20 - TKO]
------ 56% - [CH04 BB » G20 - TKO]
------------------ [ 3x3 VEG TENT ] ----------------
------ 41% - [CH05 BL » GR7 - Garlic Budder OG#1]
------ 40% - [CH06 BR » GR7 - Garlic Budder OG#2]
------ 42% - [CH07 FL » GR7 - Gorilla Goat #1]
------ 44% - [CH08 FR » GR7 - Gorilla Goat #2]
--------- Veg: 38% - 45% | Flower: 45% - 55%
--------- General: 30% [Dry] «| 45 - 60% [Moist] |» 70% [Wet]
- [20:12]: Checked the 4x4 tent.
--- Ca-Caw! Ah yea! The garden is looking incredible and wow growth is raging!
--- The tallest growth is just barely under the netting!
--- Not much to do in the main tent now but to wait until the stretch slows down.
--- Time to relax and let the grass grow! Let’s go!
- [21:34]: Have an extra stainless steel rack and thought of a better way to hold the solo cups in the veg tent.
--- The cups are balancing on the edge of the pots am concerned that they may tip over.
--- Carefully too each cup out of the tent.
- [21:36]: Placed the rack upside-down in the middle of the tent.
--- Have the rack positioned on top of all 4 pots just above the center floor fan.
- [21:39]: Gently placed each cutting cup onto the rack.
--- The floor fan can easily still blow through the grid of the rack. Great!
--- This should be way more stable while still allowing decent airflow.
- [21:40]: Checked the humidifiers.
--- Tanks are still full and no leaks found.
Day 05 - Friday - 08/08/25 - Total Days: 117
-----------------------------------
Daily Averages ~[+01:00]
- Temps: 84.5°F [29.2°C]
- Humidity: 82.5%
- VPD: 0.72 kPa
- Soil %: [32, 50, 30, 53, 40, 42, 41, 42]
-----------------------------------
- [23:02]: Night check on the 4x4 tent.
--- Ahh yea! The garden is thriving!
--- Both Heady OG and TKO are still stretching upwards and the canopy is getting dense!
--- Wow! TKO has reached the top netting! Heady OG is just under the top netting.
--- Ca-Caw! Let’s go ladies!
- [23:11]: Checked the 3x3 veg tent.
--- The veg garden is looking great!
--- The bonsaied mother plants are still recovering from the heavy defoliation. But growth is looking a lot better than I would expect from such a large biomass reduction. Nice!
--- Cuttings are looking great as well!
- [23:13]: Time to swap the aloe water out!
--- Replaced each solo cup with a clean one filled with fresh RO water (1.5cups).
--- Plan to start using the propagation dome soon!
--- Going to let these soak for another day before transplanting into Coco Coins for rooting.
- [+02:05]: Quickly checked on the auto-watering system.
--- System is still charged and no leaks or kinks found in the tubing.
- [+02:08]: Checked the humidifiers.
--- Tanks are still full and no leaks found.
Day 06 - Saturday - 08/09/25 - Total Days: 118
-----------------------------------
Daily Averages ~[+01:00]
- Temps: 83.4°F [28.6°C]
- Humidity: 83.3%
- VPD: 0.67 kPa
- Soil %: [32, 50, 35, 52, 41, 40, 41, 41]
-----------------------------------
- [07:55]: Quickly checked on the 3x3 veg tent.
--- Looking great in the veg garden!
--- Mothers are all recovering nicely from the bonsai defoliation. Great!
--- Cuttings also look healthy and ready for transplanting!
--- Both Heady OG and TKO clones are looking perky and getting bigger!
--- Heady OG cuttings also looking green and rooting! I think. Will check for roots in a few days.
- [20:58]: Night check on the 4x4 tent.
--- Ca-Caw! This is why we grow! Wow!
--- Also hyped that the canopy is getting dense with nodal growth!
--- TKO has more tops stretching through the top scrog netting! Heady OG has not reached the net yet.
--- Stoked the 14in space in between the netting is filling quite nicely and just going to let everything grow!
- [21:01]: Checked the Ecowitt soil moisture sensor data:
------------------ [ 4x4 MAIN TENT ] ---------------
------ 29% - [CH01 FT » G30 - Heady OG BX1 #1]
------ 50% - [CH02 FB » G30 - Heady OG BX1 #1]
------ 34% - [CH03 BT » G20 - TKO]
------ 53% - [CH04 BB » G20 - TKO]
------------------ [ 3x3 VEG TENT ] ----------------
------ 40% - [CH05 BL » GR7 - Garlic Budder OG#1]
------ 40% - [CH06 BR » GR7 - Garlic Budder OG#2]
------ 40% - [CH07 FL » GR7 - Gorilla Goat #1]
------ 40% - [CH08 FR » GR7 - Gorilla Goat #2]
--------- Veg: 38% - 45% | Flower: 45% - 55%
--------- General: 30% [Dry] «| 45 - 60% [Moist] |» 70% [Wet]
- [21:05]: Checked the 3x3 veg tent.
--- Growth is still recovering quite nicely! This may be my solution to maintain mother plants longer between cycles.
--- Mother clone cuttings are also looking healthy and ready to be rooted!
--- Was originally planning on rooting all of the cuttings, but since the mother plants are recovering better than anticipated, just going to plant one of each pheno.
--- Let’s go!
- [21:23]: Filled a measuring cup with 1.5 cups of RO water.
------ Added a pinch of Quillaja Saponaria Extract [60]
------ Added 1/64tsp of Horticultural Aloe
------ Added 1/32tsp of Mycrobe Complete
--- Mixed the solution thoroughly.
- [21:26]: Dropped 4 Coco Coins into the measuring cup.
--- The coins immediately started to expand.
------ [» ~10 MINUTES LATER «]
--- Placed each fully saturated Coco Coin into half-cut solo cups.
- [21:41]: Using a squeeze bottle filled with Clonex,
--- Gently filled each pre-made hole with Clonex rooting gel.
- [21:43]: Time to plant the cuttings!
--- Using a pair of clean trimmers, made a final 45° cut.
--- Also stripped and scrapped some of the stem’s outer membrane.
--- To help with planting, gave each Coco Coin a squeeze to loosen the coco.
--- Made sure to insert each stem straight and snug with the tip about a 1/4 inch from the bottom of the Coco Coin.
--- Also secured the stem by pinching and pressing in the top of the Coco Coin.
--- Once each cutting was planted,
- [22:11]: Placed each pheno into the propagation dome’s tray.
--- Made sure to keep each clone properly tagged.
--- Added 1/4 cup of RO water to the bottom of the tray.
--- Placed the side extensions onto the tray.
- [22:15]: Misted the top of the propagation dome before covering the cuttings.
--- Vents are fully closed.
--- Also lowered the intensity from 5 to 1.
--- At the current light intensity (LV1), the PPFD is around 110 μmol/m²/s which gives a DLI of 7.13 mol/m²/d under an 18/6 light cycle
--- Will check back daily to cycle the air under the dome.
- [22:17]: Placed the extra mother cuttings back on the rack. Will try to keep these cuttings alive until the planted ones root.
--- Will need to change the water every day or two.
--- Also need to water the Heady OG and TKO clones.
--- Ca-Caw! Let’s go!
- [11:33]: Here are the starting initial watering ranges:
------ Heady OG BX1 » 261.4g → 301.2g
------ TKO » 240.9g → 301.4g
--------- General Solo Range: [Dry] «| [Initial Cup Weight] + ~55-100g |» [Wet]
--- All cups were last watered 3 days ago.
--- Took the starting weight of both clones before watering,
------ Heady OG BX1 weighed 257.0g
------ TKO weighed 259.7g
--- While on a scale,
--- Gently misted the straw mulch of both cups with RO water.
--- Focused on the straw and sprayed as evenly as possible.
--- Misted 10-20 sprays. Waited a moment, then misted again.
--- Made sure to reference the watering weights.
--- Repeated this process for both cups.
--- There was no runoff.
--- Also defoliated and removed the lowest growth on both clones.
- [23:03]: Took the saturated weight of both clones after watering,
------ Heady OG BX1 » 345.3g
------ TKO » 355.4g
--- Marked the final wet weight on the back of each cup. Also marked the watering date on the front.
--- Placed both phenos back into the tent. Have them now resting on the rack (on drip trays).
- [23:14]: Checked the humidifiers.
--- Tanks are still full and no leaks found.
Day 07 - Sunday - 08/10/25 - Total Days: 119
-----------------------------------
Daily Averages ~[+01:00]
- Temps: 83.9°F [28.8°C]
- Humidity: 83.6%
- VPD: 0.66 kPa
- Soil %: [49, 49, 30, 52, 43, 45, 46, 44]
-----------------------------------
- [08:02]: Quickly checked on the 3x3 veg tent.
--- Ooo yea! Looking great in the veg garden!
--- All mothers are still green and recovering. New growth is starting to develop and growth is looking healthy!
--- Quickly checked on the propagation dome.
--- All clone cuttings are looking green and healthy!
- [19:04]: Night check on the 4x4 tent.
--- Ca-Caw! Ah yea! Heady OG has reached the top scrog net!
--- TKO has several tops above the netting and she is raging with healthy!
--- Canopy is also showing more signs of pistil crowning and vertical growth seems to be slowing down. I think.
- [19:07]: Checked the Ecowitt soil moisture sensor data:
------------------ [ 4x4 MAIN TENT ] ---------------
------ 48% - [CH01 FT » G30 - Heady OG BX1 #1]
------ 49% - [CH02 FB » G30 - Heady OG BX1 #1]
------ 36% - [CH03 BT » G20 - TKO]
------ 55% - [CH04 BB » G20 - TKO]
------------------ [ 3x3 VEG TENT ] ----------------
------ 41% - [CH05 BL » GR7 - Garlic Budder OG#1]
------ 43% - [CH06 BR » GR7 - Garlic Budder OG#2]
------ 43% - [CH07 FL » GR7 - Gorilla Goat #1]
------ 43% - [CH08 FR » GR7 - Gorilla Goat #2]
--------- Veg: 38% - 45% | Flower: 45% - 55%
--------- General: 30% [Dry] «| 45 - 60% [Moist] |» 70% [Wet]
- [19:10]: Checked the 3x3 veg tent.
--- The veg garden is recovering beautifully!
--- Since the stretch seems to be slowing down in the main tent, going to give these ladies a little extra.
- [19:17]: Going to feed some Stash Blend for the first time.
--- This blend of beneficial microbes and mycorrhizal fungi also includes a bit of silica which should help during the bloom phase.
--- Also shout out to Mr. Grow It, Rob (from CLTV), and Pigeons420! Stay lifted!
- [19:19]: Filled a pitcher with 16 cups (1gal) of RO water.
------ Added 1/8tsp of Quillaja Saponaria Extract [60]
------ Added 1tsp of Stash Blend
--- Mixed the solution before pouring 6 cups straight into a pump sprayer.
--- Gave the sprayer a good shake before spraying the entire solution onto Heady OG’s straw mulch.
- [19:52]: Repeated this process again for TKO.
--- Depending on how growth develops, may start feeding these ladies weekly.
--- From personal experience, the veg phase can easily be grown with straight RO water.
--- Flower is probably the most important time to feed because there are more roots and the plants are trying to produce more biomass. I think.
--- Anyways!
- [20:10]: In the veg tent, repeated the watering process for all mothers (1 cup + 1 cup RO each).
--- Focused mainly on the straw (2 cups each).
- [20:13]: Checked the humidifiers.
--- Tanks are still full and no leaks found.
--- Wow what a grow week!
--- The difference in growth from Monday until now has been incredible!
[END OF WEEK 16]


Likes
1
Share


@Weedwithwes
Follow
2 of the 6 plants in this series got left behind in veg due to lack of space in the flower tent from the auto run. Should be able to harvest those in a few days to bring the last 2 in to flower.
Have had the flu this week and haven’t gave much attention or love to the ladies as I’d like. 5 gallon pots are kinda sucking too. Really wanting to do a 4x4 bed to improve everything and better compost as mine has thrips … don’t trust people on Facebook marketplace… even with there website/ company .. totally screwed my base living soil mixture up.


Likes
22
Share

@MyLittleGarden
Follow
Vegetationswoche 12 - 26.06. – 03.07.2026
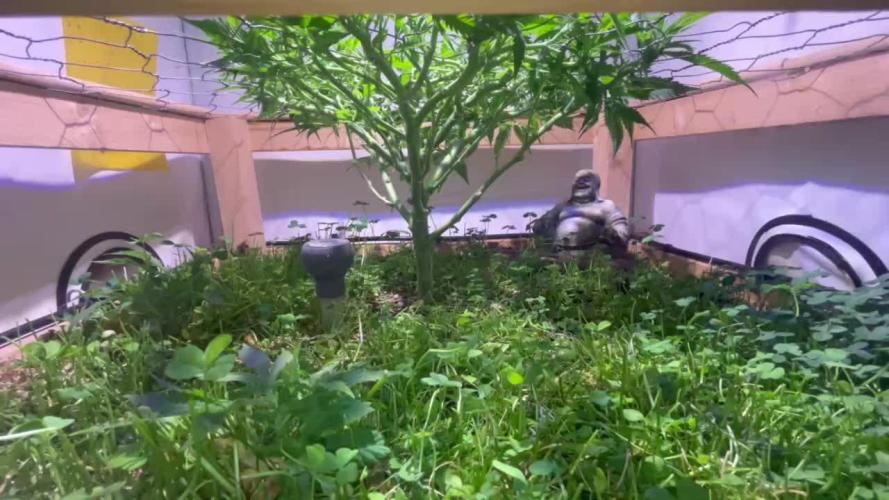
Diese Woche habe ich die Utopia einmal großzügiger entlaubt und die Triebe mit etwas Low-Stress-Training weiter unter dem Netz verteilt. So füllt sich die Fläche langsam immer gleichmäßiger.
Gegossen wurde einmal mit ungefähr einem Liter, ansonsten habe ich nicht weiter eingegriffen. Die Pflanze sieht nach wie vor sehr gesund aus und entwickelt sich stabil weiter.

Processing
Likes
12
Share


@eldruida_lamota
Follow
Que hay familia, nuestras única variedad con predominancia sativa, bastante vigorosa, flores bastante compactas vemos como van formándose y engordando, desprenden un aroma bastante dulce me recuerda al regaliz rojo.
Humedad y temperatura controladas dentro de los parámetros.

Likes
134
Share

@DogDoctorOfficial
Follow
One more week and this Girl is just fantastic, i can already see the great genetics on her, and let me tel you, despise the fact that her next door got infected wit freaking thrips and on this side so far i have seen none , that also means she is stronger than the rest on that field, and that she is healthy and it all, non so ever i ordered a bunch of beneficial bugs and some nematodes and i will apply a IPM ( integrated pest management ) just in case, as soon as the mail arrive and i apply them i will take pictures and explain the all process and why is so important to do it , the pros and what may or may not happens wen not applied and growing in organics.
Any way she is doing great, she still growing and stretching if you guys prefer the term, and her inter node is just perfect, this one will produce great fruits i can already see them in my mind , lets keep giving her love and see how she keep reacting to it.
For this week no changes on her food recipe but if she keeps at this pass i will start adding extra K , but for now i believe she still doesn't need that extra K boost, i want her to finish completely her grown and after i will start working on her fruits <3 <3 <3
As always thank you all for stoping by, for your time, your love and for it all, i am truly blessed with you all.
All info and full product details can be find in can find @
https://dutch-passion.com/
https://aptus-holland.com/
#aptus #aptusplanttech #aptusgang #aptusfamily #aptustrueplantscience #inbalancewithnature #trueplantscience #dutchpassion #dogdoctorofficial #growerslove
With true love comes happiness , Always believe in your self and always do things expecting
nothing and with an open heart , be a giver and the universe will give back to you in ways you could not even imagine so
More info and full updates @
https://growdiaries.com/grower/dogdoctor
Growers love to you all
P.S. reminder no emogies other way the text just puff and its gone lol 😆💚

Likes
7
Share


@Mikewithgreenthumbs420
Follow
Black widow clones have been growing both male and female parts had to cut sooner than expected had younger flowering plants near and didn’t want to pollen my other plants but it happened what to do might cut those next don’t want seeds in my buds I will grow against have one more seed left

Likes
12
Share


@russrahl
Follow
Looking good so far, got a little bit of light burn at beginning of week but not to bad. Plants are really starting to shoot up now that the roots have hit the water. Topped all 4 at beginning of week 3 for LST prep. AC unit in tent is keeping it around 21 Celsius and water is keeping between 18-20 Celsius naturally so far. When the lights go up from 600w to 1000w though my tent will hit 25+ Celsius so I am currently testing a new water cooled thermoelectric peltier reservoir water cooler I built and I will be installing soon. So far testing it I can bring a 5gal bucket of water from 25 Celsius to 10 Celsius in about 6 hrs. So we will see what it can do with about 20gal of water in my set up once my lights get turned up. I will be posting pics/video once I get it all figured out. So far it’s way cheaper then a commercial water chiller and seems to work good.

Likes
136
Share


@Kitties_and_Colas
Follow
~_~_~_~_~_~_~_~_~_~_~_~_~_~_~_~_~_~_~_~_~_~_~_~_~_~_~_~_~_~_~_~_~_~_~_~_~_~_~_~_~_~_~_~_~_~_~_~_~_~_~_~_~_~_~_~_~_~_~_~_~_~_~_~_~_~_~_~_~_~_~_~_~_~_~_~_~_~_~_~_~_~_~_
02/13/22
😻 Week 9 is here already!! We intend to start flowering these last week but we ended up planting some of our own cross in 14 Solo cups...we plan to flower everything at once but decided to give the new seedlings at least 1.5weeks to establish themselves before we start..we did some minor defoliation this week, removing all small lower growth and the Bangers are now reciving nutrients with almost every watering at this point...besides a little heat stress things look pretty good
🐱👍.. we started adding a little bloom nutrients as well, we typically start this 1week before flower. thanks for reading if you made it this far and happy harvests everyone!! ❤️💡🌱😽💨
⚡Mars Hydro/SP-3000⚡ Specifications ⚙️:
Diodes: Samsung LM301B / Osram 660nm (960 total!)
Driver: Meanwell 300watt 🔌 (300W±5% @AC120V-277V)
PPF: 824umol/S ☢️
PPE: 2.8 µmol/j 〰️〰️
Lifespan: 50k+ hrs ⌛
Weight: 10.1 lbs (4.6kg)
Veg Coverage: 3 x 5 ft 🌱
Flowering Coverage: 2 x 4 ft 🌼
-The SP-3000 uses an aluminum heatsink (no fan) and the driver can be placed outside the tent 🌡️⬇️
-IP65 waterproof ratings, tolerant to high humidity grow environments 💦 ..
-Up to 15 can be daisy-chained together and all controlled from a single light! 💡~💡~💡~💡~💡
~_~_~_~_~_~_~_~_~_~_~_~_~_~_~_~_~_~_~_~_~_~_~_~_~_~_~_~_~_~_~_~_~_~_~_~_~_~_~_~_~_~_~_~_~_~_~_~_~_~_~_~_~_~_~_~_~_~_~_~_~_~_~_~_~_~_~_~_~_~_~_~_~_~_~_~_~_~_~_~_~_~_~_


