Likes
Comments
Share

@Frumplepuff
Follow
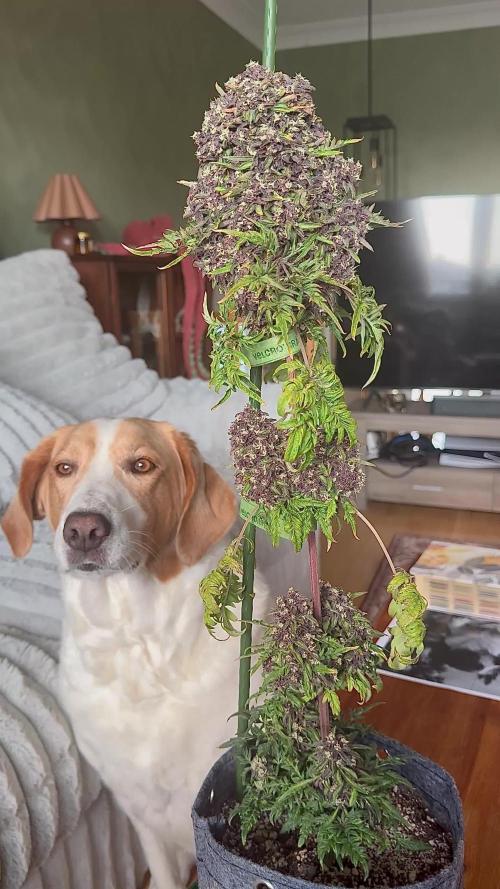
I was asked to show the whole plant 🌱
For the first 3 weeks I grew it in a 4 inch pot. When I discovered it was a female and it had really nice purple flowers , I transplanted it to a 1 gallon bag. It was intentionally meant to stay small and not branch out much. This is how I manage breeding large numbers. Structure is still easy to determine this way, I just watch which plants show prominent node growth compared to others. Both this girl and her purple male counterpart had great node growth.
I select plants for structure. I watch how much effort each plant puts into its nodes. This plant has excellent structure. I intentionally stunted its growth due to my limited space and because I was dealing with large numbers of plants to find this one! I will continue to grow them small so I can explore all the seeds.
I have a lower number of seeds than I had hoped for due to male freakshows being really pathetic pollinators and it being my first time working with male freakshows! I’ll be ready this time. I hope I find this exact massive bud pheno again!



Likes
17
Share

@MuckmanMelts
Follow
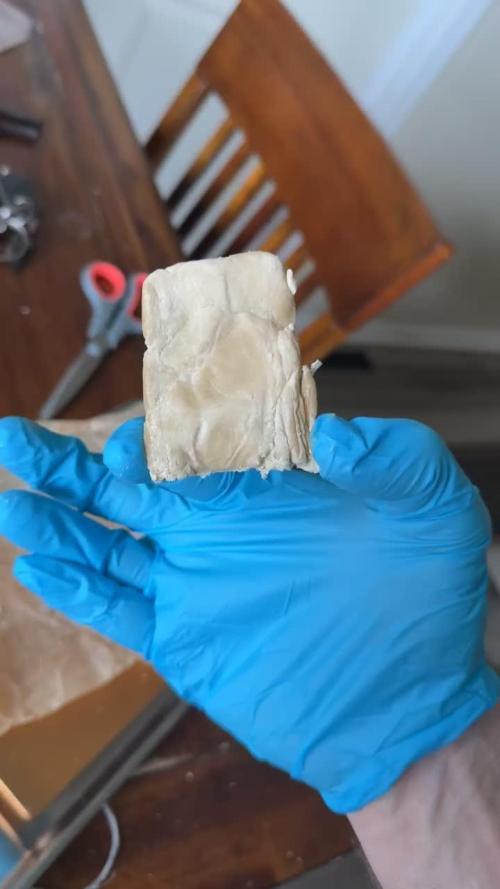
Really Babied these girls and shows the capability of some strains under optimal conditions. Especially throughout flower. Progress is becoming very noticeable. What a great experience making rosin!

Likes
14
Share


@Fullmeltalchemist
Follow
D15 - 9.27 - Cruising along, just watering them once a day
D16 - 9.28 - I planted carrots and transplanted the rest of the seedlings. They are all in the same space. That one LA Sunset never really started to thrive, but I'll keep it for now.
D18 - 9.30 - I topped my first plant for mainlining. I picked the strongest FWW with the most growth tip at the 3rd node and just went for it. She may be a little young, so I left her fan leaves for support. I've decided to do 3 groups of two for this grow, in an attempt to experience how these different strains respond to different techniques - Pair 1 will be mainlined with 8 mains, Pair 2 will be mainlined with 4 mains and Par 3 will not be mainlined but traditionally topped to 4 mains.
D19 - 10.1 - Topped the first Black Sugar for mainlining. Her growth tips are really nice looking.
D20 - 10.2 - Have them all topped 👌
Likes
2
Share


@TeesTrees
Follow
Day 36 - I watered her again with nutrients ph to 5.8, i was advised to water less but everyday. I defoliated her today and she looks great. I took of a few shade leaves and now there is a lot more space for the plant to breath .Tied a branch down so it has more space i will need to start putting branches in the places where i have big gaps.
Day 37 - I didn't have much time today when i took the picture, but i checked on her in the morning gave a quick sweep to make sure there was no headache.
Day 38 - I checked her today again nothing that can ruin the whole crop. This baby does not give me headache at all runs very smoothly. She has been watered with nutrients today at PH 5.9. I got new lights today spider farmer sf2000, this looks amazing inside there.
Day 39 - The plant is okay temperature is to high in room its at 34°c waiting on inlet fan to come to cool temperature, well to try to cool the temp because I'm not sure if i can cool it.
Day 40 - The plant looks well. The leaves with the wind hitting it looks very week. I think i might need to defoliate it just so plant doesn't get stressed. The plant has been watered with nutrients at 5.6PH.
Day 41 - once again i didn't take a picture today. I was very busy and didn't have time however i checked the plants as soon as i woke up and they looked well and healthy.
Day 42 - She looks well as always but again only thing i could ask for is a better yield but let's see what happens. I watered her today with nutrients and the water Ph was at 5.5.
Likes
8
Share


@JohnnyBarrel
Follow
Cream Caramel took more time to finish the cycle than other strains in the room. But flowers are well developed, sticky and thick.
A bigger pot is necessary for having a better yield but the weed look strong and good.


Processing
Likes
19
Share


@Fire_Farmer
Follow
Seems I told a lie last week, I'm late one day and I've done videos again cos again 🤥
Its been a good week for bud production regardless of a hiccup this week which shows as cal/mag and nitrogen deficiencies throughout each plant🤒
My ph pen malfunctioned and I ended up feeding them all 4.5 and didn't notice till the leaves told me 🍂
The ph pen has been replaced, amendments made to buffer the root zone and fingers are crossed 💉🤞
Super stinky grow this, going to replace my carbon filter before starting a new one because I caught wiffs of them when I entered my home today. If the flavours match the smells in this tent I'm in for a treat come smoke time.👃⛽🍋🍇
Its that magic time in the tent now where each girls really showing their own characteristics, both the purple punches and the zkittlez are different phenos to their siblings so I'm excited to see what they finish up like🏁
So far mostly good 👍
Thanks for reading 📖
One Love💚
Fire Farmer🔥👨🌾
Likes
30
Share


@TheGourmetWeed
Follow
Hi guys!
Here we are again, closing report for week 12, or 8 of flowering, as you prefer.
This was a great week!
I'm super happy in first place, to be home again, and that gives me much more time to look after the plants, the conditions, and really take great care of the grow.
All the 5 plants had great development in their bud production and amounts. The grow tent looks small for this 5 girls and now they're struggling a little with the space.
About the feedings: I started flushing already. Might be early for many, but I don't see the need for more nutrients when the plants are looking so nice, and I'm also satisfied with it, so now just water until the end.
Curiously, the 2 shortest ones are showing signs og being ready very soon as you can see in the close up shots and video. I might give it another week and will chop them both around december 13/14
The remaining 3 ones... they're still work in progress, growing enormously big for my expectations, and filling up the empty spaces with sweet, fruity and tropical aromas in the room.
Damn it smells nice when you open that grow room.
So yeah, basically now she's just finishing up, drinking water at 6.3 to 6.5PH max, 28 to 38ppm, the temps are good, 18 with lights off, 27 lights on...
The only 'issue' this week it turning the plants a bit because they're bending with the weight. Besides that, all good.
This happy grower is done for this week, let's see what week 13 will bring us.
Thanks for reading, hope you liked the pics also.

Likes
2
Share


@Mxtrader144
Follow
Definitely can't wait to grow this strain again with all autos and run 18/6 the entire time.

Likes
8
Share


@dreamLife
Follow
Sigue creciendo bien, súper frondosa, semana a semana se le van quitando las hojitas que tapan los brotes y se amarran las ramas mas grandes al contenedor.


Likes
4
Share


@MistaOC
Follow
**************
13.03. Day 1
**************
🤞🏼😎
I have new cuttings. Sour Frootz from Karma Genetics. I planted the cuttings in 0.2 L pots. I only applied fertilizer to the large pot.
So Let’s grow again 💚💯
*******************************************
18.03. Day 6
sprinkled with bactrex and transferred into the large pots
*******************************************
Likes
7
Share


@MadeInGermany
Follow
Hey everyone ☺️.
This week the food was increased to 4 ml per liter of water, as they can still tolerate a little more.
I'm curious how it will develop this week.
Otherwise there is not really anything to tell this week ☺️.
Stay healthy 🙏🏻 and let it grow 🌱
You can buy this Strain at
https://thecaliconnection.com/original-sour-diesel.html
You can buy this Nutrients at
https://greenbuzzliquids.com/
Type:
Original Sour Diesel ( Clone )
☝️🏼
Genetics:
Fem seeds- Original Sour Diesel to Original Sour Diesel BX3 RVSD Male
Reg seeds- Original Sour Diesel x Original Sour Diesel BX3 Male
👍
Vega lamp:
2 x Todogrow Led
Quantum Board 100 W
💡
Bloom Lamp :
2 x Todogrow Led
Cxb 3590 COB 3500 K 205W
💡💡☝️🏼
Soil :
Canna Coco Professional +
☝️🏼
Fertilizer:
Green Buzz Liquids :
Organic Grow Liquid
Organic Bloom Liquid
Organic more PK
More Roots
Fast Buds
Humic Acid Plus
Growzyme Big Fruits
Clean Fruits
Cal / Mag
Organic Ph - Pulver
☝️🏼🌱
Water:
Osmosis water mixed with normal water (24 hours stale that the chlorine evaporates) to 0.2 - 0.4 EC. Add Cal / Mag 2 ml per l water every 2 waterings . Ph with Organic Ph - Pulver to 5.8 .

Likes
5
Share

@Permanentmarker88
Follow
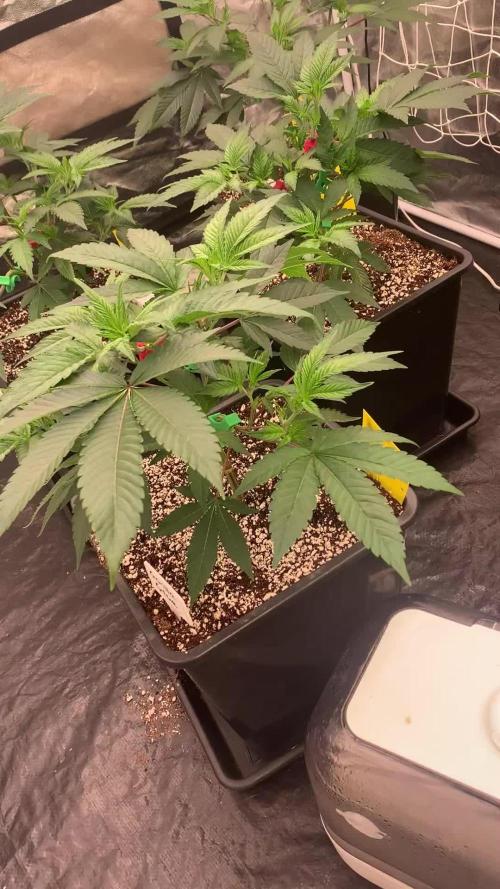
Vegetation Day 18
Die Steckies gedeihen prächtig mit den Athena Blended line Nähestoffen auf Coco/perlite70/30.
Sie sind alle kerngesund und die Triebe sprießen aus allen Richtungen nach dem Toppen.
Heute wurden unnötige Fächerblätter entfernt ,welche die unteren Triebe bedeckt haben (Defoliert).
In den nächsten 3-4 Tagen werden die Pflanzen in die Netze geflechtet und dann kommen wir der Blütenzeit immer näher.
Gegossen würd weiterhin nach dem Athena Blended Schema EC :2,1
PH: 5,8
Hinterlasst gerne ein Kommentar:))
Viele Grüne Grüße🏻🏻🏻


Likes
23
Share


@cadur
Follow
Looks like growth has stopped and the work is going into the flowers.
Some leaf tip burn but in not going to change anything, I could fuss and look at the TDS, but I've always got myself in a tis and mucked things up.
I'd say this is looking to be an average yield. Not the smallest, not the largest!
Likes
5
Share


@Acid_joker
Follow
Я. Уже. В канце. Парни дадейюсь палучить харошие фрукты буду рад. За. Помашь. И. Знакомства ,,😎👽🔥🌴🍁
Likes
9
Share


@wheedtobeus420
Follow
Day 28. She’s be beasting!!! I’m so excited for this lovely lady. She’s showing sex and pistals and will be flowering I’m sure I’m the next week. Look at the low stress training she just went kaboom. I’m so happy to see her thriving I’m very excited for her.