


Likes
Comments
Share


@in_a_few_weeks
Follow
Bending and cutting. Now on 12/12. In a few Weeks we will see how big the buds are.
Likes
4
Share

@DogDoctorOfficial
Follow
🌱 Skywalker OG — Week 6 From Seed
12/12 From Seed · Transition Into Flower
⸻
🔁 Quick Recap — From Seed to Now
Skywalker OG has been grown 12/12 from seed from day one.
No veg phase, no forced speed — just letting the plant express itself naturally while guiding structure gently.
From early life, our approach has been:
• Leaf bending instead of topping
• Minimal stress, frequent observation
• No rush — letting the plant tell us when it’s ready
Up until now, all work has focused on:
• Building a strong, open frame
• Keeping internodes exposed to light
• Preparing the plant for flower without shocking it
Week 6 from seed marks an important moment:
👉 The transition into flower structure, even if pistils are only just starting to show.
This week is less about growth speed — and more about setting the stage.
⸻
✂️ Canopy Work & Plant Training (This Week)
This week we went a little harder than usual, on purpose.
What We Did
• Continued leaf bending, but with more intention
• Light lollipopping of the lower, shaded growth
• Selective defoliation (not a strip-down, not a clean shave)
• Introduced plastic clamps to guide branches outward
Why We Did It
Leaf removal
• Improves airflow inside the plant
• Reduces humidity pockets
• Helps light reach meaningful flower sites
• Removes leaves that were blocking, not contributing
Lollipopping (light)
• Cleans up growth that would never reach the canopy
• Helps the plant redirect energy upward
• Makes future watering and airflow cleaner
Clamps & bending
• Opens the plant instead of stacking it
• Creates multiple dominant tops
• Avoids cutting or topping stress
• Allows gradual correction instead of forcing angles
We don’t see this as “defoliation” in the aggressive sense.
We see it as guidance and clarification.
Nothing here is done in one session or out of frustration.
Everything is done slowly, plant by plant, read by feel.
⸻
🌡️ Environment Update
• Day temperature: ~28°C (successfully raised)
• Humidity: ~65%
• PPFD: ~600–850 (based on plant height and position)
• CO₂: ~900 ppm
As outside temperatures remain cooler, the room itself has naturally become its own heat source:
• More plant mass
• Higher light intensity
• Under-canopy lighting added
This allowed us to stabilize the environment without forcing heaters or extremes, which is exactly how we like to work.
Airflow
• Vortex extraction
• Cross-winds with multiple fans
• Constant, gentle movement across the canopy
No leaf flutter chaos — just steady motion.
⸻
💧 Feeding & Nutrition Strategy
This week marks a clear nutritional transition.
• EC: 2.4
• pH: 6.5 (transitioning to 6.0+ from now on)
From this point forward:
👉 All feedings will be pH 6.0 and above
Why Higher pH Now?
As plants enter flowering, their nutrient priorities shift.
A slightly higher pH improves availability of key elements needed for:
• Flower initiation
• Structural development
• Energy transfer
Nutrient Changes
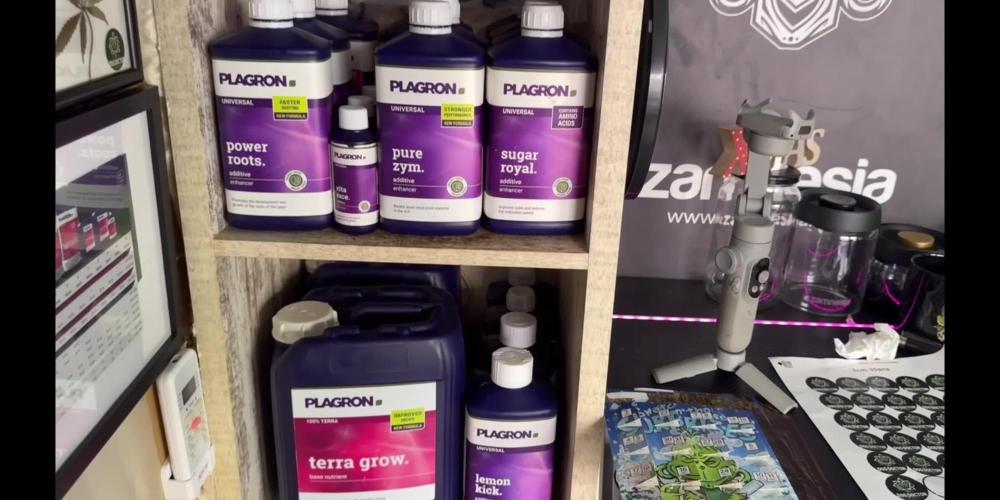
• ✅ Introduced: Terra Bloom — 5 ml/L
• ❌ Removed: Terra Grow
Simple, clean transition — no stacking, no panic feeding.
⸻
🔮 What to Expect Next Week
Expect:
• Stretch continuation
• Tops adjusting to new light exposure
• Faster response at exposed nodes
• More visible flower initiation
Do NOT expect:
• Immediate bud stacking
• Explosive flower size
• Perfect symmetry overnight
This week is about positioning, not payoff.
The work done now decides how easy (or hard) the next 4–6 weeks will be.
⸻
🧠 Final Notes
This is our way of reading the garden.
It’s our humble opinion, shaped by experience, observation, and patience.
Everyone is encouraged to:
• Try this technique
• Try other techniques
• Combine techniques
• Or do the exact opposite
Plants are teachers — not rules.
⸻
🙏 Thank You
Big thanks to:
• Grow Diaries for the platform
• Our sponsors and supporters
• The OGs who’ve been here since day one
• The new faces joining the journey
• The lovers
• The haters (they keep things interesting 😄)
And most of all — the community that keeps learning together.
See you next week 🌱
Let’s keep reading the plants.
Community Note
Due to YouTube community guidelines, our educational channel was taken down.
While we firmly believe the content was purely educational, we respect YouTube’s decision and are actively exploring alternative platforms to continue sharing this work.
📡 Please stay tuned.we never quit https://www.youtube.com/@DOGDOGTHEDOCTOR NEW STAY TUNED
🙏 Thank you for your patience and continued support.
FOR DISCOUNT CODES AND MORE JUST FOLLOW THE LINK https://website.beacons.ai/dogdoctorofficial
📲 Don’t forget to Subscribe and follow me on Instagram and YouTube @DogDoctorOfficial for exclusive content, real-time updates, and behind-the-scenes magic. We’ve got so much more coming, including transplanting and all the amazing techniques that go along with it. You won’t want to miss it.
GrowDiaries Journal: https://growdiaries.com/grower/dogdoctorofficial
Instagram: https://www.instagram.com/dogdoctorofficial/
YouTube: https://www.youtube.com/@dogdoctorofficial Deleted by Youtube
Vimeo : https://vimeo.com/dogdoctorofficial Under construction stay tuned ⸻
Explore the Gear that Powers My Grow
If you’re curious about the tech I’m using, check out these links:
🔆 Lighting & Environmental Control
• Future of Grow — Advanced LED lighting technology
https://www.futureofgrow.com/
DISCOUNT CODE: DOG20
• Lumiflora — Under-canopy LED lighting
https://lumiflorade.com/
• TrollMaster — Environmental controllers and automation gear (past collaboration)
⸻
Genetics
• Zamnesia Seeds — Genetics used in this project
https://www.zamnesia.com/
⸻
🌱 Soil, Substrates, Boosters & Root Support
• Plagron — Substrates, bio mixes, and supportive products
https://plagron.com/en/
⸻
🎒 Storage, Curing & Preservation
• Grove Bags — Curing and storage solutions
https://grovebags.com/
⸻
📸 Photography Equipment & Tools
(Not sponsors, but part of my creative toolkit)
• Sony A6700
• Sony full-frame macro lens + few more
• Stacking photography workflow - learning
• iPhone (for behind-the-scenes shots)
We’ve got much more coming as we move through the grow cycles. Trust me, you won’t want to miss the next steps, let’s push the boundaries of indoor horticulture together!
As always, this is shared for educational purposes, aiming to spread understanding and appreciation for this plant. Let’s celebrate it responsibly and continue to learn and grow together.
With true love comes happiness. Always believe in yourself, and always do things expecting nothing and with an open heart. Be a giver, and the universe will give back in ways you could never imagine.
💚 Growers love to all 💚
📸 P.S. – The Eye Behind the Lens
All photos in this diary (for now — except for the ones showing the camera, which I took with an iPhone) are taken with a Sony A6700 paired with a Sony full-frame macro lens and a few more.
Photography is part of the story — it’s how we share the fine textures, the glow, and the quiet details that words can’t always capture.
I’ve also started experimenting with photo stacking — a technique where multiple images, each taken at a slightly different focus point, are layered together to create one perfectly sharp image from front to back.
It’s not digital enhancement or AI; it’s pure photography — a way to reveal the plant’s beauty in microscopic depth, from trichome to petal.
You’ll even see a few shots of "ghost me" capturing the shots — camera, lens, setup — because every grow deserves not just to be cultivated, but documented like art.
FOR DISCOUNT CODES AND MORE JUST FOLLOW THE LINK https://website.beacons.ai/dogdoctorofficial
NEW DISCORD - Official Server Invite Link : https://discord.gg/ksjAkA5T74

Likes
12
Share


@GrowMyMeds
Follow
Welcome!
Week 7 flower!
I'm dying in anticipation.
Part of me just wants to stare at it forever, because I'm pretty sure the color will get darker when its dried
Pistols are turning orange top, so getting closer.
I took a few videos this time. One shows the Mars Hydro lights, and my tents I'm using.
The other is the best I could do to capture the beauty of this plant. I wish I had a tent full of only her.
I cut way back on nutes, I only plan to feed one more time and will be checking the trichome color next week.
Overall I'm super happy 😄
If you have some colorful grows going let me know and I will check it out
Thanks for checking out my med grow, see you on week 8. Follow and subscribe if you like my content and want more
Peace

Likes
Comments
Share


@naughtydog420
Follow
This was my first attempt at growing autos she triggered a little to early being the reason she is so squatty but I'm sure she's still going to be just as good as a plant twice her size I most definitely learned a lot about the auto flower that I didn't know before so I made adjustments on my second auto flower that I'm growing she is about 40 inches in height and filling out nicely i'm going to let the plant pictured go another week or so to make sure she's completely done I will post pictures and video of the harvest
Likes
12
Share


@Bryankush
Follow
Probabilmente il topping del ramo apicale non è stata la migliore cosa per me, mi servirà di lezione per la prossima estate.


Processing
Likes
13
Share


@GrowGuy97
Follow
Start of week 5 today, everything seems to be going great! The Gelato OG is by far the biggest plant of the bunch so far but they all seem to be taking well to LST, HST , Topping & defoliation! Will be going in the flower tent as soon as the other ladies harvest so they will probably have atleast 2 to 3 more weeks of veg!


Likes
30
Share


@Hawkbo
Follow
The grow went well considering the circumstances. 3 grows horizontally until flower and needs support for the branches as the buds got so big. 2 was easier to manage it didnt need much support. Theres no waste from this strain, barely any trim and the trim there is is smokable it's so covered in frost. My meter got out of wack in late flower and I ended up giving a heavy feed which burnt the tips of the buds.

Likes
6
Share


@Naujas
Follow
oh our nature :) 3 weeks ago there was a huge flood in this place which took away 4 girls :( this time it seems like a drought and high temperature 30-35°, but I believe everything will be fine :) the girl looks good,.

Likes
4
Share


@ChitownCannaChica
Follow
Moving along- had some leaf damage from foliar. She will be fine


Likes
34
Share


@Zzenith
Follow
Welcome to the week 6
Day 37
Did some LST, a bit, and normal level defoliation, tho I removed lots of leaves.
I think I will defoliate it once more in a week or so.
I will check on her in couple hours and post "after after" photo.
Day 41
I can smell her sweet smell already. It's unbelievably sweet. But I really got the issue with carbon filter and smell right now. I need to stock up some more Ona Gel, carbon filter is expired, replacing it now will be very difficult if not impossible without damaging the plant...


Likes
8
Share


@Spliffing_Around
Follow
We continue to mix our own nutes, but I started also testing Nutra Hydro . One rack only for now. Next project is upcoming for organic beds or huge pots. STAT TUNED BROTHERS ANS SISTERS ! Grower love ❤️❤️❤️!!!!
Likes
17
Share


@GutterHoe
Follow
New week so a couple new pics. She is a tall bushy wench. Tons of bud sights and man you can almost SEE these grow. Lol
She is really getting big and fat buds everywhere. This is the fun part for me.
Likes
87
Share


@ThrashedTV_BakedByGlaze
Follow
Week 4 - 01/22 to 01/28 2021
Pictures from Days 25 + 26
TRANSPLANTED! Might have waited too long but hopefully the transplant and LST stress might slow the plant down since i think it's already flipping to flower like the other @SweetSeeds Dark Devil Auto and the Purple Lemonade from @FastBuds. I think the Red Poison might have been the first one I noticed to flip but at least this one will be quick.
More and more reasons to go back to a photoperiod grow after this for more control/really test out the new lights 🙌
Ended up more 50/50 ratio of Destiny Organic's Dark Matter Living Soil + ProMixHP since I had to make the Destiny last. Apparently they went out of business just after I decided it was my favourite/new soil :( Would rather stay away from Ocean Floor since I haven't had the best experiences with it (bugs/rust fungus etc) Feel free to drop some recommendations other than Fox Farms below 👍
The Red Poison Auto is going strong other wise, keeping the LST basic to see if I can still get the screen in the tent but it wouldn't be practical at this point.
I raised the @ViparSpectraLED P1500 another eight inches after transplant and started basic LST. I really wanted to get these four under a ScrOG but if 3/4 are already flipping and the LSD is still runty I might have to wait it out again.
Just like the Dark Devil in my other Sweet Seeds diary, there is a solid smell on the fingers after adjusting it/when the fan hit it just right 😍
I have the @MarsHydroLED TSL2000 set up and ready to go once the girls settle into their new pots. Have the new surge protector/heavy duty power cords/power tool grade timers as mentioned in Week 3. Some of it shown in the pictures.
Threw some videos in this week as well with some Queen's Radio GaGa, Beastie Boys' Brass Monkey, and a little hint of Arkells ....COME TO LIGHT on the short @ViparSpectraLED ..GET IT.. 😓
I thought the Red Poison had the streaks in the leaves but turns out it was the Purple Lemonade, My Chocolate Mint OG Auto just finished curing so I must have made that update during the test session 😎
Chocolate Mint OG Auto Diary:
https://growdiaries.com/diaries/77696-humboldt-seeds-chocolate-mint-og-auto-grow-journal-by-glazedgrow
--
Thanks for checking in! Throw down a like and/or follow so I can return the favour 🙌
Check out my Diary of the Year 2020 Entry for my Original Auto Sour Diesel: https://growdiaries.com/diaries/54258-fastbuds-original-auto-sour-diesel-grow-journal-by-glazedgrow
IG: @GlazedGrow
CannaBuzz: @GlazedGrow
Likes
56
Share


@Master_weeda
Follow
Bonjour à tous les padawans et maîtres jedis
Tout d'abord merci à philosopher seeds ainsi que greenhouse de me permettre de faire cette culture en m'offrant le feeding greenhouse et des graines
Je rappelle que cultive simultanément 9 pots de 10 et 11 litres dans une box prévu pour 4 et que je n'utilise que le strict minimum du matériel nécessaire à une culture correcte au prix le plus bas possible
MATÉRIEL CONFIGURATION
Box 80×80×160
Lampe led Lampwin 300 watts ×2
Ventilateur à pince 15 watts
Xiaomi Deerma humidificateurs 5L
Hygrometre thermomètre
Extracteur PROFAN 107 m3/h - 100
Prise programmable électronique ×2
1 pot carré noir 10 litres
Green house feeding enhancer
Green house feeding biobloom
Green house feeding biogrow
Substrat biobizz ligthmix
Fil de fer et pince coupante
Microscope
Petite balance de précision
CULTURE ÉTAPE PAR ÉTAPE
J'ai tout dabord fais germé ma graine avec le easy start de Royal queen seed et je suis agréablement surpris car franchement le taux de réussite est très élevé (17 graines sur 19) simple d'utilisation et très efficace.
Une fois la plantule sortie et d'une hauteur de 2 ou 3 centimètres je la prend délicatement et la place directement dans son pot définitif. Je préconise des pots allant entre 10 litres et 15 litres pour des autofloraisons cultivées en intérieur.
Le pot aura été préalablement préparé (video dans diarie) avec 30 grammes d'engrais greenhouse feeding biobloom et 30 grammes de greenhouse feeding biogrow, soit l'équivalent de 3 grammes par litre de substrat.
Je dépose donc la plantule dans son pot définitif je recouvre un peu de avec de la terre je tasse légèrement et j'arrose pour garder le substrat humide pas plus
Je place ma lampe led 300watts à environ 90 centimètres de la plantule avec un cycle de lumière de 24/24 pendant une semaine. Au début de la semaine 2 le cycle de lumière passera en 20/4 grace a un programmateur car c'est pour moi le cycle de lumière qui offre le meilleur rendement pour une autofloraison.
Jour1: léger arrosage
Jour2: léger arrosage
Jour3: la plantule commence à être plus vigoureuse mise en place de la ventilation pour augmenter sa masse racinaire et léger arrosage
Jour4: arrosage avec un litre et demi d'eau ph6.3 à laquelle j'ai ajouté 0.9 gramme de greenhouse feeding enhancer (soit 0.6 gramme par litre d'eau)
Jour5: aucune technique spéciale
Jour6: aucune technique spéciale
Semaine agréablement calme sans problème ni carence apparente
Que la force soit avec vous !

Likes
57
Share


@DogDoctorOfficial
Follow
behold the epic conclusion of my Medusa F1 odyssey! Week 11 brings us face to face with an absolute masterpiece – our mighty Medusa in all her glory. She has blossomed into a cannabis goddess, and I can't help but feel a mix of pride and hilarity.
So, picture this: with scissors in hand and a grin on my face, I bravely took the plunge and performed the cosmic haircut of the century. I snipped the entire girl, leaving her looking like a botanical version of a cool, upside-down pineapple cake! It was a sight to behold, and I couldn't help but laugh at the quirky transformation.
With our Medusa delicately suspended upside down, she's now getting ready for her final act of drying. It's like she's doing an acrobatic performance, waving her buds at us from above. Who knew cannabis cultivation could be so entertaining!
In all seriousness, though, our Medusa's buds are absolutely mesmerizing. They've reached their peak density and glisten with an abundance of trichomes. The colors are a true botanical wonder, like a vibrant firework display against a night sky.
Speaking of trichomes, I continue my daily trichome investigation with the precision of a detective. Each day, I observe those tiny resinous diamonds, searching for the magical moment when they're just right – cloudy with a hint of amber.
And the aroma, oh the aroma! Terpenes fill the air with an intoxicating fragrance that makes my nose dance with joy. If only we could bottle this cosmic perfume!
Before I conclude, I must extend my heartfelt gratitude once again to Royal Queen Seeds. Their Medusa F1 genetics have granted us this cannabis goddess, and I can't thank them enough for this delightful journey.
As we prepare for the final chapter, drying and curing our Medusa to perfection, I invite you all to join me in celebrating the whimsy and wonder of cannabis cultivation. Let's cherish this upside-down adventure, savor the captivating colors, and delight in the celestial magic of our Medusa F1.
As always thank you all for stopping by and for supporting me on this journey, i am super passion about growing and fell blessed to have you all with me on this new journey <3 <3 <3
Genetics - RQS MEDUSA F1
Ligth - LUMATEK ZEUS 465 COMPACT PRO
Food - APTUS HOLLAND
All info and full product details can be find in can find @
https://www.royalqueenseeds.com
https://aptus-holland.com/
https://autopot.co.uk/
https://lumatek-lighting.com/
With true love comes happiness <3<3<3 Always believe in your self and always do things expecting nothing and with an open heart , be a giver and the universe will give back to you in ways you could not even imagine so <3<3<3
<3 <3 <3 Growers love to you all <3 <3 <3
Medusa F1
Medusa is a true F1 hybrid created from pure, inbred cannabis lines. She boasts uniform grow traits, mouthwatering aromas and flavours, and plenty of potency. If you're looking to bring stable, elongated plants into your room, tent, or garden, look no further. Mouthwatering Aromas, High Potency, and Mid-Size Plants
Though she won't turn you to stone like the mythical goddess after which she's named, Medusa F1 is bound to get you plenty stoned in her own special way. Combining genetics from inbred lines deriving from Sugar Magnolia, a thick and sweet indica, and American Beauty, a fast, fruity hybrid loved for its well-balanced, positive high, the result is an autoflowering F1 variety that produces fresh flavours, a unique cannabinoid profile, and large yields.
A very aromatic cultivar with a vibrant concentration of terpenes bearing notes of fresh mint alongside an upfront peppery kick, backed up by hints of fresh fruit, berries, and tangy fuel. Her thick, frosty flowers consistently produce high levels of THC and CBG, as well as high concentrations of myrcene, ocimene, farnesene, and caryophyllene. As a result, Medusa F1 has strong effects that relax and stone the body from head to toe (brought on by particularly high concentrations of myrcene and farnesene) while motivating the mind with an uplifting, creative, and motivating kick (thanks to high concentrations of ocimene).
Medusa F1 seeds produce elongated autoflowering plants with long, strong branches and well-spaced internodes. Plants regularly grow up to 80–85cm tall and boast a fast flowering time of just 42–45 days (72 days from germination to harvest). Thanks to her genetics, Medusa F1 produces plenty of thick flowers with big, swollen calyxes that make for very easy trimming. Medusa F1 is very stable, handling stress and unfavourable growing conditions with ease, though she is somewhat susceptible to Botrytis, so make sure to keep tabs on the humidity in your grow room/garden
Processing
Likes
13
Share


@Luv2Grow
Follow
Day 43 - Starting week 7 and did a little adjusting to a couple of the tie downs. A few branches were starting to get really lengthy so wanted to keep them somewhat tied down so when the bud weight starts coming, it’s not too heavy. Other than that, she seemed to of liked the drink yesterday and is doing really well overall.
Day 44 - Nothing much new today, just gave her a little once over, snapped a few new pictures and put her back into the tent. All seems to be going well.
Day 46 - This girl is still going strong and she’s starting to smell a bit more each day. For the most part, LST is done with the exception of a few that may still be bendable here and there. Had to give her a little under a half gallon of water today and tucked her leaves.
Day 48 - Still chugging along and budding up nicely. Not much happening with her, just giving her water when she needs it and tucking leaves but I have removed a couple that just stayed in the way. Should be ready for some water in another day or two.
Day 49 - Ended week 7 today with a full on of water, she’s really starting to drink a lot. Not much else going on or done with her today besides removing a couple fan leaves and tucked the rest.

