


Likes
Comments
Share

@Count-Dooku
Follow
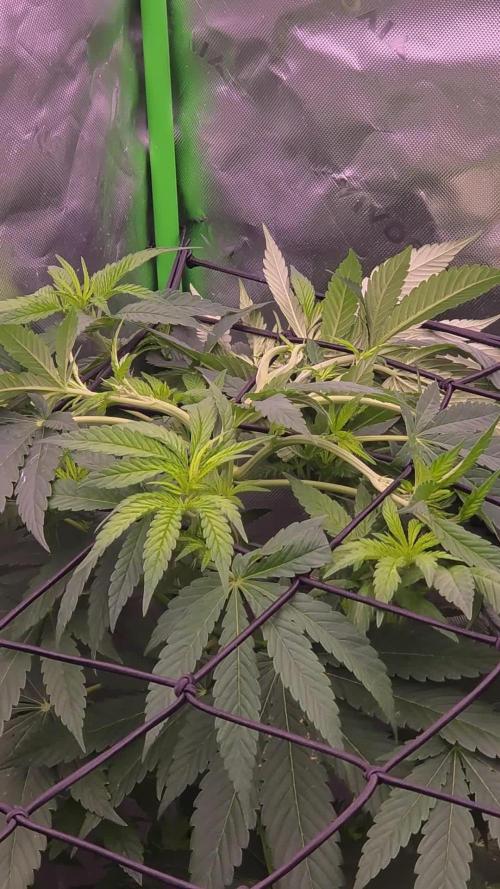
Went into the tent 7/21 Tuesday.
Got them under more ppfd 7/25, will try to shape the stretch with the netting.

Likes
39
Share


@J_diaz420
Follow
Todo marcha bien!!
Creo que lo fundamental en esta semana es arta humedad y riego foliar por encima, pero en las raíces tratar de no llenar de agua ya que a esta temprana edad la plántula no tiene tanta raíces formadas, lo que provoca que se estanquen, quedando enanas y mostrando carencias por no poder beber.
Trataré de seguir como voy, saludos 🍀

Likes
2
Share

@Inside_growlab
Follow
My Black Lebanon is getting such incredibly beautiful colors. The terpenes are starting to come through, and it smells very, very herby, tropical in my opinion, but not even particularly sweet. Very interesting; I've never had this smell before! A few days ago, I watered it again with bio enhancer, and I also removed a little bit of foliage from them. I have to say that the bio line from Green House is really great so far, but apart from one or two minor flaws, it's really great!

Likes
4
Share

@BobbersDown
Follow
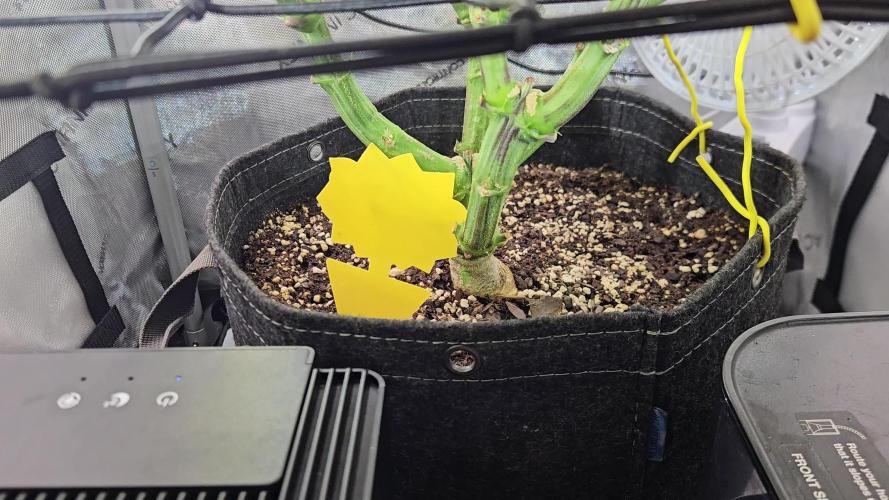
Stacking hard this week. This plant requires some aggressive defoliation and canopy management, because it was a thick, lemony jungle of buds. Hate to lose the bud sites but they can't all get enough light. Should be in a pretty strong position going forward to bulk up and finish over the next 3 to 4 weeks. Angel is getting stronger.... Still mostly citrus but it's changing daily now. Home stretch!! 🔥 ? 🍋

Likes
Comments
Share


@SmithicusAlbertaCanada
Follow
Hey y'all - this is the exciting one for me, this year - I'm submitting the buds from these plants to the 4Plants Cannabis Cup in November, wish me luck! I'm in the amateur medical category, growing one of my favourite strains, it's exciting!
Hope you enjoy the video, I'm just a doofy guy growing some dope, hoping it's, um, dope!
Thanks for looking, let me know if you have any questions or comments 🙏

Likes
124
Share


@Still_Smoq
Follow
📆 Week 11, 30 June - 6 July 2024
30 June - 6 July - Observed and let the plant grow.
📑 All is great with this little lady. She is entering her final week of flower, just before a flush. The smell is very strong, leaves are fading nicely, and buds have swollen. The pistils have turned brown and trichomes are almost at 10% amber. She is at her peek of ripeness.
🍶 nutrient solution not changed
🍽️ feeding schedule not updated
💧 Using reverse osmosis water with EC/TDS at 0
🔆 Light power at 50%, DLI 40 canopy coverage at 18hrs
😤 Using PYPABL, Air Pump, 400GPH
That is it for this week. Thanks for the look, read and stopping by.

Processing
Likes
49
Share


@AsNoriu
Follow
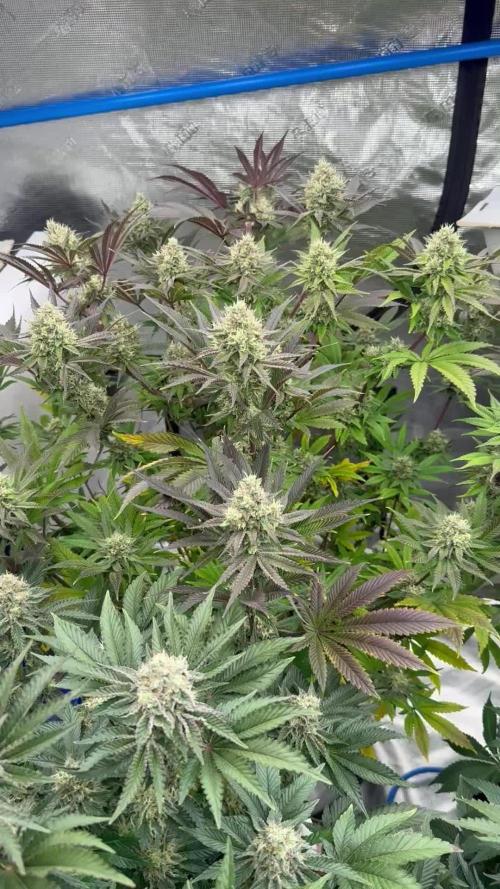
Day 15. All girls will get either first or second feed. Upside down Kush was left in original pot, newwaver Kush was ripped with fingers from soil and transplanted to new pot, never will i have two plants in same pot ever again !!! And just couldn't throw out one ;)))
Kushes got middle of the tent, think i will top them only, it will be too bushy with 11 heavily LST'ed plants.
Think day 18 - first training day for 8 girls ;)
Day 16. Girls are loving life - thats fact !. Now i have to rethink LST plan, thought to train them on day 18, but they grow so compact, that i have two options :
A. Top them on 5 or 6 nod and train from there.
B. Lift lights and induce vertical grow. But its such a tricky move, usually they repeate that overstreched patern even if you bombard them with light after ...
C. Postpone LST to day 24-26. Never i did it so late, stem becomes very stiff, hard to bend her heavily ...
Next few days will show ...
Day 18. Girls are real beauty, they started to strech a bit, will give couple more days and will train them hard on monday.
Day 20. Dice was rolled !!!
LST !!! Girls are very compact, will be fun to veg them will have to plan well how to flatten up them.
Kushes are behind, but i had to keep tent as dry as possible, need plants dry, otherwise stems crack from such heavy training. Put couple soft wires to lift leaves from soil ..
Pure ph water and loads of spray now !!!
Next few days will show ...
Happy growing !!!

Likes
5
Share


Likes
25
Share


@NONSENSE
Follow
Good day, everyone!!!
My Phoenix still in VEG. Looks great, I made Main-lining this time, the plant looks like octopus :)
I use Grow Powder Green House Feeding + Hybrid powder. ( one by one). It is enough for now.
The Phoenix looks more sativa dominant, already about 35cm .
Two times a week I add extra CalMag .
Please check the pictures and this week short video.

Likes
4
Share




Likes
169
Share

@SlowpokeFuegobud
Follow
🍊 🐶 💜 🐘 🍊 🐶 💜 🐘 🍊 🐶 💜 🐘 🍊 🐶 💜 🐘 🍊 🐶 💜 🐘 🍊 🐶 💜 🐘 🍊 🐶 💜 🐘 🍊 🐶 💜 🐘 🍊 🐶 💜 🐘
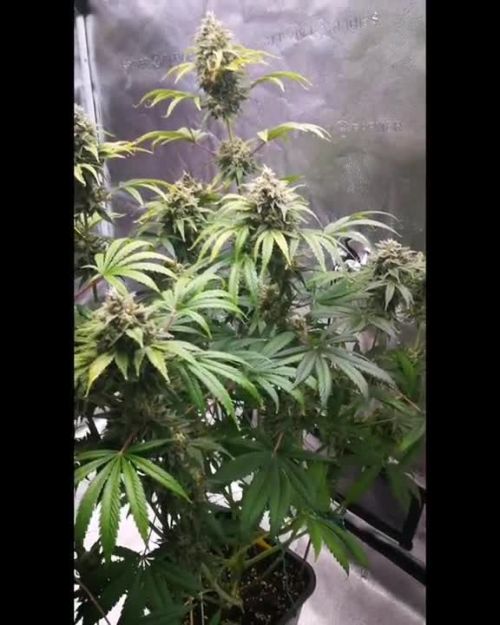
Welcome to week 13, my fellow growmies!! 💚 💚 💚
She's so cute. 😍
I need to harvest soon within the next 2 weeks, so I stopped feeding end of this week. 🙏 The trichomes look good too already! 😛
DAY 85
Watered with 2ml bloom + pk + 3ml growzyme + humics + bigfruits 💧
DAY 87
Watered with 2ml bloom + pk + 3ml growzyme + humics + bigfruits (1ml plantmagic calmag) + epsom 💧
DAY 90
Feeding stop.
Watered with 5ml growzyme + humics + bigfruits 💧
Thanks for stopping by, it's a true pleasure to have you as visitors!! 💚 💚 💚 😘
💜 🐘
______________________________________________________________
About Sour Tangie Dawg cannabis seeds
Sour Tangie Dawg is a sativa dominant cross between the famous Tangie and Chemdawg. Expect a combination of sweet & fruity mixed with a gassy, jet-fuel flavour. The amazing mix of citrus, tangerine, pine and gasoline produces uniquely rich, dank buds. The powerful sativa high is strong, uplifting and long lasting, great for creativity and socialising.
Chemdawg is the parent of OG Kush, all Diesel strain originate from Chemdawg. The Tangie is originally a Skunk hybrid strain but extremely fruity with the trademark Tangerine flavour. This strain is potent with THC-levels over 20% alongside very generous yields of top quality weed, very suited for hash and rosin producers. If you’re looking for a strain to produce the best tasting concentrates this Sour Tangie Dawg is a proven winner! She easy to grow and the perfect choice for SCROG growing due to her growth speed and stretch. We advise switching to 12/12 light when 75% of the net is filled. For outdoor growers the harvest period is early October. Indoors she’s finished after 9 weeks of flower - fast for a sativa dominant strain. We recommend growing in soil with organic nutrients for the best tasting weed.
Get some fantastic genetics here: https://supersativaseedclub.com/ 💜 🐘
___________________________________________________________________________
SETUP:
80x80x180 cm Zelsius
240W Full Spectrum LED IR UV dimmable
DW240H-A6-HS
Heatsink color red
LED Chips:
512pcs SAMSUNG LM301H + 24pcs Osram 660nm + 8pcs Osram IR 730nm + 8pcs UV 385nm
Color mix: 2700K + 4000K
2,8umol/J
Driver HLG-240H-C2100B
Coverage: veg 5x3ft / flower 4x2ft
Product size: 628x205x68mm
Green Buzz Nutrients
Shouts go out to my sponsors @GreenBuzzNutrients, thanks so much for your support! ❤️
If anyone would like to try their amazing organic products, use code GD42025 for generous 25% discount (for orders of minimum 75€) ✨
https://greenbuzznutrients.com/
Biobizz Lightmix
custom exhaust fan 320/270cm³/h
Carbon Active Granulate 240cm³/h
tab water pH 8 - EC 0,25 with Calmag to 0,5
Advanced Hydroponics pH minus Grow + Bloom to pH 6.2
🍊 🐶 💜 🐘 🍊 🐶 💜 🐘 🍊 🐶 💜 🐘 🍊 🐶 💜 🐘 🍊 🐶 💜 🐘 🍊 🐶 💜 🐘 🍊 🐶 💜 🐘 🍊 🐶 💜 🐘 🍊 🐶 💜 🐘
Processing
Likes
23
Share


@GrowGuy97
Follow
Everything seems to be going great for them to all be random bag seeds! Temp is staying a little higher than I would like trying to figure out some ways to cool it down may just order some new lights!
Likes
35
Share


@Belverde
Follow
Welcome growers
End of week n°3 in bloom for this nice CREAM CARAMEL 🍬🍭🍫
She's the best in the garden, no doubt 🙌
Great aroma...nice bud development..fast and compact 💯
And like all the other ladyes, like you have see in the video, yesterday i defoliated hard
✂️🍃🍃🍃
Usually i don't use this type of "aggressive technique"
I always defoliated a little, but never in this way...
This time I decided to practice it on all the plants I have in the garden (10 visible in the diaries + 8 regular all female) out of pure curiosity to see how each of them will react
We seeing what happens..
Anyway
After that I immediately start a more massive fertilization..
Next week we will see how they will be 😉
About nutrients 👇
I still giving their always organic/veganic nutrients..
A little bit of silicium (Bionova) / Crescita (Biomagno) / Activera (Biobizz) / Grow vegan (Bionova) / The Missing Link (Bionova) / X-Cell (Bionova) / Bioheaven (Biobizz) , a little bit of P-K 3-5 (Bionova) /Fioritura (Biomagno) / Bloom vegan (Bionova) and now i have introduced Biomassa (Biomagno) and Florastimo (Biomagno)
Basically these nutrients contain primarily NPK in organic / vegan form + kelp extracts, humic and fulvic acids, amino acids, aloe vera, potassium silicate, beneficial bacteria and fungi
Like i usually do, a little bit of everything at any watering 💧
And that's all..
See you in week n°4 of flowering 🌻
Thanks for watching 😎👍👍
FC ✌️
🇮🇹
Processing
Likes
4
Share


Likes
12
Share


@m0use
Follow
Plants are chilling, added in some bokashi and dry amendments, not expecting much more from this plant, just needs to finish growing and we can be done.

Likes
8
Share


@MrBuenchico
Follow
La EC se mantiene estable, pero el PH no, baja demasiado por lo que he decidido esta semana corregirlo con ph+. Se mantuvo toda la semana en 6.2
se rellena tanque con 20 litros cada 2 días. un volumen muy bueno. A casi 1,2 litros al día por planta
Se ha disparado el tamaño por el centro, algo lógico teniendo en cuenta que por esa zona recibe la luz de los dos lados del foco continuamente.
Se ha girado el foco para mayor comodidad ya que tocaba el cable en una barra y se quedaba enganchado. un tema peligroso.
Estoy gratamente sorprendido con este foco, su rendimiento es espectacular. no se que ocurrirá cuando ponga el otro 😲 Las plantas tienen unos tallos fuertes y preparados para soportar grandes pesos. Esto marcha bien!!!!😎
Fotos del ultimo día de la semana 3 02/09/23
Likes
31
Share


@SkunkyDog420
Follow
Hallo zusammen 🤙.
Habe sie heute geerntet.
Lassse sie jetzt 3 Wochen trocknen und komme dann mit dem Erntebericht zurück.
Bis in 3 Wochen 🤙
https://seedsmafia.com/de/


Likes
37
Share


@masterofsmeagol
Follow
8/19 Rained again last night. No damage but medium is drenched. The 9lb kush I've been struggling with seems to be improving. I spent a lot of time on her yesterday and at least an hour this morning defoliating and pruning her. New growth and flowers look promising. I'm cautiously optimistic. I defoliated what needed it. I needcto qpplyvorganocide again. I can see random signs of septoria leaf spot. I really have been off my fame lately. I'm back on it now. This week the garden will be rearranged and I'll pull that big GDP back and better support the blueberry for flower. That NYCSA is a beast. It's resilient as all hell and just continues getting bigger and fuller. Despite pr9blems in the garden this girl seems absolutely fine. At least I don't have that defeated feeling anymore. I've got flowers on a few different plants. I'll try to get a couple pictures. I may take rapacaps advice and add a cheap plastic roof for later flower. I'm not sure if the explosive flower growth is due to the liquid kool bloom but I think I'm going to switch back to tiger bloom as it works better with the other nutes. I'll jeep this updated but I've got work to do.
8/20 Well it Rained again last night. This is getting discouraging. Now my other 9lb kush has the bottom branch all droopy like there's a borer or something. Realistically with the temp swings and the weather I think it's a firm of root rot or pythiym damage which isn't good. I posted pictures of the stalks and would be grateful if anyone has any advice. I'm go8ng back down to look again for a borer hole but i didn't see one. What it looks like to me is that the petroleum jelly I put on the stalks (to battle ear wigs) seems to keep them moist or something inviting mold or fungus. I'm kind of at a loss. I don't really know where to go from here. I don't know if I should just replant the severely damaged plant away from the rest of the grow, bag it and get rid of it or leave it be and hope for the best. I certainly don't want anything spreading. I'm getting tigerbloom today as my plants still need to eat and I'm nervous about the liquid kool bloom. It's probably fine but still. I'll update after I put in more work and research more today. Any advice helps. UPDATE: No borer holes. The stalk looks fucking horrible. It's supposed to rain today. I'm going to give it one more day then I'll amputate that branch and get rid of the other plant if I don't see an improvement. Perhaps I'll plant it in the ground. Don't really know what to do. Family bar b que today so my options are limited.
8/21 FED TWO GALLONS TO THE GARDEN. ONLY USED .5TSP/GAL OF LIQUID KOOL BLOOM. Did not feed dieing plant. Back to super hot weather 80° at 9am. Did a lot of research last night. I also went to several commercial growers and asked advice. What I came up with was a fusarium infection of pythiym infection
(Crown rot). I looked at all my stalks and they all have bark and are darker where I applied the petroleum jelly. I'm also NEVER using DE again. It fucking ridiculous amounts of water. Everyone swears by it bit it's not going in my garden again. Since use I can just watch water sit right on the GD soil. I tried to get some examples of what I'm talking about with the stems. I amputated that lowest bottom branch I trained (which was huge). I didn't have time to dispose of the other plant before my wife's doctor's appointment. I'll update when I go back over. I'm sure this won't help and may hurt but I used Bee Safe 3 in 1 on the wound and around the stalks of the plants I saw discoloration on. I didn't touch the NYCSA even though I see some discoloration. I may just be seeing things. That plant I'd super healthy and I don't want to risk losing it. It doesn't seem to have the stem rot like the others. At least I'm not the only one having problems. I hears some pretty bad stories. Still. I'm heart broken. I'll keep this updated after I go back over. FUCK. I MAY just go back to indoor. UPDATE: Got back from the appointment and the rest of the plant was all droopy just like the other 9lb kush (and the branch amputated). I wondered about that because other branches looked worse. I got the totally dead 9lb kush out and found some root rot. AFTER wheeling the bag out I found earwigs and other insects where the bag had been. Awesome. I used h202 to try to wipe down anything that looked Fingal in the stem. It sucks because it seems like that liquid kool bloom pushed them over the edge into flower. Cotton balls where there was nothing. So that's both my 9lb kush plants and the largest plant of the year the GDP that have all bit the dust. If you grow cannabis you know how I'm feeling. I KEEP TRY8NGVTO UPLOAD THE MINUTE VIDEO I TOOK BUT I CLICK ON SOMETHING ELSE AND IT DISAPPEARS. WIFI SLOW. HAVE TO WAIT FOR 5G
8/22 What do I say? Fusarium? Pythium? Stem rot? I'm going to have to get a tent to do some indoor to get the medicine I need for me and my wife. I took the last 9lb kush out and disposed of it. Well it's still in the bag. I'm hoping maybe it might come out of it (beyond hope and far away from the others (but I'm going to toss it today). This blows so hard. Flowers are just starting to develop. I like the liquid kool bloom. It seems to make flowers explode when there was none before. At least on the plants I have left. Actually even the dieing ones started flowering. I'm really concerned considering that one plant (at least) has septoria and every plant has that petroleum jelly on it. Cautio to people that use that. It seems thats where the rot started or is. In spots I spread the petroleum jelly. Anyway my NYCSA has the smallest amount of "funky looking stuff on the stem" so I'm hoping it will make it. Cotton balls starting to appear. If I lose the whole fucking crop I'm gonna go ape shit. UPDATE: Spoke with a few others and did more research. I removed my braces on the bottom of all the plants. It looks like the pjelly and the brace allowed for some type of contaminate. Other growers think I'm being too bleak. They think things will turn out okay. They are more knowledgeable about cannabis than me but I'm with these particular plants everyday. They're probably right and my anxiety is just getting g to me. It's scary seeing a healthy plant completely die in such a short time. After removing the other 9lb kush I could easily see extreme rootbound roots still too the size of the 1 gallon they came in. The bag was PACKED FULL of tight roots so they definitely made it down. The plant however just fell over when I pushed it. I had roughed it up a big before. Anyway I'm praying to the cannabis gods to not take what I have left.
8/23 Fucking pouring again. This sucks. I've gotten loads of advice and made another friend on here. I forgot my phone so I couldn't take pictures this morning. My spirits are up a little seeing that others are at least attempting to help. I'm headed to the grow shop after a night of research to grab supplies to battle this. I'll update later. EDIT: I picked up plant doctor at the grow shop. It was 50% off and I couldn't find anything with trichodermia. However, I've heard good things about this plant doctor. It's systemic and can be used as a root drench and a foliar spray. BIGGEST selling point for me is that it SPECIFICALLY lists fusarium, grey mold. Pythiym crown rot, black mold and all kinds of other shit. The thing that sucks is it's raining and it's not supposed to stop for a few days. That's going to make application more difficult. Oh well. I think I may do a root drench on the one plant that has a wilted bottom branch. I'll keep this updated. Thank you everyone who reached out. Especially growing grannies and my commercial buddy who is always here for me. However he has no experience with this so I'm kinda on my own here. EDIT: I couldn't find trichodermia and I don't have time to wait around and order. I found plant doctor which literally lists it treats all the possibly pathogens my issue could be. Even has a section for medical Marijuana. I did a root drench on the plant up front in the middle AND I did a foliar spray. Might as well get the septoria too. It's systemic but it gets in faster through the leaves I guess. It started sprinkling and I want to test this stuff out before I go ham with it. I did give some to the to other plants bit left my best AND THE TWO SMALLER ONES alone for now. I'm not seeing those issues on the NYCSA and I don't want to risk damaging it. I chose tge root drench as it's raining and the instructions for fusarium WAS a root drench. Thank you all for your help. I will close out tge question once I know it's figured out. Wish me luck. DID A SHORT VIDEO BUT WIFI IS SUPER SLOW SO I NEED TO WAIT TO UPLOAD IT. Went back over. Finished foliar spraying the other two and left the NYCSA and two Littles alone. Hopefully this works. I did I short video. Who knows if it uploads. UPDATE: Went back over and finished foliar spraying. Took a bunch of pictures and did a video but it didn't upload. I'm hoping this will do it. Plants actually look good. And they're flowering nicely! It's too bad I had to do a foliar bug this us supposed to combat PM and septoria as well.
8/24 It Rained last night but hasn't Rained today yet. It's supposed to and uts overcast. I'm really considering putting a roof on my grow (like rapacap suggested) for flower to decrease mold chances. Plants looked happy. I saw no negative effects from the Plant Doctor. I even sprayed a branch of the NYCSA and the stem and a little around tge roots. I finally feel like I can take a breath. I've been working so hard and worrying about losing g everything. I may have been able to save that 9lbkush but I don't think bit was worth taking the chance. The sun is peaking out now. My buddy at the grow shop called and set a side general hydroponics armor si 0-0-4 silica supplement cause it was 90% off. I pad like a buck sixty lol. I'll incorporate that next feed or water. Whatever comes first but it will be good to get it in the regimen. I was worried plant doctor might hurt but the girls seemed to kike it and I went ham on the worst plant. I mixed according to medical Marijuana guidelines on the label
(Theres another label on the internet, it's not on this one, it's at the very bottom and just recommdations from commercial growers. I hope this stuff works. Things look better already though. That liquid kool bloom is the bees knees. That's making flowers pop up like crazy! I think I'll stick with it. I was going to use beastie bloom and cha ching later on (and still might) but I hate the lockout bullshit. I've done a bunch of videos but most don't get uploaded as i forget to upload when I leave and wifi is slow here. Anyway at least I've got a few good ones left and pleating the words of my commercial poll buddy, "barring anything catastrophic you should be fine. I know your anxiety gets the better of you sometimes." Couldn't be a truer statement. I'm still getting a tent and doing indoor though. I'm going to need to.
8/25 Did some slight defoliation. I think today I'm going to reorganize my grow space. Things are looking better though. Plants look healthier. Flower is on and they are going to beat hell. I'm glad I took a cutting from NY 9lb kush. I also took one from the NYCSA. THose are tge little ones. The 9lb kush is flowering pretty good. Too bad it's just on a 3 gal. The NYCSA us in a 10 gal grow bag though and is doing amazing. I still see septoria on the leaves. I'm sure I'll need to reapply plant doctor but thus far I'm impressed. Things LOOK better. I don't even remember the last time I watered. It Rained last night. Looks sunny today. I'm going to feed tomorrow. I want the soil to dry out though. We usually don't get consistent rain like this. It's a first for me. I'll update later if I get stuff done.still wondering if I should amputate that wilted branch or give it a bit. It's still attached right now. I'll get some sealant and do some more research.


Likes
3
Share


@TheSpoonieCrone
Follow
The girls are starting to pack on some weight. I'm still learning so it feels like I will kill them at any moment but I can see that isn't the case so far. Here is to making it another week <3
