


Likes
Comments
Share

@DomForester
Follow
Lots going on this week.
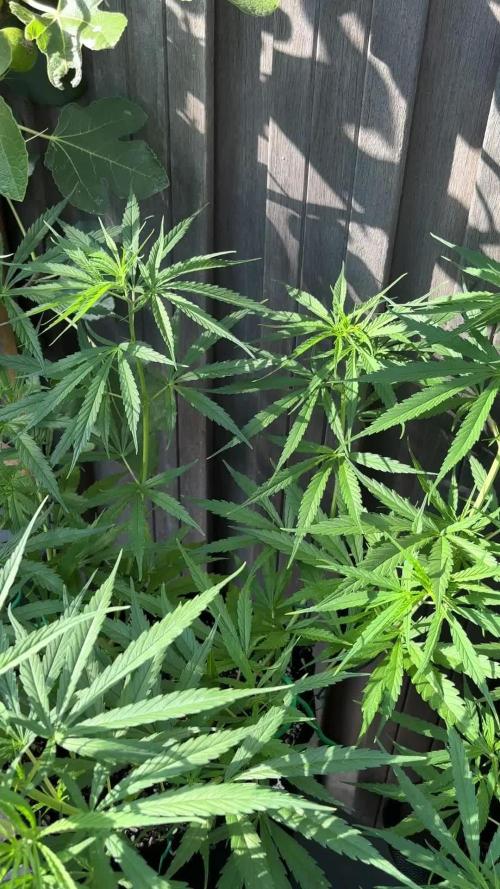
Prince (LST’d Purple#1 - my favorite in structure) turned out male and I caught it just a day or two after moving him into his final 25l pot. He got a bit of a trim, re-repotted back to his 7l pot, and moved into a tiny grow box indoors under 12/12 light. I’ll keep him in there until pollen sacs are ready to go into the fridge to pollinate a bit of one of the Casamance Sativas later.
With that 25l pot (and a bunch of fresh soil) now available, I quickly moved Jimi in there and got a growth spurt almost immediately after.
With everyone in their final pots the table is getting crowded despite Prince moving out. Made me measure current canopy dimensions to start thinking about how to get them into the tent in a couple weeks. Turns out they’re all around 60x40cm in width/depth, which means I’ll get only three in there at best…
In other news - I’ve only just figured out that I might have been overfeeding them. BioBizz nutrient schedule says only up to 3ml/l Grow and I’ve been feeding up to 5ml/l. Does anyone have real experience to share?
Most importantly: Can you identify any male or female signs in the close up shots I’ve uploaded?



Likes
12
Share


@SiriusBlack117
Follow
They’re getting close!
I could probably chop the GSC and GC but the Gelato has at least 2 weeks to go. I was hoping to bring them all down at once and dry in the tent but I may have to figure something else out.
I think this is the most aesthetically pleasing garden ive grown so far. I enjoy all manner of plants and in general the GC is the nicest looking mj plant I’ve ever produced.
I’d love a porch full just for the look!
Anyways, all these girls are a little stunted from all the cold nights. Dark temps under 60, a lot under 50-55 for most of their lives but they look good, and still very frosty.
Never had gelato or GC before so im excited to try them out, thanks for dropping by!

Likes
50
Share


@SolitudeCorners
Follow
Last week of flowering (72days from the light switch) Gonna cut soon when the dirt is dry. A quite late harvest. Many buds denser more, and stem can’t longer resist.
This season so satisfy. Thank for all mentor and comment. You all are my inspiration for grows.
Feeding
23/1 Water 13.5L+Flawless 20ml ppm80 ph6.2
MDR 3L 2Lx5
Runoff
MDR 1400 /1155
Zkittle 1600/1300/1150
Pineapp 900/600
Purp 1300 /1200
Sapp 2000/1100
Dozdos 1100/1000
25/1 10.42 6L ppm9 ph6 1L per pot
3L+Flawless6ml ppm116 ph5.9 1.5/1.5 Purp, Zkittle
4.5L+ Flawless7ml ppm119 ph6 1.5/3 Sapp,MDR
Runoff
Purp 1300
Zkittle 1500/1200
Dozdos 1400
Sapp1300
Pineapp850
MDR950
27/1 runoff
Pineapp 500
Purp 900
MDR 600
Zkittle 400
Sapp 300
Dozdos 400

Likes
16
Share


@Chocolopeison
Follow
Estuve de viaje así que me salte la reseña de la semana 2 pero continuaremos con las nenas hoy terminan están en su 3era semana de vida. Se siguen manteniendo parámetros lo más ideal posible. Cabe destacar que: Orca, Myco Chum y Cannazym se les da semanalmente, mientras que el resto de los nutrientes es diario.
Watermelon Zkittlez x Watermelon Zkittlez - Purple City Genetics
Papaya x THC Bomb - Purple City Genetics
Punch & Cookies - @mamikoseeds
Double Stuffed Sorbet x Golden Cobra - @Secretlife.cl


Processing
Likes
11
Share


@chimera
Follow
A week of wonder watching all the bud sites emerge. Lots of training keeping leaves under not blocking areas. Now can see the benefit hopefully soon to be flowering in bloom.
Likes
21
Share

@GERGrowDesigns
Follow
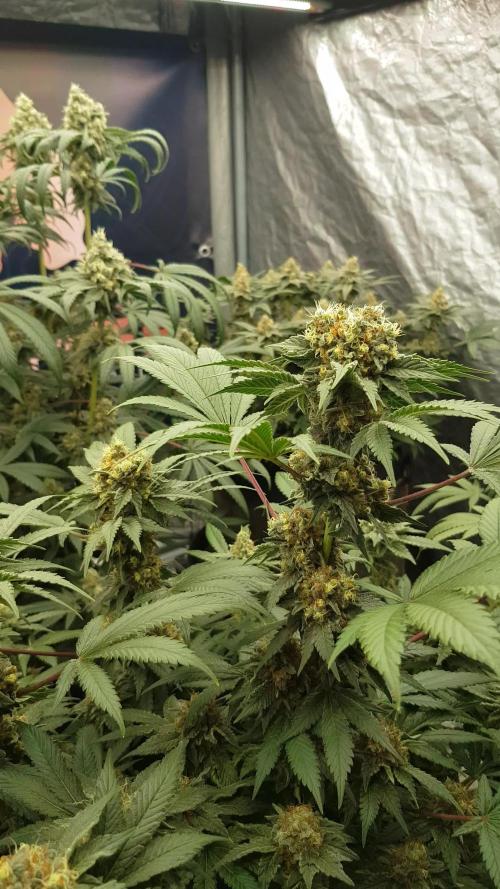
Welcome to Flower Week 6 of SuperStrains Amnesia
I'm excited to share my grow journey with you from my
SuperStrains Project . It's going to be an incredible ride, full of learning, growing, and connecting with fellow growers from all around the world!
For this Project , I’ve chosen the Feminized Photo Strain Amnesia :
Here’s what I’m working with:
• 🌱 Tent: 225x150x150
• 🧑🌾 Breeder Company: SuperStrains
• 💧 Humidity Range: 45
• ⏳ Flowering Time: 10 Weeks
• Strain Info: 25%THC
• 🌡️ Temperature: 26
• 🍵 Pot Size: 20
• Nutrient Brand: Hy-Pro
• ⚡ Lights : 600W x 2
A huge thank you to SuperStrains for allowing me to try my Best with this amazing collection from Photo Strains they managed to Sponsore side by side with theyre Hy-Pro Nutriets . Big thanks for supporting the grower community worldwide! Your genetics and passion speak for themselves!
I would truly appreciate every bit of feedback, help, questions, or discussions – and of course, your likes and interactions mean the world to me as I try to stand out in this exciting competition!
Let’s grow together – and don’t forget to stop by again to see the latest updates!
Happy growing!
Stay lifted and stay curious!
Peace & Buds!


Likes
22
Share


@Lerome
Follow
Unfortunately ive managed to overwater my young plants when experimenting with a new substrate. They looked really droopy with grey edges and yellowing already, so i decided to restart this post for a second try germinating directly into my living soil, like im used to do it.
📆 [23rd of August]
Ive put the 2 remaining seeds directly into my homemade living soil. Exactly 72 hours later, on the 26th, one has popped up and showed their germination leafs.
I am planning to repot the plants into their "real" home after about 14 days of vegetation. That is gonna consist of 2 substrate levels in a 40l container. The bottom 2/3 is going to be a mix of peat, pumice, sand & vermiculite, the top third is gonna be a layer of my homemade living soil, which is made of 1/3 peat, 1/3 compost and 1/3 pumice 4-12mm & Spelt Husk 50%/50% (measured by volume) amended with kelp meal, sproutet bean meal, basalt rock dust, microbial mushroom biomass (chitin), oyster grit, gypsum, charcoal, bentonite and tiny amounts of bone meal & horn meal.
It is my first time growing in a (partly) nutrient poor substrate. I want to do some kind of Experiment this time, as i have not seen many growers use "hydroponic" /nutrient poor substrate paired with the "living soil" approach & organic feeding. I'm trying to boost the growth by providing plenty of oxygen and water like hydroponics does, without needing to use those mineral salt based fertilizers or frequently having to discard "old" substrate.
In my mind this idea would work similar to an "Autopot" system, where you prodive water and oxygen mainly in the bottom with some small amounts of nutrients, but feed mainly from the top by amending. Ive seen this in the "Build a soil" youtube channel.
I've set their homes up already a couple weeks ago and moistened it to let it cook together, so the living organisms could colonize the bottom subtrate before transplanting.
(Edit: Change of plans, those "homes" are gonna go to my Red Hot Cookies instead, ive just transplanted her right into an 8l pot to become a mother. Its made the same way, without the cooking together in prior part.)
The plants are going to be fed purely organic/natural material by top dressing with different amendments like fish hydrolysate, basalt, kelp, gypsum, guano and this "living soil - grow" fertilizer i've showed in the pictures.
Furthermore i am going to be using homemade nutrient ferments on cannabis for the first time. Ive already tested those on roses, tomatoes and some houseplants. (made from fish, insect, kelp, aloe vera, guano, kitchen scraps, plants etc). My goal is to additionally boost the plant growth by watering these quickly available nutrients. It should contain all the essential minerals plants need, as well as phytohormones, amino acids, vitamins, humic and fulvic acid, beneficial bacteria and fungi.
Stay hyped with me!
[Edit Week 4]
I am not as happy with the results as ive expected it. The plants are looking pretty fine and growing nicely, but i dont see any benefit compared to pure living soil yet. It almost seems like the plant is growing a little bit slower than usual and just needs to be fed more with this method, i dont see any "hydro like" boost happening... Maybe i needed to fertigate her more often and topdress more, i didnt want to try out too much though as i want to keep this plant as a mother. I dont have much time to do experiments with clones, so im probably just going to go for it as planned and hope that they will like the system in the big 40l pots. Probably going to amend the soil heavier then by topdressing more and fertilize with every watering later in veg - until mid/late flower.

Likes
23
Share


@Canadian
Follow
Day 50 the plant has been growing at an incredible speed and has a very very large flowering stretch in fact I only have left 5 inches to raise up my light and then I'm going to have to do something to keep an eye on those branches so they don't stretch anymore or at least they can have enough light to proper development.
From all the plants I have grow indoors this one is the only one that has make my light stretched to the top of the tent I guess it's a good problem to have.
Other than the incredible stretch the plan seems to be healthy and doing pretty well the flower is development and I'm looking forward to see how this is going to turn out.
Day 52 I have rise my light to the top as high as I can and she still grow past the light towards the exhaust system I had to tie her down in order to create an arch and in that way make her receive enough light instead of growing over the top of the light where there is actually no sufficient light if this problem persist I will have no choice but to do super cropping on the tallest branches and see how they react to that I decide to take some cuttings I'm trying to clone this one to see if I can get her outside in the summer in another buddy house and see how she reacts to challenging Ontario weather.
Day 53 I have to Super crop several branches Unfortunately they were growing straight into the light becoming burned by the intense light I hope the plant doesn't react to bad to HST and still deliver awesome buds
thank you for reading I will continue to update have a happy grow.

Likes
19
Share


@Joeycrack9
Follow
Lemon Mandarin 1 & 2 09/17 5 weeks
Orange Sherbet 1 09/17 5 weeks
Papaya Sherbet 1 & 2 09/25 4 weeks
Gorilla Melon 1 & 2 10/04 3 weeks
Lemonpaya 1 10/04 3 weeks and 2 10/14 2 weeks

Likes
18
Share

@Pierrougarou21
Follow
Salut les growmies
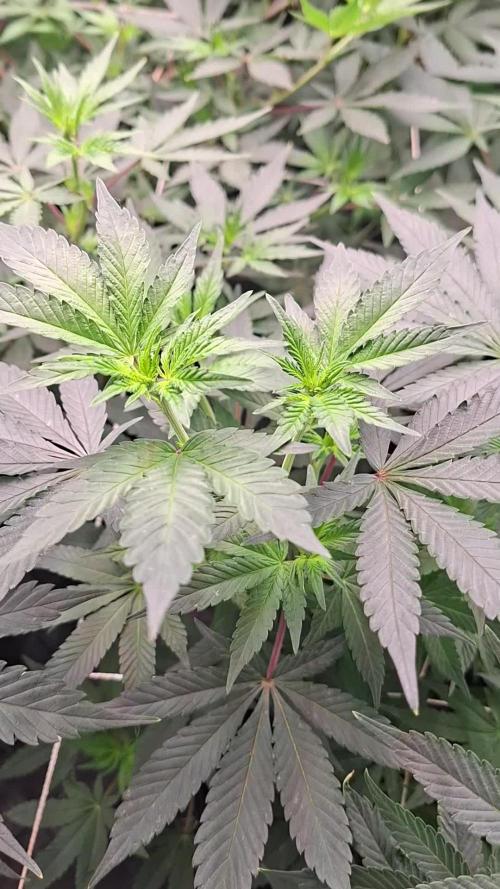
Fin de la semaine de croissance donc la nouvelle sera en mode 12H/12H.
aujourd'hui j'avant de passer mes contrôleurs en mode foraison :
J'ai traité en préventif la totalité de l'espace et des plantes à IPW.
J'ai prélevé des clones de chaque individu et pour finir j'ai installé le filet et j'ai commencé à palisser les filles sur le filets afin de bien remplir l'espace
18/09 5 jours apres le switch
20/09. Video du 7eme jours de la 1er semaine en 12H/12H. Les filles sont justes éblouissantes. Les nutriments BIOTABS sont exceptionnels. Avec, les filles sont en pleine santé et plein de vigueur.

Processing
Likes
10
Share


@Ktims420
Follow
Huge growth this week , a week behind but taller than my blue dreamatic’ auto . Looking nice and healthy but I am running out of room could have done lots of lst on these babies but I just don’t have the space. Lots of tall stalks not just one main one . Loving this strain, very tolerant for new growers. All ears to feedback good and bad. 💚
Likes
56
Share


@Aedaone
Follow
The temperatures, humidity, height, and watering volume(if measured) in grow conditions are all averaged for the week. The pH is soil pH. Any watering done by me is well water which is 7.6 pH and 50° F. Any listed nutrients are ml/gallon of soil to be spread evenly on top of the soil. The plants are getting just under 13.5 hours of light now. In grow conditions half hours aren't an option, so I'm noting here.
Day 1 we had a high temperature of 83° F with partly cloudy skies. I watered each pot about 5 gallons once.
Day 2 we had a high temperature of 81°F. There was plenty of sun and I watered about 5 gallons per pot. Even though the girls are drinking more, the cool weather, and them rooting through the fabric pots into the soil, has kept me from watering twice a day. The girls cleaned up nice after the fungicide treatment. They look great.
Day 3 we had a high temperature of 78°F. Skies were clear and sunny. I watered about 5 gallons per pot with well water. The air has been a little drier with this cool from and the girls are loving it.
Day 4 we had a high temperature of 77°, clear sunny skies, and humidity at 66%. This weather is very fall like and the plants are loving it. We've got rain in the weekend forecast though. I hope we miss it. I added 100ml of feather meal top dressed they're getting a little hungry for nitrogen.
Day 5 we had a high temperature of 77°. Skies were partly cloudy to mostly sunny. The humidity dropped into the 40%'s today. The plants are loving this weather. I watered about 5 gallons per pot from the well. The girls are getting their trichromes up.
Day 6 we had a high temperature of 86°F. Skies were partly cloudy and we had just a few minutes of very lite rain. I watered about 5 gallons per pot with well water.
Day 7 we had a high temperature of 85°. Skies were cloudy all day. We had a huge thunderstorm with high winds roll through followed by heavy rain most of the day. I added another 100 ml of feather meal top dressed to each pot.
This week was a success. The girls have really swung into flower. Their trichromes are really starting to pop and these flowers are filling out. I'll treat again for powdery mildew tomorrow.
Likes
3
Share


@Earthsower
Follow
She has started to move again with no further deficiency so I will continue her draught and see if she improves more!

Likes
8
Share


@MrAutoGrowerUK
Follow
packing on the Weight on the final few weeks. Added fox farm tiger bloom

Likes
16
Share


@Le_Che
Follow
5 Fullgas féminisés de chez Green House Seeds 400w hps ampoule Phillips Green Powers 30% de bleue en plus, black box silver 80 x 80 x 1,80 intracteur winflex 125mm 185m3/h extracteur winflex 125 mm 220/280m3/h ventilateur clip 16 w, un ventilateur clip oscillant 20w, 2 filet scrog 8x8
Aussi on as ajouté le Trichoderma harzanium qui préviens des apparitions de moisissures comme le botrytis, on en as mis au millieu de nos pots, on met toutes les chances de notre côté !
Je tiens aussi à préciser que j’active les graines en les laissant 4 à 8h dans un verre d’eau au bon ph, et ensuite les mets dans des serviettes humide pour la germination, je n’ai pas encore eu de graine qui n’ont pas germé avec cette méthode, je met une toute petite pincée de trhichoderma dans les serviette vraiment très très peu pour stimuler les racines rapidement.


Likes
2
Share


@Superstarorganics
Follow
Low stress trainin tryna get her to fill in early topping in 1week in a half stay tuned

