


Likes
Comments
Share

@PharmaZ
Follow
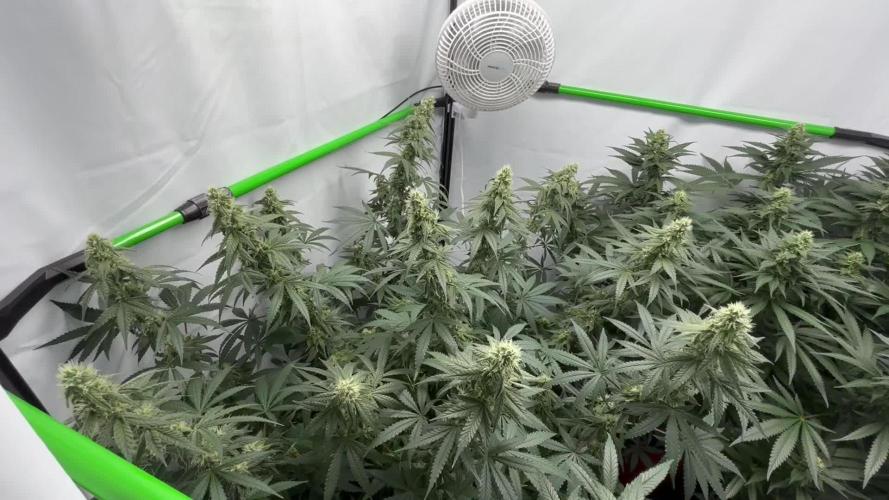
Tuesday 4th August (day 38) 2-4am
Heavy flushing EC keeps rising PH hasn’t come down below 2 after heavy watering and light feeding. I’m resorting to a reset flush now put roughly 15L of 1.0EC nutrient mix just Calmag and A&B through each pot and finished off with a Balanced feed for day 38
0.5ml/L - Calmag
1ml/L - Canna A&B
1ml/L - Big Bud
2ml/L Clean fruits
PH5.6 EC
Have removed the plant stands so I can bottom feed them extra when the lights are off, or if I can’t be home in time for watering. I’ve reduced light intensity when it’s too hot, battling high humidity.
As you can see they are surviving they are a dark green colour and bud development has been super slow due to all the issues when growing in summer.
I shouldn’t have had dry backs early flower should have just soaked them and worked with the humidity. Lessons learned as always with growing it’s never just plain sailing.
I might knock the pure coco on the head and start adding perlite again in the winter.
May get the autopots out haven’t decided yet.


Likes
14
Share


@herewegrow
Follow
41F - Seriously putting on some weight now! Pistils are just now starting to turn orange/brown. The un-topped WWBB has a massive main cola, but the topped plants are looking pretty good as well.

Likes
5
Share


@LeedsCityFarmz
Follow
Nice strain to grow overall especially for the terps it produced, yield was more on the low side as expected from one for these "hype" strains or whatever you want to call them.
Likes
Comments
Share

@Antarctic
Follow
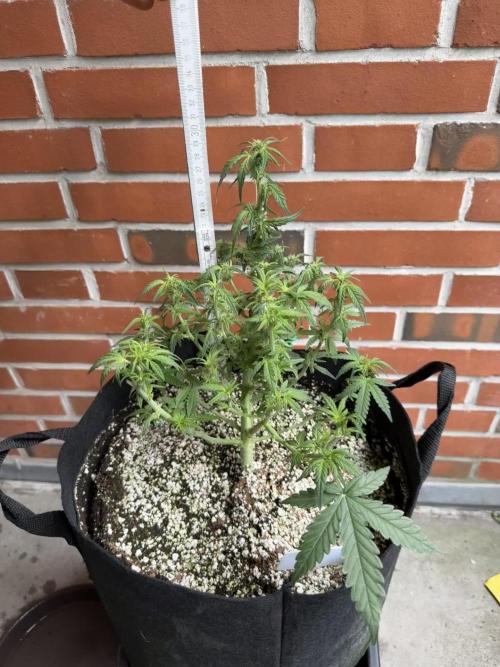
Week 8 update (full bloom):
The autos are now in full flowering mode 🌸 Buds are stacking well, pistils are everywhere, and trichomes are starting to show up. Stretch is nearly finished – now it’s all about building flowers.
Nutrients this week:
• Hesi Bloom Complex (base bloom) – plants are responding really well.
• Hesi PK 13/14 introduced at low dose to push flower sites.
• Athena Bloom + Athena Grow (light mix) to balance nutrition and keep a steady NPK ratio.
• CalMag still in rotation at ~1 ml/L.
• Silic Rock small dose for stem strength.
• Total feed around 800–950 ppm, depending on the plant.
Observations:
• Canopy looks uniform and healthy – green leaves, no big issues.
• Runtz shows the most aggressive bud growth – dense flowers already forming.
• Amnesia autos a bit more stretchy, but flowers are catching up fast.
• Mike Tyson slowly recovering from early stress, but now producing pistils.
• Aroma becoming stronger – fruity and slightly spicy terps in the tent.
Training:
• Final LST adjustments to spread colas.
• Light defoliation to open budsites and improve airflow.
• From now on: minimal interference, just supporting the flowers.
Plan:
• Keep PK booster for another week, then evaluate.
• Maintain bloom feed and slowly reduce nitrogen.
• Watch trichome development – early frost is starting, but still weeks to go before maturity.

Likes
3
Share


@Hydroponicfarm7
Follow
Terminamos la 2ª semana de floración, pese a estar a 30cm del lec, estiró más de la mitad de la anterior semana, solo hay que ver las primeras fotos que son al comienzo de la 2 a ver el vídeo que es el día que terminó. El único inconveniente es la humedad, no consigo bajar del 60%. Para ello haré una defoliación agresiva para evitar hongos, espero no arruinar el cultivo por culpa de la humedad. Seguimos firmes 🤟🏼☄️

Likes
39
Share


@Mastr
Follow
Hi everyone I'm not very happy I top them very late I should done it 2 days ago or yesterday coz I been very poorly couldn't even get out off bed but I topped all lady today (day16)from 6th node and 1 from 4th node(by accident) I cut the wrong stem then I have to cut rest so hope it doesn't effect yield
Day 21 they are so bushy already 1plant day21 start preflowering
I feed them
1ml silica
2ml biogrow
2ml heaven
2ml activera
1ml alg amic
With 1L ph water each Plant every day
Following week will reduce grow and add some bloom and top max
(Recommended silica liquid for everyone)
Likes
13
Share


@Alpha_Green
Follow
Some of you may have wondered:
Why do I use CO2 at average 950 ppfd μmol/m2/s (moral flow)?
The answer is quite simple. Because of lack of space in some regions of my cultivation area, I simply cannot keep the ideal distance to my Sanlight high-performance lamp, due to some height growth of various strains. And so some of the main colas have ppfd values of 1250 μmol/m2/s and even more...
So this is how I manage to achieve and compensate for such high radiation levels even with a CO 2 balance. And I have to say, my strategy to avoid various light stress symptoms works just fabulously. In combination with CO 2 implementation, my babies are simply unbeatably insensitive to light. Thats it!
Beginning of 3rd week flowering:
Again feeding my babies by 36 hours fermented potions of Bio Tabs Kompost Tea PK-Booster (15 g pro Liter) and added:
5ml Orgatrex/Liter
1 Spoon of Bactrex
1 Spoon of Mycotrex
1 Spoon of Mycco-Vital
1 Spoon of Dynomyco
A little tip for those who are interested in small modifications that have a big difference or influence - on the result - effect - beauty - health - taste! Before adding microorganisms or beneficial bacteria or Mycorrizae and Trichodermas, please use oxygen-saturated water. On the one hand, unwanted chlorine gases evaporate and the small world of the microbiome becomes even faster and more rewarding in compost tea to sprout.
Last but not least for this week, I would like to introduce my reasons, why I prefer growing biologically and sustainably.
First of all, it’s something which suits very well in these times/days we are living now. Sustainability is a big need and task for our planet. 🌎 Nature means life. Our home, the air we breathe and everything that surrounds us. Not just today. Hopefully tomorrow as well.
Maybe I'm starting to protect our environment on a small scale, but maybe I can also make a big difference at all.
If you change the way you look at things, the things you look at change...
I thought about what’s the difference, between Mineral Feeding and Super Soil Feeding.
It’s very easy. Biologically Growing is a similar process than the natural soil activities out there in the lap of nature’s. So plants has to work and interact with the microorganisms and microbiomic communities in the soil. So the plants will never get lazy like the lazy ones of mineral feeding growers.
If you grow biologically, you will feed the soil first and the microorganisms will support every parameter next to your plant conditions. And that will generate an unbelievable spectrum of Terpenes and Trichomes you will never forget.
It’s the same comparison, when you daily visit McDonalds and you eat only fast food. How does your body and mind react on this shit for money?!?!
May I invite you to think about it…
See you next week dear Growmies! Have a nice Weekend and take care…
Peace out!
Addendum for Day 53:
At the moment we unfortunately have another winter onset here in Germany. This means that I am forced to take additional heating measures due to structural facts in order to be able to keep the temperatures constant. After all, just tonight the thermometer climbs again to -1 degree Celsius.
In addition, my exhaust air system runs out of my bedroom terrace and I therefore grow winter and summer with the patio door open. Well, sometimes I experience real weather-related challenges. But all in all, no problem...
"Where there's a will, there's a way."
Addendum to pouring out the fermented PK tea: I always administer half a liter of lukewarm aerated water with 3.5 ml of cannazyme per liter to each plant. This means that the "root machine" is not supplied with supplies unprepared and the nutrient solution can thus also be better distributed in the soil. Since I also work with cloth shoes, I spray them evenly moistened everywhere with water that is also warm before pouring them out from the outside. This has the advantage that the moisture stays where it should: in the pot!
... I did the math today ;-) We are still in week 7 until this Friday. And week 8 starts on Friday! OMG... still so much time yeahh!
Today my Fast Buds Sour Jealousy and Sweet Seeds Big Devil and Dark Devil Automatics arrived. I'm looking forward to it.
This time Fast Buds next Time Sweet Seeds. Love them too. Very beautiful genetics.
Today a review video of the beginning of week 3.
At the time of the pictures, I had minor signs of nitrogen excess. (Light peaks first at the crown of the roof and then slightly continuing to the middle section.) I then painstakingly racked my brains as to why this could be. I found that very slight dry spots had formed and therefore the root found small accumulations of nitrogen that caused its problems. But then, when I carefully homogeneously checked the moisture content in the substrate, the problem evaporated again. However, they had not shown any loss of growth rate during this time. Nevertheless, they developed as expected.
They Strawnanas had no problem with that.
In the end, I always have a hard time killing them. But I guess that's the way things go.
We live and die.
We come and go.
But it's not there yet. ;-)
Tomorrow is day 56.
Tomorrow’s updating day!
Can't wait to see their progress.
Have a good time and see you tomorrow… 🏽🕊️
🏽 ☮️🕊️

Likes
12
Share


@Daviz_42
Follow
Me he quedado un clon para seguir trabajándola y poblándola, ya que como comente antes tiene un terpeno único y una producción buena de flores bonitas con mucho sabor.
Likes
1
Share

@c_sevilla_g
Follow
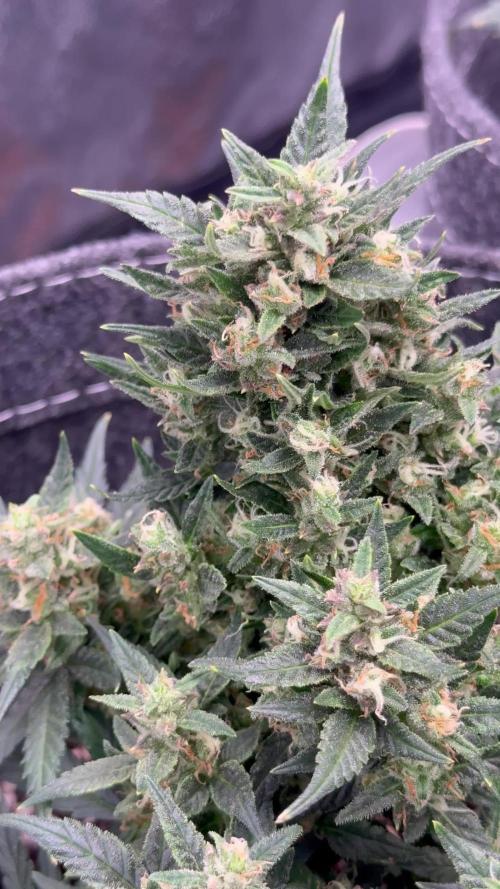
Ya comencé con el flush y Ya tienen un 2-5% de tricomas color ámbar las Pound cake, y la purple lemonade tiene aproximadamente 10% color ámbar (las colas más altas, los bajos tienen menos). Nose en cuanto tiempo más cortar para que estén en un 20-25%
Likes
43
Share


@Hashy
Follow
********************************************
Week 10 mid flower (flower week 4)
********************************************
Light cycle=12/12
Light Power=155w 65%
Extractor controller settings
High temp= Day 26c, Night 20c
Low temp= c
Temp step=0c
High Rh= Day 50%, Night 55%
Low Rh= %
Rh step=0%
Speed max=10
Speed min=2
Smart controller settings (during lights on).
Lights on=9.00am
Top fan on=+22.5c
Top fan off=-22.0c
Dehumidifier on=+50% and -26c
Dehumidifier off=-50% or +26c
Smart controller settings (during lights off).
Lights off=9.00pm
Dehumidifier on=+55% and -20c
Dehumidifier off=-55% or +20c
VPD aim=0.6-1.6
DLI aim=30-45
EC aim=0.2-2.0
PH aim=6.0-6.5
NPK(14.3/16.2/43)
💧💧💧💧💧💧💧💧💧💧💧💧💧💧💧💧
Method= Autofeed 6 drippers.
Feed=Flower Nutes.
Neutralise=0.1ml/L
Bloom=4.0ml/L
Silicon=1.0ml/L
Calmag=0.5ml/L
Pk=1.0ml/L
Boost=2.0ml/L
Volume=12L
Easy Ph down= 0.125ml/L
Ec=2.1 PH=6.7/6.8
Runs=17
Run times=4min (276ml each)
Gap times=16min
Total runtime=68mins (5.0L each)
Total flowrate= 138ml/min (69ml/min each)
Auto start time=10.00am
Auto stop time=3.24pm
💧💧💧💧💧💧💧💧💧💧💧💧💧💧💧💧
********************************************
********************************************
📅21/7/24 Sunday (day 64, day 22 flower)
📋 away
📅22/7/24 Monday (day 65, day 23 flower)
📋away
💧
Method= automatic
Feed=water
Volume=20L
Ec=0.2 PH=6.6/6.7 (PH D=0.013ml/L)
Volume left=11L Est
Volume used=9L (138ml/min) est
Volume each=4.5L (69ml/min) est
Runoff.
Total runoff=0.2L est
Ec=PH=/
💧
📅23/7/24 Tuesday (day 66, day 24 flower)
📋away
📅24/7/24 Wednesday (day 67, day 25 flower)
📋away
📅25/7/24 Thursday (day 68, day 26 flower)
📋away
💧
Method= automatic
Feed=water
Volume=11L est
Ec=0.2 PH=6.6/6.7 (PH D=0.013ml/L)
Volume left=2L Est
Volume used=9L (138ml/min) est
Volume each=4.5L (69ml/min) est
Runoff.
Total runoff=0.2L est
Ec=PH=/
💧
📅26/7/24 Friday (day 69, day 27 flower)
📋 Arrived home before lights out.
H=98cm D=16cm Dli=65.7 Ppfd=1521
Raised light to maximum hight.
H=98cm D=17cm Dli=59.4 Ppfd=1375
Did a defoliation.
Checked bucket.
Volume left=4L
Volume used=16L
Volume each=8L
Runoff.
Total runoff=0L
Drip system should have done an extra 2L but at least each plant got 4L per watering.
📅27/7/24 Saturday (day 70, day 28 flower)
📋Hot day.
H=98cm D=17cm Dli=48.5 Ppfd=1122
********************************************
Weekly roundup.
📋This one is superb and only stretched an extra 4cm this week, there isnt much room left between tops and the light, she looks great. Grown fine while I was away and starting to bulk.
Take it easy.
Back soon.
********************************************
Likes
70
Share


@Kid_Colombia
Follow
Looks like the 3 of the 4 strains are very hungry and showing signs of yellow from what i can see inn pictures my maid sends me.
Good news is im back in the game in under a week and bringing home some awesome new LED lights and New nutrients for the ladies.


Likes
3
Share


@Ghost17
Follow
Definitely learning some lessons from the manifold attempt. I'd say I have to definitely train more horizontal on the original top but I'm pretty happy with how it's coming along. Looking forward to topping down to the 3rd node most likely tomorrow! With that being said, I'd imagine having the final set up could be a bit easier to train. Once I'm able to remove the second node it will open up a solid amount of space and light for the 1st node.
On another note I became extremely confident in regards to feeding. Dancing around 690-700PPM's seems to be working very well right now. Consistent PH at 5.9 as well.
Looking forward for the next week in regards to topping and training. Depending on training and pruning time, I'd like to flip within the next 2-3 weeks. Maybe sooner.
As always, any comments or suggestions are welcome!
Thanks!

Likes
Comments
Share

@THcHunteR23
Follow
🐺⚔️ DUEL 003 — THC Hunter VS Squalino 🦈
Cette fois, on passe à l’action avec Fat Bastard d’AutoSeeds 🌱🔥
Deux cultivateurs.
La même génétique.
Deux façons de faire.
Un seul objectif : voir qui va réussir à pousser cette génétique le plus loin. 👀
🌱 Fat Bastard — AutoSeeds
🥊 Duel 003
🐺 THC Hunter VS 🦈 Squalino
Pas de compétition sur les chiffres… on compare le résultat, la qualité, l’expression de la génétique et surtout l’expérience de culture.
Que le meilleur phéno gagne. 🏆
#CannaLover #Duel003 #AutoSeeds #FatBastard #THCHunter #Squalino #GrowDiary #GrowBattle
Feel free to leave your feedback in the comments on our journals, to Squalino and myself! Let us know what you like or what you’d like to see improved for our future publications. Your opinion helps us a lot to progress, thank you for your support! 💬✍️
💚💚💚
A big thank you to the team @AutoSeeds for their kindness and for sending these beautiful seeds!
💚 💚💚Thank you to everyone who will follow this adventure with ‼️https://growdiaries.com/grower/squalino/diaries ‼️For those who want to order these amazing seeds safely, you can find them directly on the official shop: https://www.autoseeds.com/shop/seeds/
#CannaLover #Duel002 #TrainwreckAuto #AutoSeeds #THCHunter #Squalino #GrowBattle #CannabisCulture

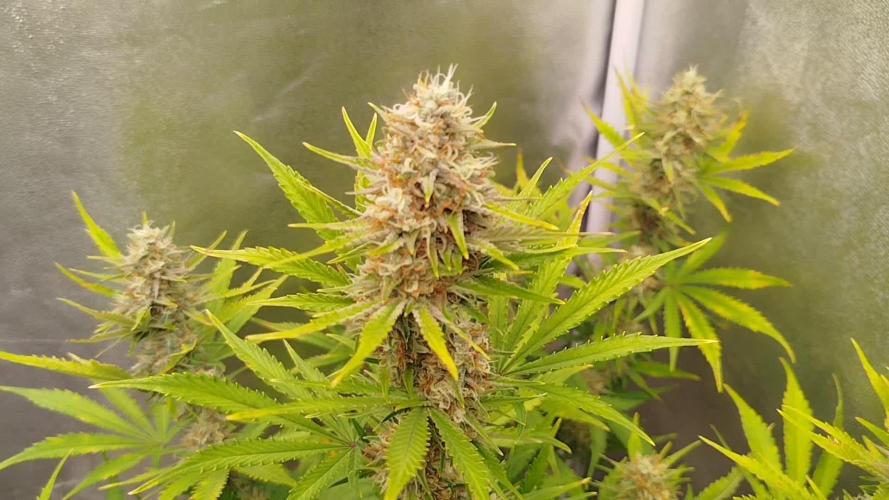

Likes
9
Share


@Drtomb
Follow
Start of Week 4 begins tomorrow, unfortunately I'll be out of town. I've been removing branches, but in the last 3 or so days I've stopped removal. It's time for these girls to really start stacking. ran out of potassium silicate. Will be continuing with out it for the rest of the grow.
Started to notice a slight smell when leaving the door open and returning after a few minutes. This started in the last couple days

Likes
2
Share


@Ferenc
Follow
Day 72: 600W LED, 18 hours on 6 hours off the same with ventilation. Water intake also remains the same 200ml per day. Humidity approx 35 percent.
Day 74: I started flushing next week is harvest time :)
Likes
13
Share


@weedacouple
Follow
75 days from seed. Our favorite for sure. beautiful purple buds, not too big, not too small with lot of sugar. hightly recommended


Likes
2
Share


