


Likes
Comments
Share

@For2itous
Follow
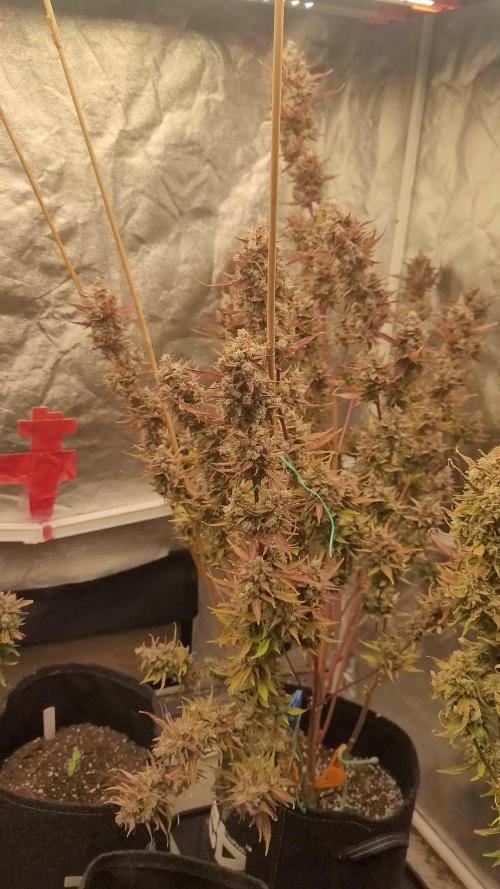
Its very frosty and big plant. Gorgeous colors and pungent cherry smells. Probably my biggest auto to date only like 3.5g soil. Looks like she'll be a good smoke just have to see. Probably only needs a week or so left Happy growing 🌴

Likes
Comments
Share


Likes
3
Share

@hinterhofgrower
Follow
.
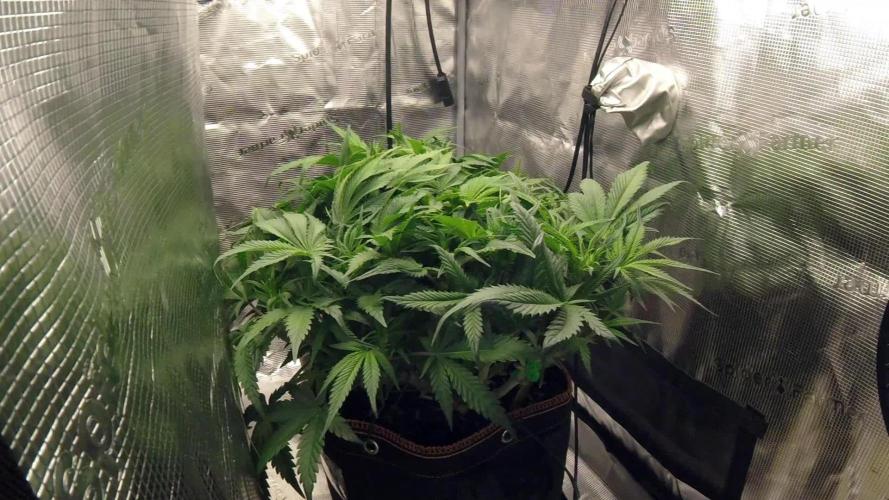
🌱 : Defoliation & LST on day 58
💧 : 4l day 54, 59
💡 : Dli: 45 mol/m²/d
🤔 :
Likes
18
Share


@ButterfliesLittleFarm
Follow
Hello Diary.
I am very happy that we are starting again. I’m going back to Automatics again. Many thanks to Royal Queen Seeds for sending me two of their new strains, Green Gelato Automatic and HulkBerry Automatic. So this is the first of two new diaries.
WHY GREEN GELATO AUTOMATIC?
Green Gelato Automatic is the autoflowering version of a legendary cannabis variety. The original strain is the lovechild of Thin Mint Cookies and Sunset Sherbet. It's one of the most aromatic strains available and produces monstrous levels of THC. Green Gelato Automatic contains both sativa and indica genetics. Her effects can be felt in the body and mind simultaneously. In fact, with a THC content of 24%, she's one of the most potent autoflowering strains you can find. She sends the mind into overdrive and makes a perfect smoke when writing, painting, or doing anything creative. The strain also boasts medicinal properties, taking the edge off pain, elevating mood, and raising appetite.
LET'S START FIRST WITH THE FARM SET-UP:
Box - Secret Jardin DS120W 120x60x178
Lights - MIGRO 200+
Ventilation - Blauberg Turbo - E 100
Fan - Oscillating Koala Fan
Humidifier - Beurer LB 45
Soil - BIOBIZZ Light - Mix
Pot - 11L Fabric Pot from RQS
Seed - Royal Queen Seed
Nutrition - BioBizz and RQS Organic nutrition
I apologize in advance for the detailed documentation, or the large number of photos, but I enjoy it, and I think it will help others around tracking their plants.
LET THE DIARY START OFFICIALLY:
10/06/2020. planting.
I have prepared everything I need for planting. The 11lit fabric pot I got from RQS, also Organic Boost Nutrition and Mycorrhizza from RQS, Soil is Light-Mix from BioBizz and of course the seed of the new strain Green Gelato Automatic. After adding 50g of pellets from Organic Nutrition and 5g of Mycorrhizze, I mixed everything well in the pot. After that I watered well and soaked the soil, I dug a hole with a wooden stick about 2-3 cm, I first put 1g of mycorrhize and then put the seeds inside. I lightly covered the hole with earth and put the pot in his new home. The temperature was about 25 degrees and the humidity about 65%.
14/06/2020. She sprouted.
After 4 days, Green Gelato came out. In the meantime, I sprayed the surface of the earth a little twice. The temperature is still around 26 degrees, thanks to the summer and the high temperature that enters the apartment anyway. I regulate the humidity with a humidifier, I maintain it around 60% -65%.
15/06/2020.
Her first photo shoot, I also watered her with about 2 liters of water, which I only regulated p.H. at 6.3 with Plagron, Lemon Kick.
19/06/2020. Day 1.
Green Gelato is officially one day old. On that occasion I took another photo shoot to celebrate this big day :).
24/06/2020. First Feeding
First feeding. She got a whole meal from BioBizz, Root-Juice, Bio-Heaven and Acti-Vera, p.H of water I regulated with Lemon Kick from Plagron.
25/06/2020. Day 7.
End of the first week. For now, everything is great. It is developing nicely, its conditions are almost perfect. Green Gelato will also have two roommates in the box, HulkBerry Automatic.
Green Gelato - Day 7. - 10 cm
I think that’s all for this week, I’m happy that it’s starting all over again, following its development and looking forward to what’s to come. See you next week.

Likes
94
Share


@love_2_grow
Follow
Earlier in the week, I saw a discolored bud, and upon closer inspection, I found bud rot. Ugh. I immediately cut off the infected bud and the one closest to it.
I looked through the canopy but couldn't see any more affected buds.
Right after, I went out of town for a few days to Mary Jane, the big Cannabis Conference in Berlin.
It was the first one after legalization, and it was wild. I had an awesome time, and it was great to meet up with friends while in Berlin.
What wasn't so great was seeing more signs of budrot when I returned home—those days of +85% humidity at the start of last week made the botrytis go brr. Sigh :(
Checking the trichomes showed it was still early to harvest, but I decided to chop anyway to save the unaffected buds.
I also decided to hang each branch separately, as it would allow me to inspect each one closely to ensure no affected buds made it into the drying tent. Another reason is to decrease the drying time. Usually, I prefer a long dry, but due to botrytis, I aim to speed up the process.
Overall, I found 12-15 affected buds, and of course, they're always the nicest-looking buds.
I don't care about the yield loss, as more than enough is still left. I only hope the remaining buds are unaffected, and I'll inspect them daily throughout the dry.
Now we wait. And hope.


Likes
Comments
Share


@Growitworldwide
Follow
They are huge. I think I will start doing defoliation 2 times per week.
PH 5,5 - 5,7
EC 2,50 - 2,75
See you next week guys!

Likes
376
Share


@Metatronix
Follow
Good day to all my friends and visitors here on GD.
Decided to finally finish this diary so that on New Year eve I'm not opening the year with unfinished business.
Now we cut the second Tropicanna XL auto plant, the first cut you can find in week 17. The plant from week 17 weighted 2.6 kilo wet, this one finished at 2.1kg. wet.
The girls where autoflower but thanks to me starting this grow in cold day temps (14 degree Celsius) the started flower really late and grew and grew :)
I enjoyed growing this strain immensely, smells so sweet and fruity, she has the most intense and most delicious aroma ever
She brunches off like crazy, gave me a ton of big and dense bud.
They were the biggest plants I have ever grown and to top that this cultivar rewarded me with one of the most tasteful buds, fit even for a picky connesour.
--------------------------------------------------------------------------------------------------
SE7000 done it's magic with this grow as with all my other grow ops.
For anyone who is interested in obtaining this efficient and affordable light fixture ($ to gram) here's the link:
https://spider-farmer.com/products/spider-farmer-upgraded-se7000-730w-commercial-led-grow-light/
A shout out to Sweet Seeds for the gift of this fenomenal genetics: https://sweetseeds.es/en/
Thank you all for your companionship on this voyage, I hope you enjoyed it at least as much as I did.
Also thank you for this awesome year together here.
Together with my little family we want to wish you all a Merry Christmas and a happy slide into the New Year, we love you all.

Likes
8
Share


@804GrowTent
Follow
3 clones from the diesels and 2 of the trop cherry. All have been Transplanted into new pots and rooted successfully and one of the cloned diesels I have on my new hydroponic set up. Trying to learn hydro for the future when I convert one or all of my tents 😉
2 gal reservoir bin filled with fresh decholrinated water.
Seperate 1gal container I mixed 18ml of canna vega (Yes I know this isn't the hydroponic version of nutrients they offer) with 6ml of photosynthesis plus.
I added this into the resevoir until i hit 600ppms and ph'd to 5.6 water temp was 21°C at time of feed and has risen and is constant at 21-22°C


Likes
Comments
Share


@BIYEI
Follow
Vegetativo 29-11-2024 a 05-12-2024
Semana 2
29-11-2024 La planta manifesto un crecimiento considerable, se ve sana y fuerte.
01-12-2024 Se realiza cambio de solucion nutritica y recipiente hidroponico.
03-12-2024 La planta crecio desmesuradamente durante estos dias, pero noto que necesita algo de CALMAG.
05-12-2024 Sorprendente evolucion.
Parametros Utilizados
Temperatura del ambiente 22 C°
Extraccion de aire 4 pulgadas
Humedad 65%
Potencia de la lampara 75%
Ec Original 0.4
Ec Nutriente 1.3
Ph 6.0
Horas de Luz 18/6
Likes
28
Share


@J_diaz420
Follow
Comienza la floración de estas pequeñas!!
Cambiamos línea de fertilizantes gracias a b.a.c 👍👨🌾🏻🍀
Likes
4
Share


@DivinePineMan
Follow
I have my Electric Sky 180v2 now in instead of the cheap 40$ for 4 lights i bought on facebook. Which were growing but nothing like this thing has been doing the past week. Im still blown away by the light but back to the plants. Doimg great i took some clones. First time ever so hopefully they root. I been sprayin em 4 -6 times a day. My 3rd g6jetfuel i took out of my tent with es180v2 and put in closet by itself with the 40$ cheap leds. It hasnt grown a whole lot compared to the tent plants g61 and 2...i thought maybe it may of had a male or hermi part but honestly i dont think it did bc i cant find it now. But its still in there bc i decided to throw it on 12-12 in closet to find out sex forsure. Ive been foliar spraying in my tent 3 timez a day. And 2 times a week i get 2 little drops of fox farm grow bif in my 10oz spray bottle of water.
Likes
20
Share


@PAPH_Grow
Follow
Day 75 - Topped up and changed water and nutrient solution. Cut down on the "Grow" and upped the "Bloom". Trimmed more dead dieing and weak leaves. Also trimmed away quite a few smaller branches underneath that just weren't going to have a chance at establishing any good bud sites and most likes would have eventually died off anyways due to lack of light penetration to lower canopy levels.
Back left plant has slowed its height growth almost to a stop at around 31 inches from the bucket rim. Front and back right plants have still been growing strong despite the nutrient cut backs but are also forming good flowers at the same time. Will have to boost up the shorter plant to get closer to light as I keep moving it farther away for the other 2 plants.
Day 79 - More watering and trimming.

Likes
5
Share


@Jays_Not_Here_Man
Follow
The girls have blown up with their flower stretch. Despite the good growth, all the buds are still staying tight, and should be some decent nugs. I’m glad they got some reasonable growth before the flower
Change happened, there could be as many as 5 more weeks of flower left for these buds to fatten up 😎
Added some more Clyde to the feeding regiment. They seem to be doing well, but could probably use a bit more phosphorus and potassium, but are showing leaf burn… I’ll keep an eye on that. RH was brought down to between 54-56 %, and temps are steady between 77-79 degrees at lights on, and 69-70 degrees lights off.
I continued with some LST of bending the top down and tying to the pot. They responded well. I don’t want to do a whole lot, just try to keep the canopy semi even. No defoliation yet, possibly next week. Happy Gardening 🇨🇦👊❤️
Processing
Likes
8
Share


@Max1973
Follow
Day 35 - few pics and vids..... everything going along nicely 👍
This is a pretty big update, so i'll add to it over the next few days, as i
finish building it all....
i'm building these 2 x SS haze, the full tent, just finishing up the setup.....
trimming them, changing solutions to 12/12 and flower.....
changed the exhaust fan and filter setup to the better outside the tent method....
and installed 12v CPU computer fan, lol ("alta9" fits in 4in ducting perfectly), drops wattage on extractor fan.... 10w tops...
got a few kg of active carbon and making/replacing the carbon filter ....
i'll add afew vids of the new setup in afew days...
Day 36 - few pics/vid of new tent setup...... "alta 9" fan :)
post tomorrow after i finish trimmin and settin up night mode etc......
and into tomorrow we go, lol ... Day 37....
slowly getting there..... little bit more to go...
this should make things abit more interesting..... right tank (short babie) has : 19 lts of tap water @18oC + 150 ml -dutch master one gold FLOWER.... 6.4 PH - 1400 PPM
left tank has : 19 lts of tap water @18oC + 50 ml of elements a and 50ml of b and 10 ml of nitro and 20ml of Crystalic (molasses/pot) .... 6.5 PH - 1200 PPM
more pics / vids of the finished tent setup.... roots, transfer, etc... Day 37 is alot of vids of the clean and change to flower.....
edit - day after build noticed left tank (nutrifield) not enough bubbles..... pulled out the 4 air pump and swapped to the 2 x original oxipumps...
much better, also to fix the problem with ph goin high, and bubbles not stirin the mix, was to add another 10ml of crystallic and another 5ml of nitro...
then pumped both tanks with ph down and set em to 5.8-6.2 - both plants have fully recovered from the big trim, and bounced back within 12-24hrs,
post pics/vid in abit.....
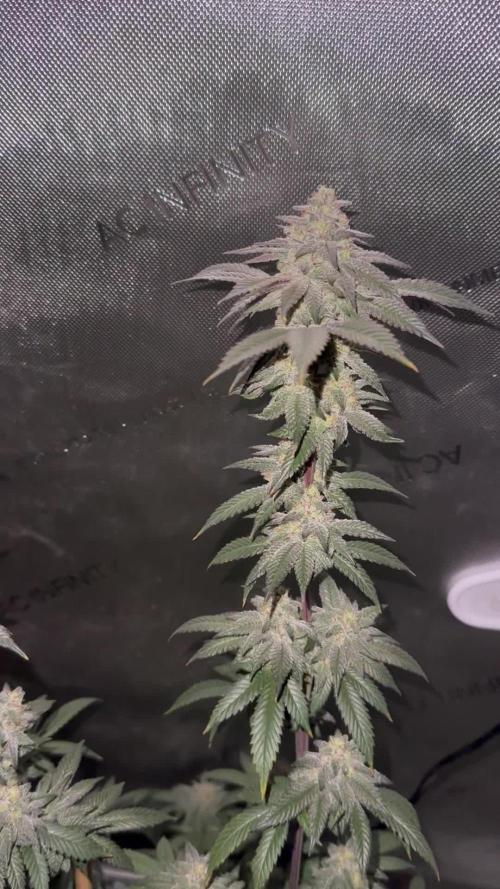
Day 39 - made a freaky video... was curious about what the plants would see looking up at the lights...
the lights and buzzing of air compressors and bubbling tank water, and dazzling lights turned out pretty cool in vid editor,
was in selfie mode....
and final vid of the bounceback from trim :)
👍😎

Likes
51
Share


@eldruida_lamota
Follow
Bueno resumiendo cookies gelato es una variedad híbrida muy fácil de cultivar pero ojo, cuidado con los últimos riegos si no queréis perder cosecha por moho. Lo demás de 10 pegada heavy sabor increíble, cogollos duros como rocas y bañados de una gran capa de polen.
El ambiente del secado se mantuvo en 23 grados de media y la humedad estuvo por debajo de los 45% en todo momento.
Poco más la verdad estuve encantado de poder cultivar una genética tan potente .
Un saludazo que paséis un final de año increíble y por supuesto buenos humazooos💨💨💨.
Likes
14
Share

@DogDoctorOfficial
Follow
🌌 Folder #2 — Cosmic Noodles
Week 3 Update — Technique, Response, Momentum
First of all — thank you to everyone following this diary.
This space exists to document real-time learning, real decisions, and real plant responses — and this week gave us a lot of material.
Cosmic Noodles continues to impress.
⸻
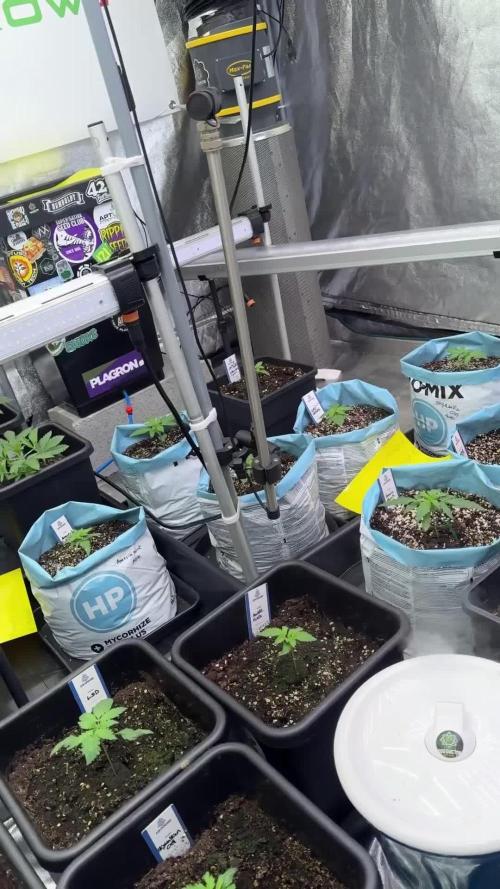
🌱 Plant B — 2 Weeks Veg → Guided Expansion still an autoflower
This plant is moving fast, confidently, and with intention. Her growth this week was so strong that I made the decision to begin structured low-stress training, not to restrict her, but to open her up.
🔧 Training Method (Accurately Explained)
This was a progressive process, not a single action:
1️⃣ Leaf Tucking (Start of the Week)
• Larger fan leaves gently tucked under
• Objective:
• expose inner growth
• encourage branch development
• allow light to reach lower nodes
This alone already triggered visible response.
⸻
2️⃣ Directional Bending (Mid-Week)
As growth accelerated, I moved from leaf work to branch positioning.
• Branches were gently pulled outward
• Secured using soft, green-coated wire
• Wire anchored directly into the soil and pot edge
• No rigid clips, no plastic clamps
The wire is:
• flexible
• forgiving
• adjustable
allowing the plant to move while still being guided.
⸻
3️⃣ Anchoring & Holding Space (End of Week)
As branches continued to push hard, I introduced U-shaped wire anchors, pinched into the soil.
Important clarification:
• These are wired anchors, not plastic clamps
• They hold branches down toward the soil
• Purpose: keep the canopy open and horizontal
• Result: light penetration everywhere
This is not about forcing shape —
it’s about creating room for expression.
⸻
🌿 Plant Response
Her reaction has been nothing short of outstanding.
• Branches: Already pushing into the 6th–7th branch
• Stress response: None observed
• Vigor: Extremely high
• Growth speed: Fast, confident, continuous
She didn’t slow down.
She leaned into it.
This plant is healthy, driven, and clearly enjoying the guidance.
Next week is going to be something special.
⸻
🌱 Plant A — 12/12 From Seed (Autoflower)
Running alongside her is Plant A, grown 12/12 from seed, and she continues to behave beautifully.
• Leaf stage:
• Third pair fully developed
• Fourth pair coming in
• Structure: Compact, balanced, composed
• Behavior: Calm, steady, almost photoperiod-like
Once again, it raises the question:
Are these autoflowers acting like photoperiods?
Or are photoperiods acting like autos?
No answers yet — just fascination and respect.
⸻
💡 Light Intensity & PPFD Response
This week, PPFD was increased, continuing the controlled progression already established in the room.
Key observations:
• Autoflowers are responding exceptionally well
• Leaf posture remains strong
• Color remains healthy
• No stress indicators present
This reinforces that progressive PPFD increases, when done patiently, can be extremely effective — even with autoflowers.
⸻
🔮 What to Expect (and What Not To)
Expect:
• Rapid structural development on Plant B
• Even canopy formation as wire training settles
• Continued confident growth across both timelines
Do NOT expect:
• Forced conclusions
• Rushed flowering assumptions
• Heavy-handed intervention
We observe.
We assist.
We let the plant lead.
⸻
🙏 Closing
This week was a reminder of why technique matters — and why precision in documentation matters just as much.
Thank you to everyone following along.
More to come — and next week, keep your eyes on Plant B.
FOR DISCOUNT CODES AND MORE JUST FOLLOW THE LINK https://website.beacons.ai/dogdoctorofficial
📲 Don’t forget to Subscribe and follow me on Instagram and YouTube @DogDoctorOfficial for exclusive content, real-time updates, and behind-the-scenes magic. We’ve got so much more coming, including transplanting and all the amazing techniques that go along with it. You won’t want to miss it.
GrowDiaries Journal: https://growdiaries.com/grower/dogdoctorofficial
Instagram: https://www.instagram.com/dogdoctorofficial/
YouTube: https://www.youtube.com/@dogdoctorofficial
⸻
Explore the Gear that Powers My Grow
If you’re curious about the tech I’m using, check out these links:
🔆 Lighting & Environmental Control
• Future of Grow — Advanced LED lighting technology
https://www.futureofgrow.com/
DISCOUNT CODE: DOG20
• Lumiflora — Under-canopy LED lighting
https://lumiflorade.com/
• TrollMaster — Environmental controllers and automation gear (past collaboration)
⸻
Genetics
• Zamnesia Seeds — Genetics used in this project
https://www.zamnesia.com/
⸻
🌱 Soil, Substrates, Boosters & Root Support
• Plagron — Substrates, bio mixes, and supportive products
https://plagron.com/en/
⸻
🎒 Storage, Curing & Preservation
• Grove Bags — Curing and storage solutions
https://grovebags.com/
⸻
📸 Photography Equipment & Tools
(Not sponsors, but part of my creative toolkit)
• Sony A6700
• Sony full-frame macro lens + few more
• Stacking photography workflow - learning
• iPhone (for behind-the-scenes shots)
We’ve got much more coming as we move through the grow cycles. Trust me, you won’t want to miss the next steps, let’s push the boundaries of indoor horticulture together!
As always, this is shared for educational purposes, aiming to spread understanding and appreciation for this plant. Let’s celebrate it responsibly and continue to learn and grow together.
With true love comes happiness. Always believe in yourself, and always do things expecting nothing and with an open heart. Be a giver, and the universe will give back in ways you could never imagine.
💚 Growers love to all 💚
📸 P.S. – The Eye Behind the Lens
All photos in this diary (for now — except for the ones showing the camera, which I took with an iPhone) are taken with a Sony A6700 paired with a Sony full-frame macro lens and a few more.
Photography is part of the story — it’s how we share the fine textures, the glow, and the quiet details that words can’t always capture.
I’ve also started experimenting with photo stacking — a technique where multiple images, each taken at a slightly different focus point, are layered together to create one perfectly sharp image from front to back.
It’s not digital enhancement or AI; it’s pure photography — a way to reveal the plant’s beauty in microscopic depth, from trichome to petal.
You’ll even see a few shots of "ghost me" capturing the shots — camera, lens, setup — because every grow deserves not just to be cultivated, but documented like art.
FOR DISCOUNT CODES AND MORE JUST FOLLOW THE LINK https://website.beacons.ai/dogdoctorofficial
NEW DISCORD - Official Server Invite Link : https://discord.gg/ksjAkA5T74

Likes
16
Share


@Plantinator
Follow
I was expecting a slower plant, but the yellow pisils proving I was wrong. I added Canna Flush to the mix and from this point I will monitoring daily the trichomes.


Likes
5
Share
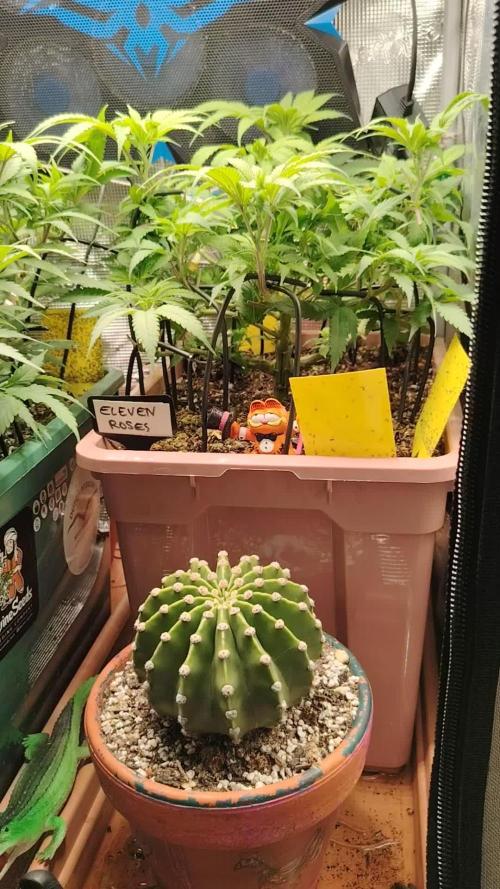

@All_our_small_plants
Follow
2000 ml alle 2 Tage
pH-Wert: 6
EC-Wert: 0,8
Temperatur: 27ºC
Luftfeuchtigkeit 62%
Schädlingsbekämpfung: Mikroorganismen und Raubmilben
PPFD: 200 µmol/m²/s
DLI: 12.96
Düngemittel: Mineralischer Dünger 10-4-7
Besonderheiten: Wurden direkt in die erde gepflanzt in einer Kokos-Quelltabletten.
-Tag 72 Sie wächst sehr gut weiter und heute hat sie wieder Wasser und Mikroorganismen bekommen 😶und sie wurde wieder mal entlaubt
-Tag 74 Heute erhielt sie 2 l Wasser, versetzt mit 1,5 ml Calmag und 4 ml NPK 10-4-7. Der EC-Wert lag bei 1,000 mS/cm und der pH-Wert bei 5,8 😋
-Tag 76 Heute haben wir sie mit 2000 ml Wasser gegossen, angereichert mit 2 ml Calmag, 4ml NPK 10-4-7, 5 ml HY-PRO Rootstimulator sowie 0,32 ml HY-PRO Generator. Der EC-Wert betrug 1000 mS/cm und der pH-Wert lag bei 5,9 😍
