


Processing
Likes
51
Share


@Silverback_Guerilla
Follow
11/24:
Looks like the Emerson Effect/14 hour photoperiod is working...stretching has commenced.👍
11/25:
Had to raise the lights 5 inches today. The big Sucrose Overdose and a Zkittlez are really stretching.
I'm using platforms of varying heights for the shorter plants to keep the canopy level.
11/27:
Raised the lights another 5 inches and fed today.
11/28:
Raised the lights another couple inches this morning...now, I'm thinking I should have topped them...that's a foot in about 3 days...doh!😏
They're already starting to show signs of budding up, so I'll just have to do some supercropping and tie down the taller mains.
11/29:
Raised the lights a couple more inches and supercropped the tallest Sucrose Overdose.


Likes
36
Share


@Cannabeast40
Follow
Welcome back 🤗
Another week has passed and I’ve started adding a small amount of Grow nutrients to the mix🌱
Cranking up the light a bit again this week trying to maintain about 400PPFD.
See you next week 😎🤙🏻💚
------------------------------------------------------------------------------------------
Light source:
Medicgrow SpectrumX
880W LED
Build in PPFD
4 controllable spectrums V1, F1, VS, FS
Visit https://medicgrow.com/ for more informaton.
Light measurement:
Apogee MQ-610 & Apogee DLI-600.
Fertiliser:
Organics Nutrients
https://www.organicsnutrients.com/en/
Green Buzz Nutrients
Discount Code: GD42025
Grants 25% with a minimum Order value at 75 Euro.
https://greenbuzzliquids.com/en/shop/

Likes
6
Share


@FinalElk10
Follow
Gg is about ready to harvest looking to harvest sometime this weekend (5/7-5/10). Everything else still has a few more weeks at least.

Likes
5
Share


@TJHeadley
Follow
This week was a little late due to the holiday. This is the week RSQ Wedding Cake flipped to flower. I accidentally super cropped her when trying to bend a branch over. After that she started drinking a whole lot more (hence the underwatered pictures)


Likes
6
Share


@LoganatorDude
Follow
Even though it says 80 Gallon pot, it’s really 400, it just glitches out when I enter 400 and converts to say only 80.
I know she looks bad! I know.
She has only been managing a nutrient lockout with horribly low pH for far too long! The Hydrated Lime has indeed fixed the pH! Resulting in my next inbound set of problems. The original soil from the second 2.3L pot she was in was too strong! She needs to get her roots out into the larger pot, but that only gives her so much more space. Plus in that larger black plastic pot, the hot dry sun at 7,000 ft in elevation, really heats up those pots! When it’s 98F later, that sounds like torture! Maybe it was enough to balance out the more concentrated stuff towards the inside of the root mass. But I don’t want her roots to stop there! The time is now for her to go into the 400!!!
The soil is 6.5 pH through and through. The peas are about to bloom! She has just avoided lockout and is picking up momentum! The 400 gives her a huge diameter for her roots! Something I sincerely hope her genetics will take advantage of. The soil is rich and alive! The temps in 400 will be so much better!
Now I must prepare for my Arch Nemesis!
The Butterfly!!!!!!
Lol
But seriously. They find my plants attractive, and decide to serve my plants as food for their offspring!!!! Not okay! Last year their success rate on my plants was a fat 0!! But they did some serious damage! I am prepared this year!! I will watch with vigilance for any butterflies around my plants specifically. I will spray my plants down regularly with diatomaceous earth! Not too much obviously! I know less is more when spraying that stuff! No mother wants to give her children food with razor blades in it!
And as always there is always next year! I can’t let a phase of mice and men get the better of me. However!!… that’s what I said LAST YEAR!!!! Lol. This year IS next year!
Anyways she looks rough right now on Day 58 but I tell yah what, she has very recently made a dramatic turnaround for the better!!
…I hope!
Happy Growing!
StrongTrees💪🌳
Likes
179
Share


@Tropicannibis_Todd
Follow
💩Holy Crap We Are Back At It And Loving It💩
Growmies we are at DAY 14 and she's just killing💀it👌
So I'm starting to pull her over and do some low stress training 🙃
Lights being readjusted and chart updated .........👍rain water to be used entire growth👈
👉I used NutriNPK for nutrients for my grows and welcome anyone to give them a try .👈
👉 www.nutrinpk.com 👈
NutriNPK Cal MAG 14-0-14
NutriNPK Grow 28-14-14
NutriNPK Bloom 8-20-30
NutriNPK Bloom Booster 0-52-34
I GOT MULTIPLE DIARIES ON THE GO 😱 please check them out 😎
👉THANKS FOR TAKING THE TIME TO GO OVER MY DIARIES 👈


Likes
126
Share


@MissFlowerPower420
Follow
Ok , this lady has been so easy to grow .
Think bud got or something is forming which is result of humidity spiking , question is do I need to harvest now or will everything be ok ??? .
She smells amazing.
I did a test taste on a small lower branch buds a few week ago n Jesus h Christ she blew mi socks off so i know shes gonna be a winner .
A WORD TO THE GROW CAPS PEEPS .... HURRY UP AND GET THE PRODUCT ON THE MARKET PLEASE 👍👍👍👍👍
Likes
12
Share


@ZzTooRightOGzZ
Follow
First feeding.
Going well so far fist day of last.
Lst going well.
Likes
2
Share


@FourTwenty_Plants
Follow
Sooo I added a scrog net a few days ago to get the branches more outward beacuse they were growing way to bushy. Seems to be a good solution!
Did a nother update for this week because of the trichome beauty that they have.
They both smell really really fruity and somewhat gassy, if you ever grew a Cherry Cola from FastBuds and you loved the smell then this strain is specially for you. The smell reminds me so hard of the Cherry Cola and I fcking love it
Likes
6
Share


@Willy_Balls
Follow
2.08
A week with CO2 and good environment conditions. This growth rate is insane.
Some of them suffered transplant shock.
Cheers 💚
Likes
8
Share


@Piro420
Follow
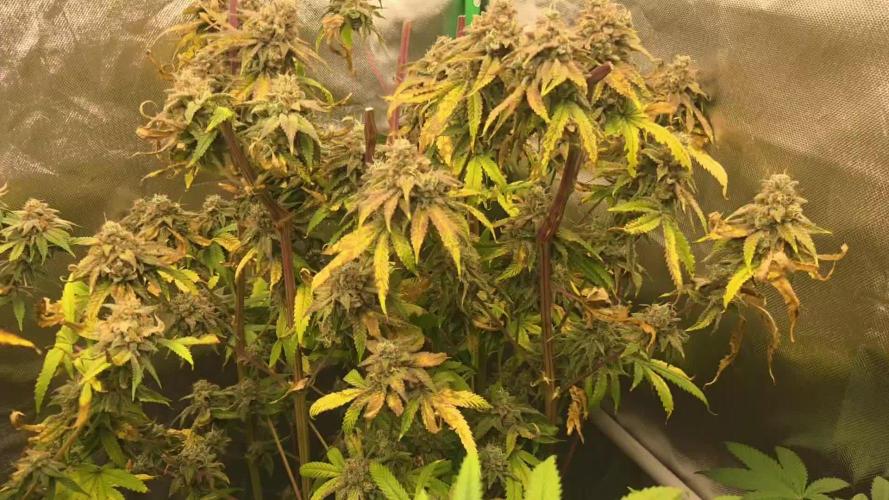
Getting a little crispy on the tops within 1 inch of the light. But all and all plant is healthy happy and starting to smell wonderful. Looking like a full 9 weeks of flower needed.
Likes
Comments
Share


Processing
Likes
28
Share


@TerpedUp
Follow
I went ahead and gave them a lil bit of voodoo just one watering with it.
I am doing leaf tucking or leaf breading whenever I see possible. They all seem to like it especially #1 and #3.😊

Likes
7
Share


@CrowMaster
Follow
Everything good normal looking good will start to flush in a week or so…smell is awesome as always I ran this cutting a few times it’s a real keeper checks all the boxes
Likes
Comments
Share


@jojopfoh
Follow
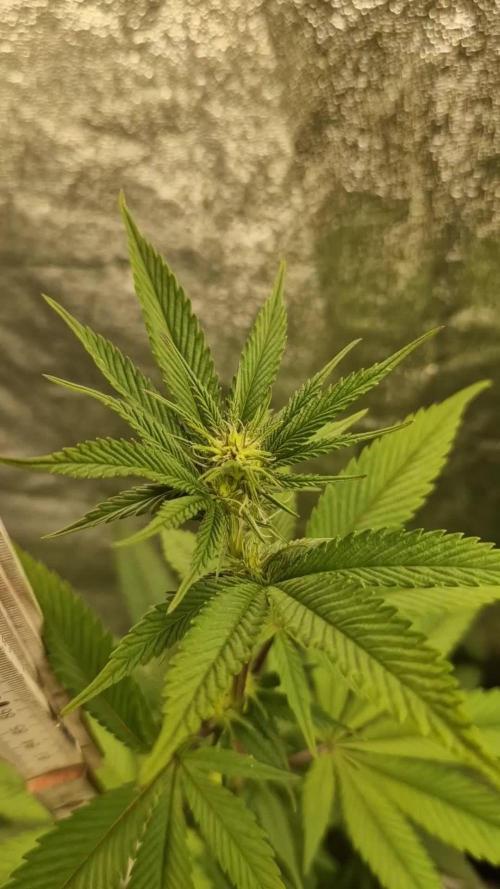
Wow, can this strain grow. She has really stetched and filled out. I am going to repot to 2 gallons later in the week. I really responded to the nutrients.
Likes
Comments
Share

@DopeCutz
Follow
Mit 90 cm ist der Stretch beendet, und die Pflanzen können sich auf die generative Phase konzentrieren. An jeder Nodie sind jetzt Blüten zu erkennen.

Likes
35
Share


@Belverde
Follow
Welcome growers
End of week n°3 in bloom for this nice CREAM CARAMEL 🍬🍭🍫
She's the best in the garden, no doubt 🙌
Great aroma...nice bud development..fast and compact 💯
And like all the other ladyes, like you have see in the video, yesterday i defoliated hard
✂️🍃🍃🍃
Usually i don't use this type of "aggressive technique"
I always defoliated a little, but never in this way...
This time I decided to practice it on all the plants I have in the garden (10 visible in the diaries + 8 regular all female) out of pure curiosity to see how each of them will react
We seeing what happens..
Anyway
After that I immediately start a more massive fertilization..
Next week we will see how they will be 😉
About nutrients 👇
I still giving their always organic/veganic nutrients..
A little bit of silicium (Bionova) / Crescita (Biomagno) / Activera (Biobizz) / Grow vegan (Bionova) / The Missing Link (Bionova) / X-Cell (Bionova) / Bioheaven (Biobizz) , a little bit of P-K 3-5 (Bionova) /Fioritura (Biomagno) / Bloom vegan (Bionova) and now i have introduced Biomassa (Biomagno) and Florastimo (Biomagno)
Basically these nutrients contain primarily NPK in organic / vegan form + kelp extracts, humic and fulvic acids, amino acids, aloe vera, potassium silicate, beneficial bacteria and fungi
Like i usually do, a little bit of everything at any watering 💧
And that's all..
See you in week n°4 of flowering 🌻
Thanks for watching 😎👍👍
FC ✌️
🇮🇹
Likes
36
Share


@gottagrowsometime
Follow
Week 14 Day 101 Flower Day 51, she's just about there. Going to apply Terra Powers finisher later during the week. She still has a lot of mycelium left on top and throughout her, I really dialed in the enzymes on this grow. My charts aren't updated properly I'll finish it this week, and will be showing root shots and hopefully we will be seeing a covered pot in roots and not just compacted soil. There's been a lot of fungi and mycelium, that is partly down to Terry Power mixing well with organic soil, it works well as a great soil conditioner. But it takes a while, I constantly fed this girl enzymes. And man O man, look at them buds. The colas are huge in length, and that's down to poor mainline practices and uneven energy distribution. As for left and right been similar, well, put it this way, you'd struggle to actually make something that's more uneven energy wise than this, there's nodes growing over nodes, nothing is even, really terrible mainline it the way it's meant to be done, the purpose was totally ditched here and it was very lazy. And to be honest, unknowingly is an understatement. And the fact I had such failures on my 2nd round with germination, I got to focusing the last few weeks, and pult it all back together and I've hit l got 2 pretty darn good looking phenos, (with no clones taken, another rookie mistake, if you find a pheno you should always have a clone tent and a few weeks into flowering if it's no good or hermies than ditch them, but if you get one like my SLH dwc with very low leaf to calyx ratio if you just have 1-2 clones, you are golden. So currently I have 5 different photos running and I'm pheno hunting. Anyways back to this grow. So, she's nice and fat, but nothing you'd really want to clone, there's nothing special about it. Medium-calyx ratio and good frosty bud. I'm happy with it. Thankfully I'm running a few of the New Green House Unreleased Strains for testing also for barneys so I think photos have stolen my attention.
Keeping the RH between 40-45 temp is more stable atm at 28c not really getting low temperature as we are in the height of summer. But I don't care, I have the winter coming to do terpness. I've got 1 SLH left, I just hope she's a good pheno. The buds on this are monsters, and really happy with them. Lots of mycelium left so there's food left and then later in the week I'll apply the finsher. Just a low dose.
D103 Sadly my mycelium got hit with some mold. Only 2 small spots, 90% most of the mycelium went through the norm, it degraded as organic matter and made for some heavy buds, she is struggling to hold herself up altogether now, am going to have to brace her to get the best out of the last 10days. She is done, but because of ALL the heavy minerals, that aren't organic, it has HAS to be flushed. Now I was on the ropes the last few weeks about flushing but I've been flushing both my SLH for the last 4 days and when you walk into my tent now, wow, the bang of 🍋 is so strong. I'm so glad I flushed these, As I was like, this is a multiple award winner, so I was like, its not from the smell of the bud as it stands but wow, its like she's at to been doing a 10k run and is sweating, the smell is so beautiful. Wow, wow, wow. I haven't been this excited to try some weed, ever. About the mold, its never a good thing. But as it started on actually fungus I'm not too worried about it. Now, if it had of just been there, I'd be like shit wtf, so I dug through some soil and scraped away the 2 bits of mold, DISCARDED, and mixed up the remaining mycelium into the soil with the spoon I use to mix my soil on top to help dry a little if over watered. Also it help let air into your plant, as your soil dries o2 gets sucked into your substrate and that.
COUPON FOR MARSHYDRO
use code GGS for discount at any mars site.
Big thanks to my sponsors terra power nutrients and marshydro and to the 2 reps who I dealt with.
Thanks for reading,
Drop a like if you'd like me to visit your grows, either way thanks for dropping by.
