


Likes
Comments
Share

@Psychopat_od_vedle
Follow
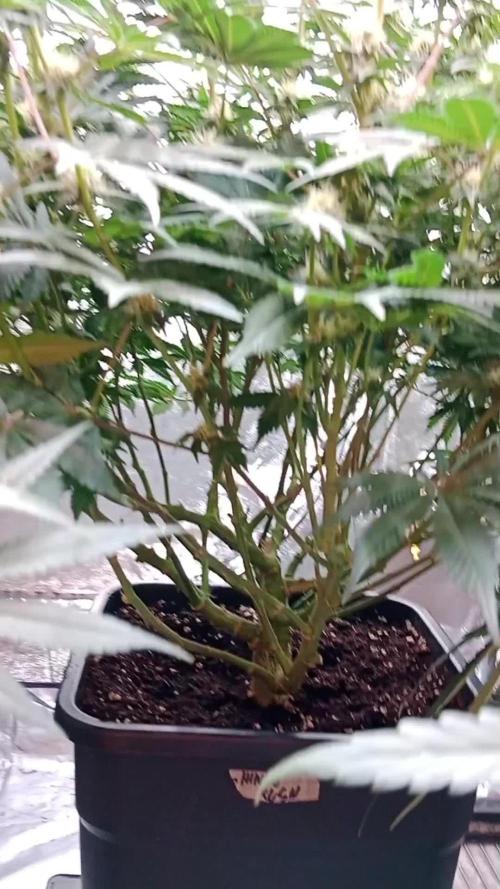
Zdarec všem začínáme 4 týden holky vypadají dobře pH 6,2 teplota 23 až 24 vlhkost 55 až 60 defoliace proběhla jen zlehka nic extra zatím všechno v cajku uvidíme jak tohle dopadne

Likes
6
Share


@Kindbudz
Follow
8/9/2018 - All of these girls are doing great and have all shown their white pistils now! The branching on them has taken off and they responded to being topped really well. I’ve switched them from my 4x4 grow tent into a 4x8. I have to say it is significantly better having the extra space to be able to water, move around and for better air circulation with multiple fans. I also believe this will greatly help with light penetration inventory they bush out. I’ve been having issues keeping the daytime air temperature down due to the extream heat wave we have been experiencing. I think I have tackled this issue by running the lights at night now while the temperatures are cooler. Tomorrow is the official switch to flower and will be on a 13 hours off, 11 hours on light cycle for the next 2 days. Then on a normal 12/12 light cycle. IVE read that this can help the plants switch quicker. I’m looking forward to seeing the growth over the next few weeks!

Likes
3
Share


@JeyGanesha
Follow
Iniziamo bene con mister Barney farm...poi con la runtz non si sbaglia mai... forza 💪belle piantine mie datemi tanti fiori 😂😂😂.la runtz è sempre una buona scelta

Likes
15
Share


@420DeepGrow
Follow
Gracias al equipo de Seedsman y XpertNutrients sin ellos esto no sería posible.
💐🍁 Alaskan Do-Si-Dos:
Alaskan Do-Si-Dos ha sido desarrollada por expertos como una versión mejorada de la siempre popular variedad Alaskan Purple de Seedsman. La introducción de la genética Do-Si-Dos en la Alaskan Purple ha creado un híbrido índica/sativa que aumenta la potencia y el rendimiento al mismo tiempo que mejora el perfil de sabor y sigue siendo versátil en lo que respecta al cultivo en exterior.
La Alaskan Do-Si-Dos está destinada principalmente al cultivo al aire libre y en invernaderos. Las plantas crecen altas y prosperan en climas fríos, templados, cálidos y secos, al mismo tiempo que se desempeñan bien en altitud. Esto no impide que se cultive en interior, pero estas plantas grandes necesitarán mucho espacio. Las plantas muestran una resistencia moderada al moho pero, si se cultivan en interiores, hay que tener en cuenta que son RUIDOSAS, por lo que se beneficiará del uso de filtros de aire de carbón. En exterior, en latitudes septentrionales, la cosecha está prevista para finales de septiembre, mientras que en interior las plantas tardarán entre 8 y 10 semanas en completar la floración. Los rendimientos en exterior son muy altos y pueden superar fácilmente los 750gr/planta, mientras que en interior los rendimientos son elevados, hasta 600gr/m2. Los cogollos maduros tienen una densidad media y mantienen un color verde medio.
🌻🚀 Consigue aqui tus semillas:
https://www.seedsman.com/eu-es/alaskan-do-si-dos-feminised-seeds-sman-aldsd-fem
🍣🍦🌴 Xpert Nutrients es una empresa especializada en la producción y comercialización de fertilizantes líquidos y tierras, que garantizan excelentes cosechas y un crecimiento activo para sus plantas durante todas las fases de cultivo.
Consigue aqui tus Nutrientes:
https://xpertnutrients.com/es/shop/
📆 Semana 5:
Comienzan a formarse los cogollos, las hojas se llenan de resina cada dia y el olor es bastante fuerte. Parece que ha terminado de estirar. Practico una defoliación intensa para airear los futuros cogollos y dejar mas espacio en el cuarto de cultivo.
Agrupo de nuevo las macetas en su lugar optimo para asi rellenar por completo la carpa @marshydro.
Me quedé algo corto de nutrientes pero estoy muy contento con los resultados, cada vez le voy encontrando mas su punto optimo. Siempre es mejor quedarse corto que pasarse.


Likes
16
Share


@ChewiesGrow420
Follow
Day 36 preflower stage, should see buds forming within the next several days or so. WE ARE AT WAR!!!! Applied a pouch of nematodes to every pot to kill the fungus gnat at its larval stage. Which has been gnawing on my roots! Increased the sticky traps to trap the flying
f*<|{£rs. Will reapply more nematodes in 10 days to kill the next generation. Then hopefully that’ll be all! Don’t overwater folks. Fungus gnats suck! Hopefully last hiccup of the grow. Cheers everyone. Good luck on your grows.
Day 41 and I’d say we’re officially in flower. Seein those hairs real good now. We’re still experiencing a rather annoying fungus gnat infestation which has really stunted these ladies. This is entirely my own doing by more than likely overwatering them, creating the problem. Sighs… lower stems grew considerably, which has me optimistic as to the potential yield. I won’t know till stretch is over to gauge my yield. Hopefully Fastbuds amazing genetics can help me fix my f up. 🤞
Day 45 and were on our second round of treatment with nematode packs. I have moved the grow lights up substantially as to hopefully help with the discoloration of my leaves. I believe it to be light stress from the lightening around the edges and some brown tips. Some of them are curled upwards so thst could also be nutrient burn. I have asked a question about it to hopefully get the help of someone more experienced than iam. Good luck growing my friends🍻
Day 48 I ripped open my nematodes packs and mixed in the first couple inches. The top few inches of soil are now aerated better. Hopefully things will improve. Seem to look better since I moved the light up. Stretch ladies… stretch watering at 6.0 to hopefully lower the ph of my girls. I could do the viniger method? Or sulfur. Comment and let me know how you lower the ph of your soil?

Likes
17
Share


@Eddjack
Follow
Inizia la fioritura !!
Ho cambiato il timer in 12/12 on off ed il giorno dopo già ha preso centimetri . Parte bene questa fase!
Per aumentare la penetrazione della luce ho tagliato qualche foglia senza esagerare. Continuiamo così 🙏💪


Likes
5
Share


@GREENPHOENIX6262
Follow
*Day 2 - 09/28 - Germination*
Seed is germinating inside a coco coir pellet, update will be given by the end of this week. Thus far all seems to be running accordingly.
*End of week 1 update*
Thus far this Critical+2.0 germinated amazingly.
Cracked shell in 2 days - Seeds germinated in a coco plug
Processing
Likes
5
Share


@Ensign420
Follow
Week 02 Introduction
This week has been a bit of a struggle. Had my first experience dealing with slime and brown algae. But I think adding enzymes and increasing the beneficial bacteria helped to fix the issue. Also experienced nutrient burn for the first time. My nutrient solution strength got as high as 671 PPMs. So backed it down to about 430 PPMs during the end-of-week reservoir change. Also cut Hydroguard (expired?), CaliMagic, and Superthrive from this grow. Now she's still stunted, but is starting to recover. Hopefully...
[START OF WEEK 02]
Day 01 - Monday - 08/10/20 - Total Days: 008
-----------------------------------
- [0830]: Still looks a bit yellow. But getting larger!
--- Solution strength was at 248 PPMs.
--- Just topped off with a bit of distilled water
--- PH went up to 6.1 so PH'd down to 5.8
--- Ran the top feed for a bit to wet the hydroton.
- [2130]: She's looking even more yellow now.
--- Even the new leaves are really yellow.
--- Decided to add more base nutes.
--- Added 4ml of Sensi A
--- Added 4ml of Sensi B
--- Now at about
--- Solution Strength went up to 304 PPM.
--- PH was at 6,
--- Also raised the water level a bit more.
--- I really hope it's a nutrient deficiency and not an over-watering issue.
--- Please live!
Day 02 - Tuesday - 08/11/20 - Total Days: 009
-----------------------------------
- [0830]: Looking less droopy. But still yellow.
--- Decided to do a reservoir change.
--- 4.5gal of distilled water
--- 8ml of Sensi Grow A
--- 8ml of Sensi Grow B
--- 8ml of Voodoo Juice
--- 4ml of B-52
--- 4ml of CaliMagic
--- 4ml of Hydroguard
--- 4 drops of Superthrive
--- PH'd down to 5.8
--- Solution strength: 302 PPM
--- Since I didn't want to risk over-watering the rockwool, I did not to do a top feed, may do one tonight after the sleep cycle (lights are still set to go off at 10am and back on at 4pm).
--- As I was doing a reservoir change, I noticed that the tubes and bucket were a bit slimy. Didn't really stink or anything. Is this normal? Maybe due to the Hydroguard and Voodoo Juice?
--- I hope she gets better soon!
- [2215]: Getting larger! But still yellow.
--- Also can see a root growing through the net pot! Tiny little thing but it's there! Will have to start dropping water once more appear.
--- After looking over a few DWC diaries using AN nutes, seems like my solution strength is still too low. Most around this stage average around 500 PPMs with about 4ml per gallon.
--- Top fed for a minute to wet the top of the hydroton.
--- Solution strength went down to 263 PPM.
--- Added 8ml more of Sensi A
--- Added 8ml more of Sensi B
--- Now base nutes are at 16ml for 4.5 gal of water.
--- PPMs went up to 411.
--- Still lower than 500 PPMs, but that's okay.
--- PH was at 6. Not sure if I should adjust PH using AN nutes. So going to not ajdust unless PH goes above 6.1.
Day 03 - Wednesday - 08/12/20 - Total Days: 010
-----------------------------------
- [0830]: Looks like more root growth!
--- She still looks yellow. But leaves are perky.
--- PH was at 6.2 so lowered down to 5.8.
--- Solution strength was at 394 PPMs
--- Since roots are still growing, I decide to lower the water level a bit. Now water level is a bit below the net pot.
- [2200]: Root is getting longer!
--- Slime is returning. Not sure why.
--- Solution strength: 357 PPMs
--- PH: 6.1
--- Decided to add an enzyme along with more beneficial bacteria to hopefully cure the slime.
--- Added 16ml of Sensizym
--- Added 5ml of Hydroguard
--- Added 8ml of Voodoo Juice
--- New solution strength: 430 PPMs
--- New PH: 6.1
--- Top fed for a minute.
--- This slimy residue is really freaking me out! I hope the added enzymes will help eliminate the slime.
--- Going to do a full reservoir sterilization/nutrient change over the weekend. Please survive until then girl!
Day 04 - Thursday - 08/13/20 - Total Days: 011
-----------------------------------
- [0930]: I think the enzymes worked! There is little to no slime now!
--- Although I think the root was also dissolved in the process. It's now just a little stub sticking just below the net pot. The enzyme is also suppose to dissolved dead roots too but guess that root was too weak? Not sure what happened there. But I think the slime is cured!
--- Solution strength went down to 395 PPMs. Decided to add more base nutrients.
--- Added 8ml of Sensi A
--- Added 8ml of Sensi B
--- Added 4ml of B-52
--- Solution strength went up to 598 PPMs.
--- PH was at 6.1
--- As long as the PH is between 5.5 and 6.3, I'm not going to use PH Up or Down. But still will monitor PH levels.
- [1715]: Checked up on her after her nap and shes looking alive but stunted. But no slime!
--- Decided to add some sugars to help maintain the enzymes and beneficial bacteria.
--- Solution strength was at 587 PPMs.
--- PH was at 6.2
--- Added 8ml of Bud Candy
--- Solution strength went up to 671 PPMs.
--- PH also went up to 6.3
--- Lowered water level a bit to hopefully promote more root growth.
--- Top fed for a minute.
--- She is getting bigger, but still looks yellow.
Day 05 - Friday - 08/14/20 - Total Days: 012
-----------------------------------
- [0915]: Leaves look a little burnt on the tips. Still no slime.
--- Going to back off on the PPMs to hopefully fix the nutrient toxicity.
--- Solution strength was at 632 PPMs
--- PH was at 6.3
--- Added/Removed water until PPMs were at 536.
--- PH was still at 6.3
--- Raised water up a bit, then top fed for a minute.
- [2200]: Looking better. Still yellow though.
--- Solution strength: 514 PPMs
--- PH: 6.5
--- Added PH down.
--- New solution strength: 518 PPMs
--- New PH: 5.2
--- PH was kind of high. So decided to PH down. Had to use quite a bit to bring it down. But eventually got it to drop down to 5.3. A little low, but so far, the PH has always gone up so wanted to start it really low.
--- Ran the top feed for a minute to re-saturate the top of the hydroton.
Day 06 - Saturday - 08/15/20 - Total Days: 013
-----------------------------------
- [0830]: She looks stunted. leaves are still yellow.
--- Solution strength: 514 PPMs
--- PH: 5.6
--- Top fed for a minute.
--- Not sure what to do at this point. Going to do another reservoir change soon. Hoping she lives until then.
- [2145]: Looking pretty much the same.
--- A bit of slime has returned. Since I've been diluting the nutrient solution, the enzyme ratio has dropped. So I guess this is expected.
--- Also noticed that slime build up was on the air-stones. Never really checked the stones so not sure how long that has been there. Looks brown too, which can't be good.
--- Going to do an H202 sterilization of the system (minus the net pot) tomorrow so did not add anything.
--- Lowered the water level to below the net pot.
--- Then top fed for a minute.
Day 07 - Sunday - 08/16/20 - Total Days: 014
-----------------------------------
- [0900]: STERILIZATION DAY!
--- Decided to skip today's night cycle for a deep clean.
--- I'm hoping that skipping a night cycle won't be too stressful.
--- Temporarily moved her to a new bucket.
--- Used about a half of gallon of straight distilled water to flush out the net pot.
--- Drained the system and wiped up all the brown sludge. Also removed the air stones and cleaned up all the goo.
--- Filled the system with 2 gallons of distilled water and at least 30ml of food grade hydrogen peroxide (35% strength).
--- Yea its a lot, but since I'm not going to sterilize the system overnight, I went with a really high doseage. Basically I kept adding until I started to see little bubbles start to form.
--- Then I ran the water pump.
- [0915]: Boiled the air stones in tap water for about 10 min. Then reconnected them to the airlines.
--- I let the air stones and hose soak in the sterilization solution for about 5 minutes so the peroxide can absorb into the stones. Then ran the air stone to help mix and agitate the solution.
--- Occasionally, I'd repeat the process of turning the air pump off for a few minutes to let the stones soak.
- [1000]: Covered the top two row of holes of the net pot with some aluminum tape. Hopefully this solves the light leaking in through the hydroton.
- [1200]: Used an old toothbrush and scrubbed the pump clean. Then drained the system.
--- Refilled with more distilled water and peroxide. Again added a lot.
--- Ran system again to sterilize even more.
- [1530]: Drained the system and refilled with distilled water to rinse.
--- Ran the system for a few minutes, then drained and rinsed again.
--- Did this a few more times over about an hour.
- [1630]: Added 4 gallons of fresh distilled water.
--- Added 15ml Sensi Grow A
--- Added 15ml Sensi Grow B
--- Added 12ml of B-52
--- Added 16ml of Voodoo Juice
--- Added 16ml Sensizym
--- Solution strength was at 430 PPMs
--- PH was at 5.6
--- I was going to add Hydroguard, but I think the bottle is expired. Since 2017 or 2018!? I think Hydroguard is good for up to 2 years from the date on the bottle or 6 months after opening. So not going to use from now on. I wonder if this could have contributed to the slime build up.
--- Also removed the CaliMagic and Superthrive too. Going to only use AN products to eliminate the chance of incompatible nutrients.
--- Placed her back in the bucket and top fed for a minute.
--- Here's hoping for the best. Going to let it ride until morning! Please feel better!
[END OF WEEK 02]

Likes
43
Share


@TheCannaProphet
Follow
~ FastBuds PAPAYA SHERBET Photoperiod~
Well here we go on another journey together through 'Canna-land' and this one's kinda special... forget that, it's VERY special because this is FastBuds newest surprise for the community, a FEMINIZED PHOTOPERIOD STRAIN!🤯
I was fortunate enough to score these seeds, of which only 1000 were available and can't wait to see what this strain can do! This Papaya Sherbet, according to FastBuds, is a hybrid with a 9-10 weeks flowering period. For a more detailed and accurate description of this strain the following from FastBuds says it best:
"Combining the massive stature of Papaya (Oni Selection) with the strength and resilience of one of our best keeper cuts (Sunset Sherbet), this strain develops into a big, expansive bush adorned with numerous bud sites that later transform into a generous harvest of medium-sized buds. Papaya Sherbet flowers deliver a signature flavor of premium cannabis with subtle citrus undertones that emerge upon inhaling. During growth, her aroma makes for a sweet yet pleasantly bitter fragrance, giving you an idea of what the smoke will taste like. Notably stress-resistant, Papaya Sherbet is a great choice for growers working in challenging environments. She is very forgiving and rebounds quickly from any adversity, allowing growers the freedom to experiment with confidence that she will take everything like a champion she is. This strain embodies resilience, flavor, and abundant yields in every grow cycle."
Sounds like an epic strain and I personally cannot wait for this lady to strut her stuff!😍
________________________________________________________________________________________________________________________________________________________________________________________________________________________________________________________________________________________________________________________
The Setup:
This is going to be an outdoor grow, but I have started the Papaya Sherbet photoperiod indoors as our weather is still a bit too chilly to put a newly sprouted seedling outside (nighttime temp's dipping regularly into the 40's℉).
The plan is simple... let her grow inside under a 19/5 light schedule until the nighttime temperatures are in the mid 50's℉, which shouldn't be long. After which, she'll be moved outside and transplanted into the soil which I have already setup and inoculated with beneficial microbes from BioTabs and slow release dry amendments from Gaia Green. Once she's established herself outside she'll be given periodic top dressings of Gaia Green 4-4-4 and 2-8-4 along with worm castings and Compost Tea's. Her grow area is approx. 5'x5' and I have posts and a trellis net set up already for when she gets bigger to aid in training her. Let the fun begin!🤪💚
________________________________________________________________________________________________________________________________________________________________________________________________________________________________________________________________________________________________________________________
Weekly Updates:
7/18- Well, we're now going into the 10th week of veg for this FastBuds Papaya Sherbet photoperiod. She's becoming quite the tall lady with wide node spacing and a classic 'Christmas tree' shape. Her overall health and vigor have remained excellent and she's tolerating our oppressive heat with out complaint!
7/20- The daily watering of 5g continues, as does the hot weather.
7/22- Yesterday, I top dressed the FastBuds Papaya Sherbet photoperiod with 2 1/2 cups of Gaia Green 2-8-4 along with 1 cup of Down To Earth Bio-Fish 7-7-2 and 1/2g of Wiggle Worm castings. After top dressing and working the amendments in by hand I replaced the straw coating over the soil and watered them in with 5g of straight well water via garden hose as usual.
Today I resumed my regular watering routine, watering late in the afternoon with 5g of well water from the garden hose.
7/24- There goes ten weeks of veg for the FastBuds Papaya Sherbet photo and she shows no signs of slowing her vertical growth at this time. I am hoping that with our daylight hours slowly diminishing, the Papaya Sherbet will begin to transition into flower in the next few weeks so that it won't be late October before she's ready to harvest... we will see!
Thank you for checking out my diary, your positive comments and support make it all worthwhile! 💚Growers Love!💚😎🙏
Likes
4
Share


@AgroCultiveta
Follow
Partimos con esta Negra 44.
Inicio su germinación el día 17/06, y se paso a su primera maceta el día 20/06. Emergió el día 23/06
Esta en una maceta de 0.15lt y lleva exactamente una semana desde que dejo de ser una plántula, es decir, desde que empezó a desarrollar sus primeras hojas "reales" (con capacidad fotosintética). Se le aplico Great white en contacto directo cuando se puso la semilla ya germinada en la maceta luego en el riego Myco chum el cual también es de Plant Success, su función es alimentar a los microorganismos antes añadidos con great white.
Mañana se le hará su primer transplante a una maceta de 3.5lt.
Estamos en invierno en mi país con lo que mi principal problema en estos momentos es mi temperatura con el led apagado. El día viernes me llegara una manta calefactora con está debería solucionar este problema, por el momento les tengo un cable térmico el cual aporta calor a sus raíces por los demás solo queda esperar.
Será acompañada con dos esquejes que tienen 4 semanas de diferencia con ella, estos tienen un seguimiento aparte. También hay un palto(aguacate) el cual esta por que hay espacio libre y es muy sensible a las bajas temperaturas.
Cualquier recomendación es bien recibida!
*Great White se mide en gramos.

Likes
18
Share


@Sabac
Follow
Plantitas sanitas.
2 semana de flora y van creciendo muy bien.
Hoy les Hice defoliacion..


Likes
28
Share


@Uwish
Follow
Not much to say about this week.
I still have not taken over ORGA Bloom which is my base and I will not do it until the end of the culture.
We see that the resin is present and that the heads grow. I’m not going to leave it at that, so I’ll tell you what I’m going to do for week seven of flowering.
So I do not take back my base but I keep my additives and I add two products to make my heads swell, Nirvana and Overdrive from Advanced Nutrients to the recommended dosages.
I will also increase my watering volume to 6L of nutrient solution for 14L of substrate.


Likes
58
Share


@1plant_closetgrow
Follow
- 2.5mL water this week. Decided to add 1/4 veg nutes. Thinking if going 1/2 dose next watering.
- Scratch LST, will see how she naturally grows out. Will still defoliate
- Gives off a slight smell at times
- Growing and green 🌱

Likes
2
Share

@Ninjabuds
Follow
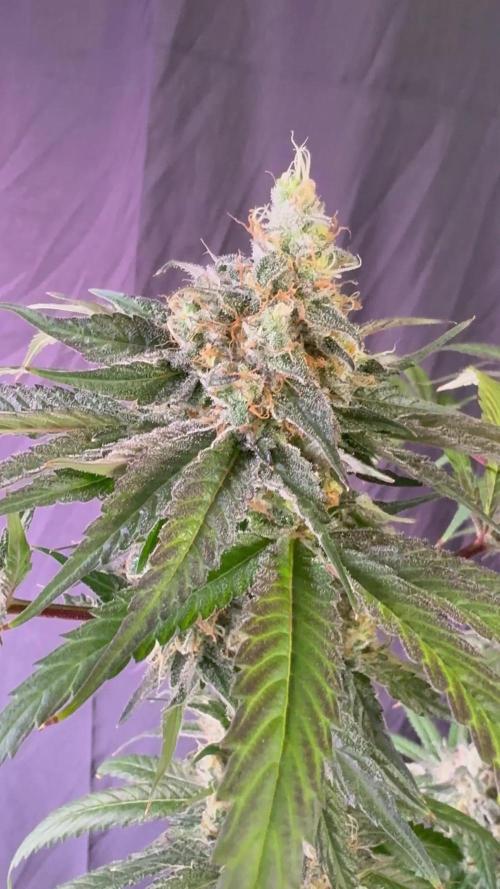
The Superboof harvest was impressive, yielding large, crystal-covered buds with a captivating aroma. What's truly striking is the deep purple hue revealed when the buds are broken apart, adding a unique visual element to its already impressive qualities.

Likes
8
Share

@GermanGrow182
Follow
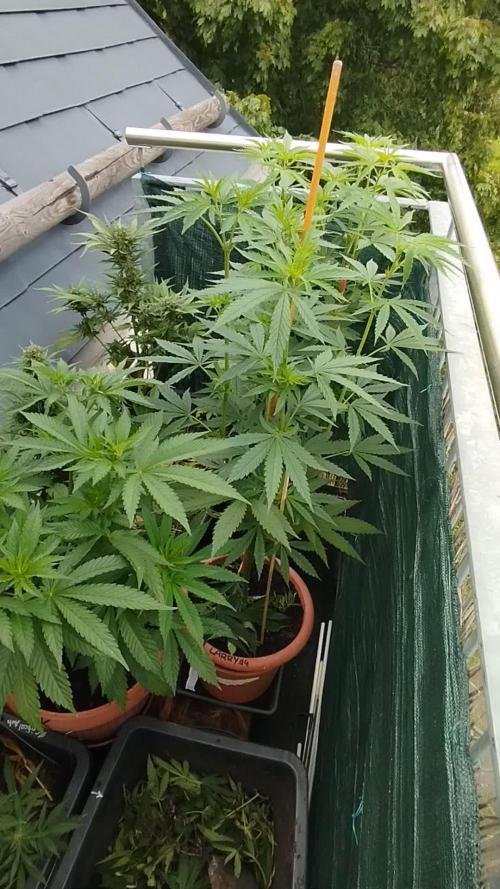
Wetter war wieder sehr Abwechslungsreich. Die Photos wachsen weiter gut. Das Stickstoff Reservoir (hornspäne als Langzeit Dünger) ist noch nicht aufgebraucht. Larry Lemon und AK wachsen gleichermaßen gut und verzweigen schön.
Die automatischen sind in der vollblüte und stehen noch ca. 2 Wochen, wenn vorher kein Schimmel kommt... Soweit so gut 👍 bis nächste Woche ✌️
Likes
9
Share


@pareto
Follow
Idk man... smells good but doenst look that great. Its mixed bag I would say.
--------------------------------------------------------------------------------------------------------------------------------------------------------------------------------
Set up cost (fixed costs)
-Lamp: 40€
-Timer: 3,5€
-Pot: 4€
-Total fixed costs: 47,5€
Given 5 years (or 15 grows) usage time translates to around 3,17€ per grow in materials.
Variable costs:
-Seeds: 6,33€
-Soil: 6€
-Fertilizer: 3,50€
-Power: 20,22€
-Total variable costs: 36,05€
-Total costs per grow: 39,22€
Likes
24
Share


@ganzigunnu
Follow
having hard time reducing the humidity. everything else is going well.


Likes
12
Share


@ktkoi
Follow
Day 73: Early/mid flower for G. Crack & Mexican.. nearing late for CBD crack. These girls are thirsty, so much watering is happening, but the smell isn't nearly as strong as the first round is even though they are all bigger. This is a test post for videos, next one will be for the contest.
Day 75:
G-crack 58cm
CBD Crack 30cm
Mexican Airlines 20cm
CBD is closest to maturity. Her leggy stature gives ample opportunity for the different buds to get light. Mex is starting to get fuller buds, but she's short and stout and her leaves are in the way. G is way too large for me to get the right amount of light on her, wish I had defoliated her more, will probably harvest in parts.
None of these girls smell as strongly as the previous grow. CBD is a bit diesely but fresh. G is smokey but light right now. Mexican is spicey and woodsy. I can't really place the scents just yet.