Likes
Comments
Share
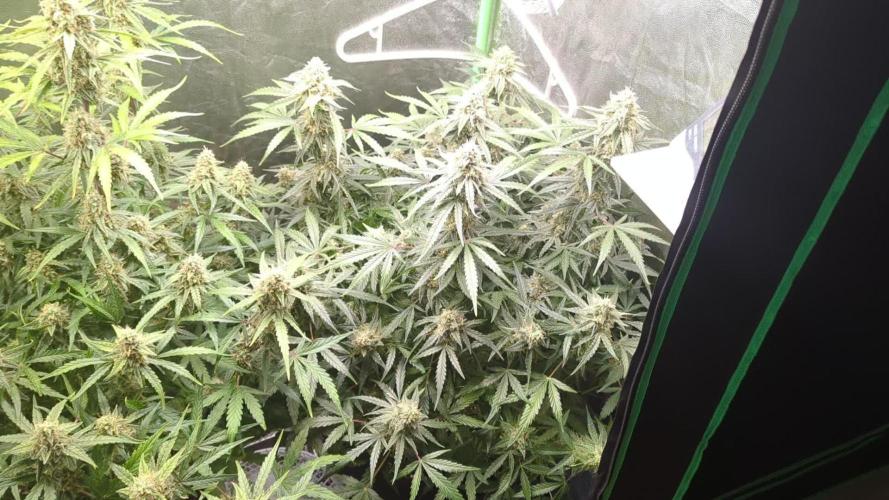
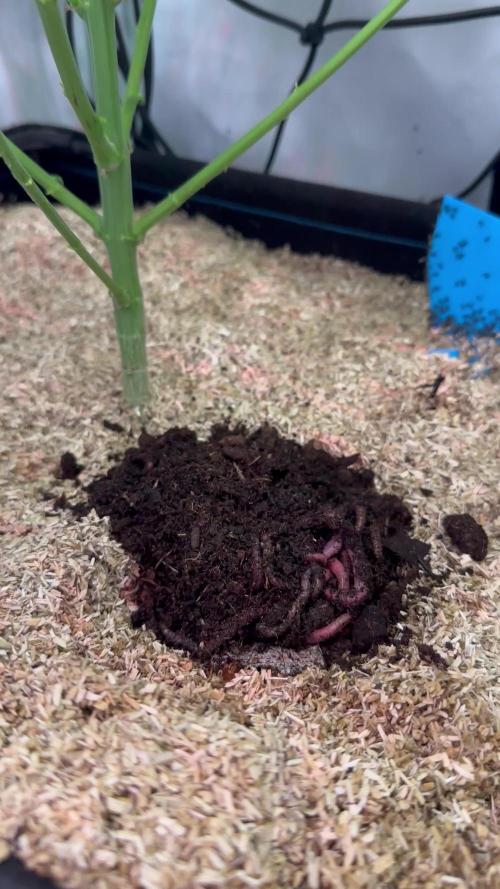
Saw a few amber trichomes and I like them on the active and less sedative side so it was time to chop. Finally freeing up space to move one of the big ones into the tent and flip!
Likes
12
Share
@Greenys
Follow
Week 3/ day 21 big strip, unfortunately I did not have enough time to complete so i will going going back in to continue tomorrow. Somthing mess up with Journal week date.. THIS IS WEEK 3 of flower Intake Run off PH 5.8 5.9 EC 1.8 1.8
Processing
Likes
22
Share
@Marrocko
Follow
Buenas growers Algunos problemas con la temperatura alta pero ya todo controlado. Están creciendo creo que bien. A ver como se portan en los próximos días Saludos y buenas cosechas ✌️🏼Peace
Likes
21
Share
Before starting this harvest chapter, I want to apologize once again for not uploading everything directly into the official harvest and smoke review tabs. GrowDiaries has been struggling a little with very large uploads lately, and with the amount of photos, videos and information involved in this Ghost Train Haze harvest, I decided to split everything into multiple parts to make sure nothing gets lost or broken during upload. And honestly… this plant deserves the full story. So welcome to Part 1 of the Ghost Train Haze harvest. 🌱✨ Before talking about harvest itself, let’s do a quick recap of how we even arrived here. This was another 12/12-from-seed run. No traditional vegging. Very little manipulation. Minimal training. Mostly just letting the plants naturally express themselves while guiding environment, airflow, watering and light intensity carefully around them. Instead of forcing the plants into a shape, the goal here was to let them grow naturally into the PPFD and into the environment themselves. And wow… Ghost Train Haze really showed personality during this run. Most of the attention naturally went toward the massive main plant everybody keeps seeing in the photos — the giant colorful spear covered in fading reds, dark purples and swollen flowers — but there were multiple plants in this room, and in this harvest report we’ll finally start talking about all of them and the different directions they took after harvest. By Week 14, the room looked absolutely incredible. The fading on these plants became something special. Deep reds. Dark purples. Almost black tones in some areas. Golden fading leaves. Heavy trichome coverage. Color spreading through the sugar leaves and surrounding flower tissue. One of those harvests where the plants almost stop looking real. And underneath all those colors: extremely heavy flowers. Dense. Massive. Sharp aromas. Long spears everywhere. The branches became so heavy during late flower that support was absolutely necessary. Yo-yos were holding branches constantly, helping prevent collapse under the weight of the flowers. And the moment the supports came out during harvest… everything opened and leaned downward immediately under its own weight. That alone says a lot about the size and density of these flowers. There are photos in this report where I’m holding entire plants, and honestly, seeing them outside the tent really puts scale into perspective. It’s one of those plants that instantly makes you imagine how unbelievably huge she could become outdoors in native soil with unrestricted root space. Harvest day finally arrived, and from there the project split into two different paths. Some plants were harvested whole and hung for traditional drying. Others were fully broken down, every single flower removed from the branches, vacuum sealed into bags and immediately frozen for ice-water extraction work. And this is where things start becoming really interesting. Because this report is not only about harvesting flower. It’s also about exploring different post-harvest directions and understanding why growers process material differently depending on their goals. The flowers selected for traditional drying will continue their journey in Part 2, where we’ll focus much more deeply on drying conditions, moisture management, branch snapping, trimming and curing. But for now… let’s talk about the frozen material and ice-water extraction. ❄️ After harvesting, the flowers destined for washing were separated carefully and placed into vacuum bags before going into the freezer. Freezing fresh material helps preserve volatile compounds, terpene expression and trichome integrity while preparing the flowers for ice-water extraction. And no — this is not simply “throwing weed into ice.” There’s actual science and technique behind this process. Before washing, the frozen material is combined with ice and extremely cold water, ideally close to 0°C. The goal is to make the trichome heads brittle enough to detach cleanly while keeping unwanted plant contamination as low as possible. At the same time, the flowers need time to fully soak and rehydrate slightly before agitation starts. This helps reduce excessive breakage of plant material during washing. And then comes the wash itself. The bubble washer machine agitates the mixture gently, allowing trichome heads to separate naturally from the plant material and suspend inside the cold water. From there, the water passes through a series of filtration bags with different micron sizes. 25 micron. 45 micron. 73 micron. 90 micron. 120 micron. 160 micron. 220 micron. Each size captures different grades and sizes of resin heads and contaminants. We are not using every single bag configuration during this run, and we’ll go much deeper into grading, collection quality, drying and final results later in the series. But since this report already includes videos and photos of the process itself, I thought this was the perfect moment to explain what ice-water extraction actually is — and what it is not. This process is not about adding anything. It’s about separating what the plant already naturally created. Water. Ice. Agitation. Filtration. Patience. That’s it. And honestly… watching these resin-covered flowers moving inside ice water almost feels hypnotic. The harvest itself may be finished… but the real post-harvest journey is only beginning now. This report will continue in the next update very soon because there is simply too much material, too many photos and too much information to fit properly into a single upload without risking GrowDiaries crashing or losing content again. Part 2 will continue deeper into: the drying process, environmental control, trimming, flower handling, and the continuation of both post-harvest paths. And eventually, Part 3 will close the circle with curing, smoke review, flavors, extraction reflections, effects and final thoughts. As always, thank you to everybody following this journey. To Zamnesia for the genetics. To Plagron for the nutrition. To all the gear keeping this room alive day after day. To GrowDiaries itself. To the community. To the longtime followers and OGs. To the new people arriving every day. To the curious ones. To the silent supporters. To the lovers. To the skeptics. To the haters. To everyone who stopped by, even for a moment. Thank you for being here. 🌱 Part 2 coming very soon. ✨ 📡 DELETED @ 1K Please stay tuned.we never quit https://www.youtube.com/@TheDogDoctorOfficial NEW 🙏 Thank you for your patience and continued support. FOR DISCOUNT CODES AND MORE JUST FOLLOW THE LINK https://website.beacons.ai/dogdoctorofficial 📲 Don’t forget to Subscribe and follow me on Instagram and YouTube @DogDoctorOfficial for exclusive content, real-time updates, and behind-the-scenes magic. We’ve got so much more coming, including transplanting and all the amazing techniques that go along with it. You won’t want to miss it. GrowDiaries Journal: https://growdiaries.com/grower/dogdoctorofficial Instagram: https://www.instagram.com/dogdoctorofficial/ YouTube: https://www.youtube.com/@dogdoctorofficial Deleted by Youtube - https://www.youtube.com/@TheDogDoctorOfficial NEW Vimeo : https://vimeo.com/dogdoctorofficial Under construction stay tuned ⸻ Explore the Gear that Powers My Grow If you’re curious about the tech I’m using, check out these links: 🔆 Lighting & Environmental Control • Future of Grow — Advanced LED lighting technology https://www.futureofgrow.com/ DISCOUNT CODE: DOG20 • Lumiflora — Under-canopy LED lighting https://lumiflorade.com/ • TrollMaster — Environmental controllers and automation gear (past collaboration) ⸻ Genetics • Zamnesia Seeds — Genetics used in this project https://www.zamnesia.com/ ⸻ 🌱 Soil, Substrates, Boosters & Root Support • Plagron — Substrates, bio mixes, and supportive products https://plagron.com/en/ ⸻ 🎒 Storage, Curing & Preservation • Grove Bags — Curing and storage solutions https://grovebags.com/ ⸻ 📸 Photography Equipment & Tools (Not sponsors, but part of my creative toolkit) • Sony A6700 • Sony full-frame macro lens + few more • Stacking photography workflow - learning • iPhone (for behind-the-scenes shots) We’ve got much more coming as we move through the grow cycles. Trust me, you won’t want to miss the next steps, let’s push the boundaries of indoor horticulture together! As always, this is shared for educational purposes, aiming to spread understanding and appreciation for this plant. Let’s celebrate it responsibly and continue to learn and grow together. With true love comes happiness. Always believe in yourself, and always do things expecting nothing and with an open heart. Be a giver, and the universe will give back in ways you could never imagine. 💚 Growers love to all 💚 📸 P.S. – The Eye Behind the Lens All photos in this diary (for now — except for the ones showing the camera, which I took with an iPhone) are taken with a Sony A6700 paired with a Sony full-frame macro lens and a few more. Photography is part of the story — it’s how we share the fine textures, the glow, and the quiet details that words can’t always capture. I’ve also started experimenting with photo stacking — a technique where multiple images, each taken at a slightly different focus point, are layered together to create one perfectly sharp image from front to back. It’s not digital enhancement or AI; it’s pure photography — a way to reveal the plant’s beauty in microscopic depth, from trichome to petal. You’ll even see a few shots of "ghost me" capturing the shots — camera, lens, setup — because every grow deserves not just to be cultivated, but documented like art. FOR DISCOUNT CODES AND MORE JUST FOLLOW THE LINK https://website.beacons.ai/dogdoctorofficial NEW DISCORD - Official Server Invite Link : https://discord.gg/ksjAkA5T74
Likes
Comments
Share
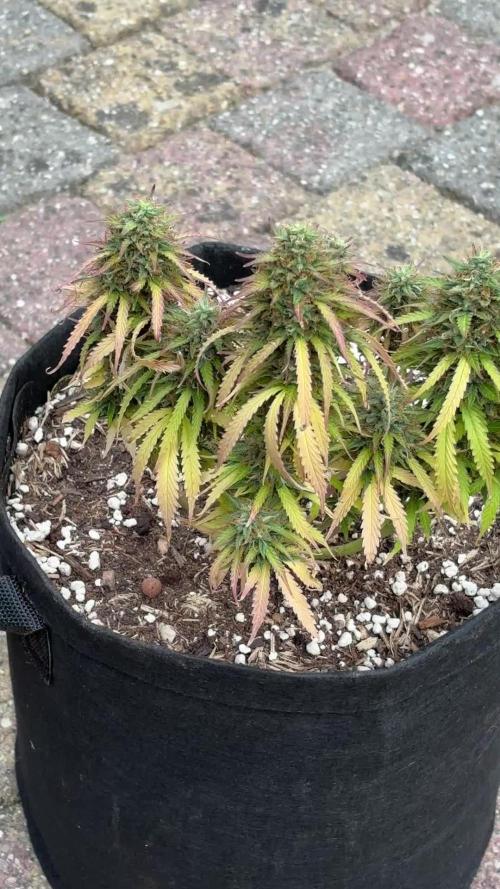
Man I am absolutely pleased with the turnout of these clones especially clone 1 with my trial and errors with the 1st initial plant made me a boss at these girls she does not like humidity at all smell of gassy peanuts 😆
Likes
10
Share
@Elpicor
Follow
Plant showing first sign of extra nitrogen, I'm trying to fix it with algae and
Likes
53
Share
@xbrico
Follow
D64/FD36 - Not much to really talk about this week. Things still ticking along. Cookies are baking nicely! 😋 SCP in the same tent on the other hand, bit of a slow goer!!! Defs going forward, only 1 strain per res and I think "Cookies" based breeds will be it for me as they're so easy worked with. RAM Oscillating Fans...again, barely 10 days running and it has died!!! WTF! Hydro place will be willing to change again but its a joke, the batch is useless!!! Not the Hydro Shops fault though! They're bending over backwards as I do a good bit of business with them! :) Apart from that, dropped my EC by 0.2 this week (Pulled back on the base and bloom by 10-15%) just because they're drinking but not taking on food at any big rate - rather not poison the roots with a rising EC when they have a wee swallie to themselves!!! Changed the CalMag to Biobizz calmag as no nitrogen in it (it is a lot dirtier in a tank though which is the down side!!!). Apart from that, no real big changes. Happy Growing all!!! 💪
Likes
84
Share
@Hempire
Follow
Im doing a bit of defoliation, moreover the leaves that covering the buds, i cut some small branches on the bot of the plants, to keep energy for the distal parts of the branches. Every 2 day approximately, to no stress a lot the plants, I pinch the apex of MD1, MD2 and BB1, that my secondary branches go up, until the height of the apex central. Nutriments : 2,0 mL/L of rhizotonic, 2,5 mL/L of cannazym every watering. 2,0 mL/L of terra vega every 2 or 3 watering in case of they need (N) until the final of the strecht (first 2 weeks of bloom). I will put 5L every watering (pots of 18L) and I will analysed the drain of every plants to check pH and the fertilizer amount. Im really proud of theses plants, they are strong, resistant (the trunks are huuuge, moreover the Moby dick from Dinafem) and so healthy !! The MD 3 has reacted really really good with the topping ! Im impressed and quite sure do topping next time ;) I hope they will give me the best of themselves !!!! Lets wait the final of the strecht 😉
Likes
18
Share
week intel: its time to harvest some of plants the ones that is mature enough. indica dominant plants will done first always so we should harvest them first because my base nutrients and one of boosters was salt based, i'll do flushing this week to get some relieve to plants in the last days stresses : flushing Drought stress via watering only one time with flushing this week feeding: day 1 : i flushed them with Advanced Nutrients Flawless finish and adjusted ph day 3 : no more feeding from now on day 5 : no more feeding from now on guide of the week : i harvest in 2 parts : first i harvest top of the branches and will let the lower buds to ripe another week then ill harvest the second wave. indica dominant plants will get done 1 or 2 weeks sooner than sativa dominant plants that will often takes more than 8 weeks so be aware to harvest them sooner. my dry and cure style is this: 3 days of hanging upside down to get water activity lower to around 0.6 in 50% humidity and 26 C temp (i know its a little high but we are in a hot summer right now and i cant get it lower even with air conditioner) and then after 3 days of drying i remove leaves and stalks, trim buds and move them to jar for the rest of their life :D . and in the first 4 days of curing i open the jar door and let hem get some fresh air in the jar for about 5 minutes and close the jar door again, after 4 days of curing like that buds are smokable but they will get better as they getting cured about 1 month. im happy as hell with this harvest :D.
Likes
2
Share
•Morning of day 19, ¾ through week 3. Did a light defol on both ladies. I gotta say I'm a big fan of Big Bud by Seedstockers! This girl is going to be exactly what her name is. I know its early with roughly 40 days to go, but I will for sure be growing this girl again. Any suggestions drop me a line. Happy gardening and stay safe Gromies! 🔥🌱🙏🖖✌️😷 •Morning of day 15, start of week 3. °Big bud is 32" in diameter after more LST. And 37"tall (soil to top). Less stretching and more compacting of nodes. Very pleased! She's feeding at full strength and looking like she might want more. Very vigorous growth. °Agent Orange. 30" in diameter after LST. plant did NOT respond well to LST. AND IS 36½" tall (soil to top). Also showed signs of nutrient burn. Will only feed half strength every 3rd watering. Any suggestions drop me a line! Happy Gardening!
Likes
31
Share
Chop week. Space Jam could go longer but I’m not letting one linger.. I’m gonna get em all down at once Space jams a savage yielders probably get 50-75% more than everything else here. POTG pheno 1 that was used for SJ was a bit fluffy. Well the BB made them buds rocks on this SJ Thanos has two distinct phenos for sure. Not unexpected in some F1s Waiska is a total Pure Indica leaner, if you got Check out my other diaries you can see the newer pure indica diary I used for the mom. Just like this waiska. Stacks so wonderfully on the branches! 9/17 Pulled waiska and Thanos fluffy pheno. Still needing to take Thanos rock pheno , space jam, and blue AF
Likes
6
Share
I'm still waiting to see less clear trichomes on the buds, carefully allowing the pot to dry before watering, and feeding just bembe and big bloom this week. I found my last pineapple kush harvest bland, hence the continued feeding after flush. This is the third week since flush.
Likes
3
Share
Hoy es 18 de diciembre el día q la Argentina salió campeón del mundo estoy muy feliz y es una fiesta en toda la Argentina!!!! Vamos que con huevos se puede ! Hoy es lo único q importa , mañana se retoma el cultivo con la mejor de las ganas espero ganar esta copa también!!!!
Likes
16
Share
@Chubbs
Follow
420FASTBUDS FBT2107 WEEK 6 These two beautiful ladies are growing great. Staying on the shorter side but very bushy and healthy from the looks of it. It's been super cold so they have hung in there when temps have dropped lower than I would've liked. Fixed the issue by adding an oil heater in the tent so far so good. Only have snow in the forcast for the next week or so then it should warm back up a little. Kept the same feeding they've responded well to it. All in all Happy Growing
Likes
Comments
Share

Flowering Week 6 – Fading Leaves, Persistent Flies The sixth week of flowering brought a mix of progress and persistent problems. The whitefly issue unfortunately hasn’t gone away. I replaced both yellow sticky traps at the end of the week, and within minutes, two new whiteflies were already spotted on the fresh left trap. The old one had four additional flies on the back. This pest pressure remains a concern, but I’ve decided to hold off on further neem oil sprays for now, given how far along we are in flowering. I’ll keep monitoring closely. Nutrient-wise, I stayed cautious this week due to ongoing signs of overfeeding. Leaf tips are still showing yellowing and some burn, especially on the lower leaves. Many leaves have pronounced yellow spots and curled tips — a clear sign of excess nutrients earlier on. To reduce stress, I watered with plain pH-adjusted water (5.5–6.0). Total watering volume was approximately 29 liters This week I also did a second round of lollipopping, focusing on removing all small popcorn buds and lower growth under the net that wouldn’t develop well. Despite the nutrient stress and the ongoing whitefly presence, the plants are still developing well. Buds are getting chunkier, trichome production is visibly increasing, and the overall structure is solid. Still, I’ll be keeping a close eye on both leaf health and pest activity in the coming days. ⸻ TL;DR – Week 6: • New whiteflies still showing up – 7 total seen this week. Both sticky traps replaced. • Additional lollipopping done: removed popcorn buds and shaded growth under SCROG. • Leaf symptoms (tip burn, spotting) persist – watered with plain pH water, once with half HESI dose. • Watered 3x this week: 9.5 L (pH only) • Light stayed at intensity level 7
Likes
18
Share
@Roberts
Follow
Zealix is doing good. She is stretching and doing well. Everything is looking good, and she should be developing flowers soon. Thank you Spider Farmer, and Terpyz mutant Genetics. 🤜🏻🤛🏻🌱🌱🌱 Thank you grow diaries community for the 👇likes👇, follows, comments, and subscriptions on my YouTube channel👇. ❄️🌱🍻 Happy Growing 🌱🌱🌱 https://youtube.com/channel/UCAhN7yRzWLpcaRHhMIQ7X4g.
Likes
11
Share
É stato il mio primo ciclo di coltivazione e purtroppo ho fatto molti errori che mi serviranno da esperienza. Ho sbagliato inizialmente la distanza della lampada e le piccole si sono allungate troppo, poi ho iniziato LST forse troppo presto e non sono riuscito a orientare bene i rami per farle crescere tutte alla stessa altezza infatti alcuni fiori sono proprio piccolo rispetto ad altri, altro errore quello di non misurare il PH e questo mi ha portato ad avere inizialmente carenze di fosforo e potassio per poi continuare con calcio. Ho sbagliato le dosi di fertilizzanti che dal prossimo ciclo alzerò per provare ad avere risultati maggiori in termini di quantità e infine come ultimo errore riconosco di aver iniziato il flush troppo presto (17 giorni di flush) quando avrei potuto dargli almeno ancora un’altra irrigata di fertilizzanti per far gonfiare i fiori. Nonostante tutto sono contento ed é stato molto divertente e istruttivo, ora le piante stanno seccando e poi le passerò in concia per provare finalmente il sapore. Ho fatto una pesata a umido solo di una pianta perché tutte e due insieme non ci stavano ma credo sia sballata come misurazione quindi peserò direttamente a secco. A secco sono risultati puliti 68g, ho fatto una concia di 3 settimane e il sapore é davvero buono. Sballo da divano, molto potente come effetto. Sono molto soddisfatto
Likes
27
Share
@Dunk_Junk
Follow
Only 1cm vertical growth this week but she pushed out quite a few side branches and leaves! Pretty much on autopilot right now.
Likes
12
Share
@Targona
Follow
Strain: Bruce Banner Auto®️ Breeder: Sweet Seeds Indica: 41.1% Sativa: 58.7% Ruderalis: 0.2% THC: 18-25% CBD: 0.1% Indoor yield: 400-500 g/m² Outdoor yield: 50-150 g/plant Indoor flowering time: 9 weeks from germination Height: 50-110 cm Effects: Happiness, Stimulation, Creativity Taste: Sweet, Fruity, Earthy, Diesel, Floral For cultivation I used: Growing area: 60x60x160 1x circulation fan: 15W LED lighting: Mars Hydro TS 600 - 100W - vegetation and flowering Exhaust: fan into the duct - RAMTT100 Odor filter: PRO-ECO HF carbon filter 160-240m3 / h - 100mm - maximum air flow up to 240m3 / h 4x textile flowerpots 11l Biobizz Light Mix substrate + perlite + coco Thank you to all the friends who support me in cultivation, who advise me - @Happy_Rakosnicek, thank you to the friends from Grow Diaries for like, advice and support 😍❤️❤️ Many thanks to the Sweet Seeds team, especially Tommy, Jaypp and Apolo for providing sponsor seeds 😍 Thank you for the likes and you can follow me on Twitter 🐦: @ Targona666