


Likes
Comments
Share

@ElCapitol
Follow
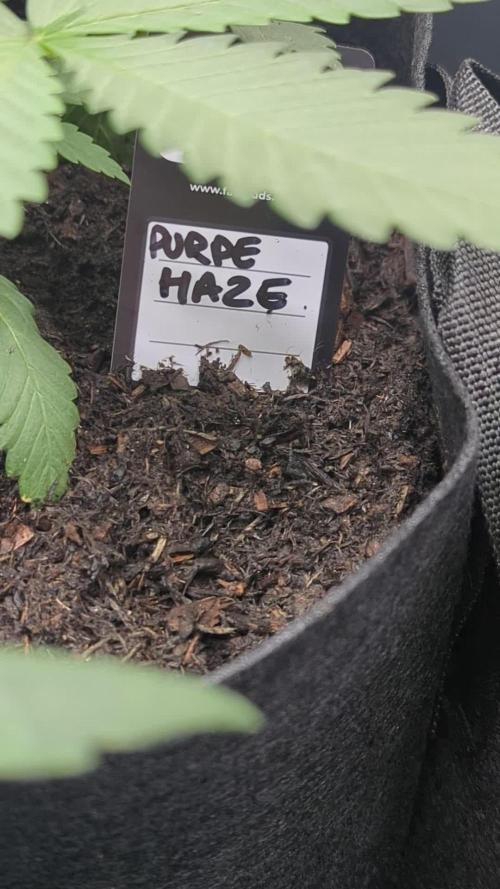
I was worried the purple haze would be too tall but it's showing indica traits and staying short. Showing healthy growth and plenty of side shoots.

Likes
15
Share


@ganzigunnu
Follow
the growth is excellent. when i look at them i look to see either their gratefulness or their demands from me. When I see no demands. I consider everything is well. thanks everyone.


Likes
24
Share


@Lycheegrow
Follow
Exactly a week ago these five Sour Diesels were planted. The sixth plant you see in the pictures is a CousKush Auto that is being nursed for 2 weeks to then be taken care of by family.
They germinated quickly, after less than 72 hours most cotyledons were fully open and the roots grew through the root cubes.
At this point they were transplanted into 0.12L seedling bags filled with pre-buffered coco and perlite (saturated with PH'd RO water). They will stay in those to develop a good root structure for around a week before moving to 1L pots.
They reacted decently to the transplant although the cotyledons curled down on some of the seedlings. I attribute that to the coco being too moist when they were transplanted. I waited to give them more water until day 5 to dry the coco out a bit.
Day 5 is when I first watered them, using a 0.3 EC nutrient solution. They all get 8-10 ml every 24 hours now and seem to be doing great.

Likes
21
Share


@m0use
Follow
***Sponsored Grow*** = Medic || https://medicgrow.com || Grow = ***Sponsored Grow***
Ok big update this week, I finally edited the footage of the lights and got their unboxing photos processed, this took way longer then expected and should have been done on germination or week 1 entry but better late then never. You can really see how the lights shine in comparison to my older ones. The brightness of the leds is next level and I can use their V1 spectrum from seed to harvest. Its a great balance of red and blue in a full spectrum light. The medic grow mini sun 2 is a all purpose light that I can see myself getting lots of use out of in the future. Plus they fit in my tent just as snug as my last ones and that's a big thing for me, I don't like dim corners. I am using the lights at 80% dim level. this will be raised to 100% when they enter flower :D First time useing lights I can dim. they also have an onboard timer attached to them, I will be playing aorund with this to see if its something I want to use in the coming weeks, I all ready have all the external timers so I can see how this is a useful tool for anyone starting off without them.
On top of all this I also transplanted my plants into their final pots. they went from a .7-.8L to a 2gal or 7.5L, all the root balls on the plants where perfect, nice white roots, maybe a bit compacted for the size and might explain why I am having some issues with them but healthy none the less. I think they will not start to grow a bit better and I will see less issues moving forward. I still have yet to get a new PH pen but I am blindly guessing the PH by adding 2 drops of phosphoric acid ph down per 1gal of feed solution. it seems to be working out just fine.
Till next week.
***Sponsored Grow***
Official Website: https://medicgrow.com/
Facebook:
https://www.facebook.com/medicgrowled
Twitter:
https://twitter.com/medicgrow
Instagram:
https://www.instagram.com/medicgrow420/
YouTube:
https://www.youtube.com/channel/UCNmiY4F9z94u-8eGj7R1CSQ
Growdiaries:
https://growdiaries.com/grower/medicgrowled
https://growdiaries.com/grow-lights/medic-grow

Likes
27
Share


@Trickybis82
Follow
OK so this week I have officially changed yje light cycle and have been running a 12/12 and will of course carry that on now until the end if we get there.
The food amounts have now changed on to flowering amounts and even though the plants are different in size they both look really well.
I have started to feed them both the following
Micro 32ml
Grow 12ml
Bloom 48ml
Ph is 6.0
These amounts are based on 20 litres of water.
So I am hoping to see changed and some flower heads popping through (I hope).
Let's wait and see what happens as again this is my first 12/12 run. So really hoping for the best here lol.
Peace out growmies
Likes
5
Share


@OnlyTomatoes
Follow
[ Information ]
For all information on this grow, including strain and grow room details, please see Week 1 of Veg.
[ Updates ]
Day 10 - Topped at the end of Day 9. Foliar sprayed with neem at lights on today. C02 has been increased to 800 ppm average, humidity lowered to 70%. Light power has been increased, now running at 35%. Amazing growth, finally removed all the rogue sunflowers as I didn't notice any significant gains having them. They're getting thirsty today but I'm going to give them another day, possibly 2, before I feed again. I'd like one last heavy wet/dry period for root stretch and then I'll go heavy with some organic nitrogen into flip. I can't use the same net as previous harvests because of the new room design so I'll have to create a new frame to start building the final even canopy. I'm fairly happy with how both groups of plants are growing into an even canopy within their expected timelines.
Day 12 - Light intensity increased to 40%. Fed today, 1.05ec (6.8ph) with 10-15% runoff. No signs of light bleaching or stress, their leaves are almost always praying upwards. They could use a lollipopping, but with how quick they're growing I'll most likely wait until a couple days before flip to clean them up now.
Likes
7
Share


@Organic_G
Follow
Tag 1 der 9. Woche der Blüte.
Ich stehe kurz vor der Ernte, die Budds sind saftig und Puderig, starker Geruch und gutes Terpenen Profil.
Werde wahrscheinlich in 3 Tagen ernten.
2. Tage vor der Ernte lasse ich die im Dunkeln stehen, gieße ab jetzt nicht mehr fürs dehydrieren und bringe die Luftfeuchtigkeit auf 35% runter für das Ende.
Likes
5
Share


@MG2009
Follow
02/28/2021
What a difference in a week! Potted up GSC
To 1 gallon pot, Blue Dream next, pics coming soon.
(Later tonight)
Blue Dream potted up and watering done.
Both have nice side shoots for clones. GSC is at 10" tall, Bluedreamatic Dream is at7.5"
Also took 5 cuttings of Wreak Havoc hope to have 2 of each clone
(GSC,BLUE DREAM,WREAK HAVOC) for outside, I believe I got the lemony kush pheno which is perfect for my climate!
Likes
6
Share


@Insane4twenty
Follow
Harvest Week!
Finished my first legal Indoor Grow in Germany in 67 Days from Seed to Harvest
Likes
36
Share


@Salokin
Follow
Hi all,
sorry for the delay, all continues to go very well, she is handling the nutrients very well wit only a very little tip burn. I increased the light a little bit, as I felt that some of the main colas on the side didn't get enough light.
Next week I will probably be able to show the little veg-box I built, since the cuttings are slowly outgrowing their current home.

Processing
Likes
9
Share


@Tango_Hotel_Charlie
Follow
Dealt with pm issue why I havent posted. Its gone. Fed compost tea, fpj, and foop. Also hit her with some mykos. Im already getting iny head when I want to begin amemding this for rhe next round
Likes
8
Share


@dank604
Follow
So far so good. Lowering the light was a bit of a mistake as the main cola started to show light stress. The main cola is 7" higher than the rest which is a bit of a PITA. I'll be much more aggressive with the LST next time around - comments on how to prevent such a taller main cola are welcome :)
I've trimmed about a dozen or so leaves to get more airflow and I moved the LED strips up to support the middle section of the plant, seems to have helped (I think).
Likes
23
Share


@Kakui
Follow
V4, están creciendo rápido, desde este punto empezaré con una EC de riego más alta 1.5~1.8, hace 3 días que aparecieron las primeras hojas verdaderas, por lo cual la etapa de vegetación ha iniciado.
V6, el día anterior tuvieron un riego con pH 6.2 y EC 1.7, se me pasó el agua y quedaron algo tristes, pero ya se recuperaron hoy, todas las stash presentan puntos de decoloración en las primeras hojas, las cookies están en perfecto estado. Están comenzando a salir raíces por el fondo de los vasos(algo que nunca me había pasado con otras genéticas) además se ven muy gruesas las raíces, están pidiendo transplante ya, en unos días serán transplantadas.

Likes
28
Share


@Heregrowsnothing
Follow
I've enjoyed every minute of this and I'm really pleased with how they turned out . I've learned quite a bit. I decided to dry them for 10 days leaving the stalks as long as I could to absorb more flavour, also I had to give them a light trim as I found a small amount of bud rot but I think I caught it really early. All in all I'm very pleased with all the products I used and will be using them again without a doubt. Thanks for reading my ramblings lol ✌️🏻

Likes
42
Share


@MadeInGermany
Follow
Info:
Unfortunately, I had to find out that my account is used for fake pages in social media.
I am only active here on growdiaries.
I am not on facebook instagram twitter etc All accounts except this one are fake.
Harvest day 71
since the time
change to 12/12 hrs.
Hey guys :-)
Finally the time has come .
The lady was harvested.
After the trichomes have been checked (70% milky 30% amber) as always, it was left in complete darkness for 48 hours before it was neatly trimmed by hand.
After trimming, she was put back in the drying tent on nets.
There they are allowed to dry for the next 8-12 days at 62% humidity before they are put into the jar to ferment with 62% boveda packs.
After about 4-6 weeks in the jar I will swap the 62% boveda pack for a 58% boveda pack where it can be ready for another 4-6 weeks to enjoy :-).
As always, the remains of the leaves are used to make Ice o Lator and oil.
Of course, as always, there is a final update during the fermentation process.
Until then, I wish you all a lot of fun with this update.
Stay healthy 🙏🏻 and let it grow 👍.
You can buy this Nutrients at :
https://greenbuzzliquids.com/en/shop/
With the discount code: Made_in_Germany you get a discount of 15% on all products from an order value of 100 euros.
You can buy this Strain at :
https://sweetseeds.es/de/cream-caramel/
Type:
Cream Caramel
☝️🏼
Genetics:
Blue Black
x
Maple Leaf Indica
x
White Rhino
👍
Vega lamp:
2 x Todogrow Led
Quantum Board 100 W
💡
Bloom Lamp :
2 x Todogrow Led
Cxb 3590 COB 3500 K 205W
💡💡☝️🏼
Soil :
Canna Coco Professional +
☝️🏼
Nutrients :
Green Buzz Liquids :
Organic Grow Liquid
Organic Bloom Liquid
Organic more PK
More Roots
Fast Buds
Humic Acid Plus
Growzyme Big Fruits
Clean Fruits
Cal / Mag
Organic Ph - Pulver
☝️🏼🌱
Water:
Osmosis water mixed with normal water (24 hours stale that the chlorine evaporates) to 0.2 EC. Add Cal / Mag to 0.4 Ec Ph with Organic Ph - to 5.8 - 6.4

Likes
15
Share


@DaddyPrime2
Follow
6/4/2 goddamn I'm loving this plant. The underneath of the fan leaves turn a deep magenta. They will look so beautiful contrasting with the buds

Likes
29
Share


@gottagrowsometime
Follow
Welcome to my Ztrawberry Diary sponsored by Green House Seeds.
Days 85-98 Flowering Days 35-47 Flower Days 17-30
Plant is coming along real nice. She has stacked up in mass, rock hard big ass buds. Gonna be a very intense smoke. Has taken awhile for the top buds and bottom to follow up. Nearly all pistils up and down the plant are 70-30 Trichomes are nearly all cloudy pushing 35+ambers. Another week on water after this. I've upped the co2 to combat the high tent temperatures of 29c. Her buds are big, dense, stick of ripe berries with hints of gas and other a dank musk. Bit pungent. Really nice. Time for soft flushing. And to go under SF-1000 or lower the temperature.
Diet/Defoliation
Added a few of plagrons organic like with Atami products and all buds are getting nice and evenly ripening. Very happy with the products I used this grow, mainly Green House Feeding mineral line, and got some amazing fungi from the Biobloom I used at the start of pre flower. Carried her through most of her bloom phases. And I had to add other PK booster and a few terpine enhancers. This was her last day on nutrients. She'll be going under my SF-1000 now for ripening with lower temps. She's only been heavily on co2 this wk. (A few days. So, it won't of had much affect on it boost wise). Got a decent defol through her later stages of bloom. Most of her fans were removed and took a few sugars, well they were fans before the cakyxs swollen. Very sticky with a lovely gasy berrie smell that's very lovely.
Thanks to my sponsor from Green House Seeds, & shout out to mars-hydro for the lights.
COUPONS
Mars-Hydro "ggs" 3% WW
Spiderfarmer.eu "ggst" 3% EU only.
Zamneisa "GROWITGD" 20% WW.

Likes
9
Share


@Tropicalsalt
Follow
This week was their last of bulking. I have to harvest them in two weeks because I'll be away from home for a while. I think it'll give them enough time to finish anyway, pistils are turning brown and by lowering nitrogen and using crop steering I think they'll be ready soon!
#3 is really really sweet, almost like Z. #2 smells like burnt plastic and #1 a bit chemical and sweet

Likes
13
Share
@BettyFlores
Follow
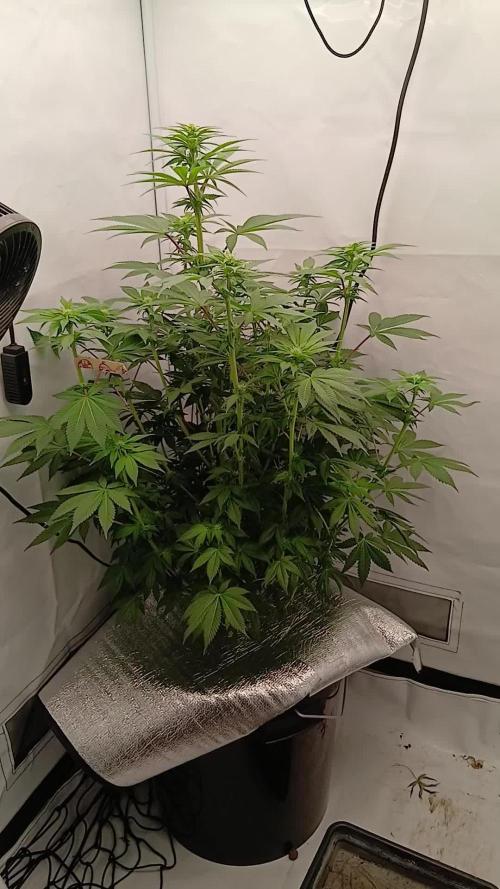
20.11.2025 Well, I did it and chose a branch to pollinate. I've put a bag over the Agent-Orange-Male-Flowers, cut it off, carried it to the tent, put it over the Gelato x Black Lebanon-Female, shook and clapped et voilà, I hope it worked 😅. She is georgious, splendid and healthy. I need to defoliate her more, but now, after the pollination of one branch, I do prefer to leave her alone for a while. Her flowers are bulping up, the stretch was extremely intense and also she does drink very much! What a journey 🌸💜.
Likes
18
Share


@DogDoctorOfficial
Follow
Seedsman Seeds Germination Report - Run 01: The White OG Journey
Kickoff to Germination: The Start of Something Great!
Welcome to the beginning of this adventure with The White OG feminized seeds from Seedsman Seeds. Excitement is in the air as we’re searching for strong, resilient plants, and this journey has all the best tools and tips. Starting with five seeds, we’re aiming for a solid beginning and maximum potential. Let’s explore every step in detail to make this grow as robust as it can be!
Germination Process: Tools of the Trade
TheCannaKan: The Ultimate Germination Gadget
I’m thrilled to share my love for TheCannaKan, a little germination wonder! This tool is essential for any grower who wants to start their seeds with precision and care. I noticed rapid results in just 24 hours, with the seeds showing signs of life. At about 32 hours, I transferred them to the Root Riots, which brings us to the next exciting stage.
Why I Love TheCannaKan:
• Quick Results: Seeds sprouted rapidly, minimizing wait time.
• Consistency: Keeps moisture levels optimal for uniform germination.
• User-Friendly: Simple yet effective for both new and experienced growers.
Root Riots and Their Role in Root Development
After sprouting, I placed the seedlings into Root Riot cubes under a dome. Root Riots are fantastic for stabilizing young plants, providing an airy and nutrient-friendly environment that promotes robust root growth from the start.
Benefits of Root Riots:
• Root Aeration: Soft yet structured, these cubes support root expansion.
• Moisture Retention: Holds just the right amount of water for growing seedlings.
• Enhanced Root Health: The cubes are ideal for preventing damping-off and ensuring healthy, white roots.
Nutrients to Kickstart Growth: Aptus Holland Regulator and Startbooster
To give the seedlings a perfect start, I added Aptus Holland’s Regulator and Startbooster (1ml/L each). This mix promotes early root and stem strength, giving seedlings the ability to absorb light and nutrients more efficiently.
• Aptus Regulator: Enhances plant resilience, aids in nutrient absorption, and promotes early vitality.
• Aptus Startbooster: Adds a balanced mix of growth hormones and nutrients that are ideal for the early stages, encouraging healthy roots and faster seedling growth.
Light and Environment: Future of Grow FOG LED with TrolMaster Tent X Controller
I’m using a Future of Grow (FOG) LED at 600W, but keeping it dimmed down to around 200 PPFD. This setting is controlled by the TrolMaster Tent X Controller to give the plants the perfect start without overwhelming them with intense light. Controlled lighting helps seedlings to develop without stress, encouraging healthy growth and internode spacing.
Shoutouts:
• Future of Grow LED: High-quality, efficient LED light that adapts well to seedling and veg stages.
• TrolMaster Tent X Controller: Reliable and intuitive control over light, humidity, and more. Perfect for a hands-off, efficient environment setup.
Observations: One Seedling Takes the Lead
At the end of this germination stage, it looks like one seedling has emerged as the strongest, while the others may need a few more days. Patience and observation are key; some seeds naturally take a bit more time to sprout. I’ll keep monitoring these with hope, allowing each seedling its own rhythm.
Grower’s Notes and Tips
• Consistency Matters: Germination is all about steady conditions—consistent moisture, gentle nutrients, and stable lighting make all the difference.
• Document Everything: Keeping a log of each step (like this one!) helps track growth patterns and provides valuable insights for future grows.
• Stay Positive and Patient: Not every seed will sprout at the same rate. Trust the process and remember each plant is unique.
Community Shoutouts
Thank you to everyone who makes this process smoother and inspiring—TrolMaster, Aptus Holland, Future of Grow, and Seedsman Seeds for amazing genetics and tools, as well as the growers’ community who share insights, tips, and encouragement along the way.
Next Steps
Now that we’re through germination, we’ll move into the early growth phase. I’ll keep documenting the lighting adjustments, nutrient changes, and growth patterns of each plant, especially that eager seedling leading the way!
Growers Love, and here’s to a strong start for the future of this grow! 🌱
DISCOUNT CODE - SeedsmanSeeds - DOGDOCTOR 10% off
As always thank you all for stopping by, for the love and for it all , this journey of mine wold just not be the same without you guys, the love and support is very much appreciated and i fell honored and so joyful with you all in my life 🙏
With true love comes happiness 💚🙏 Always believe in your self and always do things expecting nothing and with an open heart , be a giver and the universe will give back to you in ways you could not even imagine so 💚
Friendly reminder all you see here is pure research and for educational purposes only
💚Growers Love To you All and remember to keep that smile big and alive 💚