




@Selkot
Follow
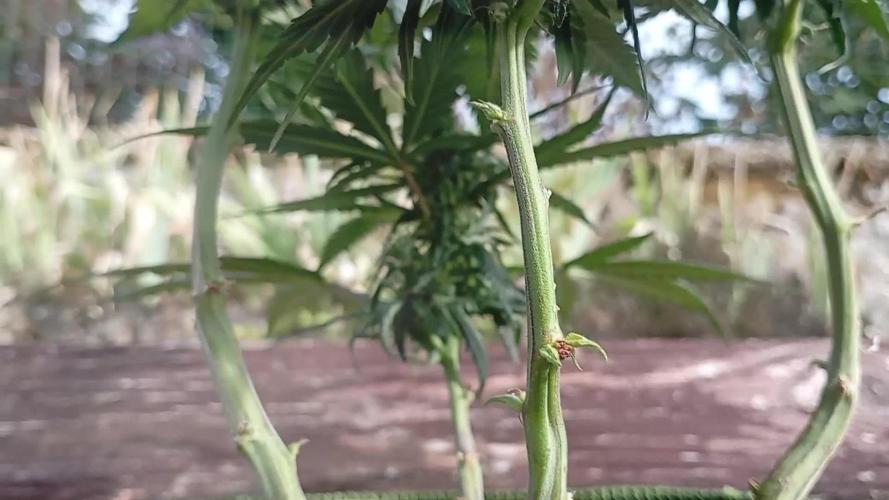
Despite the return of some rain (finally! 😊), temperatures are still high, once again reaching close to 30°C around midday. This weather seems to suit my Strawberry, whose stretch is slowing down, while her buds are now visibly starting to develop.
The leaves in the greenhouse are becoming supple again. I kept the feeding very light throughout the week, and the substrate feels more aerated today. I’m still keeping things modest for a few more days before increasing the P and K.



@DogDoctorOfficial
Follow
# 💙 Project Blue Tent – Week 12 💙
## Blue Waffle F1 – Pheno B
### 🌸 466 Photos. 600 Photos. One Ridiculously Frosty Girl! ❄️😂
Hello everyone, and welcome back to another chapter inside Project Blue Tent! 💙🌱
And my friends...
I REALLY DON'T KNOW WHAT TO SAY ANYMORE! 😂❄️
Well, actually, I do. I have plenty to say, because this beautiful girl deserves her own report!
Last week, we talked about the incredible uniformity we're seeing throughout this tent. Four plants, two different cultivars, the same environment, the same irrigation system, and the same nutritional program.
And this week?
Her sister is looking ridiculously beautiful too!
But today, we're giving the spotlight to Blue Waffle F1 – Pheno B, because even when plants share the same room and the same conditions, each one deserves to have her own story documented.
And honestly, what a story she's giving us.
The flowers are stacking. The buds are developing. The frost is becoming increasingly impressive, and the whole plant is showing us why I love documenting every stage of a grow.
We've made a few small adjustments to the environment, increased the power of the overhead LEDs, and left the nutrient recipe unchanged.
No unnecessary interventions.
Just a beautiful ecosystem, some seriously frosty flowers, and a grower who's spending far too much time staring at them.
😂💙🌸
Let's get into it!
## 🌿 PHENO B – SAME ROOM, SAME ENVIRONMENT, SAME BEAUTIFUL STORY
If you've been following Project Blue Tent, you'll already know how much work went into getting these girls to this point.
The long vegetative period gave us the structure. The topping and training helped organize the growth. The SCROG supported the canopy, and the second layer of support helped us manage the flowering structure after the stretch.
We also improved the available space inside the tent by moving the extraction equipment outside and raising the main lights.
All those decisions helped us establish the environment we're working with today.
And now?
We're watching the flowers develop within that structure.
Blue Waffle F1 Pheno B is approximately 145 cm tall, and the overall framework is already established. We're not looking to reshape the plant every week or make changes just to have something to report.
At this stage, I'm much more interested in observing the flowers, following their development, and seeing how the plant responds to the environment.
And she's giving us plenty to look at!
## 🌸 THE FLOWERS ARE STACKING BEAUTIFULLY
One of the things that really catches my attention this week is the flower development.
Look at those close-ups!
The flowering sites are becoming increasingly defined, the buds are developing along the branches, and the amount of visible resin in the photographs is absolutely beautiful.
The white pistils are still prominent, and the flowers are continuing to develop.
This is such an interesting stage because the plant is gradually shifting our attention away from the structure and toward the flowers themselves.
Earlier in the project, we were talking about stretch, canopy management, training, defoliation, and support.
All of that work established the framework.
Now we're looking at what that framework is carrying.
And Pheno B is certainly giving us a reason to keep the camera ready.
She's stacking. She's budding. She's developing.
And she's looking ridiculously frosty!
😂❄️💙
## ❄️ THE FROST IS REAL, MY FRIENDS!
I know I keep saying it.
And I know I'm probably going to keep saying it next week too.
But LOOK AT HER!
😂😂😂
The close-up photographs show an incredible amount of detail across the developing flowers and surrounding sugar leaves.
And that's precisely why I enjoy taking the time to photograph these plants properly.
From a distance, you can appreciate the overall structure and the way the flowering sites are distributed.
Get closer, though, and there's an entirely different world waiting to be discovered.
The trichomes. The pistils. The tiny details across the flowers.
It's beautiful to see, and it's even more satisfying when we can document those details and compare them with the previous weeks.
And the best part?
Her sisters are looking just as impressive.
This isn't a story about one plant doing all the work while the others watch.
The entire tent is giving us something to appreciate.
But today, Pheno B gets the spotlight.
And she's absolutely shining! 💙🌸❄️
## 📸 PHOTO STACKING – 466 PHOTOS AND 600 PHOTOS COMBINED!
Now, let's talk about something a little different in this week's report.
The photography!
For this girl, we managed to create two separate photo stacks.
One combines 466 photographs, while the other combines 600 photographs.
And yes, my friends, that's a lot of photographs!
😂📸
We weren't able to take this plant out of the tent and move her into the studio setup, so we had to work with the conditions available to us inside the grow room.
It's not the same as stacking photographs in the studio, where we have much more control over the environment and the shooting conditions.
But we made it work!
And honestly, I'm happy with the results.
The two stacks give us a closer look at the flowers and allow us to appreciate details that can be difficult to capture in a single photograph.
More importantly, they give everyone following this diary a better view of what's happening throughout the flowering structure, including the lower portions of the buds.
Because the top of the plant isn't the whole story.
There's plenty happening further down, too, and I want to document as much of that development as possible.
These photographs are another way of bringing the community closer to the plants.
We can't all stand inside the tent together, so let's bring the tent to the community!
😂💙
And if you're interested in photography, this is also a nice opportunity to see what can be achieved through stacking hundreds of images, even when we're not working in a dedicated studio.
Are the results identical to studio stacking? No.
Am I happy with what we managed to achieve under the circumstances?
Absolutely!
Two stacks. Hundreds of photographs. One very frosty Pheno B.
I'll take that!
📸❄️🌸
## 🔬 WHY PHOTOGRAPH THE LOWER FLOWERS?
This is something I particularly wanted to highlight this week.
When we photograph a flowering plant, it's very easy to concentrate on the most accessible tops.
They're usually easier to reach, easier to frame, and often the first places our eyes are drawn to.
But the plant is a three-dimensional structure.
There are flowers at different heights, branches extending in different directions, and flowering sites that don't all sit in the same position relative to the main lights.
That's why I wanted to make these stacks available.
They help us look more closely at the flowers beyond the most obvious parts of the canopy.
And that matters for documentation.
We're trying to record the plant as a whole, not simply collect a few attractive photographs of the uppermost flowers.
The more detail we can preserve, the better we can appreciate the development we're documenting.
The stacks aren't a substitute for observing the whole plant, of course, but they're a fantastic addition to the diary.
And personally, I love having the opportunity to show everyone a little more of what's happening inside this beautiful ecosystem.
## 💡 MORE LIGHT FROM ABOVE – A SMALL BUT INTERESTING CHANGE
This week, we increased the power of the overhead LEDs.
We're now running the main lighting at the highest level we've decided to use in this 1 × 1 metre tent.
Notice the wording!
We're not necessarily running the equipment at its absolute maximum output. We're using the maximum level we've currently planned for this particular setup.
I honestly don't think we need to push everything to 100% just because we can.
The goal is to give the plants an appropriate amount of light while maintaining a balanced environment.
Light intensity is an important factor in plant development and flower production, but more light doesn't automatically mean more weight.
The response depends on how much light actually reaches the canopy, how the plants tolerate it, and whether the surrounding conditions remain suitable.
So we're increasing the available light without treating maximum output as the objective in itself.
And now we observe.
How will the flowers continue developing?
How will the plant respond to the additional light?
How will the environmental adjustments work alongside the lighting?
Those are the questions we're interested in answering as the project progresses.
We're not making promises about the outcome.
We're documenting the experiment.
And that's what makes this interesting!
💡🌿
## 🌡️ SLIGHTLY LOWER TEMPERATURES AND HUMIDITY
Alongside the lighting adjustment, we've also reduced the temperature by approximately one degree and lowered the relative humidity slightly.
We're making small adjustments rather than changing the entire environment.
The structure is established, the equipment is working, and we're happy with the overall direction of the grow.
So there is no reason to introduce unnecessary changes everywhere at once.
We want to maintain a comfortable environment while observing the plants as flowering progresses.
The increase in lighting power makes it particularly important to keep paying attention to the relationship between light intensity, temperature, humidity, and the plants' overall condition.
It's all connected.
And this is where I think a well-organized ecosystem really makes a difference.
You can adjust one part of the system while keeping the rest as consistent as possible.
That gives you a much clearer picture of what you're observing.
The temperature has come down a little. The humidity has come down a little. The lights have gone up a little.
And the nutrition?
Exactly where it was.
No need to change everything just because we've adjusted a few settings.
## 🌱 NUTRITION – KEEPING THE RECIPE CONSISTENT
The nutrient recipe remains unchanged this week.
We're continuing with the PLAGRON Hydro line, and we're keeping the same mixture in the reservoir.
Our current recorded recipe is:
- PLAGRON Hydro A — 2.2 ml/L
- PLAGRON Hydro B — 2.2 ml/L
- PLAGRON Power Buds — 1 ml/L
- PLAGRON pH Plus — 0.03 ml/L, recorded quantity
- PLAGRON pH Minus — 0.03 ml/L, recorded quantity
Hydro Roots is not part of the current recipe.
We're keeping the nutrition consistent while making the environmental adjustments, which means we're not introducing another variable into the picture.
The current recorded pH is 6.01, and the last recorded EC is 2.24 mS/cm.
Those readings give us a reference point, but we shouldn't automatically assume they're unchanged without taking fresh measurements.
For now, the important point is that the recipe itself remains the same.
We're observing the plants, maintaining the system, and recording what happens.
Consistency is part of the experiment too!
## 💧 IRRIGATION AND DRAINAGE – STILL PART OF THE BIG PICTURE
The automatic irrigation and drainage system continues to play an important role in this setup.
All four plants share the same reservoir, and the system allows us to maintain a consistent approach across the tent.
That's particularly useful for this project because we're documenting the individual plants while keeping the shared inputs as consistent as possible.
The irrigation system doesn't need to be the star of every report.
When everything is working as expected, that's already a positive result.
Our job is to keep an eye on the system, monitor the plants, and make adjustments when there's a reason to do so.
And that's the philosophy we're following this week.
Keep things running smoothly, avoid unnecessary changes, and let the plants continue developing.
💧🌿
## 🕸️ THE STRUCTURE IS READY – NOW THE FLOWERS TAKE CENTRE STAGE
Remember how much work went into creating this structure?
The topping and training.
The original SCROG.
The management of the flowering stretch.
The defoliation.
The second SCROG for additional support.
The changes to the extraction system and the available vertical space.
All those steps helped us reach the stage we're at now.
The plant has an established framework, and the support system remains in place.
We're not trying to redesign her this week.
Instead, we're observing how the flowers develop throughout the existing structure.
And this is one of the most satisfying parts of a long grow.
You make decisions weeks earlier, sometimes without knowing exactly how everything will look when the plant reaches flowering.
Then time passes.
The plant develops.
And eventually, you can stand back and appreciate the result of all that work.
That's what I'm enjoying right now.
The structure has done its job.
Now the flowers are telling their story.
## 💡 TWO LUMIFLORA FIXTURES – THE LOWER CANOPY MATTERS TOO
Our two LumiFlora 150W full-spectrum under-canopy fixtures remain part of the setup.
The main LEDs provide the primary lighting from above, while the LumiFlora fixtures supplement the lower portions of the canopy.
This is an interesting experiment because the plants have substantial vertical structure, and the light reaching different parts of the plant naturally varies with position.
We're interested in observing how the lower flowering sites develop as the plants progress through flowering.
We're not assuming that supplemental lighting will automatically produce a particular result.
We're watching, documenting, and learning.
And this week's photo stacks complement that experiment beautifully.
They allow us to inspect the flowers more closely and give the community a better view of the details we're observing.
The lights are one part of the experiment.
The photographs are another part of the documentation.
Together, they help us tell a more complete story of what's happening inside Project Blue Tent.
## F1 UNIFORMITY – THESE SISTERS ARE INCREDIBLE
And now we come back to something that continues to amaze me.
The similarity between these plants!
We have four individual plants sharing the same tent, with two different cultivars represented.
Blue Waffle F1 and Pickle Lemon Haze F1.
They're sharing the environment, irrigation, reservoir, and general cultivation approach.
And when I look across the room, the similarities in their development are genuinely impressive.
Similar overall structure.
Similar flowering progression.
And now, increasingly impressive flowers across the tent.
Of course, we're still keeping individual diaries because each plant deserves to be documented separately.
Even when two plants look remarkably similar, we shouldn't assume they'll remain identical throughout the entire flowering cycle.
The subtle differences are part of what makes these comparisons interesting.
But right now?
I'm extremely happy with what we're seeing.
And I have to say, Blue Waffle F1 Pheno B is absolutely holding her own.
Her sister looks incredible too, and so do the other girls.
Four plants. Two cultivars. One beautiful ecosystem.
What a pleasure it is to document this!
💙🌸
## 🌿 SOMETIMES THE BEST DECISION IS TO LEAVE THINGS ALONE
One of the biggest lessons from this stage of the project is that not every week requires a major intervention.
There was a time when we were constantly managing the structure, training branches, opening the canopy, and making room for the stretch.
Now, the main structure is established.
The support is in place.
The irrigation is running.
The nutrition remains consistent.
And the flowers are developing.
So we're making a few deliberate adjustments to the environment, but otherwise, we're allowing the plant to do what she needs to do.
There's always a temptation to change something simply because another week has passed.
But that isn't a good reason by itself.
If the system is working, sometimes consistency is the most valuable thing we can provide.
We observe.
We record.
We learn.
And we intervene when there's a genuine reason.
That's how I want to approach the rest of this journey.
## 🌸 CURRENT GROW CONDITIONS
- Cultivar: Blue Waffle F1
- Phenotype: Pheno B
- Flowering: Week 12
- Height: Approximately 145 cm
- Light schedule: 12/12
- Day temperature: 27°C, last recorded
- Night temperature: 27°C, last recorded
- Relative humidity: 59%, last recorded
- pH: 6.01, last recorded
- EC: 2.24 mS/cm, last recorded
- Solution temperature: 25°C, last recorded
- Substrate temperature: 24°C, last recorded
- CO₂: Approximately 666 ppm, last recorded
- Pot size: 8 L
- Watering volume: Approximately 1.6 L per plant per 24 hours, recorded value
- Main lighting: Increased this week to the maximum planned level for this tent
- Under-canopy lighting: 2 × LumiFlora 150W full-spectrum fixtures
- Nutrient program: PLAGRON Hydro
- Nutrient recipe: Unchanged this week
The environmental readings above are the last recorded values shown in the diary. This week's temperature and humidity were reduced slightly, but the new readings have not yet been provided.
## 🔭 WHAT I'M WATCHING NEXT
At this stage, my attention is on the details.
I'm watching the flowers continue developing.
I'm watching the pistils and the way the buds are forming.
I'm watching the overall appearance of the plant and the visible resin across the flowers and sugar leaves.
I'm interested in how the plants respond to the increased overhead light intensity and the slightly cooler, less humid environment.
And I'm particularly interested in continuing to document the lower flowering sites.
The two photo stacks have already given us a fantastic opportunity to look more closely at Pheno B.
I want to keep building that photographic record as the plant progresses.
Because every week adds another piece to the story.
And we're not finished yet!
## 💙 FINAL THOUGHTS – SHE'S FROSTY, AND HER SISTERS ARE TOO!
My friends, if I had to describe this week in a few words, I'd say:
Same room. Same environment. Same beautiful cultivar sisters. And a whole lot of frost!
😂💙❄️
Blue Waffle F1 Pheno B is looking fantastic.
The flowers are stacking.
The buds are developing.
The frost is beautiful.
The structure is established.
The nutrient recipe remains unchanged.
We've slightly reduced the temperature and humidity, increased the overhead LED power, and continued observing the plants without making unnecessary changes.
And we also managed to create two photo stacks, combining 466 and 600 photographs, giving us a closer look at the flowers and the lower parts of the buds.
I'm genuinely happy with the results.
It's not the same as taking the plant into the studio, but it gives us another way to appreciate and document the incredible details we're seeing.
And honestly, I think that's what matters.
We're working with the conditions available to us, finding ways to improve our documentation, and sharing the results with everyone following the project.
I also have to say how much I'm enjoying this entire ecosystem.
Four plants. Two cultivars. Shared conditions. Individual diaries.
The similarities between these girls are fascinating, and the flowers are becoming more impressive every week.
But today, Pheno B gets her moment.
And she deserves it.
We've done the structural work.
We've established the system.
We've made a few small environmental adjustments.
Now we're watching these beautiful flowers develop.
Let's see what the next week brings!
More flowers. More photographs. More observations. And hopefully, even more reasons to stand in front of the tent and say...
"MAN, SHE'S FROSTY!"
😂💙🌸❄️
## 🙏 A HUGE THANK YOU
A huge thank you to Zamnesia for making Project Blue Tent possible and giving us the opportunity to document these beautiful Blue Waffle F1 and Pickle Lemon Haze F1 plants individually.
Thank you to PLAGRON for the Hydro nutrient line supporting this project.
A massive thank you to Mars Hydro for the irrigation and drainage system helping us maintain consistency throughout the tent.
Thank you to Zamnesia for the Phytonaut LED lighting, curved scissors, and clip fans that have become important parts of this ecosystem.
And a special thank you to LumiFlora for the 150W full-spectrum under-canopy fixtures that we're using to explore supplemental lighting beneath the canopy.
Thank you to GrowDiaries for providing the platform where we can document the entire journey, including the experiments, the photographs, the unexpected moments, and the lessons we learn along the way.
And, of course, thank you to everyone following Project Blue Tent!
Your support makes sharing these individual diaries even more enjoyable.
We're continuing to learn, observe, photograph, and appreciate every stage of the journey.
Four plants. Two cultivars. One beautiful ecosystem.
And four girls giving us plenty of reasons to smile.
Growers Love, happy growing, and take care everyone! 🌱💙🌸


@Rinna
Follow
This was a wild ride. Gave way to many nutrients and I realised this way too late, when lock-ups already started to happen. The buds still look very potent, I just think they had way more in em size/potency wise if the nutrients would've been on point. Not growing auto flowers indoor anymore, but I'll deffo be growing this one outdoors this year! The smell is out of this world, #1 smells like tropical fruit juice, #2 more of a candy-sweetness but definitely tropical. Can't wait for ya'll to grow this one!


@Belivitez
Follow
15.9. Girls are insane! Contest girl have biggest, harder buds with more intense smell like others 🤤 all girls get just pure balanced water. There we have 2 different phenos of this strain.
Chop day is on next door 😁
22.9. Chop day!!! I found few mold spots but nothing serious 💪


@LittleBigTrees
Follow
This week I've been pulling the top fan leaves to stop the plant growing taller and to allow the side branches to catch up. I also started feeding them.
I will probably repot and switch to flower next week now they've all outgrown their mutations.


@Chubbs
Follow
420Fastbuds
FBT2310/Week 6
What up growmies. Weekly update on these beautiful ladies. This week we've had some temperature swings and wow did they not like getting down into the high 50's. They both bounced back but won't be letting it get that cold again if I can help. Flower sites are all over with pistols. No signs of any major issues so will keep the same routine. All in all Happy Growing


@RDWCGrowing
Follow
12/25/2023-Germination Day 1
Merry X-mas 2023 I decided to start a run of SolFIre Gardens Hoodz Candyz S1. I am going to do a cup filled with RO water a touch of Hydrogen peroxide and let it sit for 24-48 hours until I see tap root then I am going to put it into a rapid rooter.. Tap root Down and put it about 1/4 of the say down the Rapid rooter.
I made some modifications to my basket on this run.. I have taken a few Pods that I use for my cloning machine and decided that I am going to try and use them as sure plants, so that I can take my water right up to the bottom of the basket this time and see if these can make my planting more consistent.
12/26/2023-Germination Day 2
Tap root achieved Planting Commencing
12/27/2023-Germination Day 3
Misted the dome lightly misted the rapid rooter and added a little water to the bottom of the pan to encourage root growth to the pan.
12/28/2023-Germination Day 4
Ground Hogs day
12/29/2023- Germination Day 5
She is up, she has broken surface, I misted the root riot, and around the bottom of the tray to try and entice root growth down rapidly.
12/31/2023- Germination Day 6
Ground Hogs Day
1/1/2024-Germination Day 7
HAPPY NEW YEARS!!.. I did it I planned it out so my planting day would fall on New Years and it worked.. Yay!!!
1/2/2024- Germination Day 8
Since the roots are not to the water yet, I am pouring one cup of water lightly on the hydroton around the lady to try and encourage root growth down to the water..
1/3/2024- Germination Day 9
Ground Hogs day, will continue until roots hit the water.
1/4/2024- Germination Day 10
Ground Hogs day, will continue until roots hit the water. I will just continue to top feed until roots are in the water.. Shouldn't be more than a few more days.
1/5/2024- Germination Day 11
Ground Hogs day, will continue until roots hit the water. I am going to change the water Sunday and kick off Week 1, I will just continue to top feed until roots are in the water.. Shouldn't be more than a few more days.
1/6/2024- Germination Day 12
Ground Hogs day, will continue until roots hit the water. I will just continue to top feed until roots are in the water.. Shouldn't be more than a few more days.
1/6/2024- Germination Day 13
Ground Hogs day, will continue until roots hit the water.
1/7/2024- Germination Day 14
Ground Hogs day, will continue until roots hit the water.


@Dickeknolle420
Follow
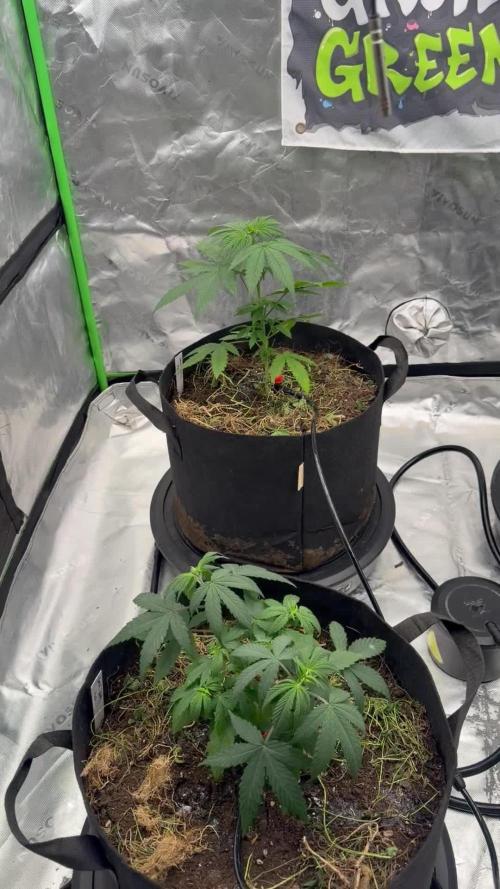
Also ich muss sagen, dass die nicht getoppten, mir bisschen besser gefallen, weil ich denke sie sich voll entfalten können. Das werde ich sogar evtl. beibehalten.


@valiotoro
Follow
Hello everyone 😎
Week 5 of flower for the Tropi🌴🍪
The top buds are ready✂️
Harvest in 2-3 times…
Amazing buds solid as a diamond 💎
It’s not easy to get this result with an autoflower.
Exactly what I’m looking for and this is why I love so much Fast Buds🤩
And when you get this result the trim is easier😁


@CanadianFillmore
Follow
Welcome back growfessors to another episode of growfessor theatre!
Week 6F begins for the ladies of the 4x8, they continue to bulk up, frost-up, sticky and they got that good stank! The ladies are hungry! Going from 4 liters of nutes + water per plant, to 6 liters per plant per week (extra feed started on week 5). They get 4 liters at the beginning of the week and then 2 more liters on day 5 of the week.
Well that's all for this week, I hope you enjoyed the show growfessors 👽🌳💚


shorts_status_processing


@Kelly420
Follow
She has shown her first couple hairs , not sure if with autos if that starts week one flower but I'll continue veg until I see more than just a couple, then moab or sonic bloom to week one flower. I've used moab and sonic bloom and I can't tell which is better honestly. Thinking of making my own just without the extra b1 they put in.


@Shaunofthedank
Follow
Plants responded well to topping/fimming. They all have 4/6 main stems. Training them to get a bit of a canopy going. Cookies kush is def a keeper. Gonna try clone it. My clone games weak though.


@PinonAraucano
Follow
The flowering started! I'm very excited to see those first little white "hairs" in my plants. Everything is going well, the stems are getting thicker and flowers are groing very fast. I'll keep you all updated with this, send me good vibes!


@OilyEliteOrganics
Follow
Took a sample out and it was very smooth and sweating .
Smells great is growing very flush .
Dense fluffy buggy flowers.
Purps all over as a natural color.


@YouCannaBlowMe
Follow
Seems to be taking well to being moved to the 5gal pot. Growing a lot faster after the 2nd day in the bigger pot. Watered for the first time since planting in big pot after 5 days with 1L distilled water (Ph 7) mixed with 1/2 tsp. fox farms grow big and 1/2 tsp. big bloom. Since my soil is considered hot soil I wanted to use less than the recommendation on the bottle.


@DaddyPrime2
Follow
9/22 topped them at 4th node. some of them are looking better for mainlining that others. some of them i may not mainline and others i left an extra node in case i want to keep clones around.
#1 is looking happy with the topping and looks really good.
#2 is the only one thats been praying and is the tallest and strongest looking all around.
#5 short and such tight internodal spacing that it makes it hard to see whats all there. just looks like a bunch of small leaves until they grow out. i may not mainline this one either be cause of it being so tightly packed it may make it
9/27/24
day 20 theyre growing quite well. #1 i ended up taking the bottom nodes. i was originally goi g to use them as clones later on but decided to just let her go with her 4 nodes. #5 is so tightly packed, she has like 8 mains all in such a small space, its hard to even make sense of it all.




@Bread_n_Buds
Follow
Our Permanent Markers are promising and we can't wait to taste one of the most famous strains of the moment.
Remember that we are growing 1 Plant worked with the techniques and one left to grow without cutting techniques only with a little LST.
She has been in bloom for two days, we consider these days vegetative and from the next we will narrate the exploits of the buds that form.
Comparison is the salt of experience so the plant in the other diary will be worked very differently go and see it to compare them.
We have started the Plagron fertilization program, we are in 100% organic configuration, the soil is recycled Promix + 1/3 fresh soil + 10% Perlite + RQS Mycorrhiza Mix (4 g in the mix, 1 g under the small fiber pot).
We are administering // 1 ml/l Power Roots - 1 ml/l Pure Zym - 1 ml/l Sugar Royal - 3 ml/l Alga Grow
We sprayed Vita Race Foliare 3 ml/l.
https://plagron.com/en
The doubts about the compatibility between Pure Zym and mycorrhizae have been dispelled, they can get along according to Plagron experts. If someone tells you that enzymes eat mycorrhizae, which in principle may seem possible, explain to them that it is not true.
https://www.royalqueenseeds.it/growing/452-easy-roots-mix-di-micorrhize.html
Try this variety, it is a top strain of recent years very high level of thc ---- // https://www.zamnesia.io/it/12508-zamnesia-seeds-permanent-marker.html
Brief description of Zamnesia // Here is a good opportunity to enrich your genetic library with another award-winning variety: Permanent Marker was crowned Strain of the Year 2023 by Leafly, thanks to its intense aromas, high levels of THC and its physical vivacity. Originally created by JBeezy and Seed Junky Genetics, our team managed to secure a cutting of this modern top cultivar, so you can grow it comfortably at home, whether indoors, outdoors or in a greenhouse. Permanent Marker fits perfectly in any environment!
--- // www.zamnesia.com





@gottagrowsometime
Follow
Welcome to my Ganja Farmer contest grow. Drop a like if you want me to drop by your grows. Either way thanks for dropping by
She's doing really well. Would like for her to have bigger buds. Should of started flowering her under my P1000.
She has a lovely structure and some nice colors showing up on the buds which seem to be getting nice and dense
20/6/22 she's doing really well. Growing nice and strong. This time I think I'm going to have to do bud washing as the hair is just beyond a joke now. I'm going to do a deep tent clean this week. Just waiting on some stuff and I'm going to get my tents in order.
Plant is at to getting struck down with what I'm nearly sure is iron defs. Found 1 to 2 leafs starting out yellow with green vains.
Let the soil dry out after a few watering and gave them a boost of Iron (fe). (Have put up a video and focused partly on showing a light iron def. This leaf showed up like this 4 days ago. Took me a day to dry out the soil so it was a little harder to notice) but if I hadn't of fixed you'd of seen what looked like a N def (a yellow leaf with green vains) hope this video helps to help u. Feel free to DM me if you need me to go into any fixes
24/6 Have installed my new AC intake unit, it's more of an AC unit the way I have it set up. I have it outside the tent. And have a negative pressure environment. So, if I can drop my outside temp then in turn the inside temp will drop. There's no point in having it set up inside with the lights off as the RH will go sky high with no exhaust set up as that would defeat the purpose of having AC in an unsealed tent setup. Be good though when I want to grow with co2 this beast will have no issues keeping the temp in check. It's doing my whole top floor. Yeah, it's struggling. Have it set at 20% but it won't drop to 20% until you reach the temp you have it set at. It was 31.5 brought it down to 27.5 in 15mins and that's a top floor in a 3 bed big bedroom house. Id say it would work quicker with the door closed but my RH will only go high and I'd have to run my Dehumidifier and that well, raise the temp. Going to see what happens by dropping the temp to 24c when the air around the pre attached probe goes down to 24 it will go to the % you have it set at. But until then, (you reach the temp) it runs at full steam. It has brought the temperature down 2.8-3c in 15mins.
Update. My AC unit intake is nothing but a big ass temp controlled intake, not control temperature. It does help draw up cold air from an extended 10m ducting so I can get 18c air if I want. Just gotta run big ass ducting threw my house. Just until I can punch a hole up into my attic. It runs 16c up there. But I'll need a filter 1st and then I can drop temps rapidly. Looked into an AC unit. They are affordable. A 7000 Btu unit would do my grow room. Runs at 800watts an hour but you have to hook it up to a window. My air outside at night is that temp so I'd be better just running poxy ducting from my attic using this powerful 110watt intake.
It'll be great for air flow with co2 growing. I'll hook it up from the bottom to the top and run the ducting either side and let the unit sit on top of the tent. It's so powerful won't need any fans. Just co2 and high ppfd which I have now.
Thanks for reading this week.
gottagrowsometime
