
Likes
2
Share
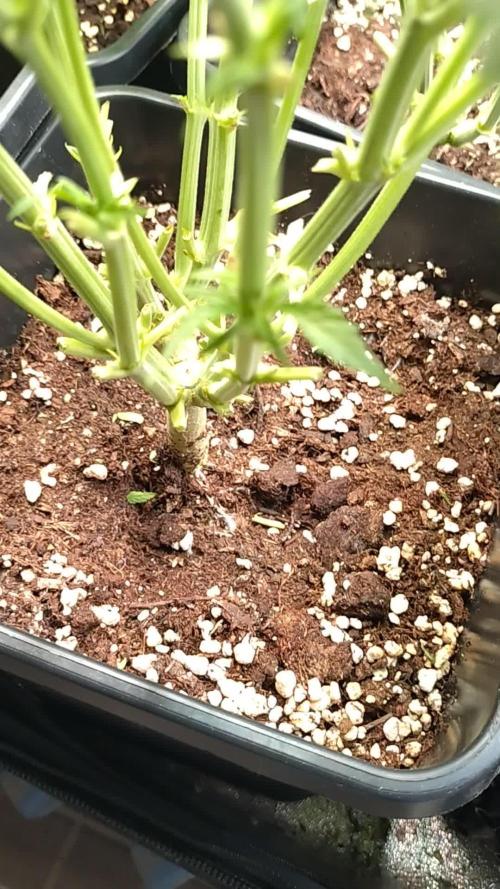
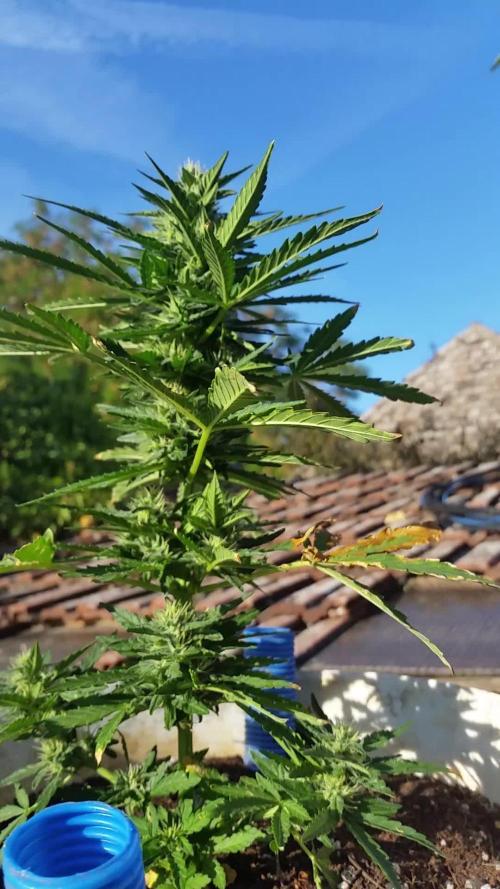
🌱 Week 3 | Godfather OG – Pheno A | Building the Foundation Week three marks another exciting step forward for this Godfather OG phenotype. While some of her sisters are stretching with a little more enthusiasm, this lady has chosen a different path. She remains naturally compact, stacking tight internodes while producing broad, healthy foliage and vigorous new growth. One of the goals of Project Blue is to discover each phenotype’s individual personality, and this plant is already showing exactly that. Rather than reaching for height, she is focusing her energy on building a sturdy framework that should provide an excellent foundation for flowering later on. The growing environment remains extremely stable, allowing the plants to develop without unnecessary stress. Daytime temperatures averaged around 27°C, dropping to 25°C during the night, while relative humidity stayed close to 55%. Root zone temperatures remained stable at 21°C, nutrient solution temperature at 20°C, with pH carefully maintained at 6.0 and nutrient strength increased slightly to EC 1.3. CO₂ levels averaged approximately 666 ppm, and lighting continued under the 12/12 From Seed schedule, delivering roughly 600–700 PPFD, adjusted according to each plant’s individual height. Nutrition continues to follow the Plagron Terra program, providing everything needed for healthy vegetative growth. This week’s feeding consisted of: • Terra Grow — 1.8 ml/L • Power Roots — 1 ml/L • Pure Zym — 1 ml/L • Sugar Royal — 1 ml/L The gradual increase in EC has been met with an excellent response, with healthy leaf colour, vigorous growth and no signs of nutrient stress. This week also introduced the first stage of canopy management. Rather than using aggressive training techniques, I simply began gently bending and repositioning a few large fan leaves to expose the developing secondary branches underneath. This subtle approach allows more light to reach future bud sites while letting the plant continue growing naturally with virtually no recovery time. This Godfather OG appears naturally suited for a bushier architecture, so encouraging those lower branches now should help create a fuller canopy as flowering progresses. Overall, she continues to look exceptionally healthy, with strong branching, thick stems and lush foliage. She may not be the tallest girl in the room, but she’s quietly building what could become an incredibly productive structure in the weeks ahead. As always, a huge thank you to Plagron, Zamnesia, GrowDiaries, and everyone following along on this Project Blue journey. Mr. Baggy completed another careful inspection of the canopy and is pleased to report that this queen has officially passed quality control once again. Growers Love 🌿🛍️
Likes
11
Share
@Tuki3
Follow
Buenas gente, vienen tomando buena formita los cocos! muy contento con su aroma como ya he mencionado, y ahora que estamos arrancando las 6ta semana se empieza a ver la parte mas linda (a mi parecer) que es el engorde.. es esa semana crítica donde uno piensa que los cogollos se estancaron, que algo le pasó, y ahí es cuando aguantas 2 o 3 días más, y te das cuenta que empezó a engordar 😍😍😍😍 Veremos estas semanas como sigue!
Likes
14
Share
@Mr_Pgrow
Follow
Part 1 of a video project I give myself for this run. And wow ,I'm absolutely loving this grow. The girls are preforming brilliantly with the training, although the Forbidden Runtz excelled with LST more so then the StrawNana, she is more bushy and compact, which made it quite tight in the 2x2 grow tent, but not overcrowded. I'm just a grower, who just loves growing. My passion was vegetable gardening, but living arrangements are different now and can no longer have a garden..... but it has opened up the possibility of indoor cannabis growing which wasn't a option for me before. My medium is a make up of reamended soil from my last run, to make my 25% supersoil base, 65% complete organic compost and topped off with 10% light seedling soil. I also fed a compost extraction once a week from WEEK 5 and they always responded brilliantly. I used the chop and drop technique when I defoliated which my worms seem to love and also used the compost feed for my compost extraction as a mulch layer every week after the feed, which covered the defoliated leaves. Thank you very much for dropping by, I hope you enjoy my videos. Please give a like if you did and I'll return the favor 🙏 Part 2 to follow shortly. Stay blessed Growmies 🌱Mr.PersonalGrow 🌱✌️
Likes
12
Share
@Daviz_42
Follow
Como podemos ver ya todas están para el corte o casi, en algunas tendré que seleccionar el pheno, ya que hay alguna que me gusto más que la otra, en general un terpeno muy diferente en cada variedad y también la calidad de la resina, en general mucha resina, pero por ejemplo he podido observas que los tricomas de la Gorilla Melon son más grandes y se oxidan de una manera más lenta, ideal para hacer extracciones, en cambio, la Reinbow Melon .... ese terpeno dulce intenso tanto que es hasta abrumador...me muero de ganas ya de probarla... la Lemon Mandarín es exagerado el olor que tiene a mandarina si cierras los ojos y ueles fuere parece que te vayas a comer una buena mandarina y la Paya Sherbet tiene un olor dulce y muy agradable, pero nada que aún pueda relacionad del todo..... un saludo y buenos humos fam.
Likes
7
Share
@gablmo
Follow
I finally turned 600 watts on, would love to get comments from you folks, so clueless here. If you see something wrong, please let me know.
Likes
16
Share
Lst wurde über die vegi weiter ausgeführt, Dünger anwedung ungefähr 60-70 % laut Tabelle.
Likes
13
Share
@Roberts
Follow
Mintz Runtz automatic is doing good, I should of changed the solution last update, but I did today. She is starting to form her colas, hopefully she stretches more so I can turn on the Saturn under canopy light. Everything is looking good for the most part. Thank you Elufah, Spider Farmer, and Spliff Seeds. 🤜🏻🤛🏻🌱🌱🌱 Elufah (Power by Growpros solutions) UAP1500,Die-cast radiator and featuring an optical lens design(Uniform PPFD),150W,PPE3.0μmol/J,PPFD1500umol/s/m²,Use the verified commercial-grade spectrum;Full/Epar Boost Spectrum adjustable,A very excellent grow light; By entering the discount code, you can enjoy an additional 10% price reduction when making the purchase. Amazon discount code:SAVEURCASH10 product Link:https://a.c1ns.cn/uap1500 Thank you grow diaries community for the 👇likes👇, follows, comments, and subscriptions on my YouTube channel👇. ❄️🌱🍻 Happy Growing 🌱🌱🌱 https://youtube.com/channel/UCAhN7yRzWLpcaRHhMIQ7X4g.
Likes
17
Share
@4chuk
Follow
Jan. 1 - Happy New Year!!! Week 13 begins. Jan. 7 - Going to cut her down today or tomorrow, the trichomes told me to.
Likes
2
Share
🌱 **Week 8 of my Orange Bud Car - An incredible trip! **🌈 We have reached the **eighth week** of growth of my beloved Orange Bud Auto and, let me tell you, the route was nothing short of extraordinary! 🚀 ### 🌞 **Wedding light with PHLIZON FD8000! ** 💡 In this crucial phase, the **1000W** PHLIZON FD8000** lamp proved to be my best ally. 🌟 Thanks to its power and full-spectrum lighting, I noticed a significant increase in the rate of photosynthesis. My plants have developed wider and healthier leaves, with an intense green that makes them shine like precious gems! 💚 ### ⚡ **Heat Management: The key to success! **🔥 One thing I learned is how important heat management is. Thanks to the good balance of the temperature that the PHLIZON manages to maintain, I had no problems with overheating. I set the lamp at a distance of **60 cm** from the plants and used a strategic fan to maintain perfect air circulation. My friends wouldn't believe me, but I almost heard the plants applaud for the freshness! ### 🌿 **Nutrition: the secret of health! ** 🥇 Let's move on to the **nutrition** chapter! The **Advanced Nutrients** line has really transformed my cultivation routine. In particular, the **Cal-Mag** played a crucial role in addressing any nutrient deficiencies. I have administered Cal-Mag during the last few weeks, noticing a noticeable improvement in the appearance and robustness of the leaves. 🌳 They look sleek and vibrant, and my shoots look more vigorous than ever! 💪 ### 🔄 **Set up upgrade: a choice that paid off! ** ⚙️ Speaking of changes, my recent set up upgrade had a significant impact. I replaced the old fans with quieter and more efficient models, ensuring the right air flow without disturbing my evening relaxation in the grow room. And if you're wondering if the cost is worth the candle: absolutely yes! ✨ ### ❓ **Request for advice: control units for temperature control! ** 🛠️ At this point, I turn to you, illustrious growers! I really need some suggestions on **temperature control control controls**. I'm considering different models to handle fans, extractors and heaters, but I want something that works well and, of course, that is reasonable in price. What experiences have you had? Share your pearls of wisdom! 💬 ### 🌼 **Looking to the future! ** 🔍 I am extremely curious to see how the growth of my plants will continue in the coming weeks. The buds are beginning to form, promising a harvest that promises to be spectacular. The energy is palpable and I can't wait to document every step of this trip. 🌿✨
Likes
47
Share
Day 22 - Rolling into week 4 looking mean and green! 💪 I need to make a decision on what kind of training I want to dish out to this lady. She's growing a bit faster than her tent mates. Day 23 - Always experimenting - today I begin my first mainline! I've already built the foundation by allowing the plant to grow to 6 nodes, as recommended by the tutorial I followed by the brilliant Miss Nebula Haze @growweedeasy. My next step is documented here in a video, as I take my lush, happy, healthy plant, and give her the kind of haircut that makes you want to storm out of the salon without leaving a tip. 😂 I even managed to get in my signature branch snap early in the game - being held together now with duct tape. 🤦‍♀️ In all seriousness though, I'm thrilled to be trying this out, despite the agony of cutting down my plant to nothing but a stump and antennae. I've seen some great growers create some serious masterpieces using this method, and damn it my curiosity is taking control! Here's to learning something new! Day 27 - Came home from vacation to find that my plant had hulked through the duct tape that held her snapped branch together... I guess she's doing well. ☺️ Over the course of the past few days her branches have gotten notably thicker! 💪 Day 28 - Now that each new main stem has grown out, I removed all the growth tips from below the 3rd node on each side. I left the fan leaves in tact to give plant access to extra energy as she pushes through this intense training. I softened the branches with my fingers, very slowly, to tie down my new main stems horizontally across the net basket. I took a sterilized x-acto knife to then top each of my two main stems at the 3rd node on each side, leaving me with a beautifully symmetrical base to my masterpiece.
Likes
7
Share
@Bills1995
Follow
Added co2 to tent, added molasses and big bloom to nutrients for pyramid purples. Looking to veg For one more week. Reminder my diary is from seedling so veg is more like 6-7 weeks instead of 8. STAY TUNED. Youtube search “ nugg man95” need ideas for videos!!
Likes
6
Share
Legend Timestamp: 📅 EC - pH: ⚗️ Temp - Hum: 🌡️ Water: 🌊 Food: 🍗 pH Correction: 💧 Actions: 💼 Thoughts: 🧠 Events: 🚀 Media: 🎬 D: DAY, G: GERMINATION, V: VEGETATIVE, B: BLOOMING, R: RIPENING, D: DRYING, C: CURING ______________ 📅 D57/B20 - 11/06/24 ⚗️ EC: 1.0 pH: 6.1 🌡️ T: 25°C H: 70% 🌊 🍗 💧 💼 🧠 🚀 🎬 1 TL video ______________ 📅 D58/B21 - 12/06/24 ⚗️ EC: 1.0 pH: 6.4 🌡️ T: 25°C H: 80% 🌊 8 L 🍗 Calmag - Bloom A-B 💧 💼 🧠 🚀 🎬 1 TL video ______________ 📅 D59/B22 - 13/06/24 ⚗️ EC: 1.2 pH: 6.6 🌡️ T: 25°C H: 70% 🌊 🍗 💧 💼 🧠 🚀 🎬 1 TL video ______________ 📅 D60/B23 - 14/06/24 ⚗️ EC: 1.0 pH: 5.8 🌡️ T: 25°C H: 70% 🌊 15 L 🍗 Calmag - Bloom A-B - B52 - Big Bud - Bud Candy 💧 💼 Spinosad and pH- 🧠 🚀 🎬 1 TL video ______________ 📅 D61/B24 - 15/06/24 ⚗️ EC: 1.0 pH: 5.8 🌡️ T: 25°C H: 70% 🌊 🍗 💧 💼 🧠 🚀 🎬 1 TL video ______________ 📅 D62/B25 - 16/06/24 ⚗️ EC: 1.0 pH: 5.5 🌡️ T: 26°C H: 80% 🌊 🍗 💧 💼 🧠 🚀 🎬 1 TL video ______________ 📅 D63/B26 - 17/06/24 ⚗️ EC: 1.0 pH: 5.2 🌡️ T: 26°C H: 80% 🌊 🍗 💧 💼 🧠 🚀 🎬 1 TL video
Likes
2
Share
@Trinidad
Follow
21th.05.2025. Day 21 Moved the two survivors into 2x2. The roots are getting big. I need to put them in final bucket soon.
Likes
92
Share
Week 5 Veg Report: SCROG Netting, Massive Leafs & Precise Data Mastery! 🌱 Girls Growing Stronger Than Ever! 🌱 This week has been truly epic in the grow room—so much so that it’s time to bring in the SCROG net! With the canopy expanding and the younger ones still working to catch up, the SCROG net will help me achieve that perfect, even canopy. A well-placed SCROG not only ensures better light penetration but also gives the smaller plants a chance to spread out and thrive alongside their bigger sisters. Now, let’s dive deep into the SCROG method. The Screen of Green (SCROG) technique is a grower’s secret weapon for maximizing space, light efficiency, and yields. The concept is simple but powerful—train the plants to grow horizontally along the net, forcing them to expose multiple budding sites instead of just a single cola. This way, the canopy spreads evenly, improving light distribution and air circulation throughout the tent. As the plants grow, I’ll gently weave their branches through the screen, ensuring they fill every square inch of space. The end goal? A sea of buds all basking in equal light! 💪 Huge Leafs Everywhere! 🌿 One thing that’s really catching my eye this week is the size of the leaves—they’re HUGE! Honestly, they’re so big I couldn’t resist a little fun, so I made myself some fashion accessories: leaf earrings and a cap from the Super Sativa Seed Club Green Papaya! 😂 And, of course, I captured the moment. But seriously, large leaves at this stage are a great sign of healthy, robust plants. These “solar panels” are hard at work soaking up all the light, driving photosynthesis, and fueling growth. So, what does it mean when your plants are showing off big, luscious leaves? It’s a clear indication that they’re happy, healthy, and thriving in their environment—big leaves mean lots of energy being produced and stored for future bud growth. Exactly what we want! 💧 Precision Feeding with Aptus Nutrients 💧 This week, I took a deep dive into my Aptus nutrient lineup and shared a video explaining how each product affects the water’s pH and TDS. Using the AMP-3 Precision Meter, I’m getting real-time water readings and keeping everything dialed in perfectly. Let’s break it down: • pH: 5.83 • TDS in solution: 445 ppm • Water temperature: 25.2°C The Aptus products are incredible for balancing nutrients without throwing off the pH or TDS too much. I’m fine-tuning my feedings based on these readings to make sure the girls are getting exactly what they need. The precision I’m able to achieve with the AMP-3 is mind-blowing—I get immediate feedback on pH, temperature, and EC, allowing me to make real-time adjustments and ensure the perfect environment for nutrient uptake. 📊 Environmental Mastery Thanks to TrolMaster 📊 Speaking of control—let’s talk about the TrolMaster system! Between the DSH-2U Humidity Station and all the other sensors, I’ve created the perfect environment for my plants. Here’s where we’re at this week: • Temperature: 26.2°C • RH: 70.6% • CO2 levels: 775 ppm • VPD: 1.0 kPa • PPFD: 423 Thanks to TrolMaster, I can monitor and adjust these metrics in real time, and the best part? I can do it all through the TM+ Pro app, even while I’m lounging in my green papaya leaf hat! 😆 Whether I’m checking the CO2 levels, adjusting the lights, or fine-tuning the humidity, it’s all in my hands with just a tap of my phone. Talk about convenience! 🌱 P.S. – Inline Sensors: Heavy-Duty Precision 🌱 Now, let’s talk about the heavy-duty players in this game—the (PCT-2) Heavy Duty Inline EC/Temp Sensor and the (PPH-2) Heavy Duty Inline pH Sensor. These bad boys are connected directly to the AMP-3 Precision Meter, and they’ve been absolutely crucial in giving me the most accurate readings on my water and nutrient solution. The PCT-2 keeps me informed about the electrical conductivity and temperature of my solution, which is key for monitoring how well my plants are absorbing nutrients. Too high or too low, and we’re asking for trouble, but this sensor ensures I’m always in that perfect range. The PPH-2, on the other hand, is all about maintaining the perfect pH balance. A fluctuating pH can mean nutrient lockout or deficiencies, but thanks to this sensor, I get a constant read on my pH levels, so the plants are always in their sweet spot for optimal nutrient absorption. Together, these inline sensors allow me to run a super-tight ship—every drop of water and nutrient is dialed in to perfection, keeping the plants happy and healthy! Shout Outs! As always, huge thanks to TrolMaster and ThinkGrow LED for the amazing gear, to Aptus Holland for their top-notch nutrients and Pro-Mix for the best soil i have used so far. Big love to the seed banks, the amazing Grow Diaries community, and all my followers—you guys make this journey so much more exciting. Don’t forget to catch up on my social media, Instagram, and YouTube for real-time updates and exclusive content! Stay tuned for more—next week is going to be epic! DogDoctorOfficial Discount Codes so you can save big on your next check out 💚💚💚 Kannabia - DOGDOCTOR 30% off SeedsmanSeeds - DOGDOCTOR 10% off CannaKan- DOGDOCTOR 15% off terpyz.eu - DOCTOR 15% off The Neutralizer - PORKIT5-DOG 15% off Growers Love to you all 💚💚💚
Likes
6
Share
I cut another part of the girls, and the total is even greater than the first part! We wait another week for the final sums, but right now the flavor is unique.
Likes
3
Share
Put the seed in a Paper towel and in a Tupperware. Put the Tupperware in tent ON TOP of the lamp. They popped after 15 hours! Super fast. Ladies and Gentleman LET'S GROW! 🤙🏽
Likes
36
Share
Welcome to my Fast Buds sponsored shootout and living organic soil v coco side by side. I also plan to use this grow to my full advantage regarding a few age old nagging questions about methods. I have had a keen interest in L.O.S ( supersoil) since reading a few threads a while back on how amazing and productive it can be. After too much research and procrastinating I had to give it a go. I have been a decades coco/nft grower and recently threw my hat in the rdwc ring too. I have avoided soil due to the overwatering worry ( heavy handed chimp brain !) and the best potting soil/feeds. Catching up on the advances in indoor soil gardening and organics led me too subcools supersoil recipes to name a few but being a town dweller with farms everywhere around me still drew blanks on a lot of the ingredients needed and where the hell I could even begin to get them from. Thankfully , commercial savvy has now made buying it in ready to use and with a full range of beneficial bacteria ect available in amendments from a grow shop here in the uk. ecothrive have realised the potential for us to dive into this medium with all the mixing , measuring and resourcing. I bit the bullet and £150 later I now have 4 x37Litre pots that will be used for as long as I want to feed the soil for without EVER needing nutrients again potentially. The coco has also had charge mixed in to encourage the bennies to colonize there too. I will be using the shogun nutes that I know do the business with coco to compare with for yield , growth and taste. I have 3 seeds each of 4 Fast Buds Strains to use as a control for the grow and am journaling each strain in their own diaries. This statement will be used to start each one as the information is identical at this point but following this I will do them individually. I am now starting their second week since opening the seed packets , straight into soaked and shook root riot cubes and into the heated propagator. They had all showed their heads by end of day 3 and a couple needed helmet surgery to open up without being hindered . I have has them in the prop for a few days but they needed to get settled as they were popping roots out all over the cubes. They have now been in their final pots for 2 days complete and starting their 3rd today at day 8 since planting in cubes. I am impressed with the speed and success of these girls already (12 of 13 germinated) . Well done fast buds. So here we go folks , any comments , ideas ,questions , advice are always welcome and I hope we can have some fun experimenting with defol v non defol , topping v fimming v bending and any other curiosities along the way. I plan on using a quadline for them all to keep a control for the comparisons too. Be green folks Welcome aboard and a huge thank you to Fast Buds for the opportunity to try autos.
Likes
12
Share
been a decent week for jorges diamonds shes having a good stretch now branches getting thicker nice tight node spacing will be removing calmag and silicon this week giving a flush and then start with some buddy thanks for reading happy growing guys