


Likes
Comments
Share

@DogDoctorOfficial
Follow
🥒 Project Blue Tent – Week 7
Pickle Lemon Haze F1 – Pheno A (Folder 14A)
Hello everyone, and welcome back to another chapter of Project Blue Tent! 💙🌱
If you're discovering this diary for the first time, welcome aboard!
Project Blue Tent follows four individual plants, each documented in its own dedicated diary from seed to harvest.
All four plants share the same environment, lighting, irrigation system, nutrition and training strategy. By keeping as many variables identical as possible, we can observe something particularly interesting:
How much personality can an individual phenotype still show when everything around it remains the same?
Every plant has the same opportunity.
Every plant receives the same care.
Yet somehow...
They still manage to tell their own story.
Today we're checking in with Pickle Lemon Haze F1 – Plant A.
And this week marks a pretty important moment in her story.
The canopy is full.
The structure is ready.
And we're preparing for the final step before flowering.
────────────────────────
🌱 Week Seven – From Building to Preparing
For the last several weeks, the entire focus has been on building the canopy.
We topped.
We trained.
We installed the SCROG.
We guided branches through the screen.
And slowly, square by square, the empty spaces disappeared.
Now the Blue Tent has reached the point where the plants have essentially done their job.
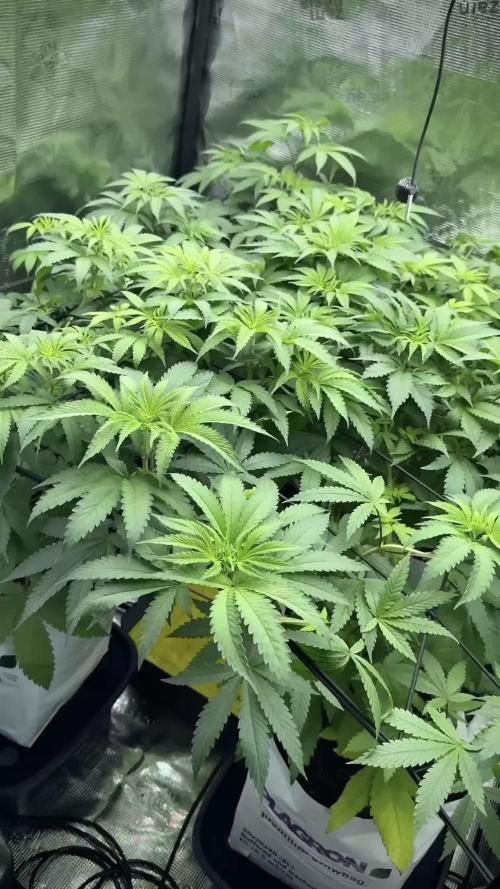
Looking from above, the canopy is remarkably even.
All four sisters are sitting at approximately 60 cm, and because the SCROG net was lowered and tightened earlier in the grow, the majority of the new growth has been directed horizontally rather than vertically.
That was the objective.
Not taller plants.
More usable canopy.
And Plant A has done an exceptional job filling her allocated space.
Her foliage is rich green, her branches are strong, and the amount of healthy growth packed into that screen is impressive.
But there comes a point where adding more foliage isn't necessarily the goal anymore.
Now we need to prepare what we've built.
────────────────────────
🕸️ The SCROG – Mission Accomplished
The SCROG has been one of the most important techniques we've used during this vegetative cycle.
For anyone unfamiliar with it, SCROG means Screen of Green.
Instead of allowing the plant to develop a few dominant vertical branches, we repeatedly guide the growing shoots underneath a horizontal screen.
As each branch moves through the screen, we can distribute the future flowering sites across a much larger area.
The result we're looking for is a relatively even canopy rather than several tall branches competing with one another.
And this isn't something that happens in one afternoon.
It's a process.
A little tuck here.
Another branch redirected there.
A few minutes of observation every day.
Eventually, the plant does most of the work itself.
This week, looking across the Blue Tent, that process has reached its goal.
The screen is effectively filled.
And that means it's time for the next stage.
────────────────────────
✂️ Defoliation – Cleaning the Canopy Before Flower
This week's main event is defoliation.
And because this technique is sometimes misunderstood, I want to explain exactly what we're doing and, perhaps more importantly, what we're not doing.
Defoliation is not simply removing leaves because we don't like seeing them.
Leaves are essential to the plant.
They're responsible for capturing light and supporting photosynthesis, so removing them unnecessarily doesn't automatically make a plant healthier.
The objective here is different.
After weeks of vigorous vegetative growth and SCROG training, the interior of the canopy has become extremely dense.
Leaves overlap.
Branches cross through one another.
Lower sections become increasingly shaded.
Air movement through the middle of the plant becomes more difficult.
And some foliage is simply contributing less to the productive upper canopy.
So we're performing a deliberate cleanup.
Removing selected leaves.
Opening congested areas.
Improving visibility.
Creating more space between branches.
And preparing the structure for the very different demands of flowering.
The goal isn't:
"Remove as many leaves as possible."
The goal is:
"Remove what isn't helping the structure we're trying to build."
────────────────────────
🌬️ Why Defoliate Now?
The timing is just as important as the technique.
A significant defoliation is a form of stress.
Even a perfectly healthy plant needs time to respond after losing a meaningful amount of foliage.
That's why we're doing this while the plants are still in vegetative growth rather than waiting until we're well into flowering.
Right now they're running 18/6.
They're actively growing.
They're not yet trying to produce flowers.
So if the plants need a little time to rebuild their balance after the cleanup, we have that time.
The sequence we're following is very intentional:
Build the plant.
Fill the screen.
Clean the canopy.
Allow recovery.
Then flip.
I would much rather have the plants enter flowering already recovered from this work than perform a major cleanup while they're simultaneously dealing with the transition into flower.
Once the lights are flipped, the priorities change.
The plant will begin redirecting its energy toward reproductive growth, and I want that transition to happen with a clean, well-organised canopy rather than asking her to recover from major training at the same time.
────────────────────────
🧠 Defoliation Isn't a Magic Trick
Another thing worth mentioning is that defoliation isn't some magical technique that automatically produces bigger flowers.
It's a canopy-management tool.
We're trying to improve the relationship between:
🌱 Growing sites
💡 Light distribution
🌬️ Air movement
🍃 Leaf density
? Plant structure
The upper canopy is already receiving strong light.
The problem we're addressing is congestion.
When four vigorous plants share a 100 × 100 × 200 cm space, the interior can become incredibly dense.
By selectively removing some unnecessary foliage, we're opening pathways through that structure.
Better airflow.
Better visibility.
Less congestion.
And a cleaner starting point for flowering.
It's about managing the environment that exists inside the canopy, not simply making the plants look prettier.
Although...
I have to admit...
They do look pretty spectacular after the cleanup. 😂💙
────────────────────────
🌿 Pickle Lemon Haze F1 – Plant A
And now, back to our girl.
Plant A continues to be exactly the phenotype I thought she might become when she first started showing her personality.
Vigorous.
Responsive.
Confident.
She has consistently been one of the most energetic plants in the Blue Tent.
Every time we've given her something to work with, she's responded with more growth.
Topping?
She recovered beautifully.
SCROG?
She filled it.
Daily training?
She simply kept producing new shoots.
Her internodal spacing remains nicely compact, her stems have thickened substantially, and the foliage has developed that rich green colour we've been looking for.
The most impressive part is probably how much growth she's managed to produce while still maintaining a very manageable structure.
She's not simply growing wildly.
She's growing usefully.
And that's exactly what we want at this stage.
────────────────────────
🥥 Feeding – No Changes Yet
The nutrition remains completely unchanged.
And honestly...
Why change something that is working?
Current feeding:
• Plagron Hydro A — 1.9 ml/L
• Plagron Hydro B — 1.9 ml/L
• Plagron Hydro Roots — 1 ml/L
Current EC:
1.92 mS/cm
pH:
5.8
The plants are showing excellent colour and vigorous growth, so I'm not interested in increasing the nutrient strength simply because we're approaching flowering.
Instead, we'll watch their response to this week's defoliation.
If they continue consuming aggressively and maintaining that healthy green colour, we may increase the nutrition next week as flowering begins.
But for now...
The plants are happy.
And happy plants don't need unnecessary changes.
────────────────────────
💧 The Drip Irrigation Continues to Impress
The Mars Hydro automatic drip irrigation and drainage system has also become one of those pieces of equipment that quietly proves its value every day.
Each plant is receiving approximately 1.2 litres of nutrient solution per 24 hours, delivered through the individual drip system.
The solution passes through the coco and the resulting runoff is automatically collected and removed.
That consistency is particularly useful in a project like this.
We're trying to keep four plants under almost identical conditions.
Manual watering can certainly work, but maintaining exactly the same routine every day becomes increasingly difficult as plants get larger and more demanding.
The automated system removes much of that variation.
The roots receive a consistent supply.
The plants receive the same routine.
And I get to spend less time carrying water...
And more time observing the plants.
That's a pretty good exchange in my book. 😄
────────────────────────
🌡️ Blue Tent Environment
The environment has remained very stable as we approach the transition into flowering.
This week's average conditions were:
• 🌡️ Day Temperature: 28°C
• 🌙 Night Temperature: 25°C
• 💧 Relative Humidity: 65%
• 🥥 Substrate Temperature: 24°C
• 💦 Nutrient Solution: 18°C
• ⚗️ pH: 5.8
• ⚡ EC: 1.92 mS/cm
• 💨 CO₂: approximately 450 ppm
• 💡 Light Schedule: 18/6
• 💧 Irrigation: approximately 1.2 L/plant/24h
• ? Pot Size: 8 L
• 📏 Plant Height: approximately 60 cm
At this point, maintaining consistency is more important than constantly chasing numbers.
The plants are growing beautifully.
The canopy is healthy.
The irrigation is performing reliably.
And the nutrition is producing exactly the response we're looking for.
So for now...
We observe.
────────────────────────
🌿 Four Plants Starting to Look Like One
One of my favourite things about this stage of Project Blue Tent is looking at the tent from above.
It's becoming genuinely difficult to tell the four plants apart.
The canopy is so even that the individual plants almost disappear into one continuous sea of green.
And that's actually a fantastic result from the SCROG.
We started with four individual plants.
Different branches.
Different growth patterns.
Different personalities.
Now we've shaped them into one remarkably uniform canopy.
But underneath that uniformity, the individual characteristics are still there.
And that's what makes documenting them separately so interesting.
Plant A still has her particular way of growing.
She's still one of the most vigorous.
She's still incredibly responsive to training.
And she's still quietly trying to occupy every available centimetre of space.
────────────────────────
🌬️ Cleaning for the Next Chapter
Once the defoliation is complete, the room should immediately feel different.
More open.
More breathable.
Less congested.
And that is exactly what we're looking for before the flip.
We're not trying to make the plants small.
We're not trying to weaken them.
We're simply creating a cleaner structure from which the flowering cycle can begin.
The canopy has been built.
Now we're refining it.
Then comes recovery.
And after that...
Flower. 🌸
────────────────────────
👀 Looking Ahead
This is one of those weeks where the best thing we can do after the work is simply give the plants some peace.
We've spent weeks manipulating their structure.
Now they need time to respond.
I'll be watching the new growth closely, keeping the environment stable and monitoring how quickly they recover.
The nutrient recipe may increase next week depending on what the plants tell us.
The irrigation will continue doing its job.
And if everything looks as good as it does now...
We'll be ready to flip the Blue Tent into flowering.
The SCROG is full.
The canopy is organised.
The plants are healthy.
The cleanup is done.
Now we let them recover.
Then...
we turn the page.
────────────────────────
💙 Thank You
A huge thank you to Zamnesia for making Project Blue Tent possible and for providing these fantastic Pickle Lemon Haze F1 genetics.
A heartfelt thank you to Plagron for the Premium Growbags and Hydro nutrient line that continue supporting this beautiful vegetative growth.
A special thank you to Phytonaut for the LED lighting helping us maintain such a consistent and beautifully structured canopy throughout the tent.
And a massive thank you to Mars Hydro for the automatic drip irrigation and drainage system, which continues making consistent irrigation so much easier.
Thank you to GrowDiaries for providing a place where growers from all over the world can document their journeys, share knowledge and learn from one another.
And finally...
Thank you to everyone following Project Blue Tent.
Whether you've been here since the beginning, just discovered this diary, leave comments every week or simply enjoy watching these plants develop...
I genuinely appreciate you being here. 💙
Four sisters.
One environment.
One experiment.
And four very different little personalities hiding underneath an increasingly uniform canopy.
For Plant A, this week is about finishing what we started.
The canopy is built.
The cleanup is complete.
Now she gets to recover.
And very soon...
🌸 Flowering begins.
Until next time...
Growers Love, happy growing, and take care everyone! 🌱💙

Likes
2
Share


@Giftedwithgab
Follow
Now for Wk8, even after all that DEFOLIATION and LST on Wk7 it don't look like it all. It took me 3 hours, to do all that work. I wanted to wait at least 2 weeks before another around of defoliation and lst but now it's every week 😪.
Do I DARE say the other 2 plants are catching up to Garganchula? I will say I had 1 big 1 medium and 1 small. Now I got 1 large and 2 medium plants. I want 1 more month of VEG, to allow the other 2 plants to catch up but I'm not sure if I'm going to be able to slow down Garganchula (big plant name). Let's see if WK9 Garganchula play nice and grow SLOWLY and allow her other siblings (didn't name them yet) to catch up.
Garganchula 1300ppms
2 other plants 1700ppms each
Likes
14
Share


@TPBzh
Follow
Things are going fast, HulkBerry 1 look close to the end, I will start to wash it soon. I think the cookies gelato familly will end in something like 2 weeks, but not sure. Feel free to let me know what u think about.
I got a real problem with the Royal Bluematic 2, buds are so small and weak. Not sure to bring it AT the end.

Likes
17
Share


@halexxo
Follow
Una de las plantas tiene un deficit de calmag creo, he probado a cambiar el pH y añadirle calmag de biobizz, veremos qué tal le sienta.

Likes
42
Share


@Reyden
Follow
Ci siamo! Siamo arrivati quasi al traguardo...questi giorni le ragazze sono al loro massimo splendore e l'odore nella stanza e fortissimo! Anche questo aggiornamento è stato fatto grazie all'aiuto di mia madre che gentilmente mi ha tenuto e curato le bambine, sono contento perché sembra che è riuscita a seguire tutte le mie istruzioni e questa volta non ci sono stati problemi...è la prima volta che mi capita di competere in un contest e farmi mandare foto per mail..chiedo scusa se la messa a fuoco non è sempre delle migliori e personalmente non posso chiedere di meglio, è un lavoro che mi serviva e sono dovuto partire lasciando tutto indietro...tornando ai nostri fiori, il green sensation di Plagron devo dire che ha fatto la differenza, contando che il cibo questa volta è stato preparato interamente da me, ha fatto un ottimo lavoro e i fiori sembrano dirlo forte! Cercherò di aggiornare l'ultimo step prima della fine...tra due giorni farò tagliare le ragazze! A presto!!!
Likes
3
Share


@Uchihajota
Follow
La pequeña esta ya casi lista, que ganas de probarla, la grande le quedan dos semanas y la he lavado para corregir el exceso y la dejaré solo con agua a ver que tal sale.. planeando ya el siguiente cultivo que comenzaré en breve.

Likes
13
Share


@Alpha_Green
Follow
Some of you may have wondered:
Why do I use CO2 at average 950 ppfd μmol/m2/s (moral flow)?
The answer is quite simple. Because of lack of space in some regions of my cultivation area, I simply cannot keep the ideal distance to my Sanlight high-performance lamp, due to some height growth of various strains. And so some of the main colas have ppfd values of 1250 μmol/m2/s and even more...
So this is how I manage to achieve and compensate for such high radiation levels even with a CO 2 balance. And I have to say, my strategy to avoid various light stress symptoms works just fabulously. In combination with CO 2 implementation, my babies are simply unbeatably insensitive to light. Thats it!
Beginning of 3rd week flowering:
Again feeding my babies by 36 hours fermented potions of Bio Tabs Kompost Tea PK-Booster (15 g pro Liter) and added:
5ml Orgatrex/Liter
1 Spoon of Bactrex
1 Spoon of Mycotrex
1 Spoon of Mycco-Vital
1 Spoon of Dynomyco
A little tip for those who are interested in small modifications that have a big difference or influence - on the result - effect - beauty - health - taste! Before adding microorganisms or beneficial bacteria or Mycorrizae and Trichodermas, please use oxygen-saturated water. On the one hand, unwanted chlorine gases evaporate and the small world of the microbiome becomes even faster and more rewarding in compost tea to sprout.
Last but not least for this week, I would like to introduce my reasons, why I prefer growing biologically and sustainably.
First of all, it’s something which suits very well in these times/days we are living now. Sustainability is a big need and task for our planet. 🌎 Nature means life. Our home, the air we breathe and everything that surrounds us. Not just today. Hopefully tomorrow as well.
Maybe I'm starting to protect our environment on a small scale, but maybe I can also make a big difference at all.
If you change the way you look at things, the things you look at change...
I thought about what’s the difference, between Mineral Feeding and Super Soil Feeding.
It’s very easy. Biologically Growing is a similar process than the natural soil activities out there in the lap of nature’s. So plants has to work and interact with the microorganisms and microbiomic communities in the soil. So the plants will never get lazy like the lazy ones of mineral feeding growers.
If you grow biologically, you will feed the soil first and the microorganisms will support every parameter next to your plant conditions. And that will generate an unbelievable spectrum of Terpenes and Trichomes you will never forget.
It’s the same comparison, when you daily visit McDonalds and you eat only fast food. How does your body and mind react on this shit for money?!?!
May I invite you to think about it…
See you next week dear Growmies! Have a nice Weekend and take care…
Peace out!
Addendum for Day 53:
At the moment we unfortunately have another winter onset here in Germany. This means that I am forced to take additional heating measures due to structural facts in order to be able to keep the temperatures constant. After all, just tonight the thermometer climbs again to -1 degree Celsius.
In addition, my exhaust air system runs out of my bedroom terrace and I therefore grow winter and summer with the patio door open. Well, sometimes I experience real weather-related challenges. But all in all, no problem...
"Where there's a will, there's a way."
Addendum to pouring out the fermented PK tea: I always administer half a liter of lukewarm aerated water with 3.5 ml of cannazyme per liter to each plant. This means that the "root machine" is not supplied with supplies unprepared and the nutrient solution can thus also be better distributed in the soil. Since I also work with cloth shoes, I spray them evenly moistened everywhere with water that is also warm before pouring them out from the outside. This has the advantage that the moisture stays where it should: in the pot!
... I did the math today ;-) We are still in week 7 until this Friday. And week 8 starts on Friday! OMG... still so much time yeahh!
Today my Fast Buds Sour Jealousy and Sweet Seeds Big Devil and Dark Devil Automatics arrived. I'm looking forward to it.
This time Fast Buds next Time Sweet Seeds. Love them too. Very beautiful genetics.
Today a review video of the beginning of week 3.
At the time of the pictures, I had minor signs of nitrogen excess. (Light peaks first at the crown of the roof and then slightly continuing to the middle section.) I then painstakingly racked my brains as to why this could be. I found that very slight dry spots had formed and therefore the root found small accumulations of nitrogen that caused its problems. But then, when I carefully homogeneously checked the moisture content in the substrate, the problem evaporated again. However, they had not shown any loss of growth rate during this time. Nevertheless, they developed as expected.
They Strawnanas had no problem with that.
In the end, I always have a hard time killing them. But I guess that's the way things go.
We live and die.
We come and go.
But it's not there yet. ;-)
Tomorrow is day 56.
Tomorrow’s updating day!
Can't wait to see their progress.
Have a good time and see you tomorrow… 🏽🕊️
🏽 ☮️🕊️

Likes
6
Share


@BLAZED
Follow
Week 6 (3-3 to 9-3)
3-3
Temps: 17.9 to 22 degrees
Humidity: 58% to 74%
I have a lot of faith in these girls, at the first sight they see a bit unhappy and it looks like it has some nutrient problem going on.
But the leaves showing signs are the ones where the plant snapped in half, and they are recovering, im sure they will be allright in some time!
4-3
Temps: 17.8 to 21.9 degrees
Humidity: 61% to 72%
5-3
Temps: 17.8 to 21.5 degrees
Humidity: 55% to 79%
Watering: Both 1000 ml. (Only calcium)
6-3
Temps: 17.8 to 21.7 degrees
Humidity: 66% to 82%
7-3
Temps: 17.6 to 21.7 degrees
Humidity: 68% to 82%
8-3
Temps: 17.7 to 21.7 degrees
Humidity: 70% to 88%
Watering #1: 1000 ml.
The girls are doing very well! They grew quite a bit 😀
9-3
Temps: 17.3 to 21.5 degrees
Humidity: 63% to 87%
Installed the dehumidifier, as the humidity is getting high at lights off.




Likes
13
Share


@Fidoe1
Follow
Good week for the girls..started way hot but has been getting cooler witch is great for flowering...they growing very fast now and have shot out meny new bud spots. My clones will db my yield and have been a great learning experience ...I have raise every kinda plant ..but these girls are a joy to grow... challenging ..frustrating .. but always a joy!


Likes
30
Share


@ButterfliesLittleFarm
Follow
Hello Diary.
It completed the last week of flowering, a total of three weeks of vegetation and seven weeks of flowering. A total of 81 days since it sprouted.
In the end, I can say that Watermelon lasted well, although I had problems, I mean over-feeding at one point, the flowers look good, they are beautiful purple color, full of trichomes and intense scent.
The photos show that most of the leaves have totally turned yellow and a lot of them have brown spots on them, but the flowers have been spared.
Although not as hard and full as the flowers of his roommate, Purple Punch.
There were only two waterings this week, I wanted him to consume all the water to make the drying faster.
The condition in the growbox is satisfactory, the temperature is around 25 degrees while the humidity is below 40%.
Here’s what the last week looked like.
31/04/2021 - Day 64.
Watering. I regulated p.H. at 6.3 and with 7 liters of water I evenly watered all three plants on the “farm”.
Temp / Humidity on the farm - 25 degrees and 37% humidity.
03/04/2021 - Day 67.
Watering. The procedure is the same as three days ago.
Temp / Humidity on the farm - 25.3 degrees and 38% humidity.
07/04/2021 - Day 71.
Harvest. After I did the photography, I cut the plant at the bottom of the stalk and hung it upside down in a growbox to dry.
The temperature in the Box is about 25 degrees and the humidity is slightly lower than 40%.
I turned off the lights and left only the ventilation on while I also turned off the fans.
Now it is preceded by about two weeks of drying, maybe a little less, so I call with one last review. See you soon.
Likes
46
Share


@eldruida_lamota
Follow
Que hay familia, vamos con la primera semana de vida de estas Candy Rain de Zamnesia, para el concurso POWER BUDS Plagron x Zamnesia CONTEST
Se germinaron las 5 semillas de Candy Rain el día 6 de octubre y en 24 horas 100% ratio , 7 días en tierra.
Por supuesto vamos a utilizar la tierra de plagron lightmix que siempre utilizo, y como este proyecto es para concurso voy a ceñirme a los productos de plagron.
Esta vez regué con una aplicación de Sugar Royal, 0,5 ml x litro de agua , por supuesto controlando siempre el Ph, que ahora mismo lo dejamos en 6.
Por el momento están creciendo bien y tener tienen un buen color, se ven bien sanas , yo creo que si siguen así finales de la semana que viene podré trasplantar, porro veremos.
Hasta aquí es todo la primera semana superada, iremos viendo cómo progresan.
Os comento que tengo un descuento y para que compréis en la web de Zamnesia de un 20%, el código es ZAMMIGD2023
The discount 20% and the code is ZAMMIGD2023
https://www.zamnesia.com/
Hasta aquí todo, buenos humos 💨💨💨.
Likes
4
Share


@IndicaVibeMe
Follow
Phenotype #4 & #5 Female plants = Pollinated successfully by brother Phenotype #1 Male
Also mixed this Mystery Purp Male Pollen w/ a Jackpot Seed i found in my weed bag from a Lume Dispensary.
☆First & Probably last time, only found 1 Single Fat seed ☆ Going to ne excited to grow these cultivars. Going to plant immediately the F2 Genetics when seeds are ready for harvest.
Phenotype #4 is mostly sinsemilla
except for the very bottom branch successful pollination by brother Phenotype #1



Likes
34
Share


@AshBrand
Follow
10/13/21 - Fed with Week 1 on our feeding schedule. 30ml Big Bloom to 1 gallon of water.
10/14/21 - Looking great today. That Big Bloom is ready making the plants more perky and happy.
10/15/21 - They all look really good. Next week we start 3 additional nutrients and they should really start popping. We’ll be topping and super cropping. (Didn’t mean to rhyme lol)
10/16/21 - They all look amazing today. I posted a video. Just super cropping and topping. The Sour OG is actually looking better.
10/17/21 - Wow they all look so good! Just kinda letting the plants go wild a little bit. Some still have plenty of growing to do.
10/18/21 - Wow! Sour OG in the middle has taken off. It was struggling and it’s sister clone died. Looks like it’s turning over and growing properly! They all look great.
10/19/21 - The ladies are looking very good today. Tomorrow we start week 2 of nutrients. They should go pretty crazy in a week or two with Grow Big and Kangaroots in the mix.



Likes
Comments
Share


@Rizzokicksbuds123
Follow
New home bigger pots finish of this training and flip them
Likes
22
Share


@JustSmokeItB
Follow
Starting Week 2! All three ladies doing great... Blueberry is the beast of the three and Amnesia Haze the runt (as expected). Light moved up to 30" and 100% and dropped humidity to 60%.
Week 2 coming to a close today! Starting Week 3 tomorrow.

Processing
Likes
3
Share


@KidCharlemagne
Follow
Trichomes have turned cloudy. Looks like about 2 weeks till harvest. Time to start the flushing process. One big flush monitoring TDS and nothing but ph’d water and a smidge of Mammoth P till the end.