
Likes
Comments
Share


@Fusion
Follow
So after week separated the clones. Have mommy in the hydro setup and mommy-x in a bdrm window.
Started spraying mommy-x with colateral silver 30 ppm about a week ago and now is in flower. Continue to spray for another week and hopefully see some pollen sacs..
Don't care about pH , nuit's, or method of growing. All I'm worried about is getting mommy-x to make x-pollen and pollenate the other clone.
Side note: Funny everyone worries if have a hermi, & I'm deliberately making one.. lol


Likes
31
Share


@LockDownGrow
Follow
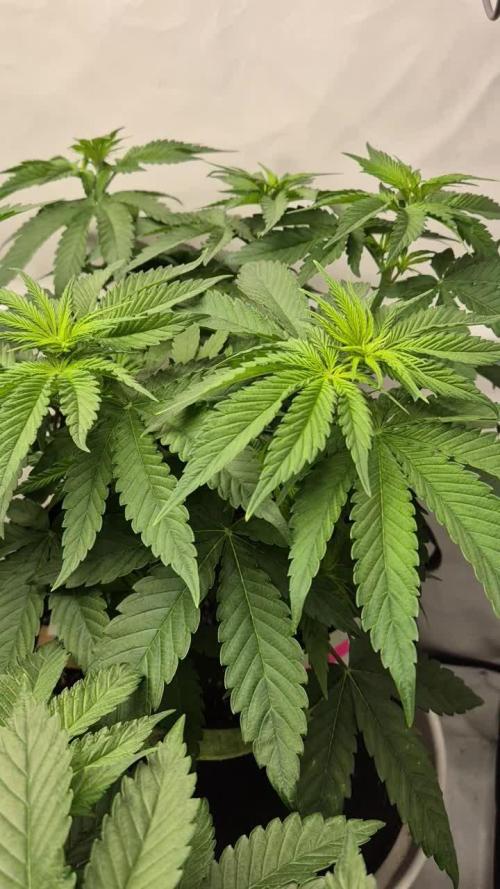
Everything has gone really well up till now ,
She is start too show the beginning of pre flower , I wasn't expecting that for a couple of weeks so not sure if this is normal ? But she is growing fast and strong ,
I picked of a few select large leaves that where coving the side branches , but very minimal , mabey one or two leaves of each plant , and also pulled down the branches too help with light getting down into the center of the girl ,


Likes
3
Share


@Bread_n_Buds
Follow
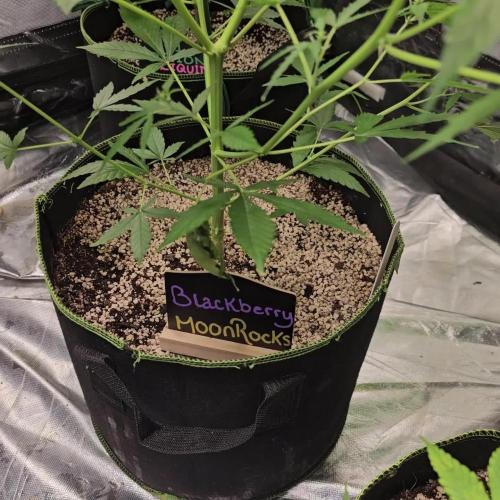
Super Boof has a super name, super genetics and consequently we have super expectations.
Remember that we are growing 1 Plant worked with the techniques and one left to grow without cutting techniques I am with a bit of LST.
She has been in flowering for a few days until now she has taken the final card for the vegetative phase from next week we will declare the flowering open.
Comparison is the salt of experience so the plant of the other diary will be worked very differently go and see it to compare them.
We have started the Plagron fertilization program, we are in 100% organic configuration, the soil is recycled Promix + 1/3 fresh soil + 10% Perlite + RQS Mycorrhiza Mix (4 g in the mix, 1 g under the small fiber pot).
We are administering // 1 ml/l Power Roots - 1 ml/l Pure Zym - 1 ml/l Sugar Royal - 3 ml/l Alga Grow
We sprayed Vita Race Foliare 3 ml/l.
https://plagron.com/en
The doubts about the compatibility between Pure Zym and mycorrhizae have been dispelled, they can get along according to Plagron experts. If someone tells you that enzymes eat mycorrhizae, which in principle may seem possible, explain to them that it is not true.
https://www.royalqueenseeds.it/growing/452-easy-roots-mix-di-micorrhize.html
Leafy's strain of the year ---- // https://www.zamnesia.io/en/13317-zamnesia-seeds-super-boof.html
Zamnesia Short Description // Here's your chance to grow one of the most sought-after strains of recent years: Super Boof, crowned Leafly's strain of the year 2024, and for good reason. Descended from Black Cherry Punch and Tropicana Cookies, this indica-dominant hybrid (70%) takes the already exceptional characteristics of its predecessors to new heights. Grow it at home to find out for yourself.
!
You can find the whole world of growing at Zamnesia and much more take a tour of the site and you will find "all the best that nature has to offer" in various shapes and colors.
The new strains are fantastic and the old ones are no exception...
--- // www.zamnesia.com

Likes
2
Share


@HIAZ_urbanbudfarmer
Follow
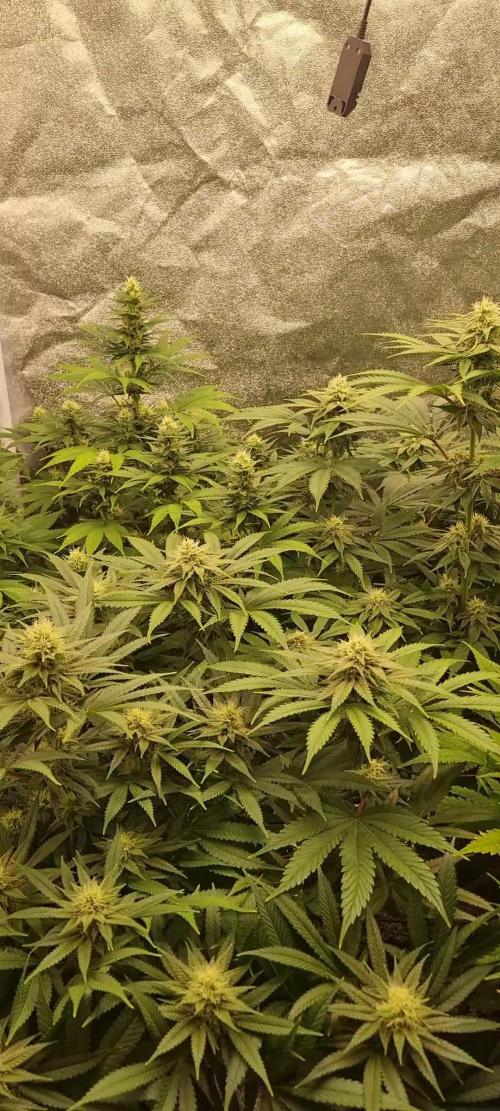
Plant at the front #3 has had slowed growth but buds are filling out pretty well now, pretty sure she is a Orange sherbet. Back 2 are on week 3 day 17!!! & Are going Awesome, buds stacking up & down every branch! Going to get some really good Cola's of them! They are loving the 730watts!’ of light, back left plant looks like a Tropicana Cookies, going to do some defoliation on her & tie branches down a bit to open up middle of plant to allow more light & air to lower bud sites.
Likes
21
Share


@Indicate
Follow
Another week under the belt and I’m not sure how much longer to leave these two. Starting to smell a bit more like weed but still waiting on the clear to opaque transition. All I want for Christmas….


Likes
74
Share


@KrautFabrik
Follow
Day 56: nutrients like plan
Last feeding
Pictures are taken on day 56
---------------------------------------------
I found some mold, i cutted 1 hole branch and 2 buds, take a look at the last 3 pics(cutted about 2.5 cm around the mold)😑 increased air circualtion too.
She is the only one with mold issues 🤔
By the way she develops super dense buds and is gettig some colour😎👍
Happy growing 🍧🌱

Likes
7
Share


@Adam22
Follow
Day 6 in flower the back left one has extremely outgrown the other 3. The front right has shown pistils and the other 2 are short and bushy so hoping I have 3 girls. Going to keep an eye on the tall one till it shows sex. Didn't get a chance to prune at all due to being in tiny pots for veg 6 weeks and causing stress and didn't want to over do it with transplanting them soo late I will wait untill week 3 of flower before I prune and keep bending the fan leaves under the lower canopy untill then. The smell is lovely
Likes
3
Share


@LX1977
Follow
Rinçage des racines pendant 2 semaines puis c'est la récolte 2 semaines trop tôt. Plantes hermaphrodites.😞😞😞

Likes
29
Share


@Smokwiri
Follow
Welcome to week 5 of my Runtz gum diary by Original sensible seeds.
Switching to 12/12 today, cant wait to see the first signs of flowering...
Viparspectra discount:
Amazon: http://url-9.cn/0y9i
Amazon US: https://amzn.to/3e0P2bk
Amazon CA: https://amzn.to/3bTnEJC
Amazon discount Code:
it10smokwiri XS1000 10%
XSsmokwiri XS1500 8%
it20smokwiri XS2000 5%
it40smokwiri XS4000 5%
ViparSpectra 8% DISCOUNT CODE on the viparspectra websites (.com/.eu)
RUFFSELEKTAH

Likes
16
Share


@Mrg7667
Follow
Day 15 of flower! Kinda goofed this week i gave the babies week two nutes after the last post wich was like day 10 and i noticed a little bit of nitrogen over dose. I think the Powersi is also helping nutrients absorption! So i actually did this week a little different then i planned just cut the bio bloom in half because i didnt realize the powersi npk ratio inceases p and k
Havent seen anymore aphids might do another couple sprays to be safe. Grow safe allows full spray through flower


Likes
16
Share

@Kirsten
Follow
The plant has just switched into the flowering stage, I meant to train her this week b tying some branches down as she is getting tall, however I didn't get round to it.
18.7.25:
I watered with 3ltrs of dechlorinated water PH'd to 6.4, containing the following nutrients;
💜 2ml Ecothrive Trace
PH: 6.4
PPM: 365
20.7.25:
I watered with 2ltrs of dechlorinated water PH'd to 6.3 containing the following nutrients;
💜 2ml Ecothrive Trace
💜 1/4 TSP Ecothrive Biosys
25.7.25:
I watered with 3ltrs of dechlorinated water PH'd to 6.5, containing the following nutrients;
💜 2ml Ecothrive Trace
💜 1/4 TSP Ecothrive Biosys
PH: 6.5
PPM: 361
28.7.25:
I watered with 6.5ltrs of dechlorinated water PH'd to 6.0 with;
💜 7ml Trace
💜 1.5 TSP Ecothrive Biosys
PH: 6.0
PPM: 351
Thank you for checking in this week and hanging out in the comments 😁💚✌️🌱🙌

Likes
37
Share


@NewbieLearner
Follow
This was a beautiful strain to grow. With her flowers getting big towards the end of harvest as well as the purple colours! I would definitely recommend that you try grow this strain. The buds are super dense and very well formed. An absolute treat to smoke and look at.


Likes
13
Share


@Oyziphar
Follow
This was the last week for the Cookies Gelato. They've turned purple. Weather is not that great anymore, and I want to avoid more budrot, so I had to chop them down 😛


