


Likes
Comments
Share

@Space_kydebt
Follow
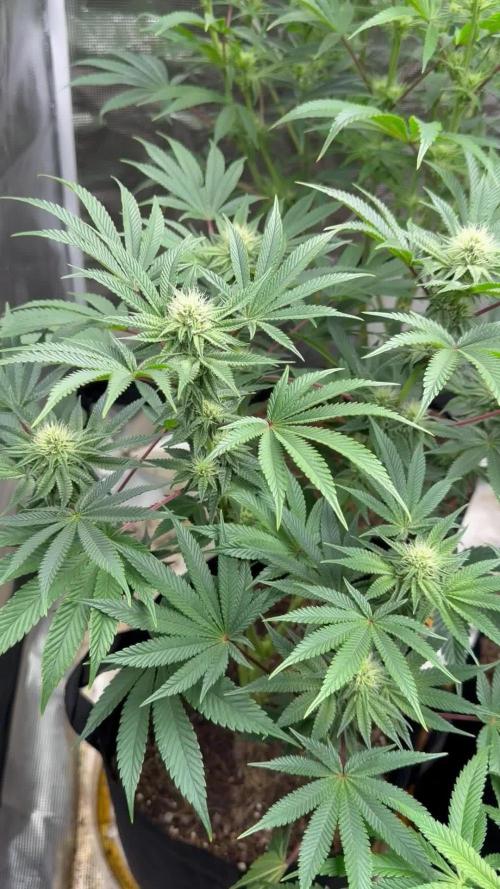
Hello and good afternoon 😃 well I popped four and I still have four but what great about these they all smell exactly alike , different looks on two phenos but they all seem to be doing well I have one that looks like she more or less on the sativa side which is cool but I think in flower still look stunning . These plants grew really tall release three of them did . There on keep out this one and it the sativa dominant one .. purple since she started but yeah love the plant I need to see alittle more to really get detailed but they are not going fast lol . But good flowers usually to longer time to process so will see .. but the all have the kushy nose so far and one smell kinda of orangish.. lol peace out people

Likes
2
Share


@Bluemels
Follow
Tag 43: Die Pflanze wächst sehr schlecht, die Blätter sind hell geworden ich gebe alles an Dünger was möglich ist. Ich weiß nicht was ich falsch mache.
Tag 53: Ich habe mich entschlossen diesen Grow abzubrechen. Ich vermute Nährstoffmangel?

Likes
9
Share


@Ieiogrow94
Follow
Eccoci di nuovo qui!!!
Super eccitato per questa nuova collab con Seedsman, team davvero al top, che mi ha dato l’opportunità di testare questa nuova genetica e di condividere i progressi con tutti voi!!!
Come sempre partiamo nei bicchieri per poi travasare.. Questa volta verrà svolto tutto sotto la Lumatek Zeus 465 ProC, mi aspetto molto da questo ciclo!!
WOOOOOOOW, odori e colori davvero incredibili... MANCA POCO!!!
Grazie a tutti per il supporto ❤️🍀🔥


Likes
11
Share


@pegonter
Follow
Lowered water flux in 1/5 this week to nearly 350ml 2x/day expecting to stop bottom pot leaking and to take 2 more weeks till harvest. Usually takes 7 weeks to full ripe but I'll let 8 this cycle to see how it goes.
Early skunk pistiles start turning orange/brown and buds gaining volume. Also showing lots of resin on all buds and top leaves.
Leaves start changing colors (due to ripening I guess).
I'm not monitoring tricomes yet..
La Fanta CBD pistils still white and bud development not as fast as early skunk. Early skunk 2 overgrew its spaisland is covering some La Fanta's light.
La fanta might take 2 more weeks to full ripe then early skunk

Likes
12
Share


@Kakui
Follow
Estuve un tiempo sin actualizar el diario porque me contagie de COVID, ahora un poco mejor vuelvo a actualizar.
Flower14, las plantas crecen bien, se cambió el LED de 480w por 3 LED de 240w, para un total de 720w y mejor distribución de la luz.

Likes
22
Share


@Luv2Grow
Follow
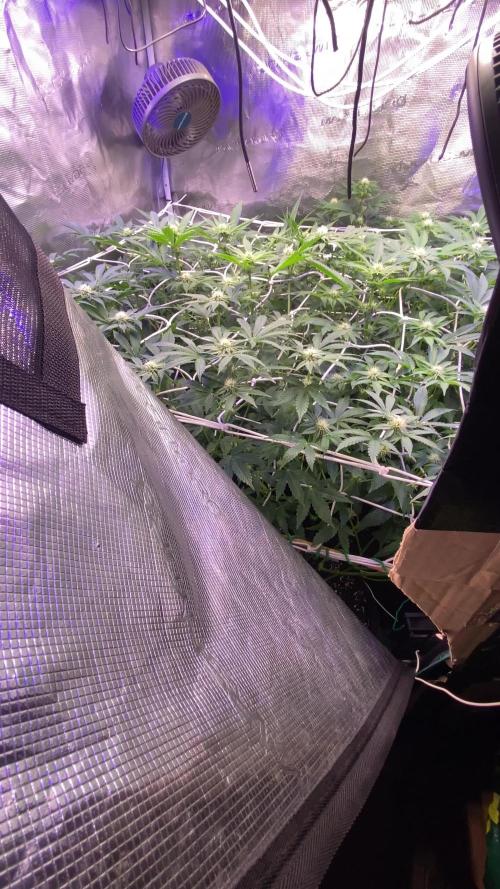
Day 78 - Starting off week 12 and couldn’t be happier. Things are going good and just gave her a feeding today. This will be the last week of feed and will flush with Sledgehammer next week. Quite a few fan leaves are really starting to fade in color and die off, telling me she’s probably towards the end of life. Hopefully there’ll be some fattening these last 2 weeks before chopping. Attempted some trich pics but can’t hold steady enough so didn’t turn Putnam so well but we’re just about 100% milky from what I can tell.
Day 79 - Looks like a change in plans and most likely will chop this weekend. Overnight she popped a lot of amber trichs. Even the bottom buds with less light and are about 20-30% amber. I don’t want it going too much further than that so I’ll do a big flush tomorrow and most likely chop either Friday or Saturday.
Day 80 - Final day before chopping. Put 5 gallons of water with the Sledgehammer through for a flush and all is looking good. Put together a new drying box today so we’ll see how that works out for the drying process. Seen some videos on it and looks like it should work. Will be chopping tomorrow and so ready!





Likes
15
Share

@Bluemels
Follow
Leider sind die Blattspitzen leicht verbrannt. Ich habe die Temperatur zu schnell erhöht 😒
Jetzt erstmal wieder auf 25°C Tagtemperatur und Alg a mic ins gießwasser, das sollte helfen 😌
Nach 2 Tagen hat sich die Pflanze sichtlich erholt 😍, sie sieht vitaler aus als je zuvor 😁
Processing
Likes
29
Share


@Grey_Wolf
Follow
Ginger nut cookies and Aussie Music Videos update 20th Feb 2020
On Monday just past, I started to leave this plant out at night thus reducing light hours to the same as a regular outdoors Plant. This should induce flowering as all my other
Photoperiod dependent strains are now in Flowering mode. Thru the use of Topping and LST training I have managed to create lots of potential bud sites for this plant to develop into lovely sticky and stinky Buds. Later on today I will do some more LST & As soon as I see pistils developing I will begin to add P+K to the soil by using Guano , Mollasses , Liquid potash, comfrey teas ,Compost teas and Worm castings. The smell of the stems is increasing in strength and has a blend of Red diesel stink mixed with cookies dankness. 😛
Now for the Weekly Music Videos yes I say videos because there will be three 🙏
Last week I chose The Divinyls but this week I thought I would do something different and ask the People what they wanted to hear. Well I got 3 responses and they all
made good suggestions all of which I will play this week . @Fruitgrower asked to see anything by Kylie minogue naked 😆 Couldn't manage that but the video I chose does see her prancing around in next to nothing which is the next best thing . So Fruity Enjoy mate heres the Link https://youtu.be/j3VjJKKVNew
@PlaguedGardens asked for Flume. I had to google them as I hadnt heard of it but they sound ok I am not particuarly into Electronic music but it has it's place and I chose this one for you mate https://www.youtube.com/watch?v=Hwg7hJrDiRg
Then finally @I_and_I asked for Airbourne which is a great group who obviously were influenced by AC/DC , Metallica , Motorhead etc etc and you will understand when you watch the video so here is Airbourne for I_and_I https://www.youtube.com/watch?v=Q0q9a5QS6WQ
All three growers couldn't have chosen more different music genres if they'd tried which just goes to show how different we all are with our musical tastes .
I won't clog up the questions section again so if anyone has a request for an Aussie artist or bands Music video they's like to see played please drop your suggestions in the comments section below. Thankyou again for reading my update I hope you enjoy the Music 👍
Likes
42
Share


@noodle
Follow
Can you believe this is just one plant!? She may only be 12 inches tall but she be over 20 inches wide. Looks like we're done with the webcam because this week the plant has grown to fill in all the space and swamp the camera. Did a few more LST bends as new shoots would start bursting through the canopy. It really seems to stunt their growth once they get pulled away from being the solo star in the limelight. My light is just two COBs so once things get off to the side you can really see the effects of the light dropoff. Plant still looks healthy A.F., I saw one leaf that had a couple brown spots on it but it disappeared beneath new growth so fast I don't really care to do anything about it-- I think my pH might be a little low.
The little sucker is growing almost an inch a day, so I've been having to raise the lights every morning. I've decided to switch to flowering light schedule to 12/12, even though I've heard that a mature plant will have nodes with leaves that alternate and this plant seems to have them still coming out at the same place. To this end I've added 10x CREE XP-E HE Photo Red diodes to supplement my 4000K COBs. COME ON BLOOMS
Likes
220
Share


@CRiSPrGrow
Follow
These had a pretty good life. I actually only fed NPK the one time . Germinated them in a Zambeza propagator, i really recommend getting one of those propagators, they're reusable and really take the heat off those first days when you're sweating. Pooped them into their plugs they sprouted out strong, germinated 5 kept 3. transplanted them no problem. Veged these for 4 weeks, then they shot up. during veg they stretched out a bit early on i should have been giving some specialised micro i had on had but for some reason on the other i didnt. They needed extra support for their first three weeks, so i decided to LST them around week 2. Two camping hooks one anchor for the main stem and one to keep the plant down. Once i dialed in my lamp to plant distance they benefitted by slowing down on the stretch a bit. they all took to LST extremely well, bushing out and creating an nice even canopy. They pushedout these thick indica leaves, one of my plants was a lighter colored leaf pheno, the vertafort one. The Six Shooter genetic really stretches, if just off the top of my head it seems that the plants quadrupled in size over an 8 week period, completely eclipsing their neighbours and creating a thick dense canopy throwing shade down below. Each turned into a bush with three or more mains sticking out the top by week 6. IThe results start to look real pro around week 8. Before that though I hadn't been defoliating. This and simple lack of light means that I had loads of undevellopped colas. If I'm honest I should have tried to harvest in stages but by colas. Anyway these kind of grew like a gorilla glue but with much different and much better flower structure. The plants started pushing out flowers and pistils and preflowers etc early, but then took a while to gear up towards towards getting fat. The flower branch out in a spiral pattern up and down the main and secondary colas evenly, creating this misssile shaped colas, but they branch out once sometimes twice, which means less branch to nug ratio than a gorrilla glue by a full multiple. They started smelling like lemons around the time they were fattening up. Then they started getting buff, really little by little, what did rippen rippened evenly. Some colas was basically waste especially the colas stuck on the sides of the tent and some of the colas where for some reason or another there was no light there due to the dense canopy. Truly a BEAST OF A PLANT, HIGH POTENTIAL, great BRANCHING, if you look carefully each plant has more than a dozen colas,
Timed it so the harvest was on a day the plants were chock full for plain water after ten day's worth of additive aided flushing. hung to dry slowly in the tent, got it around 55RH inside the buds over 12 days then trimmed and jarred in miron glass with boveda 62. The trim was a great experience, took a while but not that long because the flowers were so nice in the way they are. you do have to trim every sugar leaf one by one though if you're doing it by hand, broke these sizzors that @Mrs_Larimar sent me because of the resin lol. so I pull these plants out my tent and I just kinda look at them and they're basically dark green because of all the sugar leafs, i'm thinking to myself "shit i messed up this isnt even that frosty". well, what i found out is every time i clipped one of those trademark long sugar leafs off it revealed absolutely resious white frost. That's what can keep someone motivated. ! Once jared, if there's boveda in your jar, you dont really need to burp it daily, or even weekly i just let it sit there, obviously i've been smoking it and following the cure, let me tell you this one needs longer to cure than you're used to maybe, at least two more weeks of cure after a slow dry. Four weeks after the chop , it's a strong weed !
Didn't smell all that loud, but I have a 1300M3/H exhaust so... i'm not surprised. I will say though that my neihbour said she could smell weed even when I wasnt home and she could smell weed in the corridor, from the times I was trimming and basically every time I open my jar. Gonna need a new carbon filter for the next grow. I retired my lightbulb too. Hard to put my finger on the taste because the smoke is so smooth, and when i saw GD had a tag for Woody, i knew right away this was that taste i felt. I will say this though, cure this correctly, dont rush, dry it real slow, then cure it, citrussy tastes, usually those will evaporate, leaving this distinguished terpene heavy hitter much better tasting. So what can i tell you, this weed is white weed, so frosty. Bag appeal is great too, this strain pushes out pistills like no other, maybe even more than the gorilla glue. that means this is a chill weed right? One of the phenos I grew had more pistils than the other two. Mr. B's did, but i dont know if you can really tell from the close ups, i'll try to put some more pictures up. I got two maybe three phenotypes in terms of taste. Mr. B’s is much pine-ier than the others, and when the joint goes out and you light it again, it’s even more piney … I’m actually really happy about that reminds me of white rhino from the east coast back in the day but way piney-ier than that even. When you smoke the other phenos the smell is incense and the taste is really really smooth & woody. Sometimes I find different after tastes on the exhale like coffee, pepper, and maybe sweet/fruity sometimes too depends on the pheno I'm toking on. It is LOUD THOUGH, always have a spare filter on hand IT’S NOT WORTH IT get it !
Well at the end of my first grow, i'd like to quickly review all of Bulbi's own :
Bulbi"s Own Early VegMicro: Fine green powder with calcium and all the rare metals in it. I didnt use it ! Damn, next time I'll amend my soil with it like i did this time on the FBT1
Bulbi's Own Cal Mag : Organic fine white powder with calcium and magnesium, i used it in the feed and sometimes as a spray. I didnt know how much to put in because these things dont come with instructions so i ended up putting 1/4 doses most of time. The correct amount should have been 2.5G/L.
Bulbi's Own Flower Micro : Organic fine beige powder that I used mixed in with the sulfur. I think this one's a keeper, really helped my plants make it through the stress of bottom feeding and all that heat.
Bulbi's Own Mag Sulfur : Organic fine red powder that I used mixed in with the Flower Micro I used this one in my spray too , to great effect, in my opinion
Bulbi's Own Beneficials Trio : This was the base beneficials mix I had, you need to put 7.5 to 15g/l , watch out for clumps, use at the night fall, or when still dark.
Bulbi's Own Anti Afid : I threw it in there i think just in time to protect my plants when I intentionally overwatered when I went on my trip. There were some white flies that emerged, because... well that's what they do isnt it. but there were just a few of them and they ended up flying around wierdly, and within four days, no more white flies, didnt even use yellow sticky tape ! You mix this one with the trio for even more effect. I used these in a spray I think , also.
Bulbi's own Anti-Worm : This one is more directed against larvae, and can be combined with the base trio. I was weary of using it, but I'm glad i did to give my soil matrix that full spectrum of biological protection.
Bulbi's own Humic Acid : This one i loved, looking back I'm regretful not having used it more. the dry humic acid is a great experience, the quality of it was impressive, clumps would seperated into more clumps ad infitum the feed slowly turning completely ink black. definituely using this once a week from now on
Bulbi's own Amino Acids : this one is just amino acids, maybe next time I'll use it at the same time as the humic acid, but I'm not 100% on that. What i did do was spray the top layer of the soil with amino acids when I accidently ran into some issues from spraying kelp all over the place. So in that sense it's an absolute life saver and a must to have on hand.
Bulbi's Own Kelp Extract Concentrate. Loved this one too haha, so thick, and green, check out the video of when i pour it lol. Worked great, raises the pH some so be careful, i used this one as a sprat aswell to get those plant growth hormones pumping during the seeding and veg stage.
Bulbi's Own CO2 : well part of what I set out to do was to test the CO2 theory. Like roots do absorb CO2 but at a lower efficiency than leaves say 15% vs. 85% the theory being enriching your water or feed with CO2 would ultimately benefit the plant. So i enriched water with these ceramic based co2 tablets, because CO2 is a soluble gas, it stays in water. Then i fed the plants in this manner in the feed and also as a spray. The idea behind that was that co2 enriched water would come in direct contact with the plant allowing for absorption of some quantity of CO2 through the leafs. Someone explained to me that these are actually old school techniques. Well I know i started late and didnt follow a regular schedule like i wished for but the plants didn t die, or show any immediate negative upon innoculation, so what can I say? I'm doing this again, perhaps. Only problem is that these things are really a pain to pH correctly
General Hydroponics Dry pH Down : GREAT PRODUCT, hard to find but amazing – not registed on GD for some reason
I still have to make my bubble hash so any advice welcome ! 🚀
Likes
8
Share


@Sur_cannabico
Follow
Cursamos la segunda semana, aún aplicamos bajas dosis de fertilizantes estas pequeñas van bien hasta ahora
9 días
Likes
6
Share


@Borealis_Cannabis
Follow
Starting to get my first issues with what appears to be calcium deficiency and perhaps nitrogen deficiency as well. Bumped up the CALiMAGic to 2mL per gallon to try and turn it around. Measured runoff ph is 6.15 so I think still ok. Did not get a PPM measurement yet though. Assume I still have a few solid weeks of flowering to go.


Likes
14
Share


@RaslionS
Follow
Началась 5 неделя роста. Судя по состоянию растения, оно начинает переходить в стадию предцвета.😊 Обильно набирает зелёную массу. 💪 Продолжаю пригибать вырывающиеся вверх ветви.👇 Подключил ещё 60 ватт света.😺 Поднял лампу повыше. 👆 На улице стоит жара.😎 Температура поднимается до 33 градусов по Цельсию.😕

Likes
26
Share


@Batista
Follow
This week we increased the quantity of fertilizers and transplanted it into a 5 liter container.
Next week we will start LST.
The total height decreases due to the transplant.
We use mycorrhizal fungi (Mykos) in the transplant.

Likes
27
Share


@Dunk_Junk
Follow
I note this strain is super frosty!!!!!!!!!!!!!!!!!!
Still weeks to go!
Processing
Likes
33
Share


@cojastym
Follow
floweeer
start day 104
change fertilizer from nettle to chicken manure, from my free run chicken yard

Likes
21
Share


@Lontra
Follow
Week 7 has started and I'd say, overall she's looking good and healthy.
day 45:
It's time to give her some water and new "food". I took the opportunity to remove a few of the lower and inner leaves and arrange them a little more openly with some garden wire and string.
Regarding those lighter leafs in the top center (pictures under the LED make it really look worse) and the reddish/violet stems i won't do anything for now but observing.
day 46:
just visual checks and refreshing humidation.
day 47:
The soil was already dry again, i guess because of those high temperatures during the last days (up to 38°C inside the box). As she seemed to be doing quite well, I decided to carry out a slightly larger defoliation. Some might even call it “soft lollipopping”. But as a beginner, I want to try the experiment and I'm more afraid of mold than a slightly lower yield. So I removed about 1/3 of the leaves and small shoots in the lower area and also took out some fan leaves and leaves that were growing inwards or covering other shoots. I then used some string to give her a new shape to bring the individual shoots back to a more uniform height.
day 48:
just visual checks and refreshing humidation. I guess she isn't too sad about her new haircut. Additionally playing around with the smartphone microscope I recently bought.
day 49:
The first pistils are beginning to change color. No water needed today, but i guess for a fresh watering tomorrow.
Removed some leafes that wouldn't get much light
The weather should cool down again today and in the next few days, so I'm hoping for lower temperatures inside the grow box. Today I will leave the box open for a while and try to cool down the room in which it is standing.
day 50:
My guess was right, it's watering day. Felt like she needed a little more nutrients so i slightly adapted my plan.
Likes
1
Share

@NewNewbie
Follow
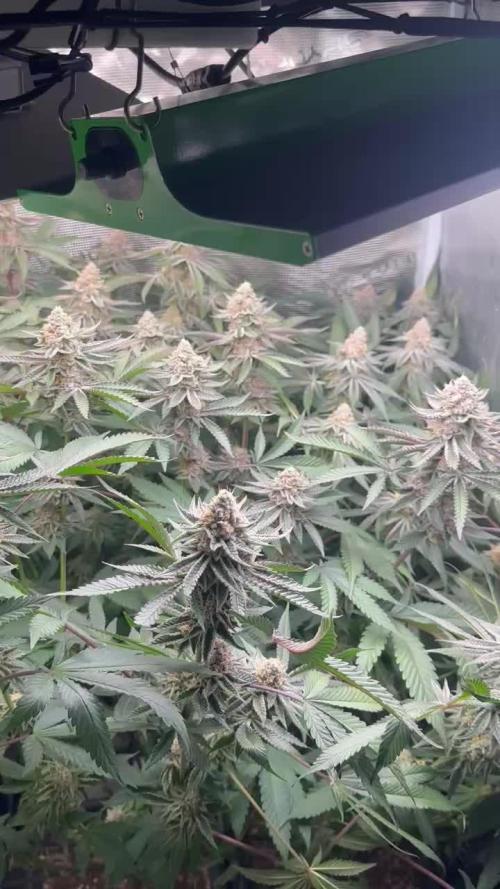
Buds are getting bigger and gain width and mass. Trichomes everywhere, and the smell is very nice. From WW i get a somewhat minty cherry, very pleasent. Love the strains, beautiful plants.