



Likes
1
Share

@birdmountain
Follow
Am Ende der zweiten Hitzewelle ist die Seven Freeze wieder einmal 18 cm gewachsen und ist völlig gesund.
Sie hat ihren Höhenwachstumsvorsprung gegenüben den Anderen gehalten mit dem Preis des vielen Wasserschleppens und Beobachtung auf Trockenstreß. Es könnte sogar sein, dass 12 l. Wasser täglich untertrieben sind, ich wiege nicht das Wasser pro Pflanze.
Die Pflanzen stehen mittlerweile schon zu eng beeinander und müssen weiter verteilt werden.
Die Seven Freeze wächst nit gutem Habitus, recht starken Zweigen und nicht zu dichtem Laub. So kann es weiter gehen.
Kein Fraß
Kein Trockenschaden
Kein Windbruch
Keine Unterdüngung (sie könnte noch mehr gebrauchen)
Eigentlich langweilig...
aber das Ziel ist eine gesunde Outdoor Pflanze mit gutem Ertrag.
Vielen Dank für euren Besuch!
Likes
24
Share


@GERGrowDesigns
Follow
Welcome to Flower Week 8 of SuperStrains Amnesia
I'm excited to share my grow journey with you from my
SuperStrains Project . It's going to be an incredible ride, full of learning, growing, and connecting with fellow growers from all around the world!
For this Project , I’ve chosen the Feminized Photo Strain Amnesia :
Here’s what I’m working with:
• 🌱 Tent: 225x150x150
• 🧑🌾 Breeder Company: SuperStrains
• 💧 Humidity Range: 45
• ⏳ Flowering Time: 10 Weeks
• Strain Info: 25%THC
• 🌡️ Temperature: 26
• 🍵 Pot Size: 20
• Nutrient Brand: Hy-Pro
• ⚡ Lights : 600W x 2
A huge thank you to SuperStrains for allowing me to try my Best with this amazing collection from Photo Strains they managed to Sponsore side by side with theyre Hy-Pro Nutriets . Big thanks for supporting the grower community worldwide! Your genetics and passion speak for themselves!
I would truly appreciate every bit of feedback, help, questions, or discussions – and of course, your likes and interactions mean the world to me as I try to stand out in this exciting competition!
Let’s grow together – and don’t forget to stop by again to see the latest updates!
Happy growing!
Stay lifted and stay curious!
Peace & Buds!

Likes
106
Share


@StarLorr
Follow
Welcome to my autø Øpium Diary.
In this Diary:
Seeds: Sponsored by Ðivine Seeðs
Media: Pro~Mix HP *•ns
Nutrients: Remo Supercharged Kit *•ns
*•not sponsored
___________________________
Feeding:
Tue 22Oct: 2L Remo/Recharge pH'd 6.5
Thu 24Oct: 2L Remo/Recharge pH'd 6.5
Sun 27Oct: 2L Remo/Recharge pH'd 6.5
___________________________
Things are going smoothly, had to put her on a pedestal as her roomie moon rock2 is hugging all the lights😄
___________________________
Thanks for stopping by, likes and comments are appreciated!👊🏻😎
Keep on growin!
Keep on tokin!!!
😙💨💨💨💨💨


Likes
28
Share

@DogDoctorOfficial
Follow
🍰 Lava Cake – Final Harvest & Smoke Report
GrowDiaries | Week 8 (Harvest & Cure)
After months of dedication, lessons, and love, our Lava Cake journey comes to a close — and what an ending it is. Both phenotypes reached maturity beautifully, wrapped in dense, resin-coated buds that carry the unmistakable aroma of sweetness and spice.
🌱 From Seed to Harvest — A Journey in Full Bloom
Our Lava Cake journey began from seed with two unique phenotypes, both full of potential and personality. Week after week, through careful nutrition, TrolMaster monitoring, and endless observation, we watched them evolve. From the early stages of vegetative vigor, through the lush canopy of mid-flower, and even through the challenges of heat and bud rot, these girls showed true resilience.
Each setback taught something — about balance, airflow, humility, and the living rhythm of nature. Both plants were ultimately harvested with respect and gratitude.
⸻
✂️ Harvest & Trimming
After about two weeks of slow drying at 60°F / 60% RH, the branches began to snap — a sure sign the moisture was just right. Each plant was trimmed by hand, carefully and patiently, letting every calyx, pistil, and trichome tell its own story.
The buds were dense, sticky, and heavily frosted — a trimmer’s delight. Finger hash collected along the way was pure gold, rich in aroma and bursting with terpenes. Each snip of the scissors felt like sculpting something sacred.
Both plants were dried whole, allowing for slower moisture migration and a smoother final cure.
⸻
🌿 On Trichomes and Harvest Timing
We chose to harvest when most trichomes were cloudy, with only a few still clear and very few amber. This moment — just before full amber maturity — is where potency meets flavor at its peak.
Why cloudy trichomes?
Because that’s when cannabinoids like THC and terpenes are at their maximum activity. Too early, and you lose potency; too late, and THC starts converting into CBN, giving a heavier, sleepier effect. Cloudy trichomes deliver a balanced high — euphoric yet grounding — capturing the essence of the strain in its full potential.
⸻
🌸 Aroma, Taste & Effects
The Lava Cake lives up to her name and lineage. Her rich terpene profile brings waves of sweet baked goods, layered with berry and grape undertones inherited from her Thin Mint Girl Scout Cookies x Grape Pie heritage.
When smoked, she’s smooth, creamy, and sweet, leaving a lingering flavor on the palate that feels like dessert for the senses. The effects are deeply relaxing, melting away tension and replacing it with calm contentment.
This isn’t a beginner’s strain — her high is potent, steady, and full-bodied. A few tokes are enough to drift into a deeply peaceful, happy state. Perfect for evenings, rest days, or moments when the world needs to slow down.
⸻
🌬️ Curing — Grove Bags & UV Glass Jars
After trimming, buds were stored in Grove Bags, which naturally maintain humidity between 55–62%, eliminating the need for daily “burping.” These innovative curing bags use a one-way humidity membrane, preserving terpenes and color while preventing mold.
Alongside them, we used black UV-resistant glass jars — perfect for long-term storage, protecting cannabinoids from light degradation and keeping aromas fresh.
Together, these methods allowed the buds to cure into perfection — firm, aromatic, and bursting with flavor.
⸻
🔥 Resin, Hash & Full Spectrum Bar
All trim from the grow — not just from Lava Cake — was collected to make a full-spectrum bar using simple, natural heat extraction with hot water in a glass bottle. The result was a potent, sticky, terpene-rich concentrate that perfectly captures the soul of the garden.
⸻
⚖️ Final Yields
• Pheno #1: 144g dry
• Pheno #2: 99g dry
Both phenotypes displayed amazing bud density and structure. In fact, their sheer weight caused a few branches to snap under their own mass — another reason that influenced our harvest timing. These were heavy girls, through and through. 🌿💪
⸻
🙏 Gratitude & Reflections
To everyone who followed along — thank you. To Zamnesia, for the genetics and inspiration, thank you. To the GrowDiaries community, the supporters, the doubters, and everyone in between — thank you for being part of this experience.
And above all, thanks to God, because without Him, none of this beauty — not even the smallest seed — would exist.
Growing Lava Cake wasn’t just about cultivation; it was about connection, learning, and the sacred patience of nature.
⸻
🌀 Closing Thoughts
From seed to smoke, these Lava Cakes have been a story of flavor, resilience, and soul. Despite challenges like heat and bud rot, the final result was spectacular: frosty, aromatic, powerful flowers that embody everything beautiful about this craft.
As we light the first cured joint, we celebrate not just the harvest, but the journey itself.
Until the next grow — stay curious, stay kind, and keep growing. 🌱💚
Thank you to everyone who followed this run — your support, questions, and shared passion have been part of what made this project so rewarding. The full smoke review will follow this harvest report and will be presented in 4K on YouTube, where we’ll document the aroma, flavor, burn, and overall experience with both phenotypes and the pressed hash.
📲 Don’t forget to Subscribe and follow me on Instagram and YouTube @DogDoctorOfficial for exclusive content, real-time updates, and behind-the-scenes magic. You won’t want to miss it.
• GrowDiaries Journal: https://growdiaries.com/grower/dogdoctorofficial
• Instagram: https://www.instagram.com/dogdoctorofficial/
• YouTube: https://www.youtube.com/@dogdoctorofficial
⸻
Explore the Gear that Powers My Grow
If you’re curious about the tech I’m using, check out these links:
• Genetics, gear, nutrients, and more – Zamnesia: https://www.zamnesia.com/
• Environmental control & automation – TrolMaster: https://www.trolmaster.eu/
• Advanced LED lighting – Future of Grow: https://www.futureofgrow.com/
• Root and growth nutrition – Aptus Holland: https://aptus-holland.com/
• Nutrient systems & boosters – Plagron: https://plagron.com/en/
• Soil & substrate excellence – PRO-MIX BX: https://www.pthorticulture.com/en-us/products/pro-mix-bx-mycorrhizae
• Curing and storage – Grove Bags: https://grovebags.com/
⸻
We’ve got much more coming as we move through new grow cycles. Trust me, you won’t want to miss the next steps, let’s push the boundaries of indoor horticulture together!
As always, this is shared for educational purposes, aiming to spread understanding and appreciation for this plant. Let’s celebrate it responsibly and continue to learn and grow together.
With true love comes happiness. Always believe in yourself, and always do things expecting nothing and with an open heart. Be a giver, and the universe will give back in ways you could never imagine.
💚 Growers love to all

Likes
42
Share


@JBoBz
Follow
Growing the Original Glue from GG Strain was an honor for me!
I loved this growth, from the first two little leafs to the hervest I was looking at them all the time because of the different structures compared with my previous and present experiences!
I'm glad to share this diary with all of you stoners!
Happy growing to everyone! 💚🦍💚


Processing
Likes
9
Share


@russrahl
Follow
Flipped to flowering on these girls as the screens are now almost full across the 4x8 tent and we will still need to train them along the screens for the next 2-3 weeks. So working for a packed tent this time hopefully. Plants have been exploding in growth daily. Water was changed out and new water added with 3/4 Remo Flowering lineup and UC Roots at full strength. Smell is starting to get noticeable when you open the tent and is very pleasant.

Likes
3
Share


@spacetimeman
Follow
Mildew was detected in the beginning if the week, the plant sprayed with solution of hydro peroxide to kill spores and then solution of apple vinegar to stop prevent new mold. It worked.
I decreased the concentration of the watering solution and reduced light. A couple of daye left before harvest.

Likes
15
Share


@Dirty_rich
Follow
Hubo avance, ganó peso, y tamaño en las flores, un olor muy parecido a lavanda, tuve problemas con la humedad de mi zona (80% HR) se presentó hongo botrytis, tuve que cosechar la cola principal para que no se propague a las demás ramas, la cola principal pesó 34 gr en verde (recién cosechada).

Likes
22
Share

@Doofy
Follow
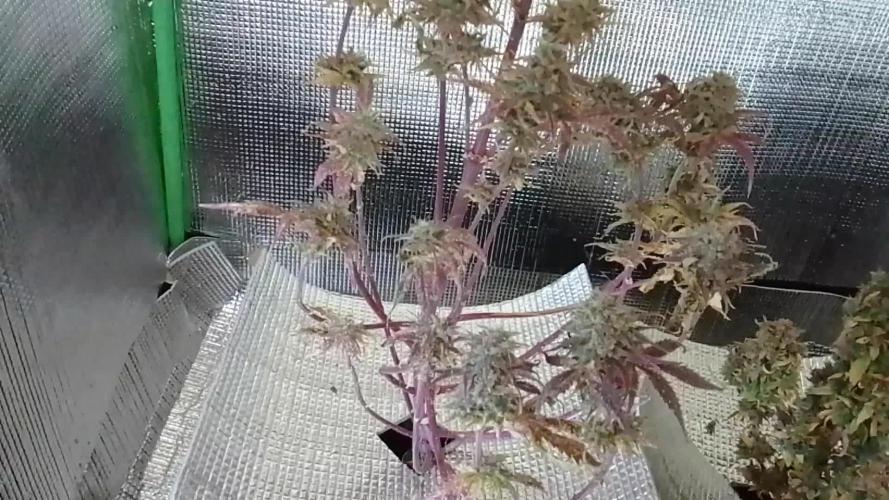
She is not gaining anymore... Guess she will ripen, bigger plant, but still not a bigger harvest...
The sap eaters r still present, but only focus on this Diesel... And they are not explodin, I'm guessing it's near a good balance, with enough natural predators. Also, I pick random beetles from the street and release it in the tent, found a lady but once....


Likes
16
Share


Likes
2
Share


@BetterBud
Follow
Nice chunky cola is starting to form, a bit too close to the light but it's looking really great
Likes
12
Share


@Jays_Not_Here_Man
Follow
Another week has flown by! The girls are doing great, cruise control this week as I have just been monitoring RH and temps. Trying to keep them as low as possible, I’ve been getting as low as 74 during the day and 68 at night.
I finally took a look a look at the trichomes with my jewellers loop, lots of cloudy, and a few amber around the leaves and top colas, but still lot’s of clear trichomes. I’ve ordered myself a wireless/usb digital microscope to assist with the process, and looks like it will be here just in time to determine harvest day. 😎🎄
I started by eliminating the nutrients at the beginning of the week. I typically allow for 3-4 pure water feeds before I harvest, and at the rate they have been drinking, this should be enough to get through the 7-12 days they have before harvest. I don’t flush, but rather “rinse” with normal water amounts, allowing the plant to use up the remaining nutrients in the soil. This also allows me to recover most of the soil from my grows and reuse ♻️ with other soil mix.
There has been great debate and a great deal of bro science out there for many years, but the recent studies suggest there is no difference in end result when it comes to flushing or using nutrients right until the end, if a proper dry and cure is performed. What do you think? What do you prefer to do? Thanks for reading this far, leave me a comment with your preferred method 👊🇨🇦❤️

Likes
13
Share


@Rene1968
Follow
Day 35 is first Day with 12-12 ger.
I get the lights at 60 cm above top of plants with 700 ppfd. About 50% and sprayt them with Neem oil.
Placed ScroG net
Day 36 lights at 828 PPFD
Day 37 lights at 884 PPFD
Day 38 lights at 890 PPFD, Distance 66cm
Day 39 lights at 890 PPFD
Day 40 lights at 890 PPFD
One of my females is al little bit smaller. I tryd too feed her with some Alga Grow too see if she becomes more happy. I hope so.


Likes
5
Share


@dwotTV
Follow
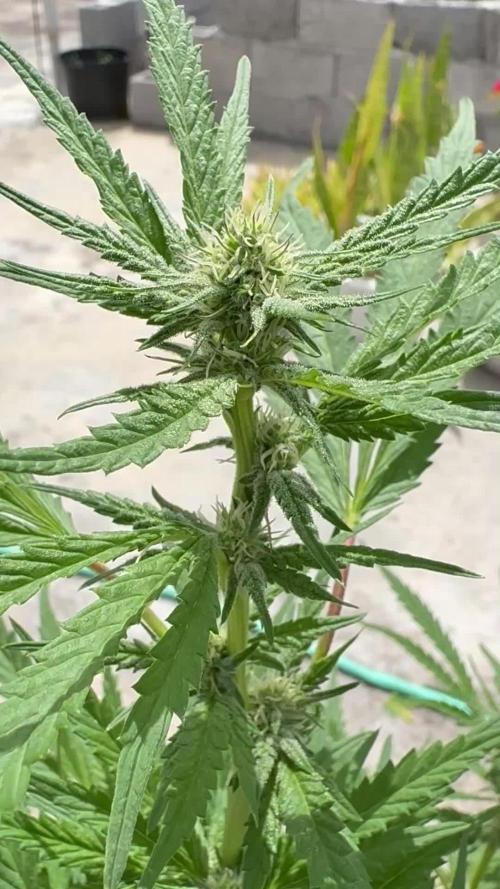
Harvested the more mature plant, it had lost it's top to the wind, harvested a few days ago and has had a couple spots with a little rot removed. Seems stable enough and mature. Going to let the remaining one run out a bit as it seems a bit slower.


Likes
25
Share


@AsNoriu
Follow
Day 85. First Diesel down. This was the most Colourfull plant in all year, sad that it was triggered by light shock, still she was always praying, drinking water fast and loved life. Smells so fruity and fresh.
Day 86. Other run pushes me to chop them earlier, but taste qualities i will get anyway, so Last to Chop is choped ;)


