
Processing
Likes
Comments
Share


@Wollywinkah
Follow
*ADVISE NEEDED*
The day before yesterday I discovered a huge error in my system. I placed filter material in the feed-throughs of the breeding boxes. This is to prevent the roots from growing together over time.
However, what I caused with that is very difficult to explain. The bottom line is that the distribution of food and circulation was actually not good at all.
This also explained the differences in the water temperature, but also PH and EC values. That is now completely under control because it now runs stably for 2 days.
However, you can see that the records have had a bad start. I am thinking about starting over.
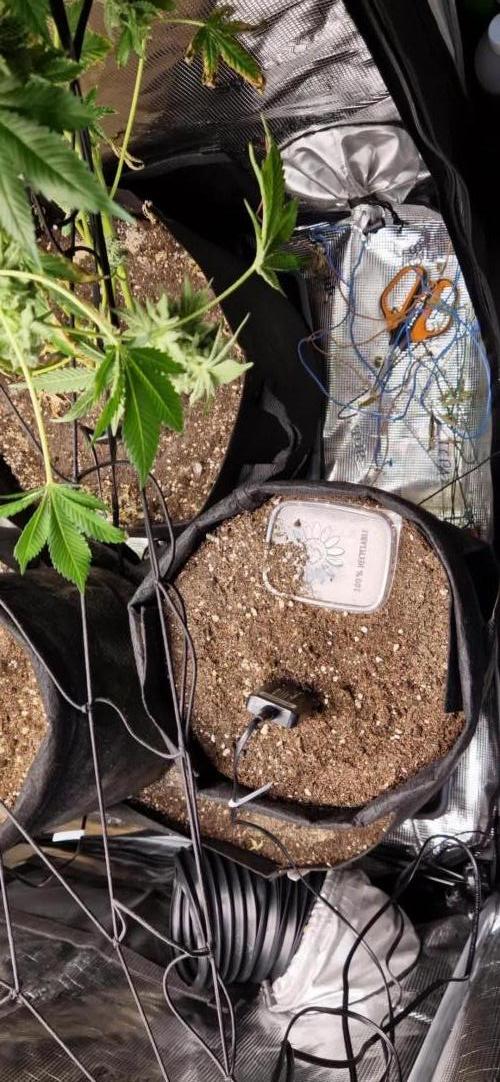
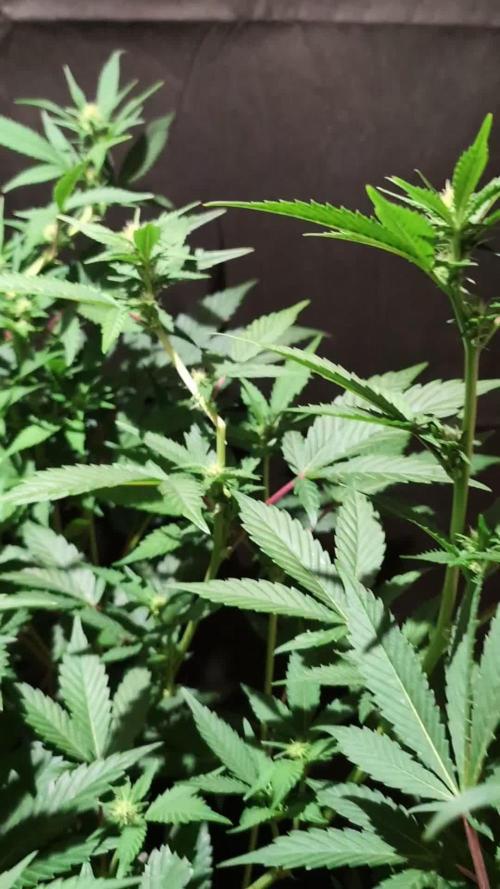
Week 3. Week 2 was looking for the correct settings for my system. I found out that the temperature in the bins is quite different. When I set the water chiller to 19 degrees, it all flows fine into the first container. There it rises about 0.5 degrees per bin. The margin of the chiller is about 1 degrees, causing too many fluctuations in the system, with tray 1 becoming too cold and the last one too cold.
I solved this by shielding the box at the inlet of the tent with heat-protective foil. I also put a fan on the water chiller. If that catches on, the entire loft heats up, whith more fluctiations.
However, I have enough space to measure very precisely and I am getting more and more control.
I think the brown leaves were the cause of much too hot water. Since I have the water temperature under control, I see that the new leaves are growing nicely. Moreover, since yesterday (13-5) I received the nutrition. 10 days late.
I just finish the root scheme I think. That is still 3 days a 70 mm per day combined with BioBizz Heaven.
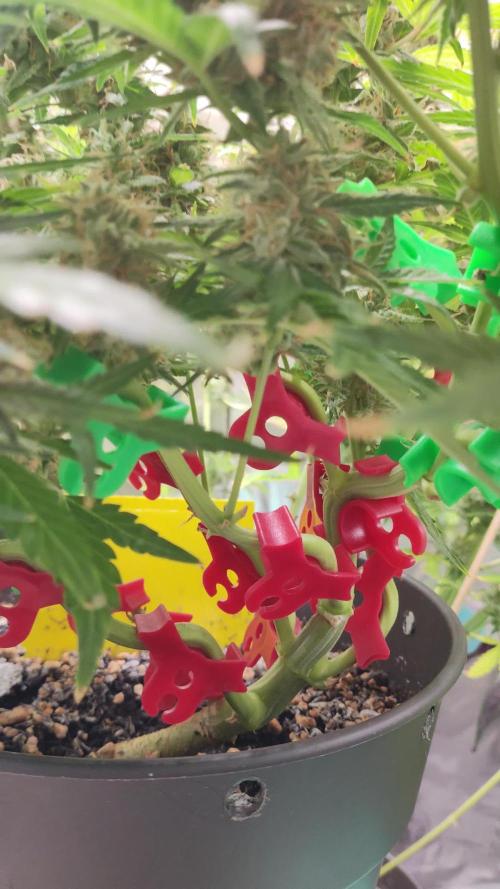
I tried to take some pictures of the roots and some close ups.
I hold the lid with my left hand and with my right hand I try to take a picture zoomed in (max). While the wind makes the roots dance past my lens😵
Something different than usual ... Hope you like it.
If you see something that needs to be addressed, let us know. It is my first breeding so there will undoubtedly go wrong.
This week I also connected the water reservoir with which I can flush the entire system at once. With this I also control the Ph in the system. Will post photos soon.

Likes
2
Share

@Muuuy
Follow
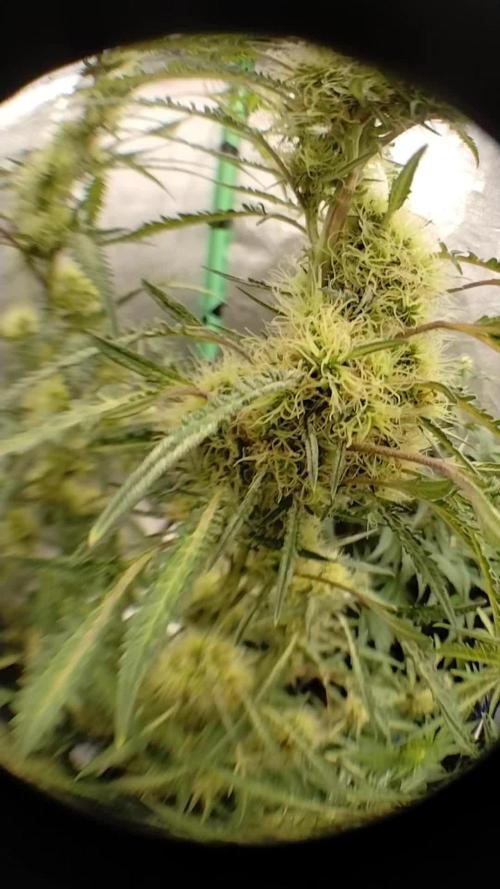
Beginning of week 13 was harvest time!
Checking the trichomes on their main buds led to the decision to harvest them. Almost all of them had already milky looking heads and some of them even turned amber. Their incredibly sour smell was barely tolerable as well.
Made the decision to harvest them all at once, so the grow room can be turned into a drying room for them. Since this is considered an experiment after all, we wanted to try out wet trimming as well to compare it to the dry trim we're used to.
So considering #3 had the least amount of effort due to the low amount of head buds overall, we choose that one to be wet trimmed. It surely was a very sticky and still time-consuming activity, but we're pretty happy with the result.
Can't wait to see and taste them when they're finally ready, dried properly and cured a bit!
This is plant #1.
In comparison to the others she had the least amount of amber trichomes, with most of them being milky though. She could've enjoyed another week of flower for sure, but for the sake of the others being ready, harvesting them all at once was the only reasonable decision. Plant #1 is one of the dry trim ones. Just made sure to remove the biggest leaves that could prevent a good airflow between the buds when they're hung up.

Likes
31
Share


@Screwie
Follow
Howdy doody folkeroonies!
decided to chop the one which was showing some brown trichomes. Glad i did as finally have enough room in the grow tent without everything squishing together!
I’ve got it drying in a box. Not sure if no airflow is an issue, I've asked this in Questions.
One of the GSC’s is a little purple, brown. So nice looking and fat buds too!!
Going away for 2 nights so planning on flushing all tomorrow morning before heading off. 1 plant chopped, 3 left to go. Probably another 2 weeks max before they’re all chopped.


Processing
Likes
3
Share


@DBanned
Follow
June 12, 2020
Week 7
I added some manure to all the pots.
2 of the plants aren’t growing much so Im leaving them to grow, and see what happens.
Plants were a bit too wet from previous thunderstorms, now waiting for them to dry out so I can try and bring their ph down.
Thank you and happy grow🌱
June 14, 2020
Plants started to dry out so we added ph down water and authentik Veg nutrients 4-3-2 by nutri+. Ph’s mix equivalence was around 5.8 So we brought the ph up to +/- 6.4
For ph Up we used sodium bicarbonate(baking soda).
And used 1 litre of water per pot.
Thanks happy grow!!!
Likes
6
Share

@CaveGanja
Follow
Was worth to give her 2 weeks more.
But i didnt dry her slow it was pretty hot around 24C with low humidity.
She dryt 6 days was to long i have a humidity from 58% in the jar.
I like more 62-64% that i cure it under my controll but it is what it is guess i have to do nothing and keep smoking 😎
It smokes well was glad that the fast drying did mess up the taste but it is fine orange citrus like but not like the froot more like the peel strong terpinns.
Likes
3
Share


@Lekouz_2023
Follow
Apport en PK 15/17 organique par griffage.
Arrosage au thè de compost oxygéné.
Defoliation légère pour dégager les sites de fleurs.

Likes
3
Share

@MrWeeedWorld
Follow
Keimungsbericht – Lemon Cherry Sundae Automatic
Heute beginnt mein neues RDWC-Abenteuer mit der brandneuen Lemon Cherry Sundae Automatic von FastBuds.
Für die Keimung habe ich diesmal eine völlig neue Methode ausprobiert – mit einem Ergebnis, das mich absolut überzeugt hat.
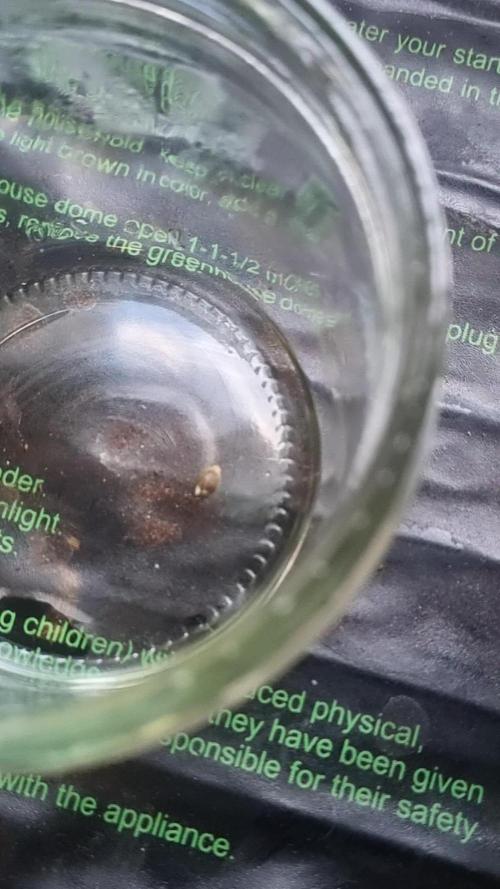
Zum Einsatz kam ein neues, sauberes Marmeladenglas mit Deckel. Das Glas wurde mit etwa 1 cm Osmosewasser befüllt. Anschließend habe ich mit einer Pipette zwei Tropfen 11,9 % Wasserstoffperoxid hinzugefügt und das Glas verschlossen.
Danach wurde das Glas auf einer Heizmatte bei konstanten 28 °C platziert.
Das Ergebnis war beeindruckend: Bereits nach nur 8 Stunden entwickelte die Lemon Cherry Sundae eine kräftige Keimwurzel von etwa 1 cm Länge.
Eine schnellere Keimung habe ich bisher nur selten erlebt. Die Kombination aus sauberem Osmosewasser, stabiler Temperatur und zusätzlicher Sauerstoffversorgung scheint ideale Bedingungen geschaffen zu haben.
Nach diesem perfekten Start zieht die Lemon Cherry Sundae nun in ihr neues RDWC-System ein, wo sie mit dem Plagron Hydro Düngeschema versorgt wird.
Ich freue mich darauf, die Entwicklung dieser neuen Genetik von Anfang an zu dokumentieren und bin gespannt, welches Potenzial sie unter optimalen Hydro-Bedingungen entfalten wird.
Vielen Dank fürs Vorbeischauen!
Jeden Sonntag gibt es neue Updates zu diesem Grow.
--------------------------------------------------------------------------------------------------------------------------------------------------------------------
Germination Report – Lemon Cherry Sundae Automatic
Today marks the beginning of my new RDWC adventure with the brand-new Lemon Cherry Sundae Automatic from FastBuds.
For this grow I decided to test a completely new germination method and the results were outstanding.
A brand-new clean glass jar with a lid was filled with approximately 1 cm of reverse osmosis water. Using a pipette, I added two drops of 11.9% hydrogen peroxide before sealing the jar.
The jar was then placed on a heating mat maintaining a constant temperature of 28°C (82°F).
The results were impressive. After only 8 hours, the Lemon Cherry Sundae had already developed a strong taproot measuring approximately 1 cm in length.
This was one of the fastest germination results I have experienced so far. The combination of clean RO water, stable warmth and additional oxygen appears to have created ideal conditions.
Following this excellent start, the Lemon Cherry Sundae is now moving into its new RDWC system where it will be grown using the Plagron Hydro nutrient line.
I am excited to document the complete journey of this new genetic and discover its full potential under optimized hydroponic conditions.
Thank you for following along!
New updates will be posted every Sunday.

Processing
Likes
6
Share


@ladyjane
Follow
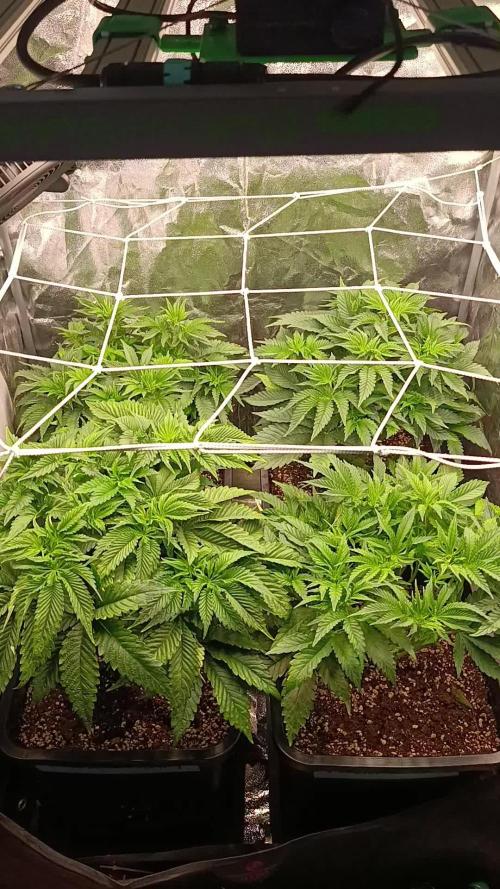
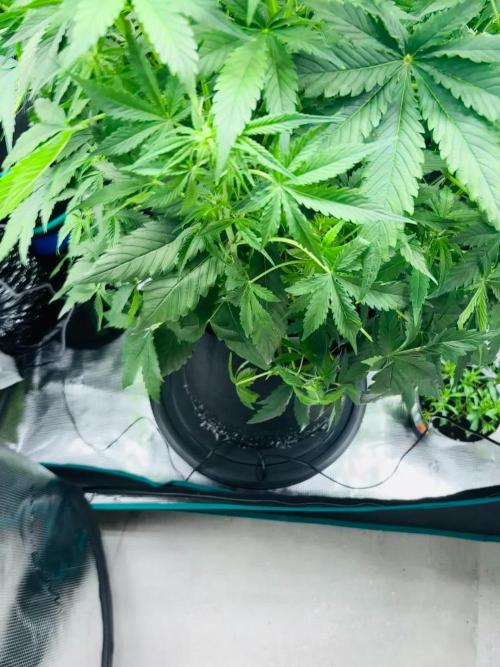
8/10 - In prep for flower I've got some Compost Tea brewing with a little Terp Tea Bloom by Roots Organics. .Also did a little selective defoliation
8/11 - Flipped the ladies to flower today! And all is good in the 8x4.
8/12 - Watered all the ladies with the Compost/Terp Tea. Also did some more defoliation and added some mosquito bits for added pest prevention.

Likes
1
Share

@Catawbiense
Follow
🌱 Veg Week 5 – Erholung & Vorbereitung auf den Flip
Veg Woche 5 war etwas holprig. Während ein paar Tagen Abwesenheit standen die Pflanzen zu trocken, kombiniert mit 24h LED-Licht, was zu leichtem Stress und CalMag-Mangel geführt hat (unruhige Blattfarbe, viele kleine Budsites).
Nach Anpassungen:
Umstellung auf 18/6
Licht etwas entschärft
CalMag-Gabe
leichtes Lollipopping & Defolieren
Bereits nach wenigen Tagen zeigen die Pflanzen eine deutliche Erholung: neues Wachstum ist vital, Triebe werden kräftiger und die Pflanzen wirken insgesamt entspannter.
Das Zelt ist gut gefüllt, weitere Trainingsmassnahmen sind nicht geplant. Der Stretch soll den Rest erledigen.
Der Flip in die Blüte ist in den nächsten Tagen geplant, sobald die Erholung vollständig abgeschlossen ist.


Likes
58
Share


@Rap_a_cap
Follow
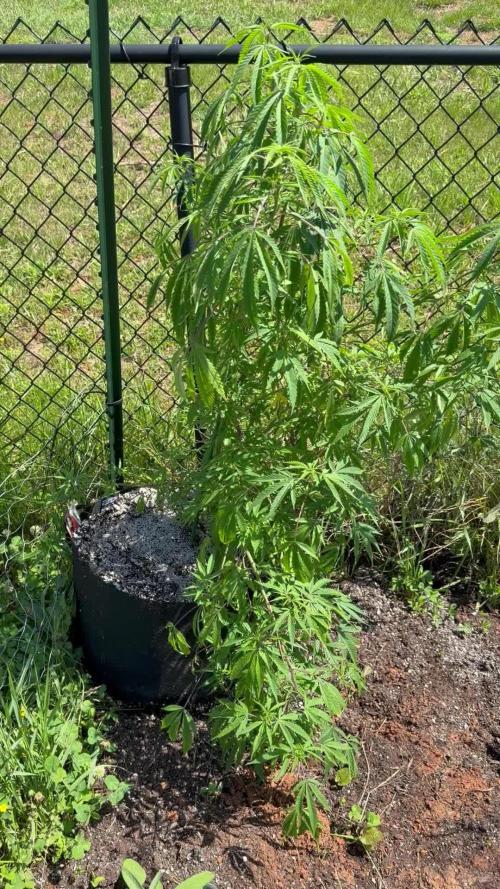
Usual summer week here in the south, every day above 86 ° F (max 100 ° F). My pheno is a medium sized plant, is not a beast but is growing well, drinking 2 gallons per day of spring water showing only few signs of heat stress. She's in full stretch. I fed her half the recommended dose of Biobizz Grow 'cause is too hot and don't want to burn her. I think we are 10 days before flowering. I covered her with a PVC net in order to give her a little shield from the sun and give me more privacy ;-)
P. S. She has an unbelievable smell, it remember to me Kashmir pollen hash
Processing
Likes
29
Share


@Grey_Wolf
Follow
Ginger Nut Cookies & Aussie Music Videos
5 weeks of flowering completed
2nd April 2020
Hi Everyone , Welcome back to my diary
The plant I created is growing nicely
nothing much to report other than the smell has changed yet again...
Now it resembles yoghurt or slightly sour milk crossed with fruit.
Not an unpleasent smell by any means
just unusual. I'm not needing to feed
a lot as the soil seems to be providing most of her nutritional needs.
Now For the Aussie Music Videos
Because this plant is geeting closer and closer to harvest time I thought I had better start doing more than one video a
week lest I miss out on too many great videos I could add. So this week I have
picked three videos from three different
Artists all of which are very much loved here in australia.
First one is a Group called "Crowded House" with their hit song "Better be home soon" here is the link....
https://www.youtube.com/watch?v=AQOlwMKpmvQ
Second group is called the "Hoodoo Gurus" with "Like wow wipe out"
https://www.youtube.com/watch?v=vFnaNPGe4gQ
And the third for this week is a great
band actually from New Zealand but we claim them as our own "Mental as Anything" with "Live It Up"
https://www.youtube.com/watch?v=kK_eQImKnPA
As usual I have provided a short clip of each song as a preview in the above image and video section.
I hope you like this weeks update and please leave me a like if you did.
Please stay safe and well Everyone and
I will see you all back here next Week.
Likes
3
Share

@GoodTimesOrganics
Follow
Hi liebe Community and Welcome back! 💚
Der zweite Strain von Good Times Genetics. Entwickelt sich überaschend anders als vermutet.
Ein schönes Wuchsbild verreint mit einem doch unterschätzen Stretch! Die Pflanze hat innerhalb der letzten 2 Wochen einen starken Stretch von knappen 20 cm hingelegt.
Das bedeutet, das die Diesel Sativa Gene jetzt voll einschlagen.
Daher eher die Tendenz 60% Indica, 40% Sativa.
Nach der zweiten Blütenwoche entwickeln sich die Blütentriebe immer stärker und die Stigmen bilden sich weiter aus.
Der Stängelabrieb duftet schon stark nach säuerlichen, dieselartigen Nuancen, mit einen etwas GMO typischen Aroma.
Die Wachstumsbedingungen im Growzelt sind aktuell wieder super!
———————
🌞 Temp: 22°C
🌚 Temp: 20 °C
💨 RH: 53%
VPD: 0,91 kPa
😎PPFD: 830 mqm
———————
Stay Tuned! 💚
Likes
49
Share


@Roberts
Follow
The Mandarin Squeeze sisters are growing good. The grow room appears to be pest free now. I had neem oil treated the plants twice. I then treated the grow space with ortho home defense. I did not get it on the plants. It appears to have work. Grow diaries is really messed up still, and Is altering my information input on numbers. Hopefully it will be fixed soon. Thank you Spider Farmer, and Terpyz Mutant Genetics. 🤜🏻🤛🏻🌱🌱🌱
Thank you grow diaries community for the 👇likes👇, follows, comments, and subscriptions on my YouTube channel👇.
❄️🌱🍻 Happy Growing 🌱🌱🌱
https://youtube.com/channel/UCAhN7yRzWLpcaRHhMIQ7X4g

Likes
332
Share


@OrganicNature420
Follow
Germination date 🌰 03/03/2021
Day 36 🌱 11/04/2021
Strain 🍁
Purple Matcha, Humboldt seed bank
Nutrients 💉
Advanced nutrients
PH perfect sensi grow A+B (veg)
PH perfect sensi bloom A+b (flower)
B-52 (through veg until week2 of flower)
Voodoo juice (🖕🏻)
Tarantula (🖕🏻)
Piranha (🖕🏻)
Sensizym (all the way through)
Rhino skin (🖕🏻) add first leave for an hour
Big bud coco (week2+ of flower
Bud xfactor (🖕🏻)
Nirvana (🖕🏻)
Bud igniter (first 2weeks of flower)
Overdrive (last 2weeks of flower)
Flawless finish (flush week)
RockHoldings Rockresinator(week2+ of flower)
Vitalink calmag
Set Up
⛺ amazon special 1.2m x1.2m
💡 spiderfarmer sf4000
📤📥 AC infinity 6inch
💧 10lt dehumidifier
Notes🗒️✏️
Well impressed with this for my first ever coco grow 🌱👍🏻 shes looking so good. Humboldt producing some good quality seeds. I did pay a small fortune for them but looks well worth ever buck spent! Rising the ec up this week to 1.0 and will leave it there until I flip. Pretty sure I could go more but I just dont think it's worth it although I do have the best master grower at hand (PharmaZ) follow his account 👍🏻🌱
Cant really fault Advanced nutrients with this strain. I'm running 9 different nutrients of theirs and it's working out nicely no hic cups at all. Now I've seen online somewhere that you cant add bud factor x with other advanced nutrients when flowering? Is this true and genuine help would be grateful
Happy growing everyone 🌱🍁

Likes
13
Share


@Bryankush
Follow
La prima settimana di fioritura è andata molto bene vediamo come prosegue
Giorno 2 la sera viene annaffiata con 2L di acqua
Giorno 4 defogliazione per esporre tutte le cime alla luce
Giorno 7 verrà annaffiata con 2L di acqua a 700ppm
Processing
Likes
11
Share


@Chimney_Chief
Follow
Strong week of flowering, shes healthy and thick ;) nutes have been upped and sumo boost added for this weeks water change.
LST is becoming lighter and defoliation I shall complete on week 3 for the last time, right now just letting her do her thing.
Shes also leaning heavy on one side so have had to give her a little support with a soft tie.

Likes
Comments
Share

@HuskyHouse
Follow
She is doing well, had a storm the second day and was tilting after her transplant so I propped her up with a stick. I will transplant her again to a 15 gallon in a few weeks.


Likes
1
Share

@Lord_Ninnyhammer
Follow
Unfortunately, I didn’t have much time to take care of the plants over the holidays. As a result, the plant on the left was exposed to a lot of heat from the grow light. Even though I adjusted the light height regularly, the plant simply kept growing straight into it. By now, a strong and very noticeable smell has developed, so I had to install the filter on the floor since I no longer have space above the grow light.
Today I also managed to install my VIVOSUN grow cam. After several attempts to connect it to the Wi-Fi, it finally worked. The image quality is good, but I’m not 100% satisfied with the overall build quality of the camera and its mounting system.
I trimmed the plant today as well, removing the old yellow leaves and thinning it out a bit. And honestly—my hands smell amazing now. 🌱

