Likes
Comments
Share


@Ledbelieve
Follow
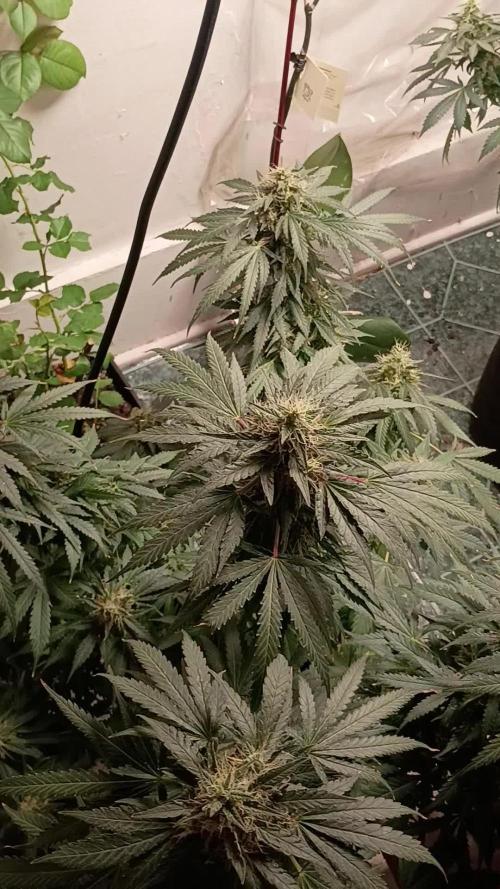
Had to tear out my best looking Deep Purple because it was a male :(. So bummed 🙁 so only have one left so fingers crossed. Two of the fast buds CBD got about one week left. The other on is twice the size and about 3 weeks left. They smell very citrusy 🍋. Grow on!!


Likes
20
Share


@Wolfgreensmoke
Follow
Los cogollos progresan adecuadamente☝️🙌
La cantidad de tricomas me esta sorprendiendo y los colores que estan cogiendo las plantas son espectaculares. Tonos morados y rosas bañan mi indoor💜
Y el olor caracteristico a gorila glue es mas que apreciable

Likes
21
Share


@BleedingGums
Follow
Hello everybody!🙏🏿🌸
the girls recovered well after the topping , with no grow stops and feeling pretty good! ( 2 of them even got 4 new main stems )
Looking forward for the first trimming and flower phase.
Moisture is pretty high, I noticed water forming under some pressed leaves.
-They getting 1,25,l 2x per week
- The roots start to grow out at the bottom of the pot
Fan running on full power and they hearing classic music most of the time
Day 20
-each Lady got 1,25l
- pulled the baby leaves at the bottom
-replaced them in the tent
- placed van on a higher point
" Cant wait for start of next week and flower phase🌸🙏🏿"
Day 21
- noticed water on the side of the tent
- leaves got greener after watering
- some leaves got little burns on the edges so i adjusted the light

Likes
15
Share


@d0cterstrain
Follow
Gorilla Zkittlez took me through all the phases and finally got culled. ayahuasca purples going good.

Likes
26
Share


@Gunnen
Follow
This week will be mostly keeping an eye on tying down new shoots as we progress into early flower and things are still able to be bent. Also as we are going into a total of week 6 from seed, I am amending the top soil with 3 tablespoons per pot (7 gal) of the 2-8-4, for the flowering stage. Also adding 1 tablespoon of the 4-4-4 all purpose per pot.
I originally messed up my measurements of nutrients. So the original medium had 6 tablespoons of 4-4-4 all purpose for a 7 gal pot with 1 tablespoon of 2-8-4 bloom. I have corrected those this week as well.
As I continue through the week I will be keeping an eye on the environment, keeping humidity lower and watering top soil to keep moist. Also some light defoliation where necessary to increase light penetration while I continue to LST.
So far things still seem healthy, aiming water to be with a PH of between 6.2-6.6 and dechlorinating for 24 hours. Strain is sitting lower and bushy, but quite a few bud sites.

Likes
16
Share


@ZzTooRightOGzZ
Follow
Just feeding it at the moment.
Still not to sure if it's male or female yet.
She is female 😁.
Likes
5
Share


@Ninjabuds
Follow
This will be my 1st auto run. Other than one time I was sent some free f1 autos from rqs and I started some but I ended up tossing them for some reason or another. I am actually super excited to try out fastbuds. I have been wanting to try out fastbuds for over a year now. I'm not the greatest with seedlings so I am doing a test run with a 2x2 tent I'm gonna try and grow the best plant I get out if the 3 seeds hopefully it doesn't out grow my small 2x2 tent . Pound cake thou looks like a killer strain with some fat buds can't wait to see how fast fast buds really are. Here we go.


Likes
36
Share


@GYOweed
Follow
One pheno smells like straight up slurricane i grew from clones so im sure not a mixed up seed lol
One pheno has not much scent and probably leans bubba kush.
I have no idea where this sweet candy berry pheno is coming from...probably wedding cake.
I hope to get some damn cheese from the 3rd one that i saved but didnt make the flower room cut.
Size and trichomes for week 3 is satisfactory given i did a heavy defoliaton at flip, and these are only 10L/3 gallon grow bags sharing a 200w light.
Tried to stop stretch with cytokinins and kelp but i may have to raise the lights?

Likes
6
Share


Likes
8
Share


@GroloCup
Follow
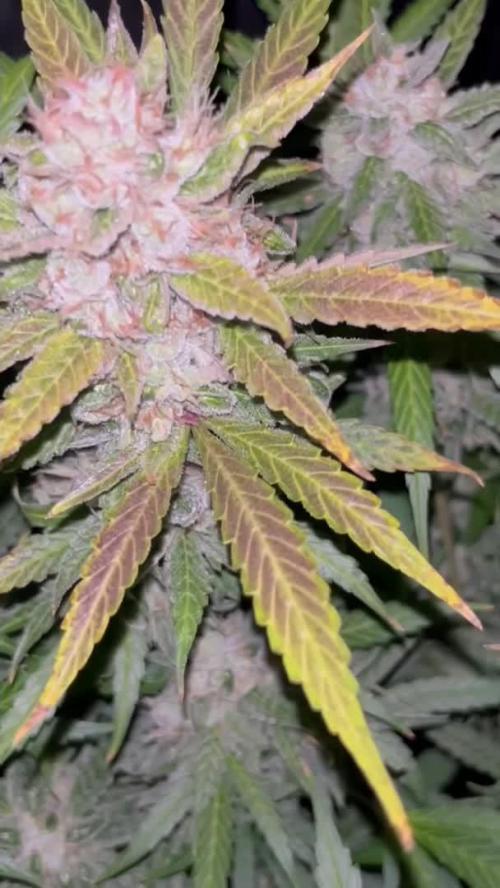
A week in and four out of the six are ready to head to the big tent to go into their one gallon hydro buckets... I've been impressed so far with the 100% germination rate as well as the vigor in which these have taken off. The roots are well over 6 inches and they've been guzzling up this diluted nutrient solution I've started them off with.



Likes
5
Share


@TheGreenGroomer
Follow
Boom! We’re officially rolling into Week 2 of flower and things are looking dialed in across the board.
PPMs are sitting right where I want them, pH is locked in, and the PPFD is tuned to a T
Since the flip to flower, she’s been getting 3L of water each day, and she’s been taking it in perfectly with no signs of stress or runoff issues.
I did a heavy lollipop and defoliation about 4 days ago—cleared out a bunch of lower shoots and leaves under the canopy, plus some fan leaves up top that were covering bud sites and couldn’t be tucked.
Airflow is much better now, and light penetration has definitely improved.
The magnesium deficiency I had earlier seems to be under control. New growth is looking lush and vibrant.
She’s back on track and praying hard toward the light.
Really looking forward to Week 3 when the buds start forming and the magic kicks in!

Likes
8
Share


@Goldenbags
Follow
9/3 One of the West Coast OG's, seems to be a bit stunted..the smallest of the lot but has the most pistils so far.
11/3 lsd has started flowering! Have been doing some light defoliation here and there and some lst to open them up.
Likes
12
Share


@MayanGrow
Follow
And thats why I hate this stage 😂😂😂... Is torture wait for taste this beauty's, the northern lights are surprising me, they are slowly but huge strains.
Likes
1
Share


@Ferenc
Follow
Day 22: 600W LED 20 hours on 4 hours off, the same with ventilation. Humidity around 60-70%. Water intake 50ml per plant per day plus some triggering spray. Bat gunao, Epsom salt, Biobizz BioGrow, BioBloom and TopMax for fertilization. .. I will use these ones 3 x a week and I will use bat gunao every second day. I will see:) Critical Orange Punch is the fastest and biggest and Lemon Zkittle started coming up as well..
Day 24: Critical Orange Punch is crazy she grows so fast she looks like a palm tree now. Sour Orange and Lemon Zkittle is developing very well Sour Stomper remains small. Another Sour Orange is on the way in the corner she is the smallest but she was planted much more later.
Day 28: End of the week the tallest is Critical Orange Punch with 22 cm and the shortest is Sour Stomper with 10 cm.


Likes
2
Share

@MrWeeedWorld
Follow
🍑🍑🍑 Apricot Automatic – Outdoor Projekt
Woche 2
Während die Strawberry Gorillas bereits in der Blüte stehen, beginnt für drei neue Damen gerade erst das Abenteuer.
Alle drei Apricot Automatics entwickeln sich gesund, zeigen eine kräftige grüne Farbe und haben sich hervorragend an die Outdoor-Bedingungen angepasst. Trotz ihres jungen Alters legen sie aktuell das Fundament für einen spannenden Sommer.
🌱 Gesunde Entwicklung
☀️ Sehr gute Anpassung an das Outdoor-Klima
💚 Keine sichtbaren Mangelerscheinungen oder Stresssymptome
🌿 Stetig neues Wachstum
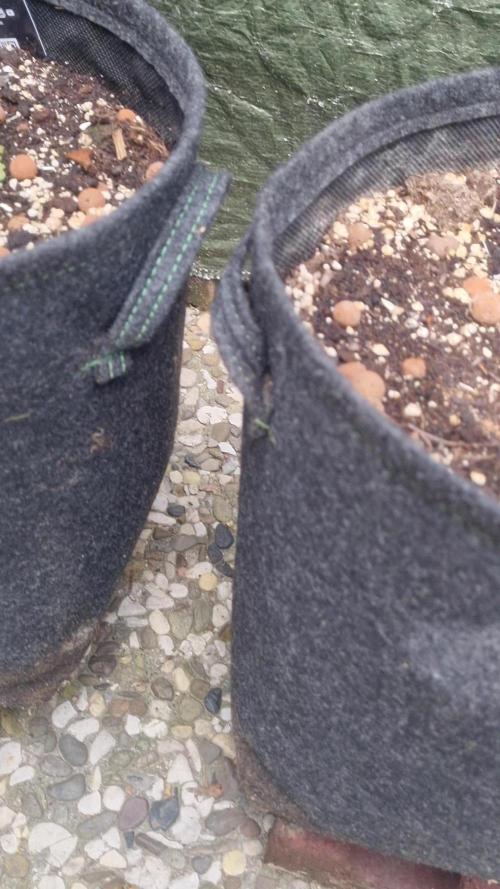
Der Großteil der Arbeit findet momentan unter der Erde statt. Die Wurzeln erschließen nach und nach die Stofftöpfe und schaffen die Grundlage für das spätere explosive Wachstum.
Es ist immer wieder faszinierend zu sehen, dass jede große Outdoor-Pflanze einmal genau so begonnen hat – klein, unscheinbar und voller Potenzial.
Für die kommenden Tage lautet die Mission:
Wurzeln bilden, Sonne tanken und sich auf die Wachstumsphase vorbereiten.
Das Abenteuer hat gerade erst begonnen. 🍑☀️🌱
📅 Wie jeden Sonntag gibt es neue Updates auf GrowDiaries, damit ihr die Entwicklung aller drei Apricot Automatic Pflanzen durch die gesamte Outdoor-Saison 2026 verfolgen könnt. 😎🍑🍑🍑🌱
--------------------------------------------------------------------------------------------------------------------------------------------------------------------
🍑🍑🍑 Apricot Automatic – Outdoor Project
Week 2
While the Strawberry Gorillas are already entering flower, three new ladies have just begun their journey.
All three Apricot Automatics are showing healthy growth, vibrant green color, and excellent adaptation to their outdoor environment. Despite their young age, they are already building the foundation for what could become an exciting summer project.
🌱 Healthy development
☀️ Responding well to outdoor conditions
💚 No signs of deficiencies or stress
🌿 New growth appearing steadily
At this stage, most of the work is happening below the surface as the roots establish themselves throughout the fabric pots. Once the root zone expands, growth above ground should accelerate significantly.
It's always amazing to remember that every giant outdoor plant starts exactly like this — small, simple, and full of potential.
For now, the mission is clear:
Build roots, absorb sunshine, and prepare for the explosive growth phase ahead.
The adventure has only just begun. 🍑☀️🌱
📅 As always, new updates will be posted every Sunday on GrowDiaries so you can follow the complete journey of all three Apricot Automatic plants throughout the 2026 outdoor season. 😎🍑🍑🍑🌱