




Likes
153
Share


@StarLorr
Follow
Welcome to my Banana Purple Punch diary.
🍌💜🤪💥🥊
In this Diary:
Seeds: [420 Fast Buds]from my growmie Tropicannibis_Todd 👊🏻😎
Media: Pro~Mix HP Open Top Grow Bag, Connect.
Nutrients: Green Planet Nutrients,
2 Part Dual Fuel starter kit.
RealGrowers: Recharge.
Diablo nutrients: Ripping.
Feeding :
Wed 13Mar: 3 1/3L Nutes/Recharge pH'd 6.5
Sat 16Mar: 2.6L Monster K,Blaster pH'd 6.5
___________________________
__________________________
Buds are getting chunkier.😋
She smell so nice!
___________________________
Thanks for stopping by, likes and comments are appreciated.👊🏻😎
Keep on growin!
Keep on tokin!!!
😙💨💨💨💨💨

Likes
20
Share


@pifflestikkz
Follow
Day 60
Day 25 Flower
She has really taken off, dominated the tent already nearly 😂🤦♂️
Blue nerdz no where near as big as this Kong auto.
Bud sites developing, pistils flying off everywhere fully loaded, resin production under way, I'll get a few good macros later.
Stretch has finished I hope 😂
She seems to have slowed down abit this week and focused on flower production.
Day 62
Day 27 Flower - had to really bring the lst down and tighter on her again, I believe her stretch is almost over as her bud development is now well under way 🙌✌️💚

Likes
9
Share


@Glen1818
Follow
Its Week 9 , i flush them once with AN Flawless Finish, i will cut them when most trichomes are cloudy and a few amber , should be in 7-10 days ready

Likes
2
Share

@MindFlowers68
Follow
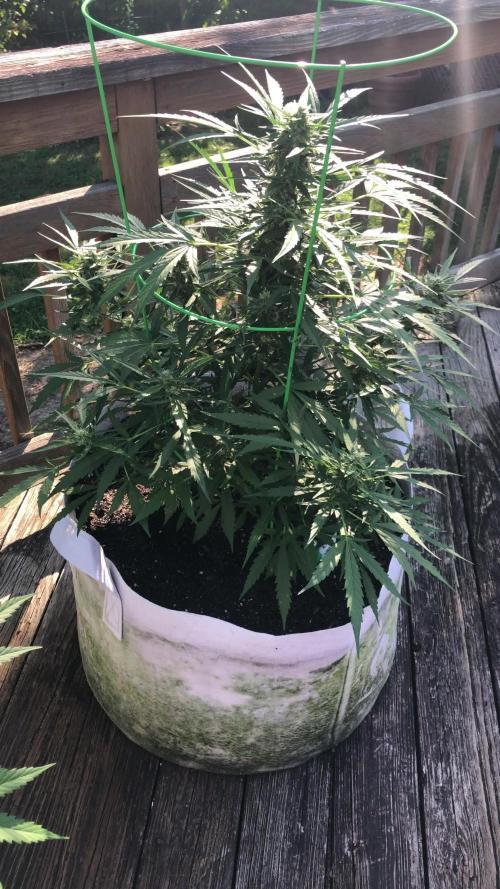
Shes stoped growing in height for the most part but the buds are just getting started and already filling the space of the nodes. Already covered in trichomes and the smell is very sweet and citrus. Going to be some perfect mid summer smoke! I cant wait.
Likes
2
Share


@Semi-Auto
Follow
I topped the two healthiest the Bruce banner and the bigger blackberry auto I also tied down two of them I will let the smaller blackberry run naturally I don’t know if I will do lst though I will see with a little more observation I am still trying to get the watering schedule down pat so I will let the soil dry out a little at least to half the weight it is now oh yeah Ac Infinity holla at me let work!!!!!
Likes
13
Share


@leefy770
Follow
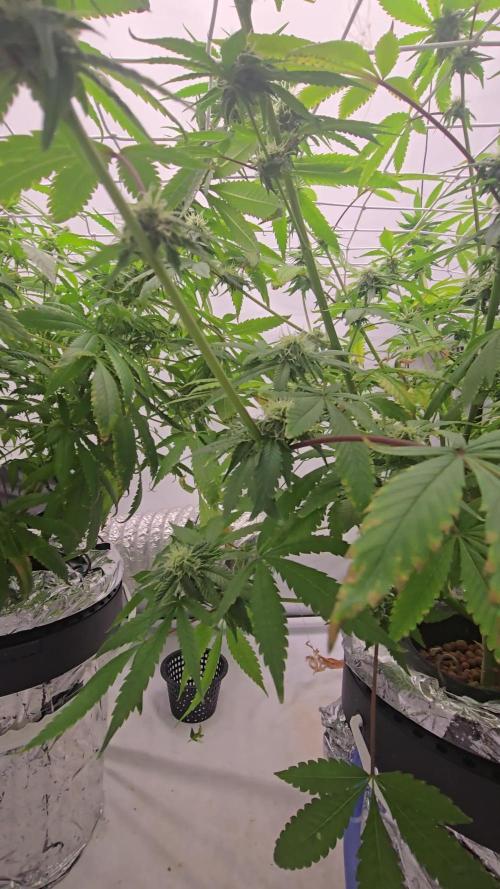
Week 2.I rearranged a few lights in my grow room to get rid of unnecessary lighting and I also moved my auto flowers to their own separate environment. Only about three more weeks left on the Auto’s and I’ll be done for now. I plan on using a harvest right freeze dryer to cure




Likes
3
Share


@Unculti_responsable
Follow
Esta semana hicimos la última poda de bajos y alicales , es una de las últimas podas q hacemos! Después de esto la vamos a pasas a 10 litros y ya la mandamos a florecer creo q esta más q lista para arrancar el proceso de floración

Likes
9
Share


@Northstar_cannabis
Follow
LSD-25 by far my favorite plant I've ever grown. It's colors are so beautiful, it's growth is exciting to watch. Fastbuds really out did themselves on this one! I love it.
Likes
27
Share


@Smokepurple137
Follow
All are going strong, zkittles OG auto is nearly 30cm bigger than the rest and has started showing bud sites, the rest are not far behind at all. I think they will be into flowering stage at the end of next week and by then hopefully 30-40cm taller. Do si dos is very different, looks short and stout so will be doing some LST on her. Seems to be happy with the nutrients and strengthening nicely. Added another 600w light on 11/12/20 so 3 600w lights in now.
Likes
13
Share


@Andres
Follow
a plant very resistant to everything highly recommended...uff .... a knock out plant an earthy taste and pine ... with a dense smoke ...... and of compact and abundant buds ... a 4x4 all-terrain plant ... 100% recommendable ... with their healthy roots....00

Processing
Likes
18
Share


@AuntMeanie
Follow
Week 6 starts 12/31/21 but I happened to notice a weird leaf the night before. The Northern Light X Blueberry auto is very dark green and has sharp downturned tips. Which starts down the rabbit hole of google search to see the cause. I decide that is is Nitrogen toxicity caused by underwatering. At this time I was not really paying attention to when I feed them just whenever the pots were light. I watered them I later realize that while it may have started with underwatering it was so many other problems at once. I forgot to check the ppm or ph going in one day last week so I checked them going out. The run off was 2700ppm and I forgot to look up what that meant. I also doubled the strength of the nutes.
1/2 Saturday I flushed all the plants with 5 gallons of fresh water each that read 6.43 ph & 51ppm. I have Fox farm sledge hammer but for some reason I decided to use just water. The run off was consistently 6.2ph and I rinsed until the ppm was about 450 on NB. 250 ppm on Gorilla Glue and Pineapple express. I then decided that since it was nitrogen toxicity from underwatering that I should not starve the plant so I gave her week 1 of flower nutrients from the Foxfarm feeding schedule at 1/2 strength. I did not use Calmag since it's nitrogen was 2 and I didn't add the boomerang because that has nitrogen as a 1 and I thought since this plant has nitrogen toxicity I should skip the extra 3 nitrogen for now. I set each plant up on blocks so air could totally circulate to dry out the pots. Turned the fans on and waited.
1/6 There has been almost no growth since the flush. NB started off at a little over 9 inches and if I stretch her she is 10 at most.
Likes
5
Share


@Enki_Weed
Follow
Diese schwarze Woche wird noch beschrieben .... in der Bericht der 11 Woch

Likes
50
Share


@GMSgrows
Follow
Sleepy Joe's are wide awake and throwing some nice flowers. Stacking up nice and starting to show some trichomes now. Odours in the room are very pleasant. Hoping these ladies hit their high tech levels. 34% is nothing to sneeze at.

Processing
Likes
9
Share


@8708x
Follow
Harvested the left one and the right one will be harvested on thursday , im pretty happy with the result from the first one considering it was my first grow. Its now drying up


Likes
47
Share


@FreddyGrows
Follow
Third week of visible flowering.
Growing out nice cant wait for the buds to grow fat and big.
While they grow i give them a bit more nutrient every feeding so now im @ EC 1.6
Im thinking of maybe going up to an EC1.8 if anyone has any tips for this??
Thanks for reading again and untill next time

Likes
6
Share

@Northfork
Follow
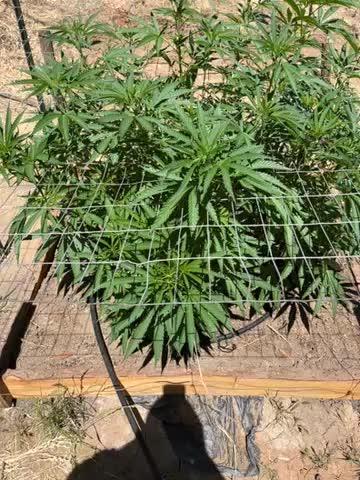
Week six for the Apple fritter continues to grow great no problems. The bugs are interfering with the temperatures haven’t interfered with this growth rate either couple hundred degree days out here so far but the apple fritter said nothing bad happened to it his truck and ride along 65 inches wide I believe by 55 inches wide 54 inches tall Got boogie brew this week and pure protein and soluble seaweed happiest can be growing great .

Likes
13
Share

@Chubbs
Follow
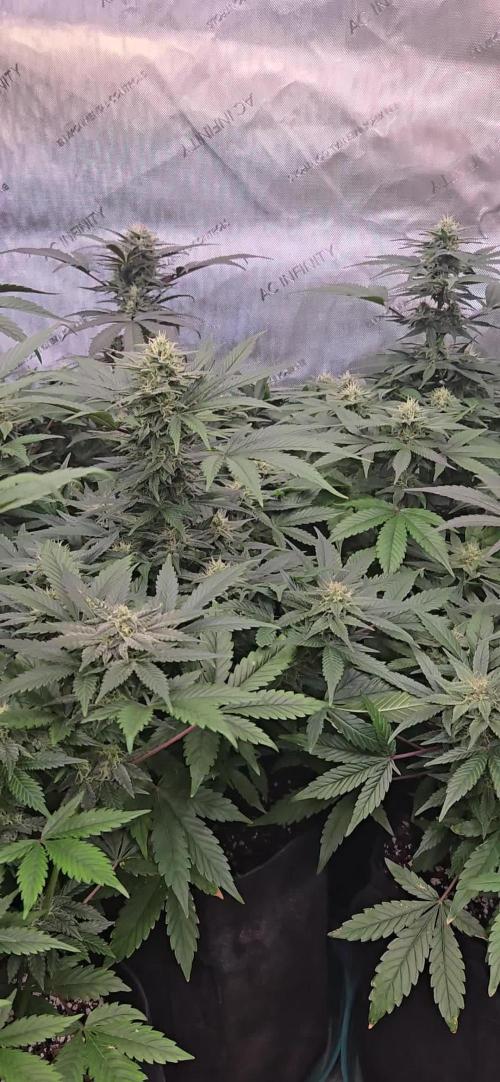
What up Fam, weekly updates on these lovely ladies. This week it's been warm and such a bad time for my AC to go out but overall temps been in the mid it's inside the tent and the plants seem to not mind at all. They're still getting fed 16oz daily. I'd say from the looks, maybe 2-3 more weeks until harvest. Happy Growing.
Likes
4
Share


@knnabisgrower
Follow
Empezamos la septima semana cambiando el ciclo de lúminico a 12 horas de luz y 12 horas de oscuridad para inducir la floración, también empezamos los riegos con fertilizantes para estimular la flora y aumentar la producción de tricomas, mejorar el aroma de la flor y aumentar el peso final de la cosecha.
