


Likes
Comments
Share

@4hundert20
Follow
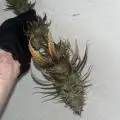
Eigentlich hatte ich dieses Mal vor, den Hauptstamm abzuknicken, anstatt zu toppen,fimmen,etc
Dabei habe ich wohl den Moment verpasst, denn der Stamm ist dafür mittlerweile viel zu robust. Wahrscheinlich cutte ich wohl einfach ab irgendeiner Nodie die Spitze. Ich habe mich aber noch nicht entschieden.
Zumindest haben sich die Ladys in ihren neuen Töpfen gut eingelebt und das ist das Einzige, was zählt.
Fotos folgen häppchenweise ?🏻
Edit: hab mich für ein schlichtes, unkompliziertes toppen entschieden.
Nun hat jede Pflanze 6 Haupttriebe, die nun trainiert werden können.
Die Dicke der kurzen Hauptstämme könnt ihr hoffentlich den Fotos entnehmen.. hatte wegen des Durchmessers sogar Sorge, dass mir die Pflanze „verblutet“, weil mir noch nie so viel Flüssigkeit entgegengekommen ist.
Fast, wie bei einer Arterie 😅😅😅
Drückt mir die Daumen 👍🏻

Likes
7
Share


@Cogollo_eu
Follow
**Encontrarás la traducción a español al final de la descripción**
From/Desde: 05/04/19 || To/Hasta: 11/04/19
From day/Desde día: 43 || To day/Hasta día: 49
You can find the Gorillas Diary here:
** Podéis encontrar el diario de las Gorilla aquí:**
https://growdiaries.com/diaries/25675-makingmoney-with-gorilla-mm-vs-gorilla
-----IMAGES & VIDEOS-----
Video 1:
Complete week 7 in 2 minutes (Original frame rate modified), i used something composed by me playing with Logic Audio, please don't blame me 👉😳👊
Video 2:
Complete growing stage plus some flowering days in 2 minutes, same audio
Photo 3:
Additives used at day 5, all but Iguana
Video 13:
Overview video of the Moneys and the Gorillas
Photo 14:
Nutrients & additives used on day 9, again all but Iguana
-----WEEK SUMMARY-----
Finally I decided to Switch to 12/12 the first day of this week, and at the end of the week i will leave the SCROG mall fixed. As you can see it's not a tru SCROG as the man-lining Gorilla is taller than the Moneys. In the other hand i'm very happy on how the plants are distributing themselves after i removed the training structures. I removed those structures to prevent more stress to the plants, as they have recieved a hard training and i want to give them a breath and also grow as they like.
You can see how many vegetation they have, it almost cover the 85-90% of the tent, in the middle of flowering week 3 i will perform a massive defoliation.
This week i can see how the Gorilla with the main-lining is developing more defined and taller colas than the other plants, let's see how they evolve in some weeks.
Also this week i will apply the last foliar irrigation, just to help them a bit.
-----WATERING CALENDAR-----
05/04/19 - 1.250 ml with all week nutrients -(Foliars, Bloom Stimulator & Bloom Nutrition) @ 1.1 E.C. PH6.4
- Foliar application of 250 ml of water with (Foliar Nutrition & Plant Vitality+) among the 4 plants
09/04/19 - 1.250 ml with (Sensizym, Bloom Stimulator, Bloom Nutrition & bud Ignitor) @ 1.4 E.C PH6.4
*****ESPAÑOL*****
-----IMÁGENES Y VÍDEOS-----
Vídeo 1:
Semana 7 completa en 2 minutos (Frame rate original modificado), he usado algo que he compuesto jugando con el logic audio, disculpadme por esto 👉😳👊
Vídeo 2:
Fase de crecimiento completa y algunos días de floración en 2 minutos
Foto 3:
Aditivos usados el día 5 excepto Iguana
Vídeo 13:
Vídeo general de las Moneys y las Gorilas
Foto 14:
Nutrientes y Aditivos usados el día 9, de nuevo todos menos Iguana
-----SUMARIO SEMANAL-----
Finalmente he decidido cambiar a 12/12 el primer día de esta semana y al final de la semana dejaré fina la red de SCROG, como veréis no es realmente un SCROG pues la Gorilla con Man-Lining tiene colas más largas que las Moneys. Por otro lado estoy muy contento en como se están distribuyendo las plantas después de haberles quitado las estructuras de entrenamiento, las he quitado para quitarlas stress ya que han tenido un entrenamiento duro y quiero dejarlas respirar e ir por si solas a partir de aquí.
También podéis observar como tienen mucha vegetación que casi cubre el 85-90% de la superficie del armario, a mitad de semana 3 de floración les haré una defoliación masiva dejándolas peladas.
Esta semana ya puedo observar cómo la Gorilla con man-lining está creando colas más definidas y largas que el resto de las plantas, veremos a ver en unas semanas como evolucionan las Moneys.
Por último esta semana también aplicaré el último riego foliar para ayudarlas un poco con el cambio de estado y el stress recibido.
-----CALENDARIO DE RIEGO-----
05/04/19 - 1.250 ml con todos los nutrientes semanales excepto -(Foliars, Bloom Stimulator & Bloom Nutrition) @ 1.1 E.C. PH6.4
- Aplicación foliar de 250 ml de agua con (Foliar Nutrition & Plant Vitality+) para las 4 plantas
09/04/19 - 1.250 ml con (Sensizym, Bloom Stimulator, Bloom Nutrition & bud Ignitor) @ 1.4 E.C PH6.4

Processing
Likes
Comments
Share


@Small_grow_297
Follow
This is the first run. Much like a try out.
Like or comment..
Thank you....

Processing
Likes
27
Share


@Silverback_Guerilla
Follow
2/10:
I watered today with about 3/4 gallon each, plus cal-mag, signal, bembe, armor si, a little open sesame, and their final dose of endoboost.
The short one never did stop making the hook leaves on all her new growth, but she seems happy..budding faster than anybody else..
2/11:
Wife home sick today....postponing construction project to raise the lights.
2/12:
Today, I tackled the project to raise my ceiling another foot. In addition to that project, I installed and hooked up my new AC Infinity 6" intake fan. It's pulling in fresh air from the soffit vent on the eave of the attic, and currently feeding the garden with 46f fresh air. I'm able to easily maintain daytime temps in the lower 70f's now. I am able to drive the nighttime temps as low as I want. The only issue is that the outdoor RH varies quite a bit, so I ordered a 30-pint dehumidifier to put in the top of the closet.
I sprayed everybody with boomboom spray to try and mitigate the light burn damage that is likely to ensue.
2/13:
The taller one is still stretching a little bit, but the 2-footer is just budding up.
2/14:
I fed them today with about 3/4 gallon each including grow big, big bloom, tiger bloom, cal-mag, signal, bembe, humic acid, and I switched over from Open Sesame to Beastie Bloomz. Raised the lights another couple of inches. I did some training on them and defo'd a little bit.
2/15:
Installed the new dehumidifier and rigged the continuous drain on it...works great.
2/16:
I rotated the edge plants and removed some old leaves. I added another 22w 3000k 4' bar light under the canopy.
2/17:
I rearranged the garden and defoliated a little bit. That's it for week 8-

Likes
7
Share


@Mr_nugs_lover_David
Follow
Stunning looking ladies, beautiful stretch, this ladies are ready to give their best in flower, I'm starting to feel a very pungent smell on the bud sides and some resin production so far, let's see how this ladies keep developing, this is a really good strain, I expect top quality flowrs from this couple of girls! Stay tuned everybody! ❤️💛💚


Likes
20
Share


@420DeepGrow
Follow
"¡Finalmente llegó el momento de la cosecha de mi Lemon Mandarin de 420FastBuds! Esta planta ha sido un verdadero placer desde el inicio hasta el final. La genética autofloreciente mostró su resistencia, y no tuve mayores complicaciones durante todo el proceso de cultivo.
Las flores tienen una estructura densa y pegajosa, llenas de tricomas que dan un brillo impresionante. El aroma es increíblemente fresco, con notas cítricas que se combinan con un toque dulce a mandarina, ¡sin duda, una mezcla deliciosa!
Estoy muy satisfecho con los rendimientos y la calidad de la cosecha. El efecto es equilibrado, ideal para disfrutar tanto de día como de noche. ¡Sin duda volveré a cultivar Lemon Mandarin en el futuro! Un gran trabajo de 420FastBuds, como siempre."
Processing
Likes
29
Share


@ChiefGrowAutoflowers
Follow
I have been super excited with everything up to this point . I have made all my preparations that I think need to be made and did some trial runs on my environment. I starting preparing around the 15th of January and my set up was complete around the 19th of February. I spaced my purchases out based on budget constraints. I wanted a cheap and efficient grow area. Some thing I paid more
for because through all the research I did I felt quality was more important. If you are as excited as I was, you get pretty anxious when awaiting order status when you first order your seeds. You should remember you are ordering from an online seed bank not amazon. Most work Monday - Friday and are in a complete different time zone. I ordered my seeds from seed supreme Seedbank. I placed my order on 31 January and mailed money as directed. This was the scariest part for me especially when I didn’t hear anything back. I finally received a email on the 12th if February saying my invoice was paid and then subsequently mailed out on the 15th and I received on the 20th. One thing I would like to note that recommend to anyone mail cash is to make sure you spend the extra cash and track your payment.
I’m currently germinating all five GSC I received I placed them in water for the first 24 hours and then a paper towel for approximately 40 Hours.
I’ll add links to most of the items I purchased below. Some items I purchased through offer up and let it go app to save money.
VIVOSUN 48" X48" X 80" Hydroponic... https://www.amazon.com/dp/B07GNBCVPZ?ref=ppx_pop_mob_ap_share
LED Grow Light 1000W Full... https://www.amazon.com/dp/B074MBP32M?ref=ppx_pop_mob_ap_share
AcuRite 00613 Humidity Monitor... https://www.amazon.com/dp/B0013BKDO8?ref=ppx_pop_mob_ap_share
Hydrofarm Grow!T Premium Coco... https://www.amazon.com/dp/B01DA4PZI4?ref=ppx_pop_mob_ap_share
iPower LGTESTSOIL 3 in 1 Soil... https://www.amazon.com/dp/B075LRY5M7?ref=ppx_pop_mob_ap_share
Unco Industries (WWSB15LB) Wiggle... https://www.amazon.com/dp/B00062KQ42?ref=ppx_pop_mob_ap_share
General Hydroponics pH Control Kit https://www.amazon.com/dp/B000BNKWZY?ref=ppx_pop_mob_ap_share
VIVOSUN Air Filtration Kit: 4... https://www.amazon.com/dp/B06XFRNPR8?ref=ppx_pop_mob_ap_share
VIVOSUN pH & TDS Meter Combo, 0.05ph High Accuracy Pen Type pH Meter & +/- 2% Readout Accuracy 3-in-1 TDS EC Temperature Meter https://www.amazon.com/dp/B06XKMH86J/ref=cm_sw_r_cp_api_i_2xyCCbK4MKNN4
Botanicare CAL-MAG Plus Plant Supplement 2-0-0 Formula, 1 Quart https://www.amazon.com/dp/B004JKBMRW/ref=cm_sw_r_cp_api_i_LyyCCbY8SMFTK
Century 24 Hour Plug-in Mechanical Timer Grounded https://www.amazon.com/dp/B00MVFF59S/ref=cm_sw_r_cp_api_i_ozyCCbHG8Q2PB
Day 1 - 2/23/19:
I planted my seeds today about a fingernail length down with tap root pointed and gave a light watering with plain tap water at a PH of 5.8.
Day 2 - 2/24/19:
Nothing new to report no activity on the surface, misted watering at 5.8 PH.
Day 3 - 2/25/19:
Plant number 1 which had the longest tap root broke the surface I started a time lapse on it to cover the first moments of birth 😭 daddy is already so proud lmao. I have another light watering today with my humidity domes on, the intent is to have the plants roots work to get the required water and hopefully promote root growth. I also added 1ml of Rapid start and diluted into 1 gal.
Day 4 - 2/26/19:
Checked the status this morning prior to work and two more have reached the surface only two more remaining which I suspect will reach by the time I make it home from work. Misted this morning pot was looking pretty dry with the exception of the humidity domes, which I removed on all the sprouted seedling. I intend on shifting to a 20 on 4 off cycle and starting my other fans.
Day 5 - 2/27/19:
All five plants have broke the surface. I did a normal watering this am still utilizing the dome to avoid watering on top of the plants. I lowered the light again some of the early sprouters we stretching a little more than I wanted and appeared leggy to me.
Day 6 - 2/28/19:
Nothing really to report today. Excited for the name reveal tomorrow. I did a light watering. I played around with my ppm meter and ec I definitely plan on using in conjunction with my first feeding this weekend.
Day 7 - 3/1/19:
Was watering this morning normal levels. I also mixed a new feed to be ready for them tomorrow. While I was watering # 5 fell over I accidentally tipped it with the spout. I grabbed some left over soul to help prop it up hopefully she is ok.
Likes
7
Share

@Marijuanaut
Follow
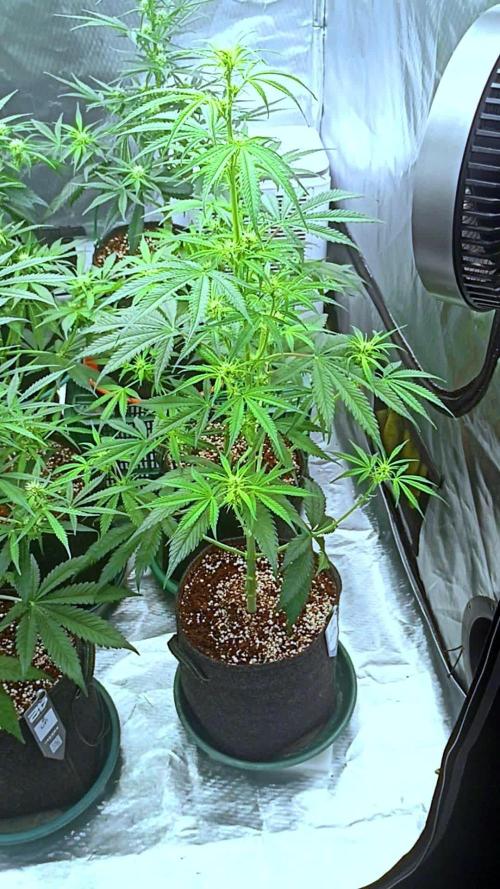
One managed to developed good the other one not so much 😔
I´m running out of the Aptus products and will be switching gradually to Plagron. 💪
💚💛❤️

Processing
Likes
7
Share


@NorthernFrostCannabis
Follow
Note: Little chem-burn this week. Feed just water for 4 days with correct PH and they jumped back. Was not that bad though.
Day 21 on flower!
Likes
5
Share


@xMuuy
Follow
Repotted her from the 4,4L pot into a much larger, 20L pot using only the pre-fertilized growmix from Floragard. Adjusted the amount of nutrients since she's in early flowering phase right now. Continuing LST as she develops new branches and therefore attempting to extend her over the whole pot width and beyond, trying to get the maximum amount of mainbuds.
Also bought a dehumidifier (Comfee MDDN-10DEN7) since theres too high humidity for her in flowering phase; especially because there is low airflow and no window in that tiny room (we peaked at 70-80% humidity at night, at ~20°C, before!). We set it up to be in 60% humidity right now.


Likes
25
Share


@I_Identify_As_A_Dan
Follow
Week 9 for Lemon Orange by greenhouseseedco,
Been trying to fix the nitrogen deficiency while also some other stuff as some of the growth has been fairly poor...
Not where i expected to be with them i expected to be in flower by now but not just going to flip them while unhealthy that would be a waste i think.
So ill be trying to get everyone in order before i flip them.
They are starting to get some extra colour on the leaf though so thats a positive.

Likes
7
Share


@Dairon
Follow
Ya se van viendo los primeros pistilos blancos, ya llevan dos semanas de 12 horas de luz, he realizado poda de bajos y he aumentado tanto el PH como la EC para que vayan cogiendo forma las flores, asimilando más fósforo y potasio al estar el PH a 6.3, voy alternando los abonados con un riego de agua, un riego con abono, respetando el rango de PH correspondiente y midiendo la EC para que este a 0.4, si me da menos subo con Calmag de Biobizz, en dos semanas estarán listas para pasar al armario grande, con 300w de led para sus últimas 4 semanas hacer que engorden bien los cogollos, buenos humos!!!!😃
Likes
13
Share


Likes
15
Share


@Shizzlemanizzle
Follow
Been away couple of days
Day 74
Came back and the lady’s exploded. Dropped down the nutrients since day 60 and started flushing on day 68. I’m waiting for the plants to get brown trichomes. But all in all I’m happy if I don’t fuck it up somehow
Day 77
Flushed yesterday the last time. Ppm was 400. Will chop them on day 84, if nothing special happens this is the last Post until before chopping them.
THANK YOU ALL FOR YOUR TIPpS AND YOUR OPINION YOU GUYS ARE GREAT!!!! Happy Growing to everyone !
Likes
42
Share


@Siriuz
Follow
Finally got my blue dream from seedsman.
Winner of the contest seeds of knowledge
Here it is finally growing this beautiful lady
I gotta say this one was almost broken, it arrived very well but since it was hidden as requested when I open the box with a razor to take out the seeds Packs my bad accidentally cut a tiny side of the seed Shell which I noticed and place into germination and now she is here with us and we are very happy to welcome her to our family
Day 1 Tuesday Place into germination
Fully at dark until next morning from 8AM
Started to get light since she is a photoperiod
At the end of the Day went and hid it in a box very well so its dark
Day 2 Same process took her out and start again sunny Day for her indoors of course
Day 3 Thursday finally got her showing its cotyledons doing the same process :3
And im guessing it goes with the sun
At the end of the Day got to give her enough darkness she is a feminized seeds which I have to make her flower after idk some time so I will try and see how much she can grow and get STRESS for yield and potency, thanks a lot for your support
Happy Friday btw 👽🌱
****
DAY 5
My girl is a monster and needs to recover
Taproot was coming out of peatmoss and I didnt even notice so had to transplant to a
Bigger pot soon, since she is not an auto she is way too fast cuz taproot was out in the bottom so I had to take the net out of the Peat moss so roots van expand comfortably but accidentally broke the tiny edge while sliding with lil to no pressure and it sucks but it was stuck and it was either that or just plant it like that but well probably I should have left her be but anyways she is young I think she will develop more since she is in a better soil mix now than just Peat moss, wish me luck cuz I really hope she is better and gets to grow huge, we will see at the process right
This is whats all about
Lets do our best tho
We will!
Enjoy & happy growing everyone ☺️
Likes
Comments
Share

@mfx98
Follow
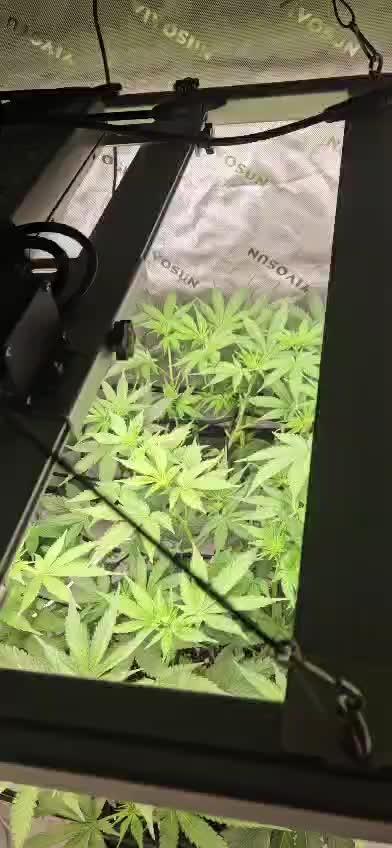
This is when I flipped the plant to flower, and you can see the stretch that occurred during this stage.


Processing
Likes
12
Share


@Piablo
Follow
Day 21: First topping. Happy to removed the light-stressed part of the plant from the equation if only for cosmetic reasons. I waited for 5 nodes before the topping.
Day 22: Godammit, the light failed again. Turned it off and waited for it to cool down. Turned it back on and it worked. Lost 1 hour of light.
Day 23: Because of previous light stress and canopy temperature, I felt that 35cm is a good distance for the light.
Day 25: First LST on the new growth tips. Started the mainline.
Day 26: Again the light is failing to come on. I rewired once again, cursing my very existence, and it worked again. Again lost an hour of light in the morning. Continued refining the LST, and seeing how far I can push it. Noticed a slight tear at the base of one of the mains. Since the plant energy is coming from below and there is no noticeable affect on growth I'm going to ignore it. Checked the roots - look healthy. Though the new growth tips are not completely symmetrical, those leaves look good enough to eat. Trimmed the excess fan leaves. Topped up with a small amount of nutrients.
Day 27: light didn't come on again. I rewired again, but this time it was stone cold refusing to do anything. Again I cursed my existence and all of life. Returned to grow store, turns out bulb was defective after all. Again lost 4 hours of light. But at least now I know the problem is solved. Rene at the grow store is a champ though, very helpful guy. The new bulb is noticeably brighter also. Maybe this was affecting growth? Also once this issue was fixed, I noticed some small amount of nutrient burn on the leaves tips. Rebalanced nutrients. Was 1.9 mS/m lowered to 1.65 mS/m, then to 1.48 mS/m. Must be more careful in future when upping the dosage but the water conductivity is now less than before (1.55 mS/m) so this should be ok. Also lowered pH of water slightly since it was 6.0. It's currently showing 5.2 but experience has taught me that this measurement will comfortably go back up to 5.7. water pH is seemingly constantly rising as the plant grows, and adjusting pH is really more art than science. (Edit: It was 5.7 the next morning, so ya ... )

Likes
9
Share


@Bread_n_Buds
Follow
Don't be fooled, this specimen of Pineapple express was born only a week after the other F1 hybrids from Zamnesia but with these latest generation autoflowering plants called f1 noin you're joking, they are really fast, the flower comes together in an instant and poof it's ready .
She has begun to grow a lot, she has made a central main cola take off which promises to be very, very interesting, and she is composing the gems.
The conditions are all there, we await the decisive weeks for the construction of the flower, cup after cup, we will see what this young lady with the famous name will do.
We are sure it will be very interesting.
The fertilizer is always a hair too much but I have very little of the paranoia of Italian grandmothers about leaving my girls hungry.
Buy seeds on Zamnesia at the link https://www.zamnesia.io/it/10681-zamnesia-seeds-pineapple-express-f1-automatic.html
Food by Plagron
https://plagron.com/en
Light www.viparspectra.com/
Tent & Air www.secretjardin.com
Music of the week www.radionula.com
+++ 432 hz frequencies for keep in line my Girls to Gaia.
Site Description
ZAMNESIA SEEDS - PINEAPPLE EXPRESS F1 HYBRID AUTOMATIC: FRUITY FLAVORS AND ENERGETIC EFFECTS
Combining Trainwreck with Hawaiian, Pineapple Express F1 Hybrid Automatic brings a beloved strain to new heights. This autoflowering F1 hybrid cultivar ensures exceptional uniformity, reliability, and stability, making it well-suited to growers of all experience levels. If you've not checked out Pineapple Express F1 hybrid Automatic for yourself just yet, now is the time.
GROWING PINEAPPLE EXPRESS F1 HYBRID AUTOMATIC
All it takes is 8–9 weeks from germination before Pineapple Express F1 hybrid Automatic is ready to harvest. Thankfully, very little effort is required throughout the growing process, aside from a bit of maintenance, to ensure ample, high-quality harvests. Thanks to its F1 genetics, Pineapple Express F1 Automatic offers superb resilience and uniformity, meaning all plants will have a similar height and appearance, and will churn out comparably large yields. Reaching heights of 50–70cm, Pineapple Express F1 Automatic is not an overbearing plant and can effortlessly slot into any setup. Once ready to yield, growers can see a return in the region of 400–550g/m² indoors and up to 200g/plant outdoors.
AROMAS, FLAVORS, AND EFFECTS OF PINEAPPLE EXPRESS F1 HYBRID AUTOMATIC
Just one hit of Pineapple Express F1 hybrid Automatic treats users to a rich assortment of flavors and aromas. This strain offers strong pineapple notes alongside moments of citrus, spice, and pine, making for a mouth-watering blend that's extremely moreish. Bolstered by 21% THC and an array of cannabinoids, Pineapple Express F1 Automatic showcases an energetic and uplifting high that will have you feeling chatty in no time. So if you've been looking for a strain to enjoy with friends, Pineapple Express F1 Automatic could be just the thing.
All F1 Hybrids and more and more and more on
www.zamnesia.io
