





@DogDoctorOfficial
Follow
💙 PROJECT BLUE TENT – HARVEST DIARIES 💙
🌈 FROM HARVEST TO DRYING – THE NEXT CHAPTER BEGINS!
✂️ THE GIRLS HAVE BEEN CUT DOWN! DIFFERENT DRYING METHODS, BEAUTIFUL FLOWERS, AND A NEW EXPERIMENT WITH DRYFERM!
Hello everyone, and welcome back to another chapter of Project Blue Tent! 💙🌱
My friends, WE DID IT!
After weeks of documenting the development of our four beautiful girls, the moment finally arrived.
The plants have been harvested, the branches have been divided, and we're now moving into one of the most important stages of the entire journey.
THE DRYING PROCESS!
And believe me, there's plenty to talk about!
But before we get started, there's something I want to explain.
As you probably know, GrowDiaries currently allows us to upload a maximum of 30 photographs per update.
And when you've got four plants, an entire harvest, different drying methods, equipment, experiments, and hundreds of photographs to share, 30 pictures simply aren't enough!
😂📸
So, just as we've done throughout previous stages of Project Blue Tent, we're dividing the documentation into several individual reports.
This isn't the end of the harvest story.
It's the beginning of another series of chapters.
This report will concentrate on the harvest aftermath, preparation, trimming, and, most importantly, the different drying methods we've been experimenting with.
We'll also introduce our DryFerm collaboration and share some observations that I'm particularly excited about.
In the following report, we'll go deeper into the individual fruits, their characteristics, aromas, flavours, terpene impressions, curing process, and final results.
And yes, my friends, we'll also reveal the final numbers!
For those who missed the previous chapters, I strongly recommend going back through the Project Blue Tent diaries.
We've documented the entire journey, from the early stages through training, flowering, the final environmental adjustments, and eventually the harvest.
Each report adds another piece to the story.
So grab a cup of tea, get comfortable, and let's continue this adventure!
💙🌈✂️
🌱 A QUICK RECAP – FOUR PLANTS, TWO CULTIVARS, ONE BEAUTIFUL JOURNEY!
For everyone joining us for the first time, let's quickly introduce Project Blue Tent.
This project brought together four Zamnesia F1 plants:
🌈 Blue Waffle F1 – Pheno A.
🌈 Blue Waffle F1 – Pheno B.
🥒 Pickle Lemon Haze F1 – Pheno A.
🥒 Pickle Lemon Haze F1 – Pheno B.
Four individual plants, two different cultivars, and one shared growing environment.
Throughout the project, we've documented their development individually, following their progress through the different stages.
We experimented with topping, training, SCROG, defoliation, environmental management, mineral nutrition, and supplemental under-canopy lighting.
We also introduced two LumiFlora 150W full-spectrum fixtures beneath the canopy, arranged in an X-cross configuration.
The girls shared the same general irrigation system, reservoir, and environmental conditions, allowing us to observe their individual development within one ecosystem.
And after all those weeks of work, observation, photography, and experimentation, the girls finally reached harvest.
The plants were cut down, divided, and prepared for drying.
But rather than treating everything identically, we decided to explore different approaches to the drying stage.
And that's where things become particularly interesting!
💙🌱
✂️ HARVEST COMPLETE – THE GIRLS HAVE BEEN CUT DOWN!
Well, my friends, the moment we've been waiting for finally arrived.
The plants were harvested, and we moved into the next stage of the project.
After following their development week after week, it's quite something to see the entire canopy come down.
All those weeks of building the structure, supporting branches, managing the plants, and observing the flowers eventually lead to this moment.
The girls were cut down and divided into manageable sections for the next stage.
And now, instead of looking at living plants inside the tent, we're looking at the fruits of all that work.
It's a completely different perspective.
The photographs from this stage capture the transition from the growing environment into the drying process.
And I have to say, the flowers are looking beautiful!
Dense, compact, and carrying the structure we've been admiring throughout the final weeks.
We're particularly happy with how the harvest turned out visually.
But I'm going to leave the detailed evaluation of the individual flowers for the next report.
I don't want to reveal everything in one chapter!
😂💙
📸 DIVIDING THE HARVEST – TWO DIFFERENT DRYING APPROACHES!
One of the things I wanted to explore during this harvest was the use of different drying methods.
Instead of placing everything into the same drying environment and following one identical approach, we divided part of the harvest between two different systems.
On one side, we have the Zamnesia drying rack.
On the other, we're using the DryFerm drying bags inside the same rack.
This gives us an opportunity to document two different approaches and compare our actual observations.
And that's something I particularly enjoy about these projects.
We don't have to assume that every method will produce exactly the same experience.
We can experiment, document what happens, and share the results with the community.
Of course, this isn't a controlled scientific trial.
There are several variables involved in drying, and we shouldn't attribute every difference to one piece of equipment.
But having different approaches represented in the same harvest makes the comparison particularly interesting.
Let's look at them individually!
💙🌱
🕸️ ZAMNESIA DRYING RACK – THE TRADITIONAL APPROACH IN OUR SETUP!
Let's start with the Zamnesia drying rack.
Part of the harvested material was placed in the rack, allowing us to document this approach alongside our DryFerm experiment.
The rack gives us a practical way to organize the flowers during the drying stage.
It's also a familiar approach for many growers, and having it represented in this project gives us another reference point for our observations.
We've included photographs showing the rack and the harvested flowers.
The objective is to document the process rather than simply show the final result.
How the flowers look during drying, how their appearance changes, and what we observe when they're ready for the next stage are all important parts of the story.
And that's precisely what we'll continue exploring in the following report.
For now, the Zamnesia rack has played its part in our harvest adventure!
A big thank you to Zamnesia for supporting Project Blue Tent and providing equipment that has been part of this journey from beginning to end.
💙🌱
DRYFERM – A DIFFERENT APPROACH TO DRYING!
Now, my friends, this is where I want to spend a little more time.
WELCOME TO DRYFERM!
DryFerm is one of the collaborations I'm particularly happy to have in this project.
And unlike something we're simply showing because it looks interesting, this is a product I've actually been using and enjoying.
The idea behind the DryFerm bags is to provide a dedicated environment for drying flowers inside specially designed bags.
Instead of using the same open-rack approach for everything, we're placing part of the harvest inside these bags and observing how the flowers develop.
Now, I'm not going to pretend that I know every detail of the material's engineering or the exact science behind how it behaves.
I prefer being honest about that.
What I can share is my own experience.
And honestly, I'm very happy with what I'm seeing!
One of the things that immediately caught my attention is how the flowers coming out of the DryFerm bags appear compared with the flowers dried outside the bags.
In my experience, the material coming out of the bags reaches that dry, finished-looking appearance noticeably faster.
The flowers also have a beautiful appearance, and they look almost as though they've already progressed further into the processing stage.
It's one of the reasons I've become particularly interested in this system.
💙🌱
🔬 MY THOUGHTS ON THE DRYFERM MATERIAL – WHAT I'M OBSERVING!
There's something I find particularly interesting about this approach.
Flowers contain many volatile compounds, including aromatic compounds that contribute to their overall smell and character.
During drying, these compounds can be lost or altered, and that's one of the reasons the drying stage deserves so much attention.
I've wondered whether the special material used in the DryFerm bags helps influence how these compounds behave within the drying environment.
My personal thinking is that the enclosed environment may help retain some of the volatile compounds that would otherwise disperse into the surrounding air.
I also wonder how the interaction between the bag material, moisture, and the surrounding atmosphere contributes to what we're observing.
But I want to be absolutely clear.
That's my interpretation and curiosity, not a confirmed explanation of the DryFerm material's engineering or a scientifically established mechanism.
I'm not going to invent an explanation just to make the product sound more impressive.
What matters to me is what I can actually observe.
And what I'm seeing is that the flowers coming out of the DryFerm bags have a beautiful appearance, seem to reach their dry state faster in our experience, and look remarkably well presented.
I'm genuinely impressed.
And that's why I wanted to include this comparison in Project Blue Tent.
I want to show the community what I'm using, what I'm observing, and why I've become such a fan of this approach.
The next report will give us another opportunity to discuss the individual flowers and their aromatic characteristics.
Because that's where things become even more interesting!
💙
🤝 DRYFERM – OFFICIAL TRUSTED PARTNER!
I'm particularly happy to welcome DryFerm as an Official Trusted Partner of DogDoctorOfficial.
It's always nice to work with companies that introduce something different and give us an opportunity to explore new approaches.
But what I appreciate most is being able to share something I'm genuinely using.
I'm not simply introducing a product.
I'm incorporating it into my own projects, documenting my experience, and sharing the observations with the community.
And I'm delighted that I can also offer something back to everyone following our adventures.
💙 DRYFERM OFFICIAL WEBSITE:
https://dryferm.de?bg_ref=uMXFvAF2MO
🛍️ EXPLORE THE DRYFERM BAGS:
https://dryferm.de/collections/dryferm/products/dryfermbag
🎁 OUR COMMUNITY DISCOUNT CODE:
DOGDOCTOR
10% OFF YOUR ENTIRE ORDER!
Thank you, DryFerm, for finding us and allowing us to explore your products as part of Project Blue Tent.
I'm genuinely happy to have you on board, and I'm looking forward to sharing more experiences with the community.
Growers helping growers, and companies supporting real-world experimentation.
That's the kind of collaboration I love!
💙🌱
✂️ TRIMMING TIME – ZAMNESIA CURVED SCISSORS AND TRIMBINS!
Once the drying stage was complete, it was time to move into another important part of the process.
TRIMMING!
And as anyone who's worked through a harvest knows, this is where the hours can disappear very quickly.
😂✂️
We used our Zamnesia curved trimming scissors throughout the process.
They're a familiar part of our equipment, and having the right tools makes a difference when spending extended periods working through a harvest.
We also used our TrimBin setup to help organize the trimming process and collect the material during the work.
Everything was separated and handled, and the flowers were prepared for storage.
I've included photographs from this stage because I think it's important to document more than just the beautiful final pictures.
There's a lot of work between harvesting a plant and finally looking at the finished flowers.
And this is another part of that journey.
A massive thank you to Zamnesia for the curved scissors and equipment that have been part of Project Blue Tent.
And thank you to TrimBin for being part of our harvest workflow!
💙✂️
? GLASS JARS – PREPARING FOR THE NEXT CHAPTER!
After the trimming, we also used glass jars to store the flowers.
This is another important transition in the journey.
We've moved from living plants to harvested branches, then through drying, separation, and trimming.
Now we're entering the stage where the flowers can continue their journey towards the final presentation.
I want to leave the deeper discussion about curing for the next report.
We'll dedicate a proper section to that, including our observations, how the flowers are developing, and what we're noticing as the process continues.
For now, I simply wanted to document the use of the glass jars and show another part of the workflow.
The harvest has been divided, the flowers have been trimmed, and we're moving into the next chapter.
And believe me, there's plenty more to come!
💙🌱
⚖️ THE FINAL WEIGHTS – A LITTLE SNEAK PEEK!
I know what you're thinking.
WHERE ARE THE NUMBERS?!
😂⚖️
Don't worry, my friends!
We haven't forgotten about them.
We've documented the harvest and have photographs showing the weights, but I want to leave the complete numerical breakdown for the next report.
There are several individual plants and plenty of details worth presenting properly.
I don't want to throw a few numbers into this report without giving them the attention they deserve.
So, if you're curious about the weights already shown in the harvest photographs, make sure you check the previous harvest update!
We've included the relevant documentation there, and you can already get a glimpse of the results.
In the next chapter, we'll bring everything together and present the final numbers in a more complete way.
For now, I can tell you that we're very happy with the harvest.
The flowers are beautiful, dense, compact, and looking fantastic.
And that's all I'm going to reveal for the moment!
😂💙
🌸 THE FRUITS – BEAUTIFUL, DENSE, AND COMPACT!
Although we're saving the detailed flower reviews for the next report, I don't want to finish this chapter without mentioning something important.
The fruits look beautiful!
Across the harvest, we're seeing flowers with a lovely compact structure and impressive density.
They've retained the appearance that made us so excited during the final weeks of flowering.
And now that we've moved through the drying and trimming stages, we're beginning to appreciate the finished presentation.
I particularly enjoy looking at the photographs from different stages.
The plants before harvest.
The branches after cutting.
The flowers during drying.
And finally, the trimmed material.
It's a fantastic way to document the entire transformation.
But there's still plenty to explore.
In the next report, we'll take a closer look at the individual cultivars and their flowers.
We'll discuss their aromas, flavours, individual characteristics, and the curing process.
I want to give each of those subjects enough space rather than rushing through everything here.
So consider this a little preview!
💙🌸❄️
🔭 WHAT'S COMING NEXT – THE HARVEST REVIEW!
My friends, we're not finished yet!
This is another divided chapter of Project Blue Tent, and the next report will concentrate on the finished flowers and the results of this entire adventure.
Here's what we'll be discussing:
⚖️ FINAL HARVEST WEIGHTS
We'll present the individual numbers and bring the harvest documentation together.
🌸 FLOWER REVIEWS
We'll take a closer look at the individual fruits, their structure, density, appearance, and overall quality.
👃 AROMA AND TERPENE IMPRESSIONS
We'll discuss what we're actually experiencing when examining the different flowers.
No invented terpene profiles, just our own observations and impressions.
👅 FLAVOUR EXPERIENCES
We'll give the individual cultivars their own attention and share our impressions.
? CURING PROCESS
We'll discuss the next stage of the flowers' journey and share how we're approaching it.
DRYING COMPARISON
We'll also continue sharing our experience with the different drying approaches, including DryFerm and the Zamnesia rack.
There's plenty to discuss, and I genuinely want to give each subject the space it deserves.
So make sure you follow the next chapters!
💙🌱
💙 FINAL THOUGHTS – ANOTHER CHAPTER COMPLETED!
My friends, what a journey!
We've gone from four living plants sharing one tent to a complete harvest, and now we're documenting the transition through drying, trimming, and storage.
This week has been about exploring different approaches and sharing what we've experienced.
We've used the Zamnesia drying rack, experimented with DryFerm bags, worked through the trimming process using our Zamnesia curved scissors and TrimBin, and prepared the flowers for their next stage using glass jars.
And I'm particularly happy with the DryFerm experience.
The flowers coming out of the bags have impressed me with their appearance and the speed at which they reach that finished-looking dry state.
I'm looking forward to continuing this collaboration and sharing more observations with everyone.
The harvest has been good, the fruits are beautiful, and the entire experience has been incredibly rewarding.
But we're deliberately leaving some of the best parts for the next chapter.
The numbers.
The individual flower reviews.
The aromas.
The flavours.
The curing process.
There's still plenty to discover, and I don't want to spoil everything in one report!
😂💙
For now, enjoy the photographs, revisit the previous harvest chapters, and stay tuned for the next update.
Project Blue Tent might be approaching its final pages, but the memories, lessons, and experiences from this run will stay with us.
Four plants.
Two cultivars.
One shared ecosystem.
And an incredible harvest adventure!
💙🌈🌸
💬 COME JOIN THE DOGDOCTOROFFICIAL DISCORD COMMUNITY!
And before we finish, the invitation is always open!
If you're already part of our Discord family, thank you for being there.
And if you haven't joined us yet, come and say hello!
We've built a fantastic community where growers can share their experiences, exchange knowledge, discuss equipment, show their gardens, share photographs, and learn from one another.
We organize community photo championships, giveaways, competitions, and plenty of other activities.
There's always something happening!
You don't need to be an expert.
You don't need an enormous garden.
Everyone is welcome!
💙 JOIN OUR DISCORD:
https://discord.gg/dogdoctorofficial
Come introduce yourself, share your projects, join the conversations, and become part of the adventure.
We're looking forward to seeing you there!
📱 FOLLOW DOGDOCTOROFFICIAL
You can also follow our adventures and updates across our social channels:
Instagram: @DogDoctorOfficial
GrowDiaries: DogDoctorOfficial
Discord: DogDoctorOfficial
We're always happy to see the community getting involved!
🎁 DISCOUNT CODES, PARTNERSHIPS AND COMMUNITY GIVEAWAYS!
We also have some great opportunities available through our partners.
DRYFERM
Website: https://dryferm.de/
Code: DOGDOCTOR
Enjoy 10% OFF your entire order!
? HEMP HOOKS
Website: https://hemphooks.com/
Code: DOGDOCTOR
Enjoy 15% OFF your entire order!
And don't forget to check our Discord giveaway channels and community photo championships.
We regularly organize activities with our partners, with opportunities for members to participate and win some fantastic prizes.
Keep an eye on the announcements!
💙🌱
🙏 A HUGE THANK YOU – OUR PROJECT BLUE TENT FAMILY!
A project like this doesn't happen alone, and I want to finish by thanking everyone who helped make this adventure possible.
A massive thank you to ZAMNESIA for providing the genetics and making it possible to document these beautiful Blue Waffle F1 and Pickle Lemon Haze F1 plants.
Thank you to ZAMNESIA for the drying rack, curved trimming scissors, Phytonaut LED lighting, and clip fans that have been part of this project.
Thank you to PLAGRON for the Hydro nutrient line supporting the girls throughout their journey.
A huge thank you to MARS HYDRO for the irrigation and drainage equipment helping us maintain our ecosystem.
A special thank you to LUMIFLORA for the two 150W full-spectrum under-canopy fixtures. This has been one of the most interesting experiments of Project Blue Tent.
WELCOME TO DRYFERM!
Thank you for becoming our Official Trusted Partner and giving us the opportunity to explore your drying bags and share our experience with the community.
I'm genuinely happy to have you on board!
🌐 https://dryferm.de/
Code: DOGDOCTOR – 10% OFF!
Thank you to HEMP HOOKS for joining our adventure and supporting our community with an exclusive discount.
🌐 https://hemphooks.com/
Code: DOGDOCTOR – 15% OFF!
Thank you to TRIMBIN for being part of our harvest workflow and helping us through the trimming sessions.
And, of course, thank you to GROWDIARIES for providing the platform where we can document our plants, share photographs, and exchange experiences with growers from around the world.
Finally, to everyone following the reports, enjoying the photographs, leaving comments, sharing experiences, and supporting the journey:
THANK YOU!
Your support means a lot.
And to our Discord family, thank you for continuing to build such a fantastic community.
We have more competitions, more giveaways, more projects, more photographs, and plenty of new adventures waiting for us!
This harvest may be reaching its final chapters, but the adventure never really stops.
Until the next report, my friends...
Keep growing.
Keep learning.
Keep experimenting.
Keep documenting.
And never forget to enjoy the journey as much as the destination!
GROWERS LOVE, HAPPY GROWING, AND TAKE CARE EVERYONE! 🌱💙🌈✂️❄️



@Jay84lawrence
Follow
This week my focus now finding sex of plants as it may be week 3 in veg this has been growing for six weeks from seed five nodes tall still looking healthy. If anyone has kind words of advice or just wants to kindly contribute that will be appreciated.
Happy growing all.


@Hempcules
Follow
WEEK 9 (DAY 64-70)
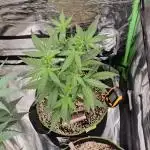
This week, my plants have significantly increased in volume. The buds are abundant, firm, and smell very sweet. Thanks to mainlining, they've become small and compact, now consisting almost entirely of flowers.
For the past few weeks, I've switched to 24-hour lighting to avoid climate fluctuations and speed up the flowering process. So far, this has proven very effective. The plants are growing at a high speed, and I think I'll be harvesting in two weeks at the latest.
I've set my lights to 700 PPFD. While this gives me a rather high DLI (Daily Light Integral), the plants don't seem to mind so far.
Due to the high temperatures and strong growth, I have to water at least every 24 hours. I'm currently alternating nutrients with Biobizz and Plagron Green Sensation.
Last week, I defoliated the plants again to ensure good air circulation around the buds and to direct all energy towards flower production.
Thanks to the high transpiration rates, I'm managing to keep the room's humidity just under 60%. It's not optimal, but I think it will work out.
With this code, you will receive a 20% discount on your next Zamnesia order:
ZAMMIGROW2024



@Kirsten
Follow
💚 ORION LIQUID NUTRIENTS 💜
3.6.25:
I watered with 2ltrs of dechlorinated water PH'd to 6.3 containing the following nutrients;
♡ 1/2 TSP Cal-Mag
♡ 1/4 TSP Mega Crop Part B
PH: 6.3
PPM: 1300
Plus an additional 2ltrs of dechlorinated water PH'd to 6.3 containing the following nutrients m;
♡ 1/2 TSP Cal-Mag
♡ 1/4 TSP Mega Crop Part A
PH: 6.3
PPM: 1000
This week has shown some good progress, and we are now in flower and in need of more nutrients, so I'm trying my best to adequately feed. Adding in the Mega Crop Part A now regularly from now on.
I'm hoping to see some better growth coming in next week.
Thanks for stopping in this week 💚🙌🍃😊🌱✌️


@highdro_wfh
Follow
1st try at LST I ripped a huge fan leaf off. 2nd try I think I got it right. Other than that I just check water levels, PPM and pH, then adjust as needed. These girls are a little short and bushy...pause....so I backed the light off a bit and noticed them climbing.
I also messed up and bought a wave maker to move water but didn't realize it'd rip my roots. This didn't matter because the roots 50x growth within a day or two.
During mid week 3 I upgraded the air pump and air stones after failing with the wave maker. I upgrade to a 2"x4" air stone and a nice 20w 475gph air pump. I believe this helped with growth tremendously because the girls are taking off 🚀
Also, water change! With the water change I bumped the PPM up, plants haven't responded negatively but I think I will back it down to about 700-750 since they seem to be taking in more water (pH rising, PPM rising).


@Corwinism
Follow
WEEK 5 (03/28/2021 - 04/03/2021)
Day 38: 03/28/2021
Plants had their first feeding today. It’s been about 3 or 4 weeks giving them tap water only. With my ppm dropping in the soil, I thought now would be a good time. Leaving out the Cal-Mag this feeding.
Nutrient mix: 651ppm, 6.0 pH, 71℉
FF Big Bloom: 5ml/gallon (⅓ strength) = 15ml/3 gallons
FF Grow Big: 5ml/gallon (⅓ strength) = 15ml/3 gallons
ppm/ppm = runoff/soil
JB#1 - 960ppm/309ppm, pH 6.9 JB#2 - 1290ppm/639ppm, pH 6.8
AP#1 - 1400ppm/749ppm, pH 6.8 AP#2 - 1190ppm/539ppm, pH 6.8
GC#1 - 1190ppm/539ppm, pH 7.0 GC#2 - 1350ppm/699ppm, pH 6.8
-------------------------------------------------------------------------------------------------------------------------------------------
Day 41: 03/31/2021
Plants watered around 5:30-6:00 p.m.
ppm/ppm = runoff/soil
JB#1 - 955ppm/653ppm, pH 6.8 JB#2 - 1070ppm/768ppm, pH 7.0
AP#1 - 1470ppm/1168ppm, pH 6.8 AP#2 - 1390ppm/1088ppm, pH 6.8
GC#1 - 1110ppm/808ppm, pH 7.0 GC#2 - 1160ppm/858ppm, pH 6.9
-------------------------------------------------------------------------------------------------------------------------------------------
Day 44: 04/03/2021
Plants watered between 5:30-6:30 p.m. Botanicare Hydroguard was used at half-strength to supplement the roots and as a preventative against rot.
Tap water: 247ppm, pH 9.4, 70℉
Botanicare Hydroguard: 1ml/gallon = 3ml/3 gallons
pH Down: 11.5ml
Mixture: pH 5.6, 285ppm (+43ppm from pH solution)
ppm/ppm = runoff/soil
JB#1 - 858ppm/573ppm, pH 6.8 JB#2 - 857ppm/572ppm, pH 6.8
AP#1 - 984ppm/699ppm, pH 6.8 AP#2 - 1030ppm/745ppm, pH 6.9
GC#1 - 880ppm/595ppm, pH 7.0 GC#2 - 932ppm/647ppm, pH 6.9
-------------------------------------------------------------------------------------------------------------------------------------------
This week has been much more pleasant than the weeks prior. I believe my plants are finally getting acclimated to the medium and recovering from transplant shock. New growth is looking much healthier. Just as a preventative measure, I picked up some Botanicare Hydroguard to use in an attempt to supplement the roots and bring the pH of the soil down to where I want it. Personally, the pH remains just a tad too high for my liking this week. I would like it more in the range of 5.7-6.5 but I'll give it a week or so to see the reaction to the Hydroguard.
I've continued with more LST on all but the Glookies #2. On this plant I simply did a topping. It was a risk, considering the plants isn't vibrantly healthy, but I need to maintain it's height. I also did a second topping to the American Pie #1.
As can be observed from the photos, not all of the plants were shaped the same way. I got creative with the fabric pots and I decided to LST a few plants a little bit differently just to see which technique/style I liked the most. So far, I am digging the way the Jelly Bananen #1/#2 and American Pie #2 are shaping up. They are going to have a beautiful, wide canopy when they head into flower.
I'm considering transplanting into 5 gallon fabric pots within the next week or two so I can flip them to flower two weeks later. My intuition is telling me this has been a pretty lengthy vegetative stage, thus far.
I'm expecting all of my plants to double in size during the flowering stage, which should be anywhere between 65-70 days long. I made sure to select strains with similar flowering times (60-70 days).
Thanks for stopping by this week. Please feel free to leave a comment or any tips/advice! Until next week! 🙏


@Greenislandfr
Follow
Je suis vraiment surpris 😲 le tronc a souffert c'est la 2e fois qu'il se fend en 2 cette fois c'est le chat qui a voulu sauter dedans je comprend pas trop il a du kiffer la plante et s'faire un kiff mais bon j'ai des gros dégâts a cause de lui j'ai réparer comme j'ai pu avec de laloe vera en gel pour cicatriser et du propolix (cire d'abeille) pour prevenir d'un état fongique. Dailleur le propolix sa a l'air de marcher je traite par arrosage quand je voit qu'il va pleuvoir +2jour a raison d'1.5ml par litre (entre 69 et 99% d'humidité en général ce mois d'août).
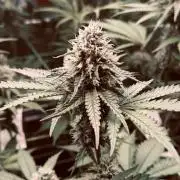
Les têtes sont collante et grossise a fond grâce au bactobloom utilisé avant le propolix bien sur et du Green sensation de plagron. J'ai réadapter l'engrais de floraison j'ai changer pour alga bloom. La plante a eu une mini carence car le top bloom de top crop il est vraiment puissant 😂
L'odeur est légère mais pas oppressante c'est une odeur de Zkittlez/Gorilla glue donc En note de tete le sucre typé 🍬 avec des note de pin/gaz avec un soupçon de café. J'ai aussi installer un filet scrog qui ressemble à rien mais qui est efficace pour le vent et bien aéré les têtes car elle vont être dense et lourde je vais devoir surveiller les attaque fongiques de très près. Pour les nuisibles type thrips j'ai jamais eu une seule piqûre sur la gorilla Zkittlez

@legal_buds_germany
Follow
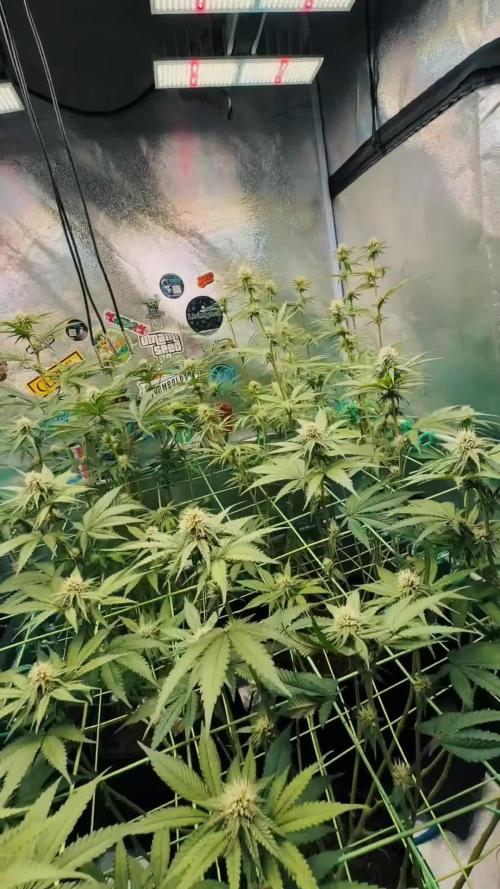
Heute habe ich alles unter dem unteren SCRoG Netz entfernt, damit die Pflanzen die ganze Energie in die Blütenbildung stecken. Das Video ist vor der Entlaubung.
- VPD liegt bei 1,1-1,2 kpA
- Gießen mit:
•Knoblauch/Chili Extrakt 4ml/6L
•Roots Wurzelextrakt 6ml/6L
•Bio Melasse 1Esslöffel/6L


@ThePotFactory
Follow
Safe to say this is where the money shots start to happen xD. All is going well I think, Im trying to water them every day. Not a lot of maintenance needed at this stage if Im honest. There seem only to be a few little flowers under the net that i just pick off; they usually amount to nothing once dried. Hope to get these colas fat and heavy.
Peace
Charlie


shorts_status_processing


@Beans
Follow
1 Leaf is obviously 1 tough customer....but is he tough enough? Can he hang with the present level of toughness he possesses? Watch and find out! (apparently my plant thinks it's a dude)
Defoliated pretty heavily toward the end of the week. partly to try to stunt growth a bit but also promote more growth once it kicks in. Got a log jam going in my flower tent and not sure what to do. May just designate 3 mothers then cram 3 in to flower in a few weeks when its opened up. This is what happens when you feel like you cant throw away anything that might be clone-able. I've gotten past it thankfully and learned a lesson in how to time things next time.


@HegauHillsFarmers_D23
Follow
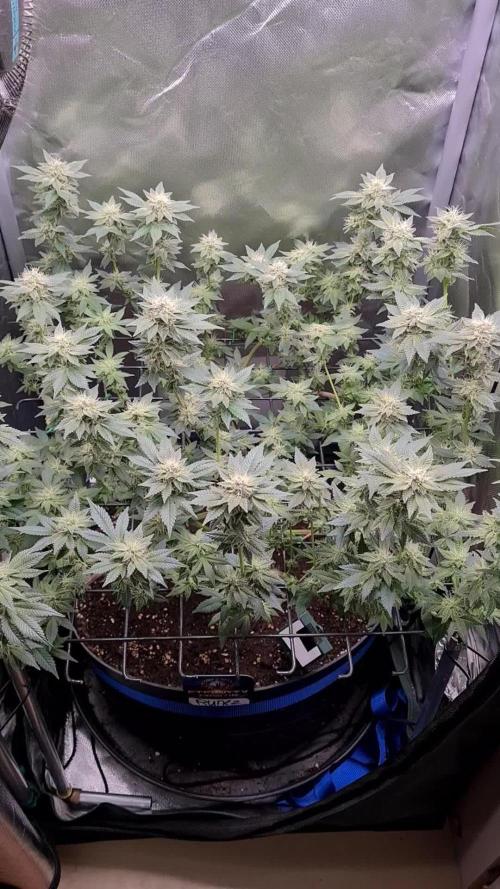
Ab dieser Woche wurde die Pflanze seltener besprüht und die Luftfeuchtigkeit ein bisschen gesenkt.
Zusätzlich starte ich die Woche mit ein bisschen mehr Dünger um der Pflanze jetzt zum Start in die richtige Vegetationsphase Kraft zu geben.


@BLAZED
Follow
Week 14 (28-4 to 4-5)
28-4
Temps: 19.2 to 23.4 degrees
Humidity: 47% to 61%
Watering: 1000 ml. 1.6 6.2
29-4
Temps: 19.8 to 23.9 degrees
Humidity: 49% to 64%
Watering: 1000 ml. 0.4 6.3
30-4
Temps: 19.3 to 23.5 degrees
Humidity: 48% to 63%
Watering: 1000 ml. 1.6 6.2
1-5
Temps: 18.9 to 25.1 degrees
Humidity: 46% to 67%
Watering: 1000 ml. 0.4 6.3
2-5
Temps: 20.6 to 25.2 degrees
Humidity: 43% to 61%
Watering: 1000 ml. 1.6 6.2
Removed some leaves for the last time. 67 grams of leaves removed.
3-5
Temps: 18.7 to 23.2 degrees
Humidity: 39% to 62%
Light set from 75% to 80% strength.
4-5
Temps: 18.6 to 23.2 degrees
Humidity: 43% to 58%
Watering: 1000 ml. 0.4 6.3


@Dirty_rich
Follow
A 2 días de la cosecha
Llegando al tiempo de cosecha en su semana 12 desde semilla, olor muy diferentes a otros cultivos.
Tricomas 70% lechosos 30% ámbar en las flores.
Buena producción, ya veremos la cosecha.


@NewbieDoobies
Follow
Won’t let me do harvest for the ultra lemon haze yet but she’s chopped and drying will try to update as harvest when it works


@BruceBlack
Follow
They look fine, progress is slower that normal.
I'm using some empty boxes and things like that under the pots in order to make em reach the light easier
Also using some cord to help some girls grow more as a I want
Removed some bottom leaves but I guess it's normal
Just watered today so hopefully they start growing fat buds!
Found that the oldest plant has already some brown pistils but its not big enough I guess
Will try to make a better follow the next week on each oh them to show the diffs
peace!!








@Paflucy
Follow
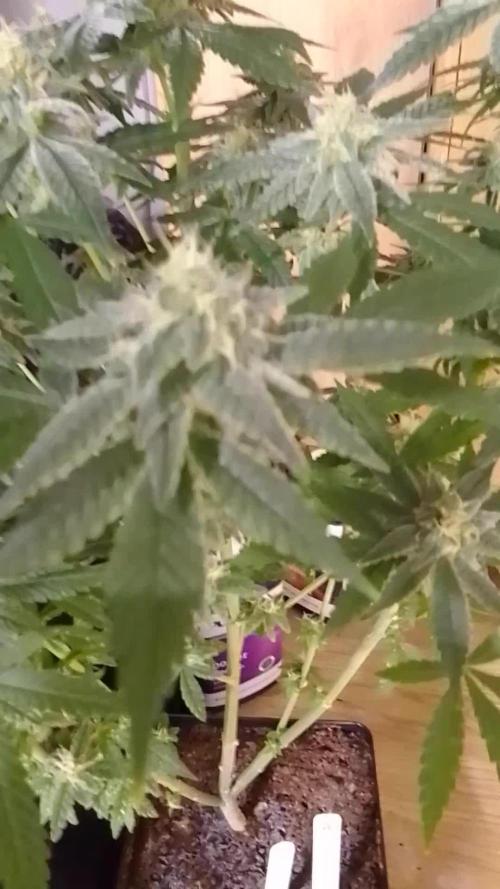
Hello Everybody :)
New grow, new adventure, new lamp :)
I've seen a lot of really hard and ultra frosty buds under this lamp, check it out yoursefl - https://firesun.pl/
This crop is an edition for absolute sativa lovers :)
Grow Medium - Biobizz light mix + Rosahumus - 85% acid humus + dolomite + perlit + pebbles at the bottom and top + Great White Shark ( when transplanting)
The end of the first week of flowering, the girls have already received the first dose of fertilizer for blooming.
1. Super Silver Haze - GHS
7 liter pot - Uncle Ben's cut
Three main branches - the fourth lazy has already been removed
2. AMG - Kera
6 liter pot - lst work out
3. Wild Thailand - WOS
6 liter pot - classic Main Lining
six main branches + lazy one... - the eight lazy has already been removed
4. Critical Haze - Resin
2 gallons Rout Pouch pot - classic Uncle Ben's cut
four main branches
5. Pellezino Ghost Train - Blimburn
9 liter pot - classic Main Lining
four main branches
6. Power Plant - DP
6 liter pot - Main Lining
seven main branches + lazy one...
Take care and wish me luck :)


