
Processing
Likes
Comments
Share


@Kushizlez
Follow
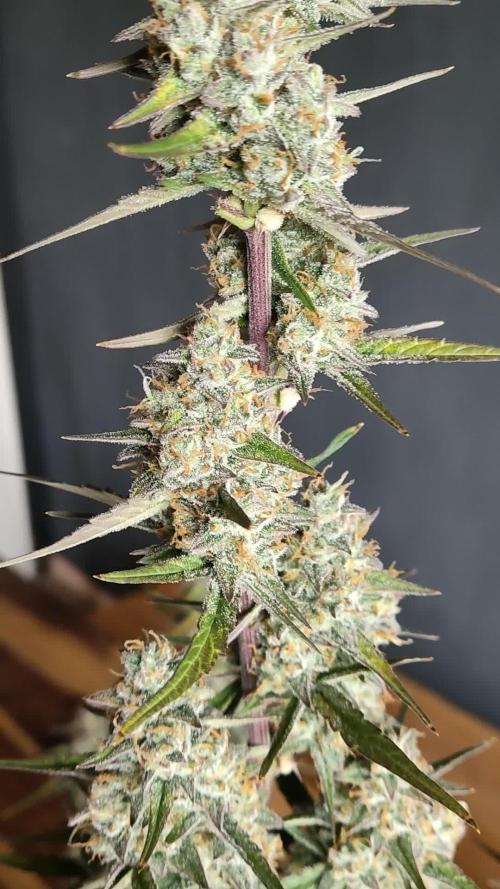
Day 40-47 (May 31st- June 7th)
(Day 41) For the first time in this grow these plants are looking halfway decent. Smell is ramping up too. I finally feel optimistic about this grow.
(Day 42) The two jacks and the chunky blueberry are showing early signs of N/Mg deficiencies. I know it’s late in flower but since I’m experimenting with this tent, I’m going to give them one final feeding of nature’s pride 2-5-5.5 (tbsp) along with a teaspoon of oyster shell flour and some rock dust. Everything else I’m going to give a teaspoon of rock dust and oyster shell. There is no way these amendments will fully break down in time to be used by the plant but they could at least use the pH buffering and trace amounts of minerals after their recent leach.
Everything but the BAOGC is covered in pistils that don’t really match their bud size. I hope they fill into their pistils because an over abundance of hairs drops the bag appeal like crazy.
Over the last few cycles, indoor and outdoor, I’ve definitely learned that different strains and phenotypes mature at different times. Sometimes really radically too.
(Day 43) None of the plants are fading at all but they’re still looking good. Black garlic I know should be fading but remains dark green and toxed. I popped a developing seed out of the main bud too. I wonder if that blueberry herm branch pollinated it at all. It seems like plants don’t really like that Destiny dark matter soil by itself. I find it works better mixed with coco or promix 1:1.
(Day 44) I’m starting to think I might be mixing up the TWOG and BAOGC. BAOGC took forever to fatten up last round and the 2 phenos I suspected already look done. I was thrown off by the similar terps. The beauty phenos are definitely TWOG
(Day 45) God these Jack Herer’s smell good. Nothing but fruity funk. Almost like a vanilla or blueberry yogurt. I would say this stuff has the most overpowering smell in the tent now. I’ve noticed they’re starting to foxtail like crazy. Blueberry#1 too.
I’m watering a final low strength feeding of seaweed extract on everything.
(Day 47) Everything really fattened up this week. Even at the beginning of the week I was saying I didn’t think they would fill out. Jack Herer and BAOGC specifically made some big gains and nearly doubled their density and still have quite a way to go on them too! The smell has ramped up and finally, everything is looking happy and healthy.


Likes
6
Share


@GrapevineGrower2
Follow
Straightforward with nothing to report out of the ordinary. I top watered on day 56 then let them dry back prior to harvest (day 61). Nice mix of milky and amber trichomes. Harvested early morning prior to lights on.

Likes
30
Share


@coyote2thick
Follow
I hung dried for three days and then bagged them up in brown paper bags for two days due to the low temps and humidity before jaring them.

Likes
11
Share


@MRTHC
Follow
Well we finally reached the end. The last week was more cruise control. Just trying to remove the big fan leaves that's blocking any flowers. The trichomes looking kinda ready but still acceptable. During the last few days I maintained a daytime Humidity of around 60 and nighttime of 55. Temperatures are between 73 degrees and 67 degrees.
Two days before chop they got 48 hrs of dark and 3 days of no water to add to the stress. After the 48hrs darkness all the ladies Came out extra frosty. Loving the change of hues on the blue gelato. The vanilla Kush is very oily and very very strong smell. Not a strong smell coming off the OrangeGelato though. The green gelato has a creamy smell.


Likes
23
Share

@SkunkyDog420
Follow
Hallo zusammen 🤙.
Habe sie heute geerntet.
Wir sehen uns in 3 Wochen mit dem Erntebericht

Likes
10
Share


@MG2009
Follow
09/11/2021
Plants are eating well bulking up, a gallon each plant of 9-0-1C
Only got pics of #1 today tomorrow will post Sunday morning photos,videos
Coffee, Reggae music, and plants.
Likes
19
Share


@Sergio_721
Follow
they do not seem mileage even after a week of fertilization even if at very low dosages the next time I increase the nutrients and let's see what happens
Days 41 it looks like it's going well they still look nutrient deficient the next time we increase the dosage.

Likes
32
Share


@Weird_Jimmy
Follow
👉The plant finally has its own space. I moved it into the center of the tent and have rotated it to get a closer look at things. I have felt like bad things may be lurking on the far side which I had no access to. Fortunately everything looks good. I did find a couple of seeds forming in the tips of a couple of colas. Since then I have been scouring the plant looking for hermies. I haven't found any, but is a large bush and the hermie could be small. Its also possible that I carried some pollen in from outdoors. While all the farmland around me is cows, the strong prevailing winds could possibly have carried a few grains of pollen and those ended up on my clothes. I didn't see any evidence of the buds filling up with seeds, just the 3-4 with the seeds forming right on the tip. I will know for sure when I do the harvest.
👉I may have stuck with the week 8 mix a week too long, so I moved to week 9 for one batch (2.5gallons) then week 10one the next, I switched to week 11 (Ripen) at the end of the week. The plant had lots of crispy shitty looking fingers in the areas at the top of the canopy and in the strongest parts of the lights. I moved the lights up to 26". I have been trimming out the dead crispy leaves and and seeing more of a normal 'fade' pattern now on leaves all around the plant. I have been trimming off those that have faded for the most part. There are still lots of leaves left. The trichomes are seemingly mostly cloudy, I have not seen any amber. The lower areas have mostly clear trichomes. The buds are not 'normal' in structure. They started out normal sized calixs with normal structure buds, but they stopped 'plumping' and most of the calixs became freakishly large. This is very reminiscent of my Gorilla Glue form last year. The buds seemed to be in a state of suspended animation with no new calix's and all pistols red. When I shifted to the week 9 and then 10 mix, some fox-tailing started and some smallish calixs formed. The temps in the tent have been mid 60's at night and some days in the low 70s. This has given some of the colas a little bit of purple color. The plant is frosty as can be with frost extending well out onto even the largest sugar leaves. The smell is generic funky stank, but with a nice pleasant sweet note. The aroma is very strong and when the breezes are moderate to mild the sweet funky stank can be enjoyed outside my house as well (vented directly outside with no filter).
👉I will continue with the ripen mix of solution till harvest day. I will be monitoring the Trichome status looking for mostly cloudy with very few clears. I took a couple of small larf branches two weeks ago and let them dry, did not 'cure' it. Sticky as hell, and when I toked it it gave a nice buzz that was uppy. It wasn't 'intense' like finished cured buds are, but it was stronger than any larf Ive toked before. Larf is usually sort of an 'empty' high for me and hardly worth the effort of lighting it up, this was good enough to give a nice long lasting pleasant buzz. I cant wait to see what the good big buds will be like!

Likes
15
Share

@MG2009
Follow
Will keep a mother plant.
Beautiful plant, probably needed more food. But it produced a good night medicine, very relaxing melt into your couch and grow roots out your as cause you won't be going anywhere soon.😑
PS. Smoke report was for first plant harvested the smaller one. And she's not even cured yet, can't Wait to see how second plant harvested bigger one turns out I let her go 60% amber 30% cloudy and 10% still clear trichomes. Pros, she will let you relax, good night med. Still curing plant 2 but feeling stoked Earlier cut was less amber still good sleeping. Can only get better meds at 60% Amber should be fire🔥🔥🔥🔥🔥🔥promise to update after testing out. Maybe 3 weeks I hope I can wait !😬0
Plant #2 dried four days, till stems almost crack, been jarred up in glass for 1 week burping jars as needed, 2 weeks till 1st test smoke plant #2. See you in 2 weeks
peace out.
Wow 2 week's already?
02/07/2018
Still a little moist. Smoking a little bit high hit me fast. Taste blah back to jar.🙏


Likes
119
Share


@DogDoctorOfficial
Follow
I love growing and i love the GD community, we are like a big canna family and its a pleasure and an honor to be part of this all. Thank you all for being here , for growing and believing in this beautiful healing plant . Growers love to you all


Likes
10
Share


@El-Ecko
Follow
Week 5: Vegetative Growth
Not much has happened this week, but it’s growing steadily and has turned a beautiful, rich green🌱.
Since the sun only shines on my balcony until 2 p.m., it’s all the more tragic that it isn’t shining at all right now. 😅 It shouldn’t be long before it enters the flowering phase and hopefully takes a big step forward.🌸⬆️
Two leaves are deformed… and look very interesting 😁.
Processing
Likes
16
Share


@Naturalist
Follow
TDS meter went bad so my reads are off (low), but until I replace it...
Starting LST today, unfortunately the main topped branchs on Gelato #2 split down the middle, I have taped up hopefully to heal.
All plants have been topped twice hope to flip in a couple weeks.


Likes
13
Share


@Oyziphar
Follow
This week wasn't as bad as last week 😊 Nights were cold 😰, but not to much rain 😿 and a few hours of sun 😍
Temperatures in the greenhouse were medium : during the day 20°C 💀; min temp 3.5°C ; max temp 31,7°C 😤
Cookies Gelato has turned completely purple 👍👍👍
I defoliated the plants 😙 and had to remove budrot (especially in the Cookies Gelatoes)😨
I took the prettiest Cookies Gelato outside for a photo session in my garden 😍
Probably these will be the last pictures of the plans, before harvesting ! 👍😄
Likes
563
Share


@Ju_Bps
Follow
Hello my friends 👩🌾👨🌾,
This 8th flowering week was good 👊, maturation Buds continue 🌲❄️, I thought it will be the last week, but need one more.
The end is for this week end I think, for moment trichromes not really full milky, and I like something like 20% amber.
I've started flush with flash cleaner
The senesence is started on the #3.
💦 1 Watering this week 1.8l/plant .
Water + flash cleaner
PH@6
Lamp @100%
Bisous 💋😘, and see you next week.
Thanks community for follow, likes, comments, always a pleasure 👩🌾👨🌾❤️🌲
Mars Hydro - TS 1000
https://www.mars-hydro.com/ts-1000-led-grow-light
Mars Hydro - FC3000
https://www.mars-hydro.com/fc-3000-samsung-lm301b-led-grow-light
Mars Hydro - SP3000
https://www.mars-hydro.com/sp-3000-samsung-lm301b-greenhouse-led-grow-light
The High Chameleon - Bisous Au THC 💋💋🌲🌲😘😘
https://www.thehighchameleon.com/shop/bisous-au-thc-83
Likes
53
Share


@Boomer911
Follow
Week 4 Update:
Plant Growth:
Noticed some plants lagging behind by 5-9 days, so I've been focusing on giving extra care to these ones.
Implemented Low Stress Training (LST) on the stronger plants, particularly the Gorilla Glue and Gelato varieties, to encourage more even growth.
Weather has been a mixed bag – occasional bursts of sunlight, but mostly rainy days. To compensate, I've set up a makeshift box with LED lights to ensure the plants get consistent light exposure.
Nutrient Management:
Adjusted feeding schedule to once every 2-3 days to provide a balanced mix of nutrients.
Using a combination of guano, worm tea, and Grow NPK Autogrow mix to feed the plants, which seems to be working well so far.
Considering adding Cal-Mag to the mix to ensure the plants are getting all the nutrients they need for healthy growth.
Observations:
Despite my efforts, I can't shake the feeling that some of the plants might be experiencing slower growth than expected. It's a bit frustrating, but I'm staying patient and hopeful that they'll catch up soon.
Looking Ahead:
As I prepare for the next batch of seeds, I'm already thinking about the lessons I've learned from this experience and how I can apply them to future grows.
Despite the challenges, I'm feeling optimistic about the future and looking forward to seeing how these plants continue to develop in the coming weeks.

Likes
18
Share


@Domenik
Follow
Day 67 and the last one is ready. The smell is incredible and the trichomes are crazy. Love this strain and gonna grow it again


Processing
Likes
7
Share


@x_grower
Follow
Last week I neglected the fertigation beyond the low humidity all that delayed the first topping and leaf burned the most thirsty girls, by the end of the week I had already recovered them and succed topping, they are looking very healthy.
Likes
34
Share


@Smokin_Joe
Follow
Day 120, 9/5, Day 50 of flowering, full week always one week back: Net down and holding in support. The discoloration is starting to spread and I'm still unsure exactly what it is or if there's time to address it at this point. I've got the lights pulled up just bit more, just over 17" to the canopy at the closest spot. Humidity and Temp have been goldilocks as far as I can tell. PPM was 1100 and 6.38pH on the last runoff with small amounts of Molasses, Senizyme, and a tiny bit of CalMag.
Bag is 60% FFOF, 30% Coir, 10% additional Perlite. Have been using FF trio as my base at half strength, only other additions have been the occasional Senizyme and some B-52 back in veg.
Day 121: Posting a video of entire plant. Having to get a bit creative to keep this lady up. Some more twist ties and a tie up.
Day 122: Will feed tonight. Planning a clean feed with a slightly high pH to bring closer to 6.5pH. Fed: 6.8pH, 6L, 71F, 135ppm - Runoff 6.69, 545ppm.
Day 123: Going to spend some time tonight trying to get a view of the trichomes without the glare of the LED on, seems I might get a better idea of what's going on. My wife took these pictures in the dark with flash only this morning.
Day 124: Well, I think I'm considerably farther along than I initially thought. I think I'm harvesting this weekend? I've at least 60-70% cloudy, and several amber as seen in today's pictures. These are likely the best micro shots I can get. I have a handheld magnifying glass that's hard AF to keep lined up on my phone camera, especially with my shaky hands. On the other hand, these are pretty decent zoom pics, LG V60, so here's some free advertising for them I guess. Considerable yellowing of the leaves seemingly over night.
Day 125, Thursday 9/10, Day 55 of flowering: So, I've decided we won't be using the Flawless Finish. I would have, had I another week to water again. Just worried about adding anything as this is my last watering. On my previous clean feed I had a run off in the low 500s, so I'm just going to 'flush' again with plain Ph'd water. Lights on thru Friday, if everything looks good, lights off all day Saturday. Sunday: harvest, trim, and dry!
Night 125: So after fretting a bit much over the past two days, I called the guy at my local grow (and home brew!) shop. He advised 50/50 one way or the other on the Flawless, but of it was him he's pass if he was harvest Sunday, as I plan. Watered with plain ol' pH'd water, 6.5 input. The first gallon was warmer ~75F and run off was 6.3pH/1300ppm, second gallon at 70F, 6.5pH/900ppm. Assume the higher ppm is from the higher temp in water for the first gallon, which was done on purpose. Tomorrow is the last day of lights.
Day 126: will attempt to get some good trichome shots tonight Going to confirm she's cloudy and amber all over then shut the lights off for 24hrs.
Day 127: Lights out! In the dark til tomorrow. While I couldn't get any good shots, I would say bud to bud my trichomes are 80% cloudy, 10% glassy and 10% amber. There are a few trichomes I was able to focus on for a second that seemed reddish or purple: no idea what that means. My wife was able to sneak into the tent and get some Trichomes pictures. See the red & amber!
Day 128, Pre-Harvest Sneak Peek & Pics: Wildly underestimated the amount of time this would take. We started at 3pm, and by 10pm we had only done about half the plant, maybe a little more. Granted we got up for small walks around the block every hour and stopped to make & eat dinner at some point, but I would say we did a solid 4-4.5 hours of trimming. We only clipped the arms of what we trimmed, so the rest is still in the dark tent. Hopefully we finish tonight!
We weighed only the largest buds we've trimmed so far and it came out to 140grams wet.
Day 130: Welp, didn't finish trimming til this morning. Worth it though! With some already drying for 2 days and some newer, the weight is likely hard to gauge at this point. Looks like the smalls are mostly dry already and weight in at 16gr, the slightly larger grade buds weighed in at 32gr, and the largest buds weighed in at 126gr now.
We tried our hand at dry ice hash for all the trim (77gr wet) and got 2gr out of the 73 screen, and 10gr out of the 220 screen! Picture posted of product.
See you all in 2 weeks for the harvest post!
