


Likes
5
Share


@Kinghaze
Follow
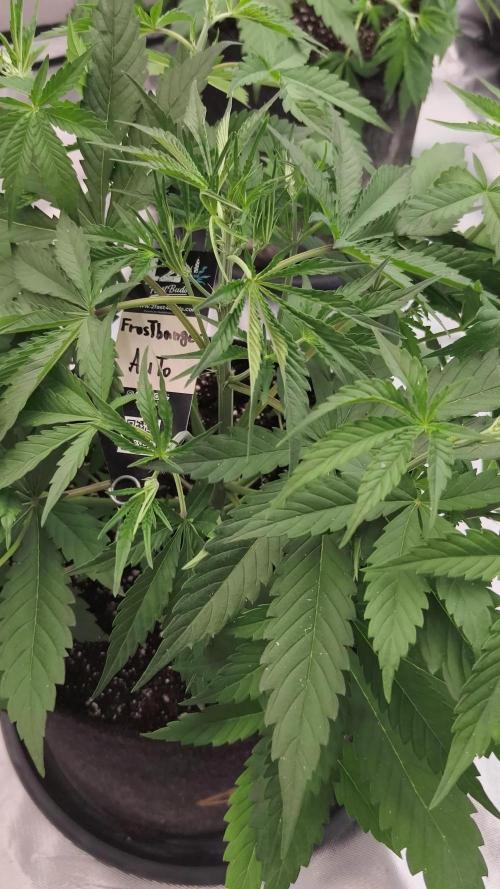
- Week 2 of veg
The humidity was way to low ( 38%)
I set up my humidifier from spider farmer and put it on 70%.
I also put them in 11.6 L Rootmaxx pots.
Tomorrow i will give the lady's some grow nutrients and b12 for the first time, and will begin on an ec of 1.1

Likes
25
Share


@Dingle_Dangle
Follow
09/06/2022 - Day 21 - First day of the 4th week.
Great developement in the last 7 days.
The plan is to let her grow without any kind of training.
Wish me good luck and let's hope in sunny mild days 🤞☀️
- DD


Likes
32
Share


@Platinouuu
Follow
Un poco de entrenamiento para llevarlas en su propio rumbo sin stress adicional futuro. Solo seran algunas guianzas de ramaa. Gracias a todos por sus buenas vibras y ayudas! Buenos humos


Likes
31
Share


@raoul_weed
Follow
Ca continue à gonfler 🤩. Les trichomes commencent à atteindre la maturité. Plus que 4 à 5 jours

Likes
1
Share


@Sur_cannabico
Follow
En plenitud de floración de la mano de Royalqueenseeds y Quemanta Nutrientes.
Engordan y engordan estas flores,
Se viene cosecha!
solo un par de semanas mas y a piso 🌴
Likes
20
Share


@Ieiogrow94
Follow
Eccoci qui...
Che splendore questa genetica, NON SEBRA MARIJUANA!!!
Questa settimana posso solo dire che sembrano fatte di marmo.
STRAIN 1 super compatta chissà come sarà alla fine del raccolto!!!!
Si inizia a vedere il viola nelle foglie FINALMENTE!!!!!!
Grazie a @Khalifa_Genetics per la collab e a tutti per il supporto🔥🌲❤️

Likes
77
Share


@Ukfarmer420
Follow
Hi guys
So entering week 11 now on this grow sherbert mimosa still have another 4 weeks I rekon and the last gelato cake is ready for the chop when I get 5 mins. Colours are popping and the frost keeps coming.
The blue cheese and dark phoenix are growing fast and have a plan for these on there own diary so keep looking.
Happy growing guys

Likes
6
Share


@DaedalusGrow
Follow
Noch ein bisschen dann schauen wir uns mal das ganze Mal in der Vergrößerung an👌✌️🤟🌱
Processing
Likes
12
Share


@rhodes68
Follow
9/14 Week 9 and she is doing fine
Little vid she is front rt
Nuets not changing for now
9/16
Doing well but some white tips are saying we gotta reduce the salts so will be dropping CT nuets 10% and upping PK to 2.5
Extra space is really doing them well
Defoliation again tonight the war on stemmed leaves has begun
9/17
Held a meeting of the minds and decided the best course of action is to flip the light schedule so I can feed them more appropriately, twice a day.
Leaving nuets as they are as this will drop pot EC. Setting the alarm for the AM before lights out at 7:30 and changing the sched to 6AM-6PM summer is done no need for current schedule. Lights be out from 7:30AM to 6AM long I know but should not bother them.
9/19
Lights on girls feed buds look fine
Video enjoy

Likes
1
Share


@Bwright_315
Follow
This week on a tale of two plants
Plant A she is going very well. She is very sticky and tricone starting to turn milky have no issue with her and she smell amazing
Plant b is feeding like crazy I water her at least 4 time a week I think that why she was delay maybe so I been making sure to keep on top of that her smell and getting stronger and she is getting thicker with tricones starting to produce


Likes
8
Share


@CashiLashae
Follow
Adding in additional nutrient called Overdrive for the nexts couple weeks


Likes
2
Share


@Green_Peace
Follow
Topped again today. This plant may grow more wiry than the others by the look of it so will probably need more training than the others. We will see.
Saturated the tent this week as I was out of town which is the reason you can see a little overflow in thetimelapse. This plant is now the one at the back in the video.
Likes
17
Share


@nerdz
Follow
F15 to 21 Tuesday
Big big big. Humidity was getting hard to handle especially during lights out so I had to do a mid stretch cleanup. I mostly did a lollipop to get air flowing through the plant. I didn't go too hard even though it looks like I did. I will do the last one in a week.
~1000ppm 3/4-full bloom @ ~5.8-5.9
Lights 100% @ 7-12"
25-26c / ~53rh
Likes
45
Share


@PotCasso
Follow
Week 3 of Flower: HLG Diablo at 90% 20in from canopy.
Watered in at 800ml top dressed 2tbs bloom, 1tbs grow, 3 tbs barley a recharge day and a silica day. I think we are about finished stretching


Likes
7
Share

@MistaOC
Follow
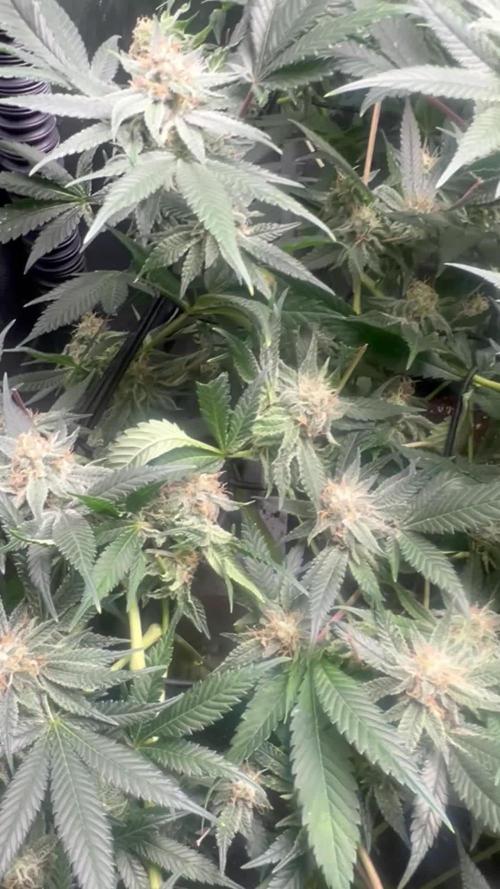
Grow Diary – Day 65 (Flowering Day 45)
Strain: Sour Frootz by Karma Genetics
Plants: 4 clones
Training: HST + SCROG
Nutrients: Green House Feeding – Bio Grow & Bio Bloom
Date: May 16
Status: Maturing beautifully – final phase underway
At Flowering Day 45, the Sour Frootz are deep into the flowering phase and transitioning steadily into the ripening stage. Buds are now dense, resin-coated, and maturing nicely across all tops. Trichome production has intensified significantly—under magnification, the majority are cloudy, with the first few amber heads beginning to show.
The canopy remains uniform thanks to earlier SCROG and HST work. No further stretch has occurred. The branches are supporting impressive bud weight, with some light staking now helping where necessary.
The aroma is rich and layered: strong notes of sweet citrus and sour fruit dominate, backed by a subtle gas-like funk that fills the tent. Terpenes are peaking and beginning to stick to fingers during inspection.
Nutrient Management:
• Bio Grow continues to work in the background as a slow-release base.
• Bio Bloom remains the main driver for flower bulk and resin support.
The organic feeding regimen is holding strong—no signs of lockout, deficiency, or excess. Watering remains consistent, with careful monitoring of humidity to prevent mold as bud density increases.
Current Observations:
• Buds are compact, frosty, and aromatic
• Leaves show natural late-flower fading on older fans (normal)
• No pest pressure or mold present
• Environment stable (moderate RH, good airflow).