
Likes
Comments
Share


@CanadianFillmore
Follow
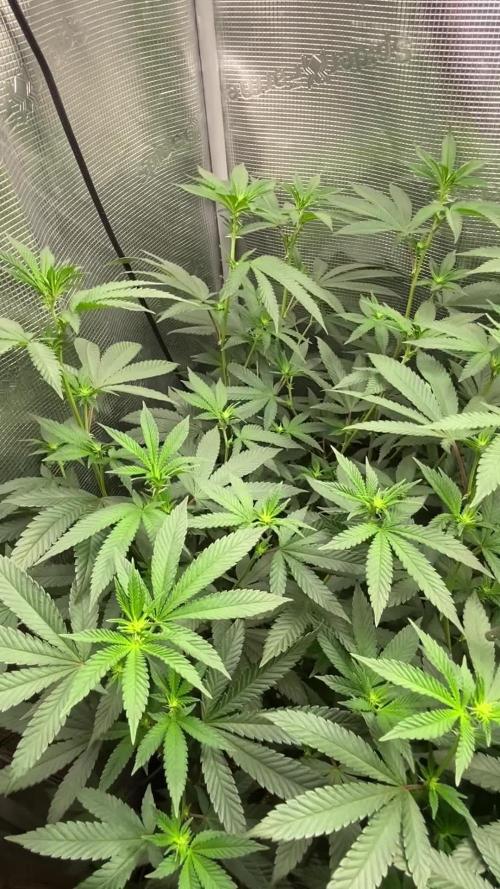
Not much to say right now, will update in about two weeks with the dry bud weight and the taste/smell/smoke profile. I'm hoping this strain is as tasty and potent as the smell, stickiness presents itself to be.
Update June 19, 55 grams on the scale. Very impressed with the hardness and density of the buds. They are pretty sticky too! The smoke is okay, but not great tasting and gets harsh towards the end of the joint. For people that like to make extracts, rosin, etc, this strain might be right up your alley.

Likes
6
Share


Likes
7
Share


@TJHeadley
Follow
The buds are ripening up. No amber tricomes as of yet but going to start keeping an eye on her. Cut back on all feeding minus molasses and coconut powder

Likes
11
Share


@samuraifroggig
Follow
Did a jump start tea, 3 feeds of cutting edge solutions. For past 4 weeks have Found one adult spider mite per week, and destroyed eggs on the leaf's bottom with the white spots. I have no clue where they came from never had them before. I live next to a river and it is spider season so the normal spiders have been hunting the mites just becasue they are attracted to the lights at night. I don't see the mites as a threat and I'm not going to spray for them I might try to make a ladybug farm if I see more.

Likes
17
Share


@Elpicor
Follow
Happy Easter all over the word, I will share my Italian best aperitif ever.
D51
Eighth week, if they are so beautiful it is also thanks to you! I love this community, I hope to stay there, as long as I don't get arrested...
Anyway...
I wanted to point out that all my doses of nutrients are for a liter and a half of water so as to be even more scrupulous to avoid overfertilizing. I turned off the dimmer, at noon simulating a half day of fire lol i'm crazy. added a reflective film to the base of the room, raised the plants to the same level by placing boxes under the pots, many Thanks @Roberts for encouraging me to look for the boxes, I'm a lazy boy!😇
...a clarification for the most refined minds .... I know very well that the glass is for white wine but it is the only one I have, I take this opportunity to thank my neighbor for giving it to me ;)
D55
Buds fattering
Likes
10
Share


@EastCoastGrows99
Follow
Week 7 now, growth slowed a tad, figured my soil mix would be running a little low on nutes now & started the feeding. Chose to give them a single feeding of Plant-Prod MJ Grow as it has some extra stuff they may have been missing but will feed bloom starting next week!
The bud sites where starting to get a little shaded from the larger fan leaves, removed them & the buds started swelling like mad!
Last day of week 7 update: They drank the grow nutes with vigour, fed bud filler last night (nov 3). The feeding greened up the leaves, now I can confirm my soil mix lacks enough flower nutes for sure.


Likes
5
Share

@AestheticGenetix
Follow
Plant is doing great in the 1 gallons with the vivosun drip irrigation. Will be harvesting probably at the end of this week.
She's at day 56 as of this update. I didn't post any updates for the first few weeks of flower.
Likes
42
Share


@Canna96
Follow
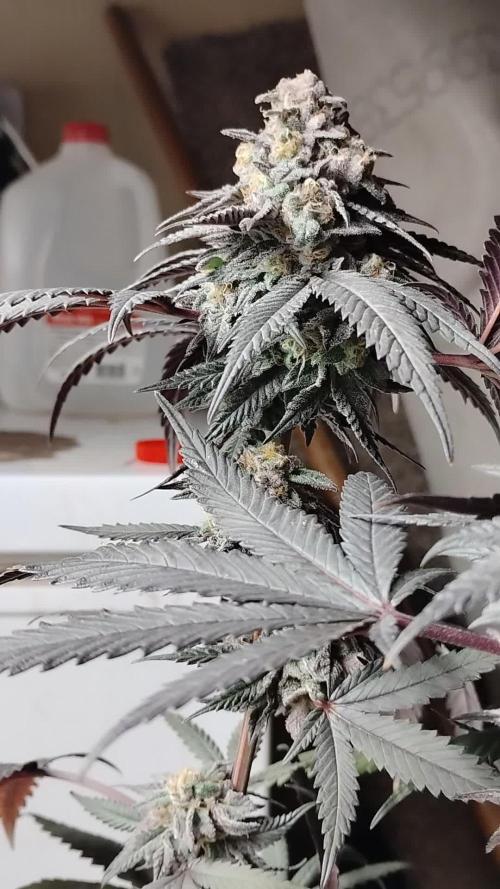
I had alot of fun growing this strain, everytime I opened the tent and smelled that delicious strawberry, it really brought a smile to my face. I have tried Strawberry Pie #1, and she is delicious. The buds are extremely dense, and have a very nice pink and green contrast. I haven't tried #2 or #3 yet, but I am very much looking forward to it after some more curing time.
I ended up making bubble hash out of the trim, and I got 8 grams, which I pressed into 4.7 grams of rosin, and all I can is that this is some of the best tasting and strongest rosin I have ever tried, let alone grown. I will be posting some videos of the flower being pressed once it is properly cured. I will say that after smoking, I realized I need some more Sativa for daytime use, so I am giving my Gorilla Cookies to a friend, and starting some Orange Sherbet instead. As a delicious night time/dessert smoke, and especially for those into concentrates, you absolutely can't go wrong. Thanks for checking me out and blaze on!
Likes
31
Share


@RFarm21
Follow
Olá growmies!
Esta semana parei com o LST na esperança que ela ganhe mais altura nestas semanas.
Até agora não tenho tido grandes problemas.
Entre as regas tenho dado 0.5L de água com pH regulado quando as folhas começam a esmorecer.
20Nov - Alimentada com 2,25L de água. Runoff EC: 1.50 / runoff pH: 6.5
Se tiverem alguma dica para me dar, estejam à vontade!

Likes
11
Share


@Homegrown93
Follow
Both were fed on day 43 3.5 liters of full strength nutes. Both ladies are growing nicely, every time I open the tent I’m blessed with that fruity dank smell. Their flowers are bulking up little by little and both are throwing out trichomes in there main colas. Can’t wait for harvest!!!
Day 47- both are looking good, maybe a little heavy on the nitrogen so I’m going to dial back a bit on the nutes. Forum stomper is really taking her time, I hope she fills out!


Likes
17
Share


Likes
11
Share


@SintrexGrow
Follow
The plant is growing very healty and fast. Very happy with the results so far. Will keep documenting as this is a DIY project 😀

Likes
4
Share

@NSABND
Follow
Welcome to Day 36 .... first Day of pre flowering 😍🙏👍
Day 37 .... massive leave cuttingto get space for the queens 😶🙏
Day 38 all strains forgive me the massive leave cutting 😃👌🙏
Day 39 everything seems to be ok 😍🙏👍
Day 40 this will be good i think 😃👌
Day 41 the growtent is really good filled up 😃👌🙏
Likes
12
Share


@KIOSKOdeCHUKI
Follow
Buenos humos amigos!!bonitos dias de agosto jueves 6 de 2020 un saludo desde españa con este entretenimiento aki os dejo

Likes
Comments
Share


@Earthsower
Follow
She looks a lot better than three weeks ago least she’s back moving again with further growth I fed her 100ml of phd water due to a very light pot. I am still holding her in natural sunlight!

Likes
13
Share


@KingSalomonsWeed
Follow
Hello and welcome to day40 of flowering of this little lovely plant.
The smell is incredible. Zkittlez. No joke.
Very sweet with a a
hit of Watermelon too, not so strength by now, but i will report.
Ill try to catch up some photos.
Not only that the phylaxien re going brown.
The colors on the buds, rose, Lila.(edit i was wrong Lila color was from the Greenception GC4)
Till now.
BARNEY FARM!!!
At this BARNEYS FARM grow they bring a smile on my face.
A very pretty strain
Thank you!
The BioBizz TOP MAX is from ny next noise forbidden to use because of a unholy smell it turns after some weeks.


Likes
179
Share


@StarLorr
Follow
Welcome to my Øpium diary.
In this diary:
Seeds: sponsored by Ðivine Șeeds
Media: Promix HP
Nutrients: Advanced Nutrients, Diablo Nutrients, Gaia Green Power Bloom.
Light and Weather: Şun☀️and Mother Earth.🌎
___________________________
Feeding:
Tue 06Aug: 4L nutrients pH'd 6.5 and 4L water not pH'd
Wed 07Aug: 8L water not pH'd
Thu 08Aug: top dressed Gaia Green Power Bloom 6 tbsp
Sat 10Aug: 2L water not pH'd
Sun 11Aug:6L water not pH'd
Mon 12Aug: 8L water not pH'd
___________________________
*please note that most water only feedings are 2L at the time throughout the day in bottom saucer*
___________________________
Øpi survived the wrath of Debby(Tropical Storm)she stood her ground(in her pot)😂Monday I added a piece of wood to the anti-tipping device to hold up the lower branches as they pull the plant sideways and will only get worse as the buds gets bigger and now Øpi look more straight than leaning sideways.😃
______________________________
Øpi and other sisters got the defoliation treatment, mostly fan leaves.
_______________________________
Top dressed her up with Gaia Green Power Bloom about half a 3/4cup as i can't keep up feeding her liquid nutrients in such industrial amounts😅but the results are already showing and she seems to like it, i will continue liquid nutrients feeding once or twice a week.
______________________________
Thanks for stopping by, likes and comments are appreciated!👊🏻😎
Keep on growin!
Keep on tokin!!!
😙💨💨💨💨💨
