


Likes
Comments
Share


@GreeneScene
Follow
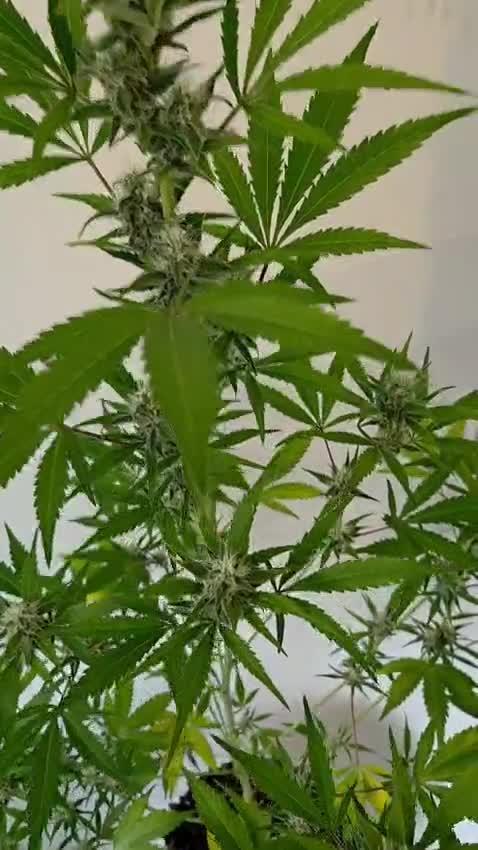
Week continued pony-tailing tops until the middle of the week some tops outgrew the ties . She’s grown back week after that defoliation . I’m proud of her she’s almost 1 ft tall 😂. Shes truly a shrub like plant now. We’re waiting for those dry amendments to become available to her and are hopeful for the next 4 weeks to be explosive in uniform growths across the canop

Likes
13
Share


@TrialAndErrorGrows
Follow
Week 9
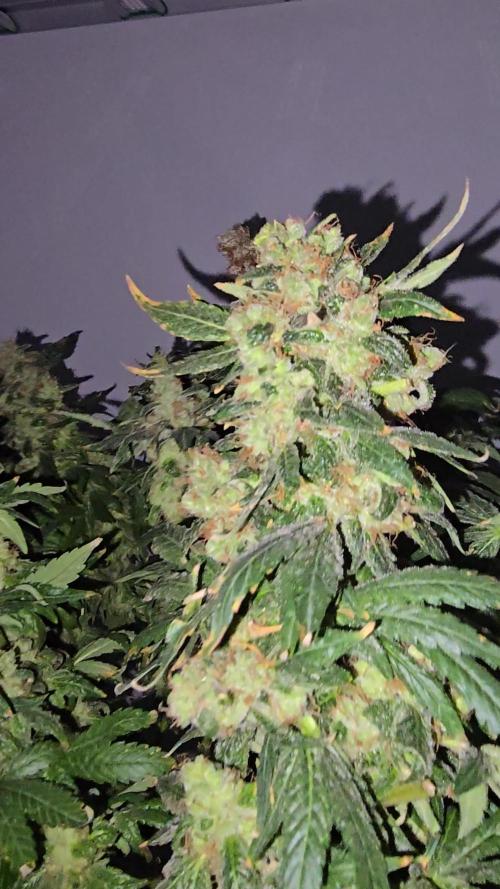
Didn’t do anything this week except water the lady’s. My telescopes batteries died so I can’t take pics of the tricomes. Rest assured they are nice as hell. They are a massive mix of colour. You see purple, cloudy yellow and amber. Super excited to puff on these nugs!!

Likes
15
Share


@Sup3rNov4
Follow
Wonka has bounced back will lots of energy finally it’s happy not to long left on her the fattening should start any day now
The fattening has begun
Found a dam spittle bug on the bottom leaf this morning poor bugger picked the wrong plant, the little blighter was higher than me. Checked Wonka over it was just the one for now and it was located on a small leaf so no damage to worry about but spring is officially a go!
Likes
35
Share


@m0use
Follow
Not a whole lot happening this week. Just waiting for the plants to mature and go from there.
The mites are prioritizing the weaker plants and I am ok with that. I have introduced some predator bugs that should eat them. They are the ones that tend to eat thrips and white flys however the guys at the grow shop said if they only have mites they will eat them instead. They won't however go onto the webs if they start forming any. I have not seen any webs but who knows, might be some hidden. little fuckers are good at going undetected for a while.
Just giving them water now till its all done and over with. Will not be drying this crop as that's when the mites will go crazy. Fresh harvest and frozen asap.
The one CBG plant seems to be thriving in all the chaos looks nice and healthy and good frost on it. Some of the other plants are loosing some upper main leaves. Could be fade. Could be issue in the roots. Don't really care, so close to being done.
Added one photo of honeymints from an old grow for a contest.
Likes
18
Share


@growingpepini
Follow
Our sweet lady survived a week of raind and intense wind, the golden rope you see was helping the buds to stay still and to help save branches from breaking.
The lady is super sugary and sticky right now, but the buds seem like they are not gonna thicken more than that.
This plant has been stressed multiple times during her lifetime, from broken branches to light overdose, she has been kept away from direct sunlight since than, so this is the cause we attribute to this slower growth.
Our biggest doubt is about harvest time. The buds do not seem big at all, but they look very orange and the breed's harvest is said to be in mid October, so we should start flushing!
While I think we should wait untill the last week of the month, F. says i's almost time for drying. 😵😲
Looking at some pics of last year's harvest I am afraid this lady is not going to produce as much as we tought, maybe because this is our first experience with so many nutrients.
Hope someone can help about harvest and buds overall look
😬😬
Likes
12
Share


@prebiancagrower
Follow
Hi guys.
Lovely strain as well, the smell and the bud colours are amazing!
Thanks RQS!!!
Processing
Likes
5
Share


@PETEROG
Follow
Hey everyone at week 4 know and wow have these girls grown early this week I applied some LST and all took really well to say it was my first time trying this

Likes
6
Share


@SecretC8keSociety
Follow
Today will be Day 64. Getting close to Harvest Day. Let me tell you. The smell was unexpected stink up the place and outside the grow tent as I come home. I also clean the bottom up little more and removed the dead 🍁. I use Cha Ching on Week 9 and on Week 10 will be the flushing week. Stay tune!


Likes
4
Share

@Papadubz
Follow
This week has been a difficult one, the cold has come and it's been a struggle to keep the temperature up, yet the girls are pushing on. Smelling strong and lovely 😍 covered in sticky resin. 😋


Likes
14
Share


@Chubbs
Follow
These ladies are in full flower and progressing like a dream. The colas on them are chunky to all get out. And to think they've barely begun the flower period is mind blowing to me. I'll go in this week and do a good cleaning taking out some of the crispy leafs on the under canopy. Over all though Happy Growing.
Likes
4
Share


Likes
11
Share


@Bread_n_Buds
Follow
We have underestimated our number #3 all the time until last week... now it's a great little bush, always a little short, for heaven's sake, but the flower is not lacking and also very beautiful.
https://seedsmafia.com/en/
https://www.mars-hydro.com/


Processing
Likes
22
Share


@420_TRON
Follow
overall very satisfied with the results and can't wait for the drying and curing to finish so i can lit one up!!
the growing process wasn't that hard until she stressed during one of the training sessions and i had to cut off 2 colas during the veg cycle.
for my first harvest ever i'm pretty happy with this little beauty:)
day 2 of drying:
weight dropped by half.
total is now 50g and there's some more to loose 🙈
started curing the buds after 4 days of drying- overall 20g of dried buds
------
first taste 👅 (2 weeks curing):
man it was worth waiting for an acceptable curing time before digging in, i tried it twice before and i have to say that curing plays a huge role when it comes to flavors, scents and high (so basically all the aspects that matter). wasn't even close to what i'm experiencing right now.
great high, the taste is great with yummy fruity aftertastes.
also looks like the volume of the buds have decreased by about 30-40% but they got denser
will wait some more to see how curing benefits this one!
------- update 11/19/20
i had the trimmed leaves freezes so i decided to make some coconut infused RSO
Likes
56
Share


@Ganjagrandaddy
Follow
The Gorilla girls all popped the soil overnight from potting. Day 1 with a bang. lol
The cheese broke on the second evening and even now at day 11 , 2 are still struggling to escape the soil fully. Frustrating to watch helplessly.
The Gorilla girls are all nice and settled in on day 11 ( today) . I am watering occasionally and keeping it wider than the plugs width to encourage the roots to explore out. The Amnesia are still dormant so I have excluded them from rhe grow this far. dissapointed is not the word and no idea why they failed so badly ??.
The potential growers are settling in now so hopefully a good weeks growing will bring them to heel.
Likes
19
Share


@UKLEEDSGROWER
Follow
Just harvested last night so will come back on in next couple of week to review!! No estimates on yield as yet. But the smell is definitely pungent lemon and sweet smell. Can’t wait to try the end product!!

Likes
12
Share

@Bncgrower
Follow
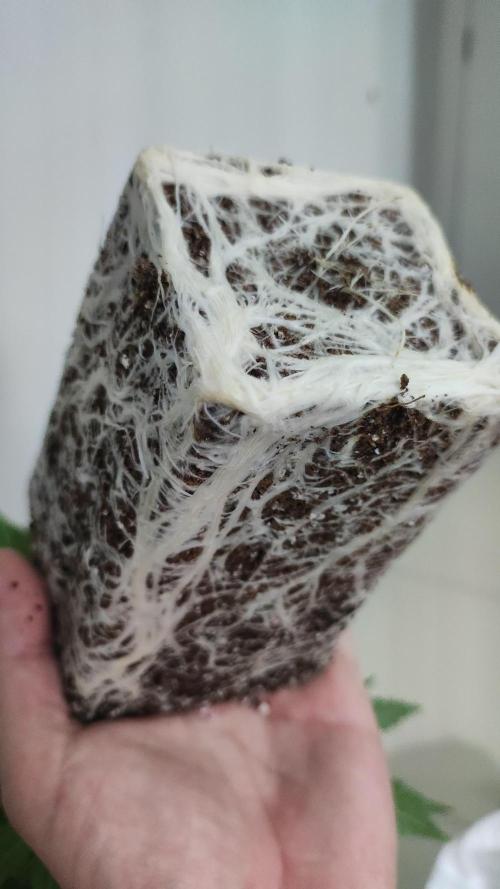
One more week completed, transplanted on the last day of week to a 7L..