Likes
Comments
Share
@OgHaze74
Follow
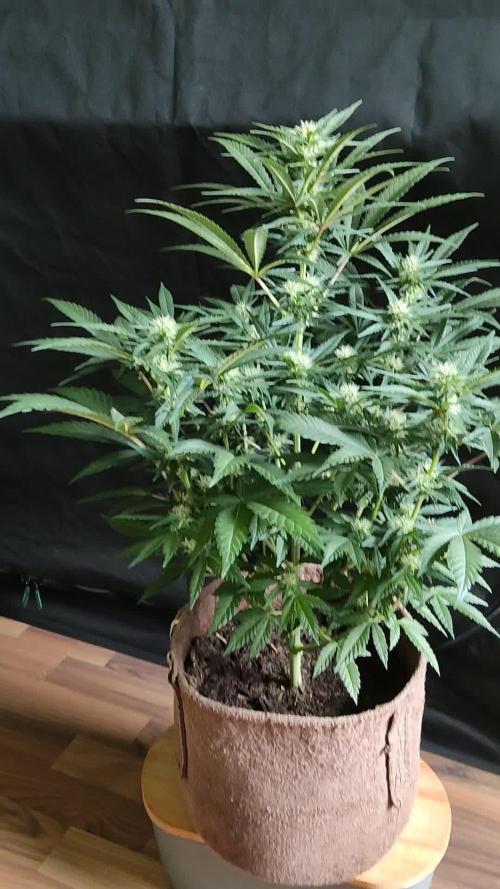
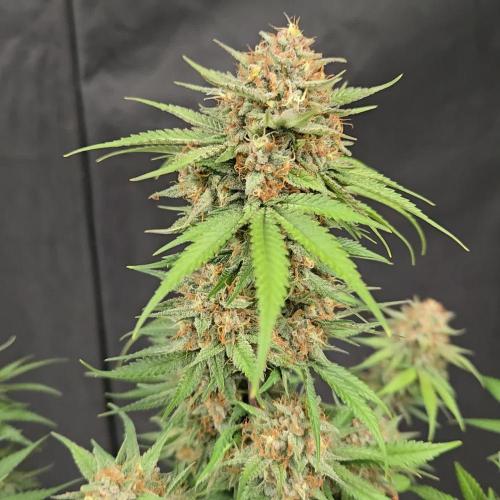
This week was bad super bad super bummed out she got lockd out you win some you lose some it's all good learn from me that is gonna hurt my yield real bad
Likes
26
Share
@Hawkbo
Follow
These are doing great rocbudinc continues to impress me with his genetics they are always top shelf. The mac x PBB seem like they are pretty close to being done for whatever reason.. and it's only day 45 in the video. 1 of the rocstar breath is looking to have a little deficiency, Its very minor but looks like it could be iron? I'm not sure it's not one I see often and never in my own garden but it's still putting out. The purple candy paint obviously stayed small but has some serious frost piling up. Humidity dropped s little this week since it's getting colder here but other than that there really hasnt been much change.
Likes
52
Share
@MephistoGenetics, Hi all the happy people here in GrowDiaries. This is my second cultivation ever and it will be fun to try a bigger space than my closet grow. First, I'm just going to say I'm done with the construction of my new growroom. The room is 2.14 meters by 1.7 meters and has a ceiling height of 2 meters. It provides a floor area of ​​3.6 square meters. I use a 54 Watt Lightwawe T5 for germination and 2 Pcs 400 Watt HPS lamps. I have a channel fan that replaces the room air about 40 times an hour to get a comfortable environment in the room, the air enters a fresh air intake from the outside. The air is purified through a carbon filter to then leave the room to the rest of the basement. Then I use that heat to heat the rest of the basement. I will use 10 pcs 15 liter Autopots to grow with and a 100 liter water tank that supplies the pots of water and nutrition. I will grow completely organically in soil and will watercure my buds to get the best possible medicine for me. But there are no cultivation rooms to be displayed here, so I continue with what is most important. I am very excited to see how the new growroom will work and how this Stilton Special will turn out. Strain Name: Stilton Special F1 Genetic heritage - Sour Livers F3 x Northern Cheese Haze F3 Strain behaviour - Stilton grows well from the off, and develops into a stout but branchy specimine that leads to a fine yield of awesome flowers. She's not too stretchy but also is sizeable enough with good growth, to train and shape to your liking. Flowers develop pretty fast and grow to a good size, it may to advised to clear out some undergrowth and if needs be a very gentle defoliation mid-way through the grow, although leaf tucking may suffice well enough.The end product is of top shelf quality and she doesn't lack in yield either.Give your garden, nose, and body a treat and be sure to indulge in a slice of Stilton this year, You won't regret it. Size - 50 - 70 cm Structure - Medium height but bushy Flower Density - 9/10 Indica/Sativa - 65/35 Cycle Time - 65 to 70 days from sprout Yield - 90 to 140 grams as a single plant Best Method for overall high yield - 9-12 per 1,2m x 1,2m sq in 10-15 Liter pots (Soil) Aroma - Very strong, Cheesey/fruity/sour/spicey/ with a dash of coffee. Taste - Dank berries Effect - Good hybrid powerful but balanced effect Medicinal Benefits - TBA Best Grown - Indoor/Greenhouse Cannabinoids - TBA Extract information - Ideal extract candidate - High in resin, oil and terps. -------------------------------------------------------------------------------------------------- 2017-09-25. Week 5 starts. Added a video of the girls. Gave the girl water and nutrients. This girl is 24 cm high and have grown 7 cm in 7 days. I flushed the girl yesterday with 40 liters of tap water. Im lowering the humidity in the room with a dehumidifier and try to have 50% air humidity. ---------------------------------------------------------------------------------------------------------------- 2017-09-29. Installation of the New light rail in the grow room. Its Advanced star light V 5.0. Added a video of it.
Likes
13
Share
Week 9 day 1 video pheno. Gonna chop this week Week 9 day 7 well chop this weekend so on week 10 Day 1-2. Just waiting on a light to reveg one. Everything is magic
Likes
5
Share
@Ensign420
Follow
Greetings fellow growers 🖖 and welcome to my first grow ever. This adventure actually started several months ago when I decided to stop buying flower from dispensaries and just grow my own bud. How hard can it be!? This is actually my second seed of this strain. The first bean sadly died due to over watering (sorry girl, RIP). I was literally watering the cube to the point where water was dripping from the bottom, then heavily sprayed the humidity dome and tray with the vents completely closed. Everyday. Multiple times. I never let the dome or try dry out. So after about 8 days of not sprouting, there was a funky smell of rot. So that was that. Later I learned that rockwool retains a lot of water and can easily drown seeds. So a wet/dry cycle is best for rockwool germination. So even after hours of researching and digging through forums and tutorial videos, I was still under prepared for this journey. Did not consider how delicate the germination phase is. Oh well. Lesson learned. Reset and try again! I hope everyone is safe and stoned during this corona crisis. Just like everyone else in the world, I want this pandemic to be over with. But in the meantime, let's grow some weed! 🖖 [START OF WEEK 01] Day 01 - Monday - 08/03/20 - Total Days: 001 ----------------------------------- - [0830]: Light Schedule: 24Hrs/0 --- Soaked cube in 5.5 PH water for 10 min. Did not shake water out. --- NO NUTES! Only PH'd down to control the PH levels. --- Did not use the default hole (way too deep). --- Flipped cube upside down and made a shallow hole for the seed (less than 0.25" deep). --- Placed seed in and pinched hole close. No additional water added. --- Sprayed the tray and dome with straight water (5.5 PH). --- Vents are cracked opened a for ventilation (about 1/4 opened each). --- Distance between the light and tray was 53" --- AC was set to 80 °F --- Exhaust fan was set to 86 °F --- Room average temp was at 85 °F --- Dome humidity was at 85-99% when sprayed. --- Allowing to completely dry before respraying. - [2200]: Dome and tray were completely dry! Sprayed only tray and dome with more water. Day 02 - Tuesday - 08/04/20 - Total Days: 002 ----------------------------------- - [0845]: Sprayed dome and tray in the morning. Everything was dry. --- Hoping for the best! - [2130]: Everything was dry again, so sprayed dome and tray at night along with a light spray on the cube. Day 03 - Wednesday - 08/05/20 - Total Days: 003 ----------------------------------- - [0830]: Everything was dry again. Resprayed dome and tray. Slightly sprayed cube. - [2125]: Hooo damn!! She popped! Am little stub is visible! Resprayed dome and tray again. --- Still going 24/0 for lights. - [+0033]: Just checked up on her and I swear she grew a bit taller! Getting excited! Day 04 - Thursday - 08/06/20 - Total Days: 004 ----------------------------------- - [0845]: Wow! Went from a little stub to fully sprouted overnight! Everything was pretty dry again so resprayed dome and tray. - [2200]: Tap root is visible! Over 1" long too! Just resprayed dome and tray again. -- Going to prep for hydroton transplant tomorrow! Day 05 - Friday - 08/07/20 - Total Days: 005 ----------------------------------- - [0930]: She keeps growing! -- Added a bit of CalMag to the spray bottle (8 drops to 650ml of distilled water). Resprayed dome and tray. Water was at a 5.4 PH with 141 PPM. - [1045]: Prepped the bubble bucket with 4.5gal of water. Water is high enough to reach about 0.25" above the bottom of the net pot. --- Added 3 drops of Superthrive --- Added 3.5ml of CaliMagic --- Added 2ml Hydroguard --- Then PH'd down to 5.6 --- Solution Strengh: 120 PPM --- Water chiller is set to 20 °C - [1100]: Transplant time! --- Filled the net basket 1/3 with hydroton. When placed in the bucket, air bubbles are not visible, but are slightly below the surface (slight digging will reveal the water/bubbles below). --- Removed plastic on rockwool cube and placed in basket, then filled around and covered with hydroton. Making sure to block any light from passing through the net pot and into the nutrient solution. --- Covered with a half-bottle dome sprayed with the CalMag water from earlier. --- Hoping for the best! - [1300]: Raised Bucket 5" higher. Now light distance is 48" to top of bucket. - [1820]: Lowered tent exhaust temp to 76 °F --- Lowered AC to 75 °F --- Raised bucket even higher so light distance is 30" to top of bucket. - [2300]: Looking good! --- Sprayed dome and surrounding hydroton with more CalMag water. --- Attached timer to light! So new 18 Hrs On/6 Hrs Off light schedule. --- Lights On: [1600] (4pm) --- Lights Off: [+1000] (10am the next day) --- Decided to go with lights on during the evening/night and off during the later mornings/afternoon (the hottest part of the day) to see if temps can be controlled better. --- Please survive girl! Day 06 - Saturday - 08/08/20 - Total Days: 006 ----------------------------------- - [0800]: Everything was dry. Resprayed hydroton and dome. - [2000]: Here first night cycle seemed to go well! Get'n taller! --- Dry again. Removed the dome. --- PH went up to 6.5 so PH'd down to 5.7 --- Ran the top feed drip ring for a bout a minute to wet the hydroton and rockwool with the nutient solution. ---Too scared to leave the top feed on 24hrs (I don't want over water her and cause dampening-off). Will let dry before re-watering. - [2100]: After closer inspection, I think she's looking a bit yellow. --- Decided to add a bit of grow nutes to the bubbler solution. --- Added 2ml of Sensi Grow A --- Added 2ml of Sensi Grow B --- Solution strength after adding more nutes: 176 PPM --- PH went up to 6 --- I hope that the extra chelating properties of the 'PH Perfect' solution is enough of a buffer for proper nutrient uptake. Day 07 - Sunday - 08/09/20 - Total Days: 007 ----------------------------------- - [0800]: Water dropped a bit (mostly due to evaporation) so solution strength was at 190. --- Checked PH again. Was still at 6, so PH'd down to 5.4 --- Ran the top feed for a minute to wet the hydroton a bit. - [0915]: Since she's looking perky but still a bit yellow. So decided to up the nutrient concentration even more before lights out. --- Added 2ml more of Sensi Grow A --- Added 2ml more of Sensi Grow B --- Solution strength after adding more nutes: 199 PPM --- PH went up to 5.8 - [1700]: Checked nutrients. --- PH: 5.9 --- Solution strength: 202 PPM --- Added 4ml of Voodoo Juice --- Added 4ml of B-52 --- PH after adding more nutes: 5.9 --- Solution strength after adding more nutes: 238 PPM - [2130]: Decided to make a new foliar spray to address the continued yellowing. --- Started with 500ml of distilled water. --- Added 3 drops of CaliMagic --- Added 3 drops of Sensi Grow A --- Added 3 drops of Sensi Grow B --- Added 3 drops of B-52 --- Added 1 drop of Superthrive --- Solution strength: 164 PPM --- PH was at 5.9 and did not adjust. --- Gave her one spray. --- Also sprayed the surrounding hydroton. [END OF WEEK 01]
Likes
13
Share
@Rungood
Follow
Flo +48 ca grossit tellement 😍😍 c'est le début des pop corn sur les têtes l'odeur est démente
Likes
9
Share
Hat sehr viele Seitentriebe entwickelt🌱💪 mit Vielen Blüten, sehr fein👌🌱🍃
Likes
2
Share
Day 35 Today the plant shows healthy, vigorous vegetative growth. The canopy has filled out noticeably, with several new shoots emerging from the top and sides. The leaves appear a rich green, and the serrated edges are well-defined. The plant is developing tighter node spacing compared to earlier growth stages, giving it a fuller, bushier appearance. The top growth (“new growth tips”) is a lighter green, which is typical for fresh developing foliage. Multiple tops are pushing upward, suggesting the plant has responded to previous growth changes—possibly training or natural branching. The lower leaves appear slightly more mature and darker, while the new growth is soft and fresh. Compared to an earlier stage, the plant clearly looks more structured and defined, with emerging symmetry in its branching. It seems to be entering a phase where vertical and lateral shoots are increasing in number, giving it a more complex canopy.
Likes
7
Share
I added the small cooler with water with some ice packs, now the water will be below 20° for a longer period (around 2 days with the same ice pack), I also added a couple of sensors with the Raspberry Pi to check the humidity, temperature, light intensity and water temperature sensor
Likes
19
Share
Bueno , este es el segundo cultivo que realizó del la cepa "Waka" , el anterior lo tengo igualmente documentado en otro diario . en esta ocasión cultivamos los clones que habíamos recolectado del cultivo pasado , guardando los fenotipos que nos gustaron más y los clones restantes los pasamos a floración que fueron los que se le hizo seguimiento en este diario. El crecimiento fue bastante explosivo y reaccionaron muy bien a cada trasplante realizado . pude observar que los clones de cada fenotipo seleccionado se desarrolló con mucha similitud al de sus madres . El olor en vegetación es bastante discreto y en floración se pone un más intenso El desarrollo en floración fue explosivo generando bastante resina y se vieron muy hambientras . Al fumar se puede sentir un rico toque cítrico en las N° 4 se siente un fuerte sabor a limón en algunas flores mucho mas marcado que en otras, N° 3 y 13 un agradable toque a naranjas muy rico de sentir en el paladar , La N° 8 con pizcas dulces bastante interesantes. El humo al fumar es muy suave lo que permite sentir mejor el sabor de cada fenotipo.- saludos y buenos humos😉 Al momento de cosechar se cortaron los clone y se dejo secando en oscuridad a temperatura ambiente por cerca de 16 días posterior a eso se pasó a curar en frascos
Processing
Likes
2
Share
@BigHorn
Follow
Week has gone very well. Growth has exploded will be trimming back some fan leaves this coming week to help the light reach the bottom stocks that have now come in. You can see the growth explode after I transplanted the plant.
Likes
18
Share
Ladies and gentlemen, here we are getting into the 3rd week of flower, so you know what that means!!! Next week is Plagron Green Sensation 💚 and silica and a little cal mag, if needed... this girl is getting big.She is about two and a half feet wide and has been stretching like crazy.. this is gonna be a great plant and a nice harvest, and I can't wait to see how the Plagron nutrients swelling up those buds .. stick around because if need be I will add more pictures throughout the week .. thank you Zamnesia Seeds and Plagron for the opportunity to grow this beauty 😍.. I hope everyone is doing well on the contest.Since everybody else God bless and happy growing ✌️. Day 56 i just uploaded a video showing what she looks like after a massive defoliation. In lollipopping, we're focusing on the top of the plant.. hopefully the stretch is over and start stacking
Likes
33
Share
@Growbody
Follow
Meine lieben Freunde und Freundinnen, Brüder und Schwestern im Geistigen und Tatkräftigen, herzlich Willkommen zum Greenhouse Summer Outdoor Grow 2026. Der erste Strain des Outdoor Grows den ich Euch vorstellen werde ist die Purple Lemonade FF von 2Fast4Buds, eine 60% Sativa die laut FastBuds etwas nebulös als eine Kreuzung aus purple und citrus Cali Genetik beschrieben wird. Egal, sie soll sehr fruchtig und zitronig schmecken und könnte schöne Farben bekommen. Außerdem soll Sie eine kurze Blütezeit haben. Hier ist die URL: https://2fast4buds.com/de/seeds/purple-lemonade-fast-flowering#description Der zweite Strain der im Set mit dabei ist, ist die Mimosa x Orange Punch fem. von Barney's Farm, die ihre Genetik und den Taste bereits im Namen trägt, eine 65% Indica, die laut Barney's "ein wirklich sensationelles, zitrusähnliches und mandarinenartig-süßes Aroma" haben soll. Auch sie könnte interessante Farben bekommen. Hier die URL: https://www.barneysfarm.de/mimosa-x-orange-punch-552 Last but not least, der dritte Strain ist die Chocolate Sherbet fem. von Grower's Choice, eine 70% Sativa, deren Eltern Chocolope x Sunset Sherbet sind. Auf den Geschmack bin ich schon jetzt gespannt, cremiges Haschisch. Mit bis zu 240cm könnte sie die größte im Greenhouse werden und würde dann bis zur Decke wachsen. Hier ist die URL: https://www.growerschoice.nl/de/chocolate-sherbet.html#description EDIT: Nachdem die oben aufgeführten Pflänzchen nicht so recht loslegen wollten, habe ich mich entschlossen, fertige Stecklinge von Hanfgarten aus Österreich dazuzubestellen. Die Stecklinge kommen in die Mörtelwannen, die selbst gezogenen kommen in die bereits bewährten 15 und 20 Liter ROOTiES. So kann ich die auch mal direkt in die Sonne stellen. Der erste Steckling ist die Blueberry von Hanfgarten, eine 80% Indica, einer Kreuzung aus Afghan Indica x (Thai Sativa x Mexican Oaxacan Sativa), die nach 8 Wochen Blüte Mitte Oktober fertig sein soll. Außerdem soll sie fruchtig, beerig und süß schmecken. Auch hier gibt es eine URL: https://www.hanfgartenshop.de/blueberry.html Der zweite Steckling ist die Runtz, ebenfalls von Hanfgarten, ein Hybrid aus Zkittlez × Gelato, die auch nur 8-9 Wochen Blüte hat, mal sehen. Wenn sie ein ähnliches Aroma hat wie die Wurlz bin ich happy. Die URL: https://www.hanfgartenshop.de/runtz.html Der dritte Steckling ist die Super Lemon Haze, eine 80% Sativa von Greenhouse Seeds, deren Genetik von Lemon Skunk x Super Silver Haze stammt. Mit 9-10 Wochen Blüte steht sie wohl mit am längsten im Greenhouse. I💖Haze und hier sind die URL's: https://www.hanfgartenshop.de/super-lemon-haze.html https://shop.greenhouseseeds.nl/feminised-cannabis-seeds/1-seed-pack/super-lemon-haze/?variation_id=604 Auch dieses Jahr gibt es wieder etwas Neues: Mir ist vor einigen Wochen im Baumarkt ein Foliengewächshäuschen begegnet. Die Aussicht, meine Schätzchen immer im Trockenen zu Wissen, lies mich sofort (also sofort nach einem Recall mit meiner Liebsten) zuschlagen. Danach war nur noch ein teilweiser Umbau unseres Gartens nötig, einen kleinen Weg anders verlegen, ein Fundament ausheben, Bordsteine zersägen, 2 Zentner Beton verbuddeln, Löcher bohren, verdübeln und verschrauben ohne das der Beton ausplatzt, einen haufen Astwerk vom Wein opfern und viel Rasen neu anlegen, das war's schon fast. Neu: Sind auch die zwei 90 Liter Maurerbottiche, in denen sich meine Pflanzen wohlfühlen dürfen, 4x soviel Platz wie im letzten Summer Outdoor Grow. Zur Drainage habe ich Rheinkiesel 9-18 verwendet. Da drauf kam mein altes Erdmischungsrezept mit frischem Kompost von Piluweris, Lehm, den die Wühlmäuse ständig in unserem Rasen aufwerfen und Sand aus'm Kieswerk mit gaaanz viel Staub drinne, praktisch Gesteinsmehl. Auch hier gab's was Neues: Hornmehl zusätzlich, hatich früher schon verwendet und ganz vergessen. Der erste Sack Sonnenerde Hanferde wurde mit der oberen Schicht meiner Mischung vermischt. Der zweite Sack kam dann blank obendrauf. Neu: Für mich ist auch die angewendete Keimmethode noch neu, die Samen zuerst in einem Marmeladenglas mit temperiertem Wasser mit Zusatz von Wasserstoffperoxyd keimen zu lassen. Das ist jetzt das dritte Mal, dass ich diese Methode anwende. Der Vorteil daran ist die superschnelle Keimung, der Keim schaut tatsächlich bereits am nächsten Tag aus der Schale und nach ein oder zwei weiteren Tagen haben sich die Keimlinge von der Samenschale befreit. Das weitere Vorgehen bereitet mir noch Probleme. Ich verwende immer noch die SmartStart Plugs von Zamnesia die ich praktisch halbiere, also von oben nach unten einmal Mittendurch. Dahinein lege ich jetzt den Keimling und klappe die zwei Hälften dann zusammen und pflanze den Plug in den Topf. Neu: In die Wannen kommen zusätzlich Gäste als da wären erprobte und neue sowie überwinterte Chilisorten, verschiedene Basiliken oder -kums, Weiße Melisse, Roter Klee, paar Blumen und so. Tag 43: Heute hat es 36°C und das bleibt die ganze Woche so bis Samstag, dann soll es abkühlen. Die Blumen im Greenhouse bekommen jetzt 2-3 mal 0,5-1 Liter Wasser täglich. Tag 47: Sonntag hat es geregnet und danach war unser Rasen mit kleinen 2-3cm Schnecken schon fast bedeckt, so viele waren es und alle in Richtung Haus unterwegs. Richtig Spooky. Letzte Woche habe ich die PC-Nematoden gegen Schnecken von Oere BioProtekt im ganzen Garten ausgebracht und die nächsten 4 Tage Abends mit gut 100 Litern Wasser den ganzen Garten feucht gehalten. Nach Regen sind wir gewohnt, von Schnecken aus der benachbarten Obstwiese überfallen zu werden, aber halt normal großen so ~10 cm, aber diesmal waren keine großen dabei. Tag 48: KEINE Schnecke mehr zu sehen, nirgends, keine kleine und schon gar keine große. Jetzt bin ich mal gespannt, wie lange das anhält. Ich kann's noch gar nicht glauben. Eins kann ich versprechen: It will take a very, very long time 😃 Schön das du es bist, der mich begleitet 👍😎
Likes
27
Share
Let’s Go day 85 from Seed!! These ladies have all got the chop !! We will be hanging to dry over the next 2 weeks or 12-14 days an we will be ready for trim an jar up for cure! What a very satisfied grow this was @fastbuds_genetics very happy with the strains an would definitely run em again! Hope you all enjoy stay tuned for next week! Start trim up an get some weights!
Likes
15
Share
November 6, 2021 The Quick Critical is taking off!!! I started feeding some nutrients this week and she really seemed to like it. I could flip her to flower now, but I'm going to wait another 1-2 weeks so the other two ladies can veg longer (and to give the autos a chance to finish). Critical Sour looks like she is ready to start rocking, I expect to see significant growth this upcoming week. CBD Medi Kush is finally starting to look like a cannabis plant! I have no idea what caused the delayed growth in the initial couple of weeks, but she's seems on track now. Lots of good growth in the past couple of days. This morning when looking at her closely I noticed she is growing two stems. This is going to be fun to watch how she develops. I just hope she doesn't herm out later. Neither of the two Dr Bruce Banner seeds nor the one CBD Lemon Aid seed I tried planting ever popped. This is now a 3 plant diary.
Likes
9
Share
Week 7 12/15-21: Still coasting.. No big changes got the humidity level down.. Buds looking beautiful
Likes
14
Share
Glad to have gotten what I did. Small harvest. But it wasn't about that for me. I done a huge number of crops to hone in what traits I like. And now I pick with much more by looking at the genes and what went into making it.