
Likes
Comments
Share


@blacknpearl
Follow
Tried to do a little more LST this week but it is clear that it can't be done properly so far along so I won't be trying anymore.
Increased, again, Megacrop dose by the end of the week.
jule 20. Megacrop ~2 litre feed number 16. 1.32gr/litre. ph 6.2
jule 22. Megacrop ~2 litre feed number 17. 1.32gr/litre. ph 6.2
jule 24. Megacrop ~2 litre feed number 18. 1.46gr/litre. ph 6.1


Likes
35
Share


@hotdamnitman
Follow
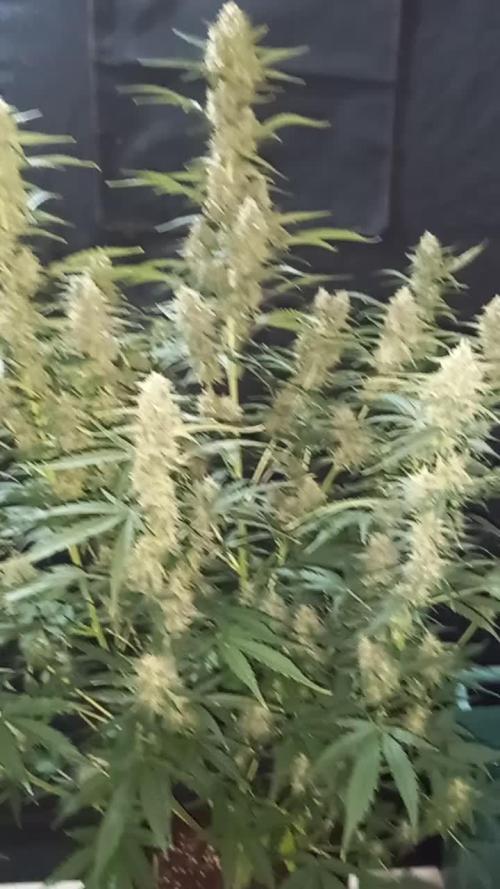
Going very slow! I don't think she likes the LST I'm going to put them into flower at the end of this week.
Likes
55
Share


@Max1973
Follow
Day 37 - Everything looks good.... they are drinking so much.... i built a bit more stable light setup, and i'll need to buy afew more plugs and stuff, to fill it out ...... i organised all the 2700k globes, ready to swap in..... still waiting on the exhaust fan, so i'll keep em in "grow" mode another week or 2 .... i'm vaping a leaf or 2, and drinking "green tea hot chocolates" .... it is so delicious in hot chocolate .... my health has picked up since starting the vape/drinks... the 21 thc/19 cbd is supa healthy ...
Day 38 - Getting them ready for Flower, noticed they are lacking in nutrients, so i started em on the heavier dutch master gold flower nutrients.
Day 40 - Added some pics. (they look droopy because they in night mode, just turned on lights for pic) - Started them on 12/12 flower, still working on getting all the lights, gear, and globes, for the right spectrum and amount of light.... atm got - 7x 2700k (click) , 2x 6400k (osram), + 60w light panel .... i'll go get some more gear today and hope to expand it to 10x 2700k , 2x 6400k ...... I put the exhaust filter fan on seperate power, so it doesn't go on/off with the timer, but stays on all the time.... it totally fixed up any odour problems, haha ....... Added some different pics for my light spectrum ... etc.....
the outside winter temp is now at 40-60oF (5-15oC) so with the 12/12h, the temp inside the tent is dropping to 60-80oF (18-22oC), abit low, but flowering is supposed to be in winter, so idk, see how it goes.....
I'm new to growing, so idk how this will work out....... just working it as i go.... i noticed afew spots on a leaf, so i upped the neuts abit more, they are still drinking like fish, huge amounts....
Day 40 late - new vids - Got the extra gear and installed it all... redesigned the initial setup, refined it with proper measurements, had to get my steel rule out, lol.......
got the 12 leds in and running, 10x 2700k clicks, and 2x 6400k osrams, with the panel..... it's lookin beautiful and got the exhaust on 24 hrs now, all working perfect with 12/12 timer.... they are forming a few spots on leaves, so hammering the nute water into them now... they are drinkin 1-2 litre of nute water a day each.... (nute water = Dutch mater gold one grow/flower, 800-1000 ppm 6 PH)
😎
Some details about lights.... i did some maths on it, and included some handy pics..... because i'm using cheap leds, i'm keeping the distance at 25cm, they are leds so they won't burn, and it massively increases the lumens/lux/Par, and with my home built light setup, the leds are spread out enough to keep it lower.... worked out good..... something of note is that all the led globes are built/made in china... however different marketing/selling companies from around the world... and the german osrams are 1w leds ... by far the most superior, but anyone can design and send the requirements to china to build em, haha) it's not a contest, we all work together.... haha.... the person with the best led light globes gets my business, because i want the best for my babies.... :)
(let me explain- 1w led vs 0.5 w led, the watt of the led projects the light, lumens, LX/PAR etc much further the higher the watt of the led....my 600w panel has 0.5w leds, the philips has 0.75, the osrams have 1w leds..... )
each globe
philips (dutch)- 10.5w
internal - 14 leds 0.75w
1055 lumens
each globe
osram (german)- 10.5w
internal - 10 leds 1w
1080 lumens
each globe
click (cheap)- 9w
internal - 16 leds 0.56w
800 lumens
light panel - 70w - 600w
30 red - 8 red
12 blue - 8 white 7500k
1 ir - 1 uv
= 20x blue 6400k - 38x red 2700k
internal - 60 double leds - 120x0.5w
6000 lm
Likes
148
Share


@BioBuds
Follow
Greetings my dear Jungletamers,
So a major surprise came when @MarsHydroLED contacted us and asked if would like to try out their new SP 3000 light. Being a fan of Mars Hydro for years, we of course accepted their offer. We are totally in love with this light. I was when I saw it in another grower's setup and was in awe of its output and results.
So with much pride and thankfulness for the presents the Universe bestowed on us, in the form of MarsHydroLEDS offer and the bountiful harvest of the last grow, (which I am thoroughly enjoying btw, such a great weed to have grown ourselves) we start out on a new adventure that we can't wait to share with you.
With many lessons learned from the previous grow, a mighty producing strain in the form of Expert Seeds Gorilla Glue #4, a.k.a Expert Gorilla's and a tweaked super soil mixture, we are setting out to hopefully get over a gram per watt, preferably 1.5.
The Setup
A 4.5 (140 cm) x 2(70) x 6.2 (200) grow tent, giving me a .98 m2 workspace. This space is customized to my needs.
A standing fan will provide airflow through the whole grow, a top fan will help guide cooler air past my lights onto the grow.
3 56 ltr pots will be the home for the plants when they are 2 weeks old, up to then in smaller jars.
The Light
The leading role and star of the show will be played by the Mars Hydro SP-3000, so kindly provided by MarsHydroLED, which we will test and review here and I might say, endorse.
I'm very careful with who I endorse and support these days, but a company with that many wins in design, I'm talking ever since their first range came out in 2009 these guys have been raising the bar for the whole industry, I did not hesitate to support this leading brand.
If you want to compete with these guys, you better bring some quality AND affordable pricing. Why do I endorse the SP-3000 without ANY hesitation?
It is seriously THE BEST light on the market in this price range and size group. It has an enormously effective output in U/Mol and with 30% less energy waste comparing to older LED lights.
Prove me wrong!
And with a company holding a considerable market share selling thousands of units every month, competing on price and quality, one would think that customer service would suffer. Of course, also Mars Hydro is not perfect, but check the sheer amount of people that not only praise the light but also the service received, should the light somehow not perform up to par. It is this dedication to their customer base that made this company have a fanbase... Yes, a fanbase with a website and a wiki.
So if you are looking to buy new lights, check out the END OF SUMMER OFFER at the Mars-Hydro Global Store on Aliexpress:
https://marshydroled.aliexpress.com/ 👈 Check their offers but also their score, they ship from a warehouse near you so you don't have the extra import fees!! Cut out the middleman and have a deal on these lights!!
At the moment I write this in August 2021, the lights are 408,20 euro when sent from Germany to the rest of Europe, that's 40 euro cheaper than the other Mars outlets, BUT EVEN 60 euros cheaper than ordering at a grow store!!
The Strain:
Experts Seeds - Expert Gorilla feminized regular.
Don’t let the name fool you because Expert Gorilla is suitable for growers of any skill level. However, you do need to be an experienced smoker because Expert Gorilla is one of the most potent strains on the market.
Lineage: Chem Sis x Chocolate Diesel x Sour Dubb
Popularity: Extremely Popular
Flavor/Aroma Profile: Chocolate, Earthy, Fuel
Yield: 400 g/m2
Stress Tolerance: High resistance to disease
Potency: 24% THC
Flowering time: 58 - 63 days
The Soil:
Those who saw my Monstercropped Gelato #33 grow (you should see it if you didn't, I'm so proud of that grow), know about my super soil and organic nutrients/ permaculture tea combo that starred in my previous diary.
Because of the great results, we are going to use the same recipe, adjusted some more with some new ingredients that will complete the mix and give an even more sustained super soil buffer.
20% Atami Bi-grow (very similar to ocean forest)
20% Atami worm castings
20% Atami Coco Coir
10% Hydrocorn
10% Peat powder
1 cup Fossil seaweed chalk
1 cup bonemeal
1 cup bloodmeal
1 cup Microlife
3-4 teaspoons of epsom salt
3 cups of activated biochar (activated with our own permaculture tea)
I just made layers, starting with hydro corn on the bottom to aid airflow/run-off. On this I started layering the coco coir, Bi-grow, peat, castings, and amendments in a way that the more mature the plants get, the more phosphorous and less nitrogen they will find. Every time I made three layers, I would mix them by hand. This way we simulate natural soil, which consists of humic layers, composting plant waste, fungal and microbial life, and nutrients from fossilized sources.
The Nutrients
I will start with just adding 6.4 PH water, although this soil should buffer ph itself and regulate, after 4 weeks, I'll slowly be adding:
- Biobizz Grow
- Plagron Alga Grow
- Biobizz CalMag
- Biobizz Flower
- Plagron Alga Flower
- Biobizz Topmax
- Melasses
The Tea
Some of you might remember the permaculture tea from my previous grow, I have a short video in my harvest page showing how we make it), it will star again in this grow.
- (Rain)water
- Comfrey (whole plants)
- Dandelion leaves
- Roots and leaves from the earlier grow
- Minor periwinkle (Finca minor) is a plant we have in our garden, it contains an alkaloid that is associated with increased brain function but also is a light toxin for wee beasties and other unwanted guests like gnats (who hate it).
- When flowering I add some wood ash to this mix
Thank you for checking in on one of my grows again! Thanks for all the love on my previous grow, check it out if you haven't seen it!!
Hug
Bud

Likes
4
Share


@SolitudeCorners
Follow
Animal Mints »»» Animal Cookies x SinMint Cookies X BlowPops Bx1 »»» BlowPops x CaliSunset
2Years old clone that I got as a freebie at that time. 5th Diary of the Month March 2023
Got only these phenotypes left while the mother plant was about to hit the ceiling so I decided to take some cut and flower her for a second time along with Mintlickz
THC is roughly 18-20% as I sent the #1 and #5 to test
I named it "Animal Pops"
These freebies amaze me with the flavor than I expect ( Better than the purchase pack😹)
#3 more fresh mints than#1 and relax high and mild gas
Light and Enviroments💡💧
Light 18/6 (06.00 AM - 12.00 PM)
Aim VPD around 0.7-0.9
Temp26-28 RH70-80
DLI 16-18 PPFD 200-300
22/2/24
Water 15L+Silica m/ fulvic 16ml(half) @0.1ec
+V1 130ml @1.2Ec+V2 125ml @2Ec
Ph 5.4 +Silica m/ Fulvic 25ml @PH6 Ec2.1
@11.00PM -Up to 6.2 @08.00AM
Feed 5min - around350ml per cubes
23/2/24
Last batch mix @ph5.7
2.30min shot 180ml
25/2/24
Tray
Water 5L+Silica mix Fulvic ml+Bushdoctor 5ml @0.3Ec
+V1 40ml @1.3Ec +V2 35ml @1.9Ec +Root Exceluration @2Ec
Ph 5.8
200ml per cube
Likes
3
Share


@FatalFarmer
Follow
So this week the tent really started filling up, lots of new growth probably going to flip next week just giving the mac 1 time to root in a new 7 gallon bag as she was far too big for her 3 gal one and is definitely female 😀 I’m planning on just keeping all six at this point harvesting as plants/branches are ready. heavy defoliation is in order soon
Likes
39
Share


@DogDoctorOfficial
Follow
Still my favorite one , and i think she will b e the frostier of all fb testers i am running, she is just out of this galaxy , provably from a very very far away one were the frost levels are different topic than the one we have here hihihi, she us just amazing .
with the week evolving she shows some color changing and what seams to be some darker fruits, moving very fast on this week 9 i kind a fell she will finish very fast and wen the week started i did not think that at all for her
the col,or on them trichomes are almost to the point i love and like , meanwhile added a short video update from this peace of art on her week 9 of life <3 <3 <3
Dying here to see how will she finish and how will she taste in the end <3 <3 <3
As always thank you all for stopping by, for the love and time you guys spend on my stuff, i fell blessed and humble, many thanks to you all <3<3<3
Genetics - Fast Buds Tester 2309
Ligth - LUMATEK ZEUS 465 COMPACT PRO
Food - APTUS HOLLAND
#aptus #aptusplanttech #aptusgang #aptusfamily #aptustrueplantscience #inbalancewithnature #trueplantscience #fastbuds #dogdoctorofficial #growerslove
With true love comes happiness <3 <3 <3 Always believe in your self and always do things expecting nothing and with an open heart , be a giver and the universe will give back to you in ways you could not even imagine so <3 <3 <3
All info and full product details can be find in can find @
https://2fast4buds.com/ wen released
https://aptus-holland.com/
https://autopot.co.uk/
https://lumatek-lighting.com/
Have a bunch more diaries going on, fell free to drop by and say hi dont be shy <3 <3 <3
<3 <3 <3 Growers love to you all <3 <3 <3

Likes
2
Share


@Saintvicious
Follow
Holy Lst. Getting crazy now for just a few weeks from seed. No stopping it now.
Likes
18
Share


@Grower_Of_Persia
Follow
week intel:
every thing is amazing girls are ripening , we can now cause more e.c stress than before because:
1-plants are very mature now and can handle stress
2- at this week its the only stress that is helpful for increasing plant resins
stresses :
E.C stress around 1.6 and 1.7 3 times a week
feeding:
i replaced B-52 with Bloom Base Nutrient
i feed them 3 times this week with this order :
day 1 : i feed them high with base nutrients(calcium & micros (half dose) + Bloom) about 850 ppm - 1.7 e.c to cause a little stress.
day 3 : i feed them high dose of Top-Max + Bloom Base Nutrient around 877 ppm - 1.7 e.c to cause stress .
day 5 : i feed them high dose of Feeding Booster around 850 ppm - 1.7 e.c to cause e.c stress again
guide of the week :
last weeks are time of ripening , and the only helpful stress is e.c stress at this moment

Likes
41
Share


@Nordicislandgrower
Follow
Week 4
She is a lanky one, she is growing alot faster now and looks to be pretty healthy, she responded really well to the topping last week.
Other than that nothing has really happened.
Good growing everyone!

Likes
2
Share


Likes
2
Share


@Shefman93
Follow
Plant has doubled in size and has budlets growing all over. Top dressed at day 14 yo keep up with food and also did a heavy defoliation and removal of branches that was not to the top of canopy. Almost out of room vertically but I have faith I will squeak out this grow without light stress. No bugs, no wierd growth this run.

Processing
Likes
15
Share


@donovanliam
Follow
Just topped it couldnt wait for it to get to 5-6 nodes. Was getting big looking healthy and at 4. So I topped it at the 3rd node the 4th was big enought to use as a cutting got 5 all together gave them to my dad he likes gardening not smoking. And there is a picture of all the plants in my tent the royal gorilla. Two mango sapphire in the darker pots. A chocolate haze is the more mature of the lighter pots. The seedling is a white widow that's going outside probably not the late June early July.

Likes
46
Share


@Roberts
Follow
Drunken Bitch Slap has gotten pretty big. She is bulking now under the Hortibloom Solux 350. Her colas are looking dense at the moment. Everything is looking strong are the moment. I may do a solution change tomorrow for last bit of bulking. Thank you Hortibloom, and Aeque genetics. 🤜🏻🤛🏻🌱🌱🌱
Thank you grow diaries community for the 👇likes👇, follows, comments, and subscriptions on my YouTube channel👇. ❄️🌱🍻
Happy Growing 🌱🌱🌱
https://youtube.com/channel/UCAhN7yRzWLpcaRHhMIQ7X4g

Likes
27
Share


@Bread_n_Buds
Follow
Here we are at the moment of truth, the flowers are starting to form, our Ghost Train Haze reveals its sex and of course like all Zamnesia plants I will be the father of two beautiful females.
One is growing straight but I will show it to you later because I have been focusing a lot on this one in main - lining. It is a plant with a wide internodal distance so we have more time to shape it before the woodification and it lends itself very well to late lst interventions.
I managed to open it on the main line very well and the lateral branches are really, growing and stretching properly.
We will not see the super productive trees of the autumn harvest but I am willing to bet that we will have lots of beauty and lots of resin in beautiful bush-sized plants.
Wait for the uncle BreadandBuds....
We are still using soil, feeding and all the recommended additives from Plagron 100% organic. We have moved on to the flowering start schedule that keeps the same Power Roots additives - Sugar Royal, Pure Zym and adds the flowering stimulant dear in my house for obvious reasons of Biscotti. Of course the basic fertilizer is now Alga Bloom.
The Green Sensation when the flowers are already a bit swollen, do not start immediately. The Power Buds must immediately stimulate the start and development of the buds.
---- Decide on the right soil and calculate your fertilizer schedule based on the soil on the official website.
-- www.plagron.com
Try a seed of this strain that drives us crazy..
---- https://www.zamnesia.io/en/12511-zamnesia-seeds-ghost-train-haze-auto.html
Zamnesia Description // From the day its cotyledons emerge from the substrate, Ghost Train Haze Auto will surprise you with its rapid growth and robustness. When it starts to flower, this short sativa will develop long and compact buds with pungent scents of spice, citrus and fuel.
All the best that mother nature can offer is on ---- www.zamnesia.com

Likes
43
Share


@Gruenerfinger85
Follow
Hallo meine Garten und Pflanzen Freunde.
Es ist soweit diese Schönheiten mussten leider früher dran glauben als gedacht.
Wie ihr wahrscheinlich mitbekommen habt musste ich den Grow früher als geplant beenden. Ich muss aber sagen dafür dass die Pflanzen noch normal 4 bis 5 Wochen Blütezeit gehabt hätten kann sich das Ergebnis sehen lassen, bei allen Pflanzen.
Mir sagt dass das diese Strains überragend sind, ich kann sagen das alle Pflanzen die im Raum 1 waren und wo ich die Ernte vorgezogen habe ein gutes Ergebnis geliefert haben genauso wie geschmacklich und von der Wirkung super sind, obwohl alle Pflanzen noch nicht ihr volles Potenzial entfalten konnten, bin ich sowie meine Bekannten sehr zufrieden.
Ich Danke dir für deine Besuche und deine Unterstützung.
Genauso danke ich Patricia von Zamnesia vom ganzen Herzen für die Unterstützung und die Möglichkeit in den Genuss so toller Genetiken zu kommen von Zamnesia.👌🏼
Die Pflanzen wurden auf eine harte Probe gestellt die sie mit Bravurös gemeistert haben.
Auch ein großes Dankeschön geht an S&R Organics raus die mir immer mit Rat und Tat zur Seite standen und ein super Produkt entwickelt haben und diesen mit der Allgemeinheit teilt.
Likes
28
Share


@eldruida_lamota
Follow
Que hay familia, vamos con la octava semana de floración de estas Apple Fritter de Zamnesia.
La temperatura está entre los 21/24 grados, la humedad está entorno al 55%, y el ph lo mantengo ahora al principio en 6.2, el foco por supuesto está enchufado 12 horas , estan creciendo bien fuertes.
Y aparte añadimos nutrientes de Agrobeta, que no puede faltar semejante gama.
Todo correcto hasta ahora, ya van madurando las flores y ya están bien resinosas, estas próximas semanas veremos cómo avanzan.
Os comento que tengo un descuento y para que compréis en la web de Zamnesia de un 20%, el código es ZAMMIGD2023
The discount 20% and the code is ZAMMIGD2023
https://www.zamnesia.com/
agrobeta: https://www.agrobeta.com/agrobetatiendaonline/36-abonos-canamo
Mars hydro:
Code discount: EL420
https://www.mars-hydro.com/
Hasta aquí es todo, buenos humos 💨💨💨.


Likes
119
Share


@Tropicannibis_Todd
Follow
💩Holy Crap Growmies We Are Back💩
Well growmies we are at 56 days in and everything is going as good as can be 👌
👉 So even with some major issues in the early stages , shes bounced back as good as expected 👍Or better 👈
Lights being readjusted and chart updated .........👍Even with early major issues due to the soil/medium she's come a long way 👈
👉I used NutriNPK for nutrients for my grows and welcome anyone to give them a try .👈
👉 www.nutrinpk.com 👈
NutriNPK Cal MAG 14-0-14
NutriNPK Grow 28-14-14
NutriNPK Bloom 8-20-30
NutriNPK Bloom Booster 0-52-34
I GOT MULTIPLE DIARIES ON THE GO 😱 please check them out 😎
👉THANKS FOR TAKING THE TIME TO GO OVER MY DIARIES 👈


Likes
12
Share


@Brixx
Follow
Moving into the last half of flower now. Things mostly ok but that tall one in the back is recovering from uptake issues. The green is on the way back in.
Hope yalls grows are going ok. see you next time.