


Likes
18
Share


@ChitownCannaChica
Follow
So this lady probably could co one more week as I’m getting that second round push of fox tails and more white pistols, but she is also about 10% amber 10% clear and the rest cloudy. I chopped her as these buds are FREAKIN MASSIVE and it’s getting pretty humid in the basement (even with the dehu running 24/7). So I’m chopping a little early to be on the safe side!
The speed and quality is amazing! Im super impressed with these fast flowering ladies! I will have to pop more really soon!
Smoke and dry weight in a week!
✌️🏻💚


Likes
27
Share


@adam_pawloski87
Follow
First off I just want to say for some reason it’s not letting me change the right temperatures on my diaries ! Each time when I put it in they stay at 50. My day air stays 75 degrees an , night degrees is 70 !
Today is day 58 for all these ladies! This week has been really great ! Girls really progressed a lot , especially for one the Forbiddin Runtz, looks like is gonna finish up in a week or 2 ! Other then that they are coming along well! Keep those eyes peeled for next week! Cheers😶🌫️💨💨💨💨
Likes
5
Share


@hi_bengal
Follow
Another week down I think I've already defoliated before about to bit em again this strain can take alot of stress as with most mephistos I've grown.

Likes
37
Share


@MG2009
Follow
All plants potted up 1 -4 are all little bit different. Got 2 extras just in case..
Plants #1,#2,#4 are somewhat similar but different #1is nice healthy green, sharply serrated fat round yet pointed leaves tight internodal spacing.
#2 is similar yet has magenta color in veins, but still healthy green leaves,and much tighter than #1s internodal spacing.
#3 is similar yet less serrated edge softer look.
#4 is similar yet less serrated edge softer look, more magenta color in veins and paler green.
All are in same potting mix and environment is also same
01/14/2018
New observations on #1 and#2, both are at 4th mode #1 has 5 fingered leaves, #2 has 7fingered leaves.
Likes
9
Share


@RastaKidJae
Follow
Made a minor tweak with with the SCROG method on the CS strain this week, I removed the net completely to allow the stems to shoot straight up. Added molasses to my feeding this week, hopefully it does what I expect as the budding sites on both plants are beginning to thicken.


Likes
5
Share


@I_Identify_As_A_Dan
Follow
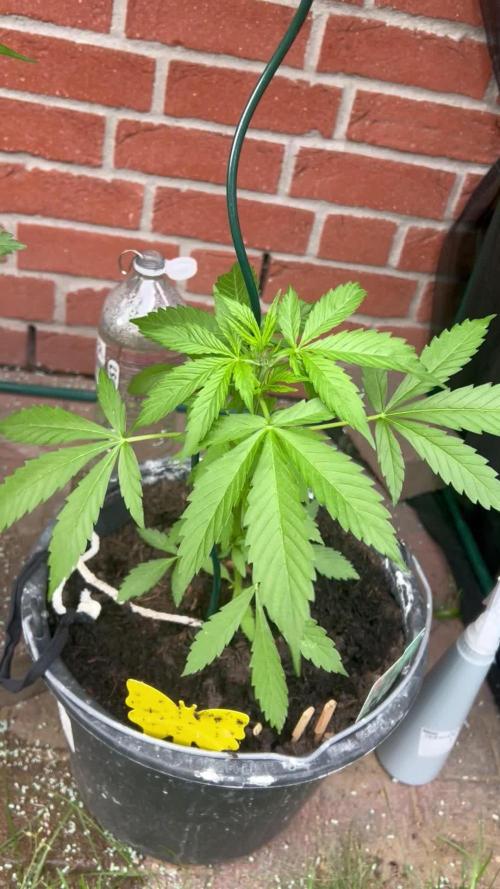
Week 5 for Moby dick,
Wow really didn't expect this explosion of growth compared to last week, this plant really really push hard now.
Wasn't really on the cards to LST this girl but her lowers just started pushing so much i thought it would be a waste to not stretch her out bushy.
Also defoliated a few leaves that were blocking light from a few of the lower branches.
Am thinking of moving her outdoors very soon to care advantage of some outdoor sun.
We can also now say for sure she's in pre-flower throwing out so many white hairs. 😎
Very happy with how shes doing atm.


Likes
5
Share

@Gorillagrower
Follow
I'm so happy to see pre flowers at 4 weeks... going into week 5 Dutch Blue Automatic is looking strong and robust growth everywhere. Thank you Marcel, @ Spliff Seeds for the opportunity to grow! Life is good! The true UVB light has been killing any insects and any mildew or mold... UVB is a must have in every garden.

Likes
14
Share


@Sensilover
Follow
Bin schon richtig gespannt wann das Ende naht.
Momentan schauen pineapple und papaya schon gut aus. Trichome sind aber alle noch milchig bis klar
Der Platz wird auch langsam eng,
Muss jetzt wahrscheinlich den lichtzyklus auf 12/12 ändern da die Photos schon ne gute Größe haben


Likes
1
Share


@Leonardo_DaGrower
Follow
I cleaned up the bottom a little. I’m pretty happy with first week switching to 12/12. Pistils are just showing on the end of the week.

Likes
12
Share


@Eauderay
Follow
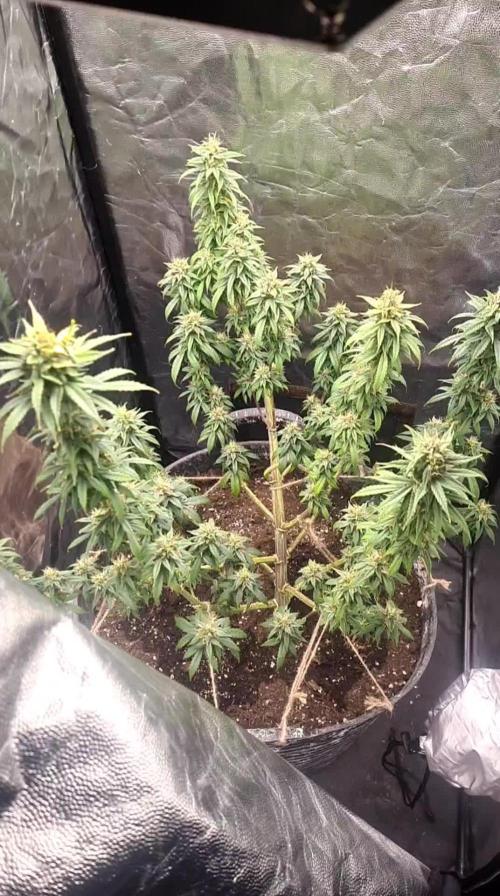
Almost done, will wait few more days and harvest top and lower one a week later, because top is done and leafs yellow unlike bottom level leafs are looking still green and maybe swell those buds a bit more, Calyxes are taking their time to reach maturity, they seemed to have slow Down.
She smells nothing when close to her but when rubbed she stinks skunk and gasy pungent. Smells sending a warning already: beware strong! Yet stealthy enough no one can smell her! Her trichomes are air tight! Lol


Likes
41
Share


@Skinnytalls420
Follow
Well I have to say even though I had a few temperature issues in the night that I think may have stressed them. They took a lot longer than expected but after drying I don’t know how but I ended up with some fantastic tasty buds a few of the plants even came out purple!! I have to say the purple buds are my favourite 🤩 fastbuds never disappoints!!!!!
Likes
Comments
Share


Likes
Comments
Share

@edezfer
Follow
I don't understand, but the regulator failed again and increased the hours of light, and it revegetated..

Likes
2
Share


@EtnoGrow
Follow
this is the beginning of the 4th week along with the publication of the end of the 3rd week, this is how the fourth week is received, another intensive pruning that has no choice but to do it due to the size of the indoor, which is working great for us and we believe that I will always work like this, I am happy, here then the pruning of its results a little before and after and how it is receiving this fourth week, with the threads I touch a little bit of hair I hope it does not affect much but all in favor of opening the field to all the branch buds alike.WE CHANGE THE MESH FOR A BETTER ONE AND OF THE IDEAL SIZE AND AGAIN WE USE THREADS THAT HELP US VERY WELL, WONDERFULLY