Likes
Comments
Share


@IAmTheMoravianGrower
Follow
Check it! This is just my and my homie gallery. Guerillas epic place! 😁


Processing
Likes
73
Share


@Fibro_Witch
Follow
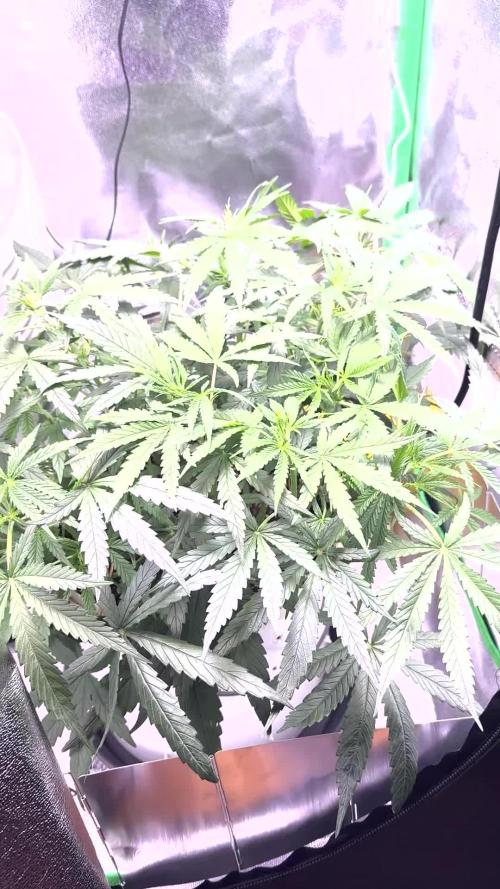
Blue Shark is looking fab! Still a darker green than everyone else.
There are 2 videos this week, one where I explain how my plan for a tomato roof using materials I already had didn't work out, and the 2nd being about the rogue who grew in my pea bed (whom I affectionately call "Rogue One") who has been raised almost exclusively on my homemade compost.
I had people who were concerned last year when I made my own compost tea from the compost in my pile. People were concerned about bacteria, nutrient profile, etc. I feel like a lot of people get really regimented in their feeding, and they sort of forget that these are plants and they can adapt. They take what they need if it's available.
I moved away from using mineral salts this year because you have to be careful with so many of these fertilizers so that you don't burn the plant, you have to flush it so you don't get a harsh smoke, mineral salts causing lockout, etc.
If you stick with products that are natural you don't really have to worry about nute burn. You don't have to flush for an extended period of time before harvest. You don't have salts building up in the soil that are detrimental that you have to periodically flush and then add beneficial microbes back in.
There is another way.

Likes
91
Share


@CAMOGROWN
Follow
Hello the greater community that is GROWDIARIES!!! This week has been well, uplifting should I say!
Two weeks ago I was pretty dismal, I had one out if three auto flowers. I had high hope for this grow with RQS being g pretty reputable, but all was going wrong! Then! with a little help from my friends here on GrowDiaries, I was inspired to carry on lol!
Now a fortnight later, I'm my opinion, things have turned a corner! I'm seeing flowering behaviour again from these three that were completely stuck in veg! So I'm happy :)
Supercropped the big sativa. Just made sense. Only one hasn't been HST, the runt who is actually most progressed of the three. Followed by big sativa.
Feeds are pretty unique for each plant so just ask, but the one shown relates to the one in flower.
Summary: 1 auto 3 photo periods all under 12/12 for the past 2 weeks.
Thanks for taking a nosey!

Likes
12
Share


@TheBudWhisperer
Follow
Off to the races after the first week of veg. And the girls are looking good. They had about 24-48 hours of transplant shock but have since turned over and look perky. They never fully transitioned and all of em look like they’re turning back around.
Definitely starting to see some pheno variation on one of the indicas (F6) - trademark from the Skywalker 100%. A light bluish/purpleish hue on the fan leaves. We’ll see what happens over the next week then probably just pick a day and flip. We don’t need em huge - just big enough to show off dem buds.
On the hardware side of this grow, the mods to the dutchy system look to be working well. It just makes plant management easier with a full trough drain as opposed to individual drainage holes. Really, the system isn’t a concern for the most part. It’s proven time and time again how manageable a recirc system can truly be. Scaling down to smaller pots and more plants has also been a revelation of sorts around here. We used to grow monsters and now the aim is strictly proportional yields across a wider array of genetics. Been a great trip so far🤟. Couple more boring weeks of veg. And as soon as the breeding tent is cleaned up and pollen free - it’s go for blast-off👍.
Background
This cycle of clones represents all the potential of this F1 line of WalkerBerry OG. Bred by myself over the last couple of years. This genetic shows excellent hybrid vigour, incredibly stable nutrition requirements to date and an eclectic mix of long and short internodal spacing bu specimen.
We know we have indica and sativa dominant traits spread evenly across the 6 available clones. Now it’s just a matter of seeing them run out under controlled and pollen free conditions.
We’ve labelled each plant and it’s resulting seed accordingly. Once we get to the F2 run, we’ll hopefully be able to isolate down to 2-3 phenos if the bud is any good. From there, who knows. It’d be great to get to a finished, stable generation that would be fem worthy but that could be a very long way off. For now - we’ll focus on this line and see where it goes🤞🤞.
Likes
49
Share


@masterofsmeagol
Follow
6/9 I can't believe it but I had faith. The transplant yesterday LOOKED like it was fucked. I cleaned it up though and left it outside. This morning it was standing straight up. Both transplants were! I put tarps up to block the wind tunnel between buildings. It's still overcast and rainy. Sun isn't supposed to come out for a couple poke days. Chance of thubder storms tomorrow but I'm going to try to get everyone in their forever homes today. Or at least most of them. I plan to light dep a few right in the 3 gallon. I'm sure I'll be updating this after I get some work done.
UPDATE: I WENT OVER AND GOT THREE MORE TRANSPLANTED. THAT MEANS FIVE ARE OUTSIDE IN THE CAGE. TWO 10TH PLANET, 2 BLUEBERRY CHEESE AND A LITTLE PURPLE PUNCH. THE 3 GALLON POTS WERE RELATIVELY HEAVY SO I PICKED THE LIGHTER ONES TO TRANSPLANT. I LEFT THE ORHER TWO 10TH'S IN THE GARAGE WITH THE DOOR OPEN WITH THE REMAINING PLANTS. I ALSO ADDED WIND BREAKS AND SUPPORTS TO EVERYTHING. I WANTED TO GET EVERUTHING DONE TODAY BUT THERE MAY BE A THUNDER STORM SO IF I DONT GET IT DONE ITS NOT A BIG DEAL AND ILL FINISH TOMORROW. TRANSPLANTS WENT SMOOTH. I THINK THEY'LL GO EVEN SMOOTHER IF THEY DRY OUT A BIT. STILL HAVE THE 50 AND 40'S TO FILL. Took a bunch of videos but the don't want to load. I'll have to try tomorrow or later tonight.
UPDATE: I TOOK TONS OF PICTURES AND VIDEOS BUT THEY DONT WANT TO SEEM TO UPLOAD. IVE GOT SIX IN THERE FINAL HOMES OUTDOORS 20s and 30 gallon smart pots. Still have massive plants but I'm going to out those in the 50 and the 40. I'll finish this shit up tomorrow and get all the girls in their forever homes and if I don't have room for some I was planning on doing a light dep anyway so that will work out good. I learned a lot and transplanting went a lot smoother todsy than before. I feel really proud of myself. The last Transplant I did break a few leaves off that I didn't notice but whatever. I used tomato cages for suppirt on two and bamboo poles and string on the others. I'll add the vertical trellis as they grow. I'm proud of myself.
6/10 I got a lot done yesterday. Six are outside already. Two are in 20s in the garage. I'm planning on transplanting the rest today or tomorrow. I'll update later. Accidently uploaded lots of stuff on the wrong week. UPDATE: I TRANSPLANTED THAT SUPER TALL PURPLE PUNCH THAT I DIDNT TOP OR HST AT ALL INTO A 40 GALLON TUB. ROOTS WERE DRY AND THIS TIME IT ACTUALLY LOOKED LIKE THEY FELL AWAY. THE PLANT HOWEVER STAYED STANDINGVUP FINE. I THINK THIS PHENO IS GOING TO BE A TOUGH ONE. LOOKS GOOD LIKE AN HOUR LATER. I HAD THE 50 READY TO TRANSPLANT THIS MONSTER BLUEBERRY CHEESE I FIMed BUT THE POTS WERE SUPER HEAVY AND I FIGURED I NEEDED TO SLOW DOWN AND THINK. WE HAVE THUNDER STORMS COMING TONIGHT. TOMORROW IS GOOD. I MAY TRY TO FINISH UP TONIGHT BUT WE SHALL SEE. THE GOOD THING WITH DOING IT A FEW AT A TIME IS THAT IF SOMETHING HAPPENS OUTSIDE IVE STILL GOT A CROP INSIDE LOL. WHAT IM PLANNING TO DO IS EITHER LIGHT DEP THAT BIG BLUEBERRY CHEESE OR PUT IT IN THE FIFTY BUT IM PLANNING TO LIGHT 3 RIGHT IN THEIR 3 GALLON CONTAINERS. HAVENT DECUDED FOR SURE BUT IM THINKING THATS WHATS GOING TO HAPPEN.......of course videos won't upload and the ones that do are old videos. Damn. I need to sharpen my computer skills....and my growing skills. Especially transplanting. I suck at transplanting. I decided not to out all my eggs in one basket and left the 10th planet amd Blue berry cheese in the 20s in the garage. I pulled them out for light further but I'm ousting them back a little tonight. That way I'll have a back up if something catastrophic happens. I doubt it but better safe than sorry. I'm proud of what I've accomplished thus far. I've successfully uploaded my 1 minute plus video several times but it won't appear. Oh well. I'll try to load the videos tomorrow I guess. Just started raining. Just a light rain. Probably what fresh transplants like.
6/11 BEAUTIFUL outside. Today is the day. Most is done and I'll add the supports as trellis as they grow. This new grow space gets about twice as much sun as my old spot. The tar stops the burrowing insects. I'm getting everything out today. I just need to decide if I'm going to light dep that MASSIVE blueberry cheese or bite the bullet and put it in the fifty. Maybe I'll try to get some help from my cousin. Plants withstood the thunderstorm like Champs. I'll update as the day goes on. I planned better this year so I SHOULDN'T have an unmanageable jungle. UPDATE: WATERED THE 3 PLANTS LEFT IN THE 3 GALLONS (1 10th PLANET WITH GREAT BRANCH STRUCTURE AND TWO PURPLE PUNCH THAT WERE THE SMALLER ONES. IM GOING TO LIGHT DEP THEM. EVERYTHING IS OUTSIDE NOW IN A MIX OF 1/3 FOX FARM OCEAN FOREST, HAPPY FROG AND ROOTS ORGANIC 707 IN EQUAL PARTS. TRANSPLANTED WITH MYKOS. EVERYTHING IS OUTSIDE NOW. FINALLY DECIDED TO GET The MONSTER BLUE CHEESE I FIMed INTO ITS FOREVER HOME A 50 FALLON POT. IT WAS TGE EASIEST BEST TRANSPLANT OF THEM ALL. JUST LIKE AETTING A POT IN THE WHOLE. I DONT EVEN THINK THE PLANT NOTICED. ONE OF THE PURPLE PUNCHES HAD ROOTS OB ONE OF ITS LEAVES WHEN I LOOKED BUTVIT WAS STILL STANDING UO STEAIGHT. I KNOW SOME OF THE PLANTS LOOK DROOPY BUT WEVE HAD SEVERAL DAYS OF RAIN AND A MASDIVE THUNDER STORM. I BROUGHT OUT THE EARLIER TRANSPLANTS AS WELL. THEY ARE OUT OF THE SHOCK. WIND IS PRETTY HIGH BUT I DONT WANT TO ADD MORE TARPS. I THINK THINGS ARE SECURED GOOD ENOUGH FOR NOW. IM SUPER STOKED THAT TRANSPLANT WENT SO GOOD! Went back at 7:30pm. Some plants have a little bit of transplant shock and a little bit of burn but it's negligible considering they've been through a thunderstorm with pouring rain and extremely high winds. That blueberry cheese in the 50 transplanted so easy and still looks like it didn't even know the difference. I'll start light dep once I get a plan. Plants are recovering nicely but should something happen to one I could replace it. I'm interested in the light dep though and I've got a pretty good idea how to start.
6/12 The plants that had a little transplant shock are coming out of it. We had a thunderstorm and pouring rain the day of some of the transplants. Wasn't forecasted. High winds moved the plants around a bunch bit they are tough as hell. Everything is out now. Suppisedcto have showers the next few days. I'm putting together a feeding schedule abd setting up a spit to start light dep on the three plants I decided to flower early. The cage now gets twice as much sun as before. This is going to be a good year.
Went back over and plants are perking up and doing even better everytime I see them. I took a video but it might not upload until tomorrow. I may start a new diary for the light dep. I have a few places I'm thinking to use for light dep. I need to make a solid plan before I start so maybe a day or two. Trying to upload again but I doubt it.
6/13 Had a rushed morning but I watered the plants in the 3 gallons as they were dry. I had added more soil to a couple of the bags. The top soil is startingvtj dry out but the plants look good and we are supposed to get rain so I don't really want to water if it's going to be raining. I think I've found my light dep spot and schedule. I'll update after I do something.
WENT BACK OVER AND SPRAYED A LITTLE BIT OF WATER ON THE EXTREMELY DRY TOPSOIL THAT I HAD TOPPED SOME OF THE PLANTS OFF WITH. SHITTY THING IS THAT WAS ADDED AFTER THE THUNDER STORM SO IT MAKES IT HARDER TO JUSTE THE PLANTS WATERING NEEDS. I CAN TELL THAT ONE OFCTHE FIRST TEANSPLANTS IS STILL HOLDING WATER. I MEAN WE GOT A DOWNPOUR AND I DONT WABT TO WATER IF WE'RE GOING TO BE GETTING RAIN ANYWAY. IM GOING TO LOOK BACK OVER THE DIARY. THATS ONE GREAT THING ABOUT THESE. YOU CAN GO BACK AND CHECK YOUR WORK.
6/14 Glad I held off watering. It's raining today. Just showers. We haven't gotten any of that extreme wind we usually do. I have the plants supported but I still worry. Definitely more than I should. Plants are still doing good and acclimating to there homes. I have not started the light dep with the 3 gallons but I think I've found my spot. Once I start it will just be staying consistent putt8ng them in and out. I need to train them anyway. I have some research to do and a joint to smoke so I'll update later.
Processing
Likes
19
Share


@GirlGoneWeed
Follow
Another great week for this gal, growing nice and healthy shooting out some long green lush leaves thickening the branches, over all she is doing great no issues so far. Although I did find a tiny lil fly hanging around the plants, hopefully this fly didn't lay any eggs... but to stay on the safe side I ended up doing a deep clean inside the tent plus made some natural homemade pesticide and sprayed all plants 2h before lights out.
Natural Pesticide Recipe consists in:
1 whole garlic bulb
1 small onion
1 teaspoon of cayenne pepper powder
1 tablespoon of liquid soap
Directions:
Puree garlic, onion and cayenne pepper powder
Let mixture sit for at least one hour
Strain
Add 1 tablespoon of liquid soap
Put mixture in a spray bottle
Apply on the top and underside of cannabis leaves
Likes
2
Share


@High_Grade_Dadli
Follow
Missed last week update but did some cutting girls have to live up to the mission 73 between the 5 plant....added one more which was a cutting from a seed plant harvested previous...didn't look like I did anything so cut dem a few day later 85 between the same plants... only cut the lower half of G4 n smaller inside branches( going to stop they dont hold up well)
Likes
15
Share


@SweetheartOG
Follow
Started the girls with some LST to see how they all coped and they bounced back well.

Likes
18
Share


@Dragosani666
Follow
Day22, Tuesday Week 3
Both are growing quick now.
Might have to clip some of the big fan leaves blocking light to the lower bud sites.
Day27, Sunday, End of the week
both getting bigger an bushier and drinking a lot more.
Hulkberry started going into flower, so I expect it to stretch during next week.
Likes
6
Share


@CanadianFillmore
Follow
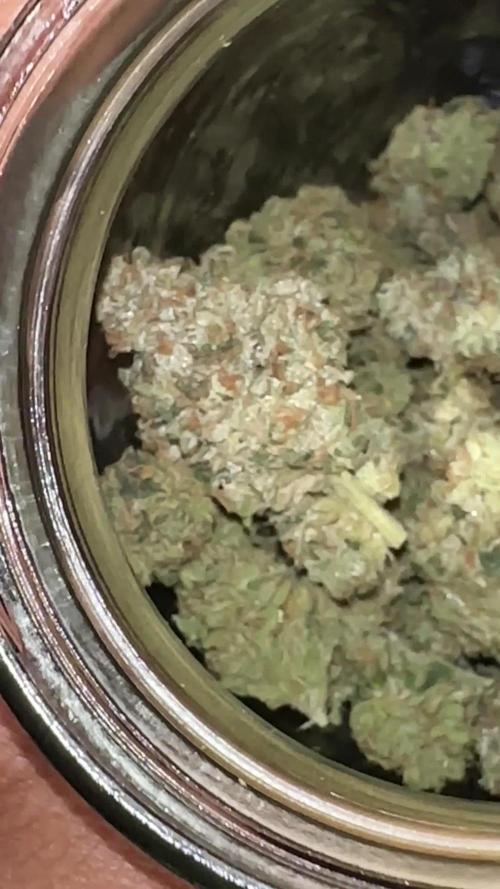
Chop chop, down comes LSD. A steady favorite in my garden, this girl is frosty, sticky, has dense buds and an amazing fruity sweet aroma.
Will update in 6-7 days with the dry weight and smoke report.

Likes
9
Share


@stacksfarms
Follow
Todo marcha correctamente, tratamos de igualar la canopia antes de pasar a floracion


Likes
7
Share

@FireAntTheGrower
Follow
Note on PieLato 💨
1. Easily breaking down before rolling up.
2. On the inhale , can taste the rubber or hint of gas(Hit the blunt) and on the tone down sweet bake (backend)
3. On the exhale light , barely coughing good cough and then once kick in smooth after that…
4. Smell like something my grandma be smoking on. Got that sitting in the living room where her plants is at and smell of incense lit in background . At the same time weeeed like dispensary walk in line up… smoking while describing..
5. PieLato effect head high , body high and rewind . I sense after party or smoking this. You going to want to go to your Momma house or whoever bake goods . That that PieLato. Mad tho only have one plant good sh!t…. Make you want to put on Nipsey part when he said burning rubber 🔥
Likes
26
Share


@420DeepGrow
Follow
* Actualizo 2 dias antes para cuadrar diarios.
Gracias al equipo de Seedsman y XpertNutrients sin ellos esto no sería posible.
💐🍁 Bubba Cheescake:
Bubba Cheesecake es un cruce de Bubba Kush anterior al 98 con Cheese Cake (Wedding Cake x Exodus Cheese). Se trata de un híbrido 70% índica con muy buenos rendimientos, alto en THC y bajo en CBD. Bubba Cheesecake prospera en interiores y exteriores. En interior se aconseja un corto periodo de crecimiento vegetativo debido a la cantidad de estiramiento que presentan las plantas. Las plantas pueden crecer hasta una altura de 250 a 350 cm. cuando se deja crecer naturalmente al aire libre. En interior, la floración dura entre 60 y 65 días, con rendimientos entre buenos y altos, de 400 a 550 gr/m2. Las plantas de exterior son capaces de producir entre 700 - 800 gr. peso seco. En las latitudes norteñas, en exterior, los productores pueden esperar cosechar a principios de octubre. Los cogollos son grandes y duros como piedras. Las plantas maduras muestran atractivos colores púrpuras y azules y brillan con una resina pegajosa que cubrirá las manos del cultivador si no tiene cuidado. El componente Wedding Cake agrega dulzura al sabor del regaliz y el aroma es terroso y musgoso. La producción de THC es muy alta con un nivel bajo de CBD. El efecto es intensamente narcótico, fuerte y duradero.
🌻🚀 Consigue aqui tus semillas:
🍣🍦🌴 Xpert Nutrients es una empresa especializada en la producción y comercialización de fertilizantes líquidos y tierras, que garantizan excelentes cosechas y un crecimiento activo para sus plantas durante todas las fases de cultivo.
Consigue aqui tus Nutrientes:
https://xpertnutrients.com/es/shop/
📆 Semana 4:
Continuamos la etapa de vegetación, ella se desarrolla muy bien 😎, comienza el buen tiempo, temperaturas agradables para todos.
Esta semana se aplica una solución de trichodermas para una mejor adaptación aunque realmente va genial.
Se mantiene 1/3 de nutrientes Master Root y Master Grow
Likes
13
Share

@GERGrowDesigns
Follow
Welcome to Flower Week 3 of Divine Seeds Divine Rapier
I'm excited to share my grow journey with you from my
Sensi Seeds Project . It's going to be an incredible ride, full of learning, growing, and connecting with fellow growers from all around the world!
For this Project , I’ve chosen the Feminized Photo Strain Divine Rapier:
Here’s what I’m working with:
• 🌱 Tent: 120x60x80
• 🧑🌾 Breeder Company: Divine Seeds
• 💧Strain Info : 29%
• ⏳ Flowering Time: 6-7weeks

Processing
Likes
61
Share


@Dunk_Junk
Follow
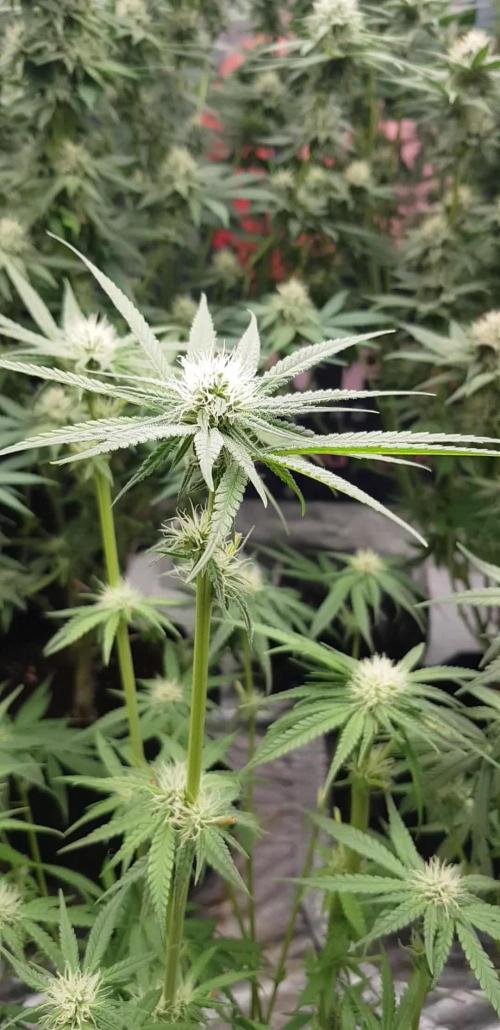
20cm vertical growth this week.
Not quite gone into flowering yet but she is very close. This will be her last veg week for sure.

Likes
9
Share


@ProlificGrowth410
Follow
She almost died before she shed her shell and now she the star of the tent..this is my first grow btw so I'm looking forward to my first harvest.


Likes
11
Share


@Barbagrows
Follow
Day 65 -
Maria got some needed defoliation to expose lower nodes to light and increase air circulation through the canopy. She is growing bushy with short internodes.
Juanita's new growth looks slightly better, even though growth has slowed down and is very stretchy. Thinking of putting her soul to rest, she's turning out to be a headache in the current tent situation.
Day 66 -
Maria's growth exploded after yesterday's defoliation.
Both plants showed pre-flowers and are both confirmed ladies. 🙂
Day 70 -
Both ladies got 1 litre each of plain water.
Maria got her lower skirt lollipopped. Also defoliated her from top to expose lower growth to more light. She is still growing very dense.
Juanita is showing signs of recovery, new growth is green and purple stems are slowly turning green again I don't like the way she is growing though, internodes are too long. Will have to see what to do with her.

Likes
172
Share


@Zannabis7
Follow
Day 12 of organic grow and all is well. Seemed to have dialed in the conditions and able to keep good air movement, CO2 levels, and consistent temperatures/humidity with the ThruWall Closet Fan (Model TW108 ), and the Holmes Twin Exhaust/Intake Fan (Model HAWF-2041). Humidity is maintained with a Lovoit 6L Ultrasonic Programmable Cool Mist Humidifier (Model# LV600HH). Added a SCROG screen (just a cargo net) and bought the Sample Pack of organic nutrients from Nectar for the Gods (just pay shipping and they will send you the sample nutrients - check out the website). People say their line of nutrients make the buds smell and taste like no other! I have always been an organic Earth Juice nutrient guy, so I am going to experiment with combining the two.
Lights are on 24/0 and she has tight internodal spacing with good vertical growth. Room that closet is in is beginning to smell skunky at times, and like diesel at other times. Will begin light organic nutrients with next watering.
Day 13 - Watered today with very low strength nutrients added. - Zannabis7