The Grow Awards 2026 🏆 


Processing
Likes
Comments
Share
@hawkeye_diesel66
Follow
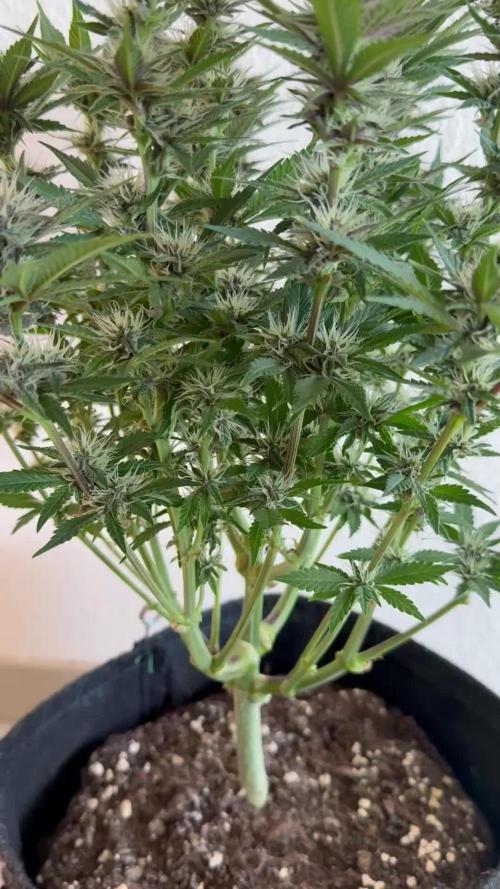
I will update the dry weight once she is finished drying, I assure y'all. I'm so glad that I have one or two more of these beans laying around and I can't wait to run this again. She became this monstrous autoflower that never seemed to stop. I supercropped her midway through flower due to her getting close to the light. She took that and just kept going. Even formed a nice knuckle where it happened, but she righted herself back up like a champ. I still can't believe that she weighed in at almost 300 grams. I know that's wet, but I've grown quite a few autos and have never done what I just did with one. I've only heard about that from autos haha. Shout out to fast buds for killing it with their genetics.

Likes
9
Share
@Headies
Follow
So I have spider mites. I screwed up so much i think this is going 15 weeks. Lost coast to the rescue! time to finish these buggers off
Likes
13
Share
@BostonGreenParty
Follow
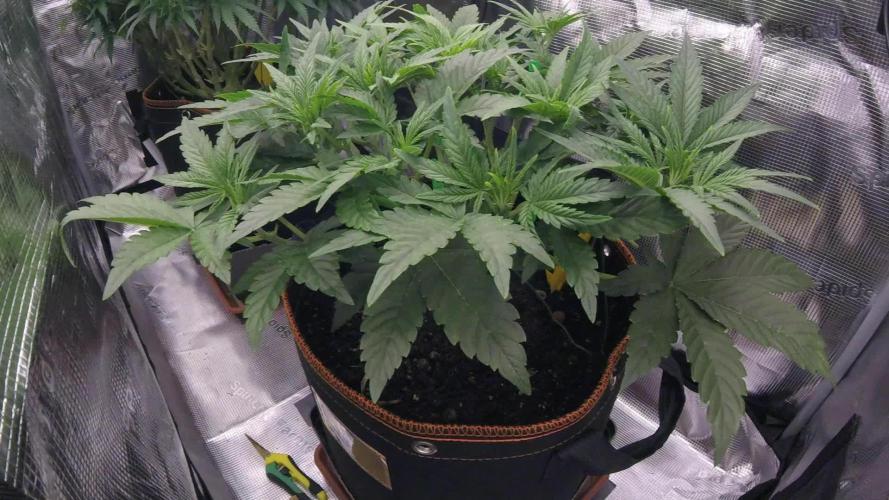
The 3rd week was a big one all plants finished stretch period and it was becoming a little wild for a second. I moved 4 of the bigger girls into their own room with their own 1000w LED plus a shared 250w HPS in the center. I will be tying down branches to get flat canopy then each of the 4 will be pushed more towards the center for better light coverage do not mind the setup its not fully there but will be finished before the end of the week. In the main grow room there is a single 1000w HPS cool tube running at 100%. To remove the 4 bigger plants I had to cut the entire trellis off the canopy but will be placing a new layer this week as well. As for nutrients feedings well clearly from the size of these girls you can tell they have been eating. In about 2 weeks I will defoliate one last time and then its them vs. the world til havest. Happy Growing!
Likes
3
Share
@hinterhofgrower
Follow
.
🌱 :
💧 : 4l day 43, 2l day 45 no nutrients, 4l day 47, back to 0,1ml/l pk 13-14
💡 : Dli: 40 mol/m²/d
🤔 :
Processing
Likes
84
Share
@Secretflower
Follow
Bonjour à tous,
le 8 septembre jour 51 pour mes 8 Royal AK.
La semaine dernière mes plantes ont bien aimé la lumière Led et elles y répondent positivement.
Je ne change aucun des paramètres précédents.
J'attend que les plantes ont fait de bonnes branches secondaires pour lancer la floraison.
Voilà c'est tout pour l'instant mes amis.
Merci d'être passé me voir, laissez moi un like si le coeur vous en dit.
Peace and Grow for All..🌱

Likes
33
Share
@NuggetPawn
Follow
Well, what can I say. She’s a beast. No nutrient deficiencies that I can see, leaves all seem green and healthy. Nute balance, PPMS and PH is dialled in, staying at around 1000 TDS 0.7.
That’s not a typo, she’s drinking 7 litres/2 gallons per day.
I think she’s doubled her size in 7/8 days.
She’s a bit bushy, as I’ve been really busy this last week I haven’t been able to defoliate.
Nutes remain the same, slight decrease in nitrogen going into week 2 of flower.

Likes
32
Share
@Compassionate_Gardener
Follow
Shortly after they were switched to flowering (after week 3) the plants continue to stretch and then start to develop their first flowers. Now in week 7 all plants have very nice flower clusters all over the plant and side branches. They have grown to 45 cm (=Shiva Skunk on left side) and 40 cm (Serious Kush on right side of aisle) in height respectively and all plants have a nice dark green color, which shows they are healthy and also that the Advanced Nutrients schedule works like a treat. The Q6W-Gen.2 LED-Lamps are now dimmed to 100% (=three green LEDs on the dimmer) and work on FULL POWER, which ensures full fledged flower production. Both varieties have now started to exude their typical aroma. The Shiva Skunk starts to smell musky and sweet, while the Serious Kush smells 'gassy' and 'fuely' like its OG-Kush heritage. The flower clusters on the Serious Kush appear to grow denser than the clusters on the Shiva Skunk.


Processing
Likes
15
Share
@Dico29
Follow
They are starting to shoot some pistils. I added some random store fertilizer that is 1-4-7 and put it in the 3 gallon. I poured it in a water bottle and just eye balled it pretty slow and not for long. It seems to help

Likes
3
Share
@High_Grade_Dadli
Follow
Lil youngin on their way home should be home for 4/20 along with 2 of their mother...as for the breeding project pollination is a success also been harvesting pollen(feminized) for later use
Mothers are growing well jus to continue cut and set aiming for about 1000 already cut 3 and got 100...happy growing

Likes
30
Share
@Hashy
Follow
********************************************
Week 9 flowering (flower week 3)
********************************************
Light cycle=12/12
Light Power=180w 75%
Extractor controller settings
High temp= Day 26c, Night 20c
Low temp= c
Temp step=0c
High Rh= Day 50%, Night 55%
Low Rh= %
Rh step=0%
Speed max=10
Speed min=2
Smart controller settings (during lights on).
Lights on=9.00am
Top fan on=+22.5c
Top fan off=-22.0c
Dehumidifier on=+50% and -26c
Dehumidifier off=-50% or +26c
Smart controller settings (during lights off).
Lights off=9.00pm
Dehumidifier on=+55% and -20c
Dehumidifier off=-55% or +20c
VPD aim=0.6-1.6
DLI aim=30-45
EC aim=0.2-2.0
PH aim=6.0-6.5
NPK(14.3/7.2/25)
💧💧💧💧💧💧💧💧💧💧💧💧💧💧💧💧
Method= Autofeed 6 drippers.
Feed=Flower Nutes.
Neutralise=0.1ml/L
Bloom=4.0ml/L
Roots=0.2ml/L
Silicon=1.0ml/L
Calmag=0.5ml/L
Boost=2.0ml/L
Volume=12L
Easy Ph down= 0.125ml/L
Ec=1.75 PH=6.4/6.4
Runs=17
Run times=4min (276ml each)
Gap times=16min
Total runtime=68mins (5.0L each)
Total flowrate= 138ml/min (69ml/min each)
Auto start time=10.00am
Auto stop time=3.24pm
💧💧💧💧💧💧💧💧💧💧💧💧💧💧💧💧
********************************************
********************************************
📅14/7/24 Sunday (day 57, day 15 flower)
📋H=89cm D=20cm Dli=69.8 Ppfd=1616 12/12
Raised light. Lowered power to 180w
H=89cm D=26cm Dli=44.5 Ppfd=1029 12/12
📅15/7/24 Monday (day 58, day 16 flower)
📋 it's getting warm again.
📅16/7/24 Tuesday (day 59, day 17 flower)
📋 Small defoliation lower growth.
💧
Method= automatic
Feed=Nutes flower
Volume=12L
Ec=1.75 PH=6.4/6.4
Volume left=3.5L
Volume used=8.5L (125ml/min)
Volume each=4.25L (62.5ml/min)
Runoff.
Total runoff=0.2L
Ec=2.6 PH=/6.4
Feed=manually @4.50pm
Run time=4 mins
Feed=manually @6.00pm
Run time=4 mins
Feed manually @7.00pm
Run time=4mins.
Volume left=1.5L
Volume used=10.5L (142ml/min)
Volume each=5.25L (71ml/min)
Runoff.
Extra runoff=0.35L
Ec=3.0 PH=/6.5
💧
📅17/7/24 Wednesday (day 60, day 18 flower)
📋 H=98cm D=17cm Dli=70.8 Ppfd=1638 12/12
HST
📅18/7/24 Thursday (day 61, day 19 flower)
📋HST snapped a cola. Defoliation.
📅19/7/24 Friday (day 62, day 20 flower)
📋H=98cm D=22cm Dli=62.5 Ppfd=1446 12/12
Reduced power to 155w
H=98cm D=22cm Dli=50.4 Ppfd=1168 12/12
Went away
💧
Method= automatic
Feed=Nutes flower (next weeks feed)
Volume=12L
Ec=2.1 PH=6.7/6.8
Volume left=3L
Volume used=9L (125ml/min)
Volume each=4.5L (62.5ml/min)
Runoff.
Total runoff=0L
Ec= PH=/
Feed=manually @4.30pm
1.5L
Runoff.
Extra runoff=2L
Ec=4.3 PH=/5.9
💧
📅20/7/24 Saturday (day 63, day 21 flower)
📋 away
********************************************
Weekly roundup.
📋 she stretched a further 15cm this week and I had to apply Hst because of the limited height in the tent, the light is about 1cm away from the roof of the tent. Had a few accidents with the Hst. She's looking good. I was a bit rushed going away as its last minute so 🤞 my automated stuff works.
Take it easy.
Back soon.
********************************************
Likes
53
Share
@Pr3m_85
Follow
More than a day in the drying tent and I'll give you the report on the weight, the taste and the effects!
‐-----------------------------------------------------------------------------
FINAL WEIGHT : 153,5 g
Effect : very pleasant. I have the impression of being in a cotton field.
Taste : cream berries 🍓🍓🍓🍓
Peace to all ✌️🏽✌️🏾✌️✌️🏿✌️🏻✌️🏼
------------------------------------------------------------------------------
✔️Pheno 1 : the appearance of the flower is much more purple than the other two phenotypes. Her effect is much more sativa as well.
✔️Pheno 2 : The strawberry taste is much more pronounced. In this phenotype, there is a not at all unpleasant mint aftertaste !!
✔️Pheno 3 : the effect is felt very quickly. In a few seconds, you find yourself in a state of joy. It's very nice !!!!

Likes
9
Share
@Mistertemps
Follow
Absolutely growing the red Pheno again. Very strong! Great citrus 🍊 smell. Taste is great not super dense but I’ll try and see if I can fix that next round

Likes
17
Share
@MrbeanTeddyVn
Follow
Veg 45 ngày, bloom 56 ngày. Phơi khô 2 tuần, thu hoạch khoảng hơn 200gram khô.


Likes
2
Share
@DE_BW
Follow
This week the Apricot continues to impress with very even bud development and a strong, healthy structure after the last defoliation. Bud sites are stacking nicely across the entire canopy, with early but already heavy trichome coverage on the sugar leaves. What really stands out is the aroma: it already smells clearly like apricot jam, thick, fruity and unmistakable, not the usual generic sweetness of early flower. The plant shows no stress and reacts very well to the current feeding, so no changes were made. If development continues like this, this looks like a very promising and highly aromatic harvest in the making.
Processing
Likes
15
Share
@eldruida_lamota
Follow
Que hay de nuevo familia, os traigo la actualización de la semana de nuestras crazy cookies, increíble el tamaño que están alcanzando los centrales, hay que tener bastante cuidado con los nutrientes, si te pasas un poco te lo harán saber.
Tienen un olor bastante peculiar, estas últimas semanas desarrollará todos sus terpenos.
Ph seguimos controlándolo alrededor de 6.5 temperatura algo elevará y humedad perfecta por debajo de los 40%.
No creo que tarden mucho en estar siguen engordando y formando esas flores, la semana que viene veremos cómo avanzan fumetillas.

Likes
74
Share
@Ferenc
Follow
Day 71, 29th of November 2021:
Here we gonthe first day of the week 5th of flowering!
Nice group like the different "personalities" and "styles".
Hopefully not much left I guess 3 weeks and we will be very close to the end :)
Let's go then Happy Growing Guys!
The only changes I made is the ventilation and the extraction fan is off at the same time with the lamp so only switches on when the lamp does.
So this is the set up and and operation schedule now:
ViparSpectra XS2000 is on full power which is 240W so 100% capacity.
Ventilation: As I mentioned it is off when the lamp is off so 12 hours. When the lamp is on it switches on in every hour and off for one hour.
The extraction fan is on 12 hours when the lamp is, and then it takes a rest with the lap together lol ;)
Watering pretty much remains the same. Humidity quite is approx 50%, temperature as well approx 26-27 Celsius.
Fertilization remains the same since last week, the BioBizz family raised up to be 2ml/L each so it is like 2ml/L of BioGrow, 2ml/L of BioBloom, 2ml/L of TopMax... see the ratio above.
The schedule of the fertilization has not changed happnes 2x a week except epsom salt just 1x a week.


Likes
18
Share
@Grower_Of_Persia
Follow
my dry and cure style is this:
4 days of hanging upside down to get water activity lower to around 0.6 in 50% humidity and 26 C temp (i know its a little high but we are in a hot summer right now and i cant get it lower even with air conditioner) and then after 4 days of drying i remove leaves and stalks, trim buds and move them to jar for the rest of their life :D . and in the first 4 days of curing i open the jar door and let hem get some fresh air in the jar for about 5 minutes and close the jar door again, after 4 days of curing like that buds are smokable but they will get better as they getting cured about 1 month.
buds are one of the hardest as fucking rocks type of buds! very dense , compact , sticky , smelly , amazing at every aspect
growing stage was 56 days and flowering stage was 75 days total (harvested tops at day 64th)
the total weight of dry buds was : (plant #1 & #3 top buds 56 G + lower buds 22 G ) 78 G + (plant #2 top buds 47 G + lower buds 18 G ) 55 G + (plant #4 top buds 120 G + lower buds 67 G ) 187 G = 367 G

Likes
46
Share
@Roberts
Follow
Drunken bitch Slap is growing good under the Hortibloom Solux 350. I pruned her roots and also did some lst on her. I accidentally broke a branch while lst ing her. I propped it back in place, and hopefully it heals if not I will ben the other two closer that way to close the gap. I have added nothing, but water since start. My nutrition mix was a bit strong in the start up. Everything has been good with this plant so far. Thank you Aeque Genetics, and Hortibloom. 🤜🏻🤛🏻🌱🌱🌱
Thank you grow diaries community for the 👇likes👇, follows, comments, and subscriptions on my YouTube channel👇. ❄️🌱🍻
Happy Growing 🌱🌱🌱
https://youtube.com/channel/UCAhN7yRzWLpcaRHhMIQ7X4g

Likes
1
Share


