
Likes
Comments
Share


@Greenpalace_420
Follow
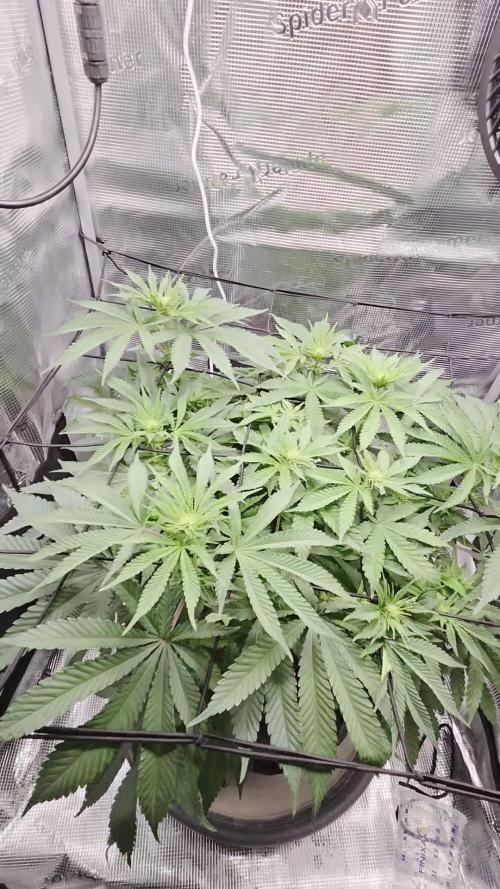
La 4 semana de crecimiento las niñas están estupendas con un montón de baras y ramas para tofos lados y súper
Robustas ya dentro de 1 semana y media entramos en floración señores

Likes
1
Share

@Professor_Little
Follow
This week I can see the bud sites starting to stack up — she’s looking happy and healthy. Whenever a big fan leaf blocks the bud sites, I just snip it off. I’m still fighting to get the RH down, though. By the end of next week, I’ll give her a nice fresh haircut.


Likes
7
Share

@420DeepGrow
Follow
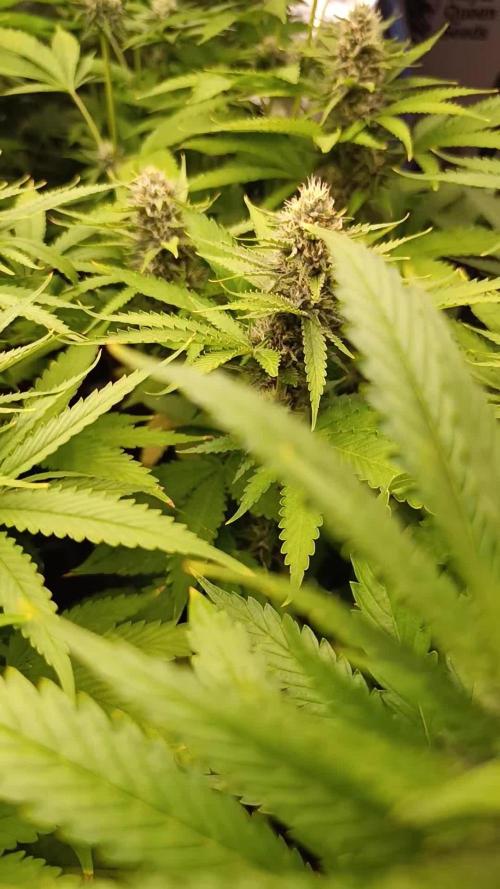
📆 Semana 5
La fase de engorde se intensifica y los cogollos aumentan de tamaño y densidad de forma notable. Los cálices comienzan a apilarse con mayor rapidez, los pistilos siguen siendo mayoritariamente blancos y la producción de tricomas se acelera, cubriendo cada vez más las flores y las hojas cercanas.
La demanda de agua y nutrientes continúa siendo muy elevada, mientras la planta concentra prácticamente toda su energía en el desarrollo floral. Los aromas se intensifican y el amarilleo gradual de las hojas más viejas puede hacerse más evidente sin afectar al vigor general.
⚡ EC: 1.7
💧 pH: 6.2–6.5
🌡️ Agua: 21°C
🌫️ Humedad: 42–48%
💡 Intensidad: 1000–1100 PPFD
🔥 Nota de cultivo: El ritmo de crecimiento floral alcanza uno de sus momentos más intensos. Mantener una nutrición estable, un buen drenaje y un clima controlado permitirá que los cogollos continúen engordando de forma uniforme y con una excelente producción de resina.
¡Seguimos creciendo fuerte 💪!


Likes
9
Share


@Luv2Grow
Follow
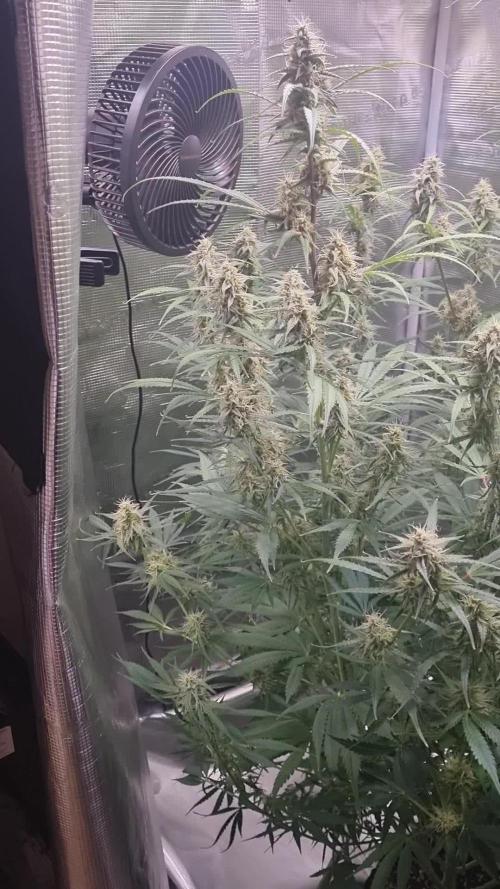
Day 57 - Starting off week 9 and she’s looking gorgeous still. Decided that I’m going to give her straight pH’d water from here on out. Trichs are mostly milky and caught a couple amber today. Thinking another week or two and she should be ready to chop but will keep a close eye on everything. Has been such an easy grow so far, just didn’t end up as big as I expected but buds are really fat and frosty.
Day 58 - Nothing new to really report. Going to continue giving her straight water and cal-mag. Didn’t notice much change from yesterday, thinking she might of stalled out a bit but hopefully these last two weeks she’ll really start packing on.
Day 59 - Not noticing too much of a change the last couple of days, no new pistils showing and she’s starting to shrivel. There’s a few amber trichs in there but pretty much completely cloudy. Debating on a partial chop this weekend. Still flushing and giving her just water. Hopefully I can hold out chopping until the end of week 10 at least.
Day 60 - She’s still looking good and REALLY frosty. Half the pictures I take almost look fake, she’s so frosty. Continuing just water to flush her out till the end. Decided I’m not gonna do a partial chop and just let her go till I think she’s done and hopefully more amber trichs.
Day 61 - She’s still holding strong and still seems to be fattening a bit. Going by the trichomes, she should be ready for a harvest by the end of week 10, next weekend. Just going to continue watching her and if she needs more time, I’ll give her more time!
Day 62 - No big changes, still looks like she’s on track for chopping next weekend. Will check her out again tomorrow and give her some more water. Can’t wait to start drying this girl, she’s smelling amazing.
Day 63 - Last day of week 9 and she’s smelling really good. Still flushing her and think I might chop next Saturday. Will be 10 weeks total but we’ll see, continue watching the trichs.

Likes
14
Share

@RakonGrow
Follow
+
Tag 72:
starting 30-70% watering rule
1.75L bottle water EC 0.35 + 0.3ml/L CalMag + Terra Flores 4.5ml/L Final PH 6.23
Tag 71:
starting 30-70% watering rule
1.75L bottle water EC 0.35 + 0.4ml/L CalMag + Terra Flores 5.25ml/L Final PH 6.17
Tag 70:
starting 30-70% watering rule
1.75L bottle water EC 0.35 + 0.4ml/L CalMag + Terra Flores 5.25ml/L Final PH 6.20
Tag 69:
starting 30-70% watering rule
1.75L bottle water EC 0.35 + 0.4ml/L CalMag + Terra Flores 5.25ml/L Final PH 6.17
Tag 68:
starting 30-70% watering rule
1.75L bottle water EC 0.35 + 0.4ml/L CalMag + Terra Flores 5.25ml/L Final PH 6.20
Tag 67:
starting 30-70% watering rule
1.75L bottle water EC 0.35 + 0.4ml/L CalMag + Terra Flores 5.25ml/L Final PH 6.20
Tag 66:
starting 30-70% watering rule
1.75L bottle water EC 0.35 + 0.4ml/L CalMag + Terra Flores 5.25ml/L Final PH 6.20
---------------------- all values are weight in grams ( assumption : 1000g = 1000ml.) -------------
Day......State...Date Time..................Seed......messure..change...watering.....surplus.....DayLight.....Night.....within 24h
...66...bloom...22.11.2025 06:00.....Wurlz...........6029.......-283.......................................................................-283.............-1689
...66...bloom...22.11.2025 07:00.....Wurlz...........7653.......1624...........1624.............-65
...66...bloom...22.11.2025 23:45.....Wurlz...........6365.....-1288.................................................-1288
...67...bloom...23.11.2025 06:00.....Wurlz...........6035.......-310.......................................................................-310.............-1598
...67...bloom...23.11.2025 07:00.....Wurlz...........7639.......1584...........1584.............-14
...67...bloom...23.11.2025 23:45.....Wurlz...........6232.....-1407.................................................-1407
...68...bloom...24.11.2025 06:00.....Wurlz...........5994.......-288.......................................................................-288.............-1695
...68...bloom...24.11.2025 07:00.....Wurlz...........7642.......1698...........1698.................3
...68...bloom...24.11.2025 23:45.....Wurlz...........6276.....-1366.................................................-1366
...69...bloom...25.11.2025 06:00.....Wurlz...........5985.......-291.......................................................................-291.............-1657
...69...bloom...25.11.2025 07:00.....Wurlz...........7651.......1666...........1666.................9
...69...bloom...25.11.2025 23:45.....Wurlz...........6240.....-1411.................................................-1411
...70...bloom...26.11.2025 06:00.....Wurlz...........5996.......-244.......................................................................-244.............-1655
...70...bloom...26.11.2025 07:00.....Wurlz...........7622.......1626...........1626.............-29
...70...bloom...26.11.2025 23:45.....Wurlz...........6199.....-1423.................................................-1423
...71...bloom...27.11.2025 06:00.....Wurlz...........5942.......-257.......................................................................-257.............-1680
...71...bloom...27.11.2025 07:00.....Wurlz...........7728.......1786...........1786............106
...71...bloom...27.11.2025 23:45.....Wurlz...........6286.....-1442.................................................-1442
...72...bloom...28.11.2025 06:00.....Wurlz...........6015.......-271.......................................................................-271.............-1713
...72...bloom...28.11.2025 07:00.....Wurlz...........7764.......1749...........1749..............36
...72...bloom...28.11.2025 23:45.....Wurlz...........6294.....-1470.................................................-1470
+

Likes
44
Share


@ILoVeThiSpLaNt
Follow
Giorno 49
Ultimi giorni di vegetativa poi giro e faccio una leggera defogliazione.
A settimana prossima 💪🤞


Likes
17
Share


@greenhousegrowgirl
Follow
Mar 7 (day 78): Start of week 12.
Mar 11 (day 82): Chopped plant.
Likes
36
Share


@Regenwurm
Follow
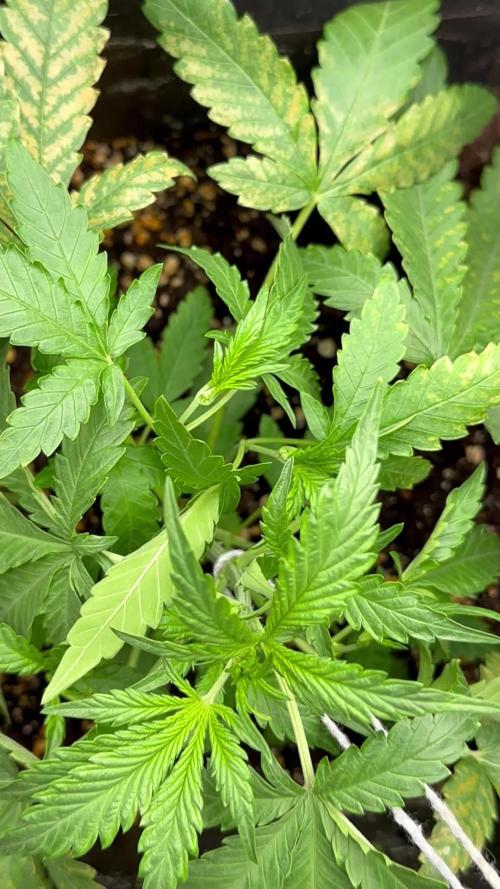
In dieser Woche habe ich eine nicht gewünschte Verfärbung der Blätter festgestellt! Das grün ist blasser geworden und ein paar vereinzelte Blätter Sind von der Farbe leicht lila/ violett geworden. Ich bin bisher noch sehr zurückhaltend mit Dünger . Ich werde besonders in der kommenden Woche ein Auge auf pH Wert und Düngemenge legen da die Blüten stark am wachsen sind
Tage der Keimungsphase = 7 Tage.
Tage in Wachstum = 21 Tage
Tage in der Blüte = 21 Tage
Wachstum h Woche 3 Blüte = 8 cm
2 mal in dieser Woche mit Purolyt Mischung 1:25 besprüht
Lichtstärke: 90 %
PPFD: ca. 850 umol
Lichtabstand: 40 cm
Std Tag/Nacht: 18/12
Temperatur Tag: ca. 25 Grad
RLF Tag: 58%
Temperatur Nacht: 21 Grad
RLF Nacht: ca. 60 %
VPD Wert: ca. 1,0
PH Wert Wasser/Düngelösung: 6,2
EC Wert: nicht gemessen
Ventilator Oszillation: Stufe 1
Befeuchter: an
Entfeuchter: aus
Zusätzlicher Entfeuchter: 0 Stk. außerhalb vom Zelt im Raum
Bewässerung: 3* bewässert 1,5 l/Pflanze mit Dünger mit den o.g. Mengen
1 * pures Wasser mit 1 l/Pflanze
Purolyt Besprühung: 2 mal
Besprühung Fastplantspray : 1 mal
Controlling: Grow Control
Dünger: Greenbuzz Nutrients
Licht: Pro Emit Vollspektrum
Abluft: EC Carbon Active 750 m3
Danke an Zamnesia für die Seeds, den sonstigen Merch und natürlich das Vertrauen in die Kooperation
https://www.zamnesia.com/de/10681-zamnesia-seeds-pineapple-express-f1-automatic.html
Danke auch an Mia von GB:
https://greenbuzznutrients.com/de/
Ihr bekommt 25 % Rabatt bei der Nutzung des Codes auf der GB Homepage
https://greenbuzzliquids.com/de/shop/
Code: GD42025
(Mindestbestellwert 75€)
Likes
11
Share


@Ninjabuds
Follow
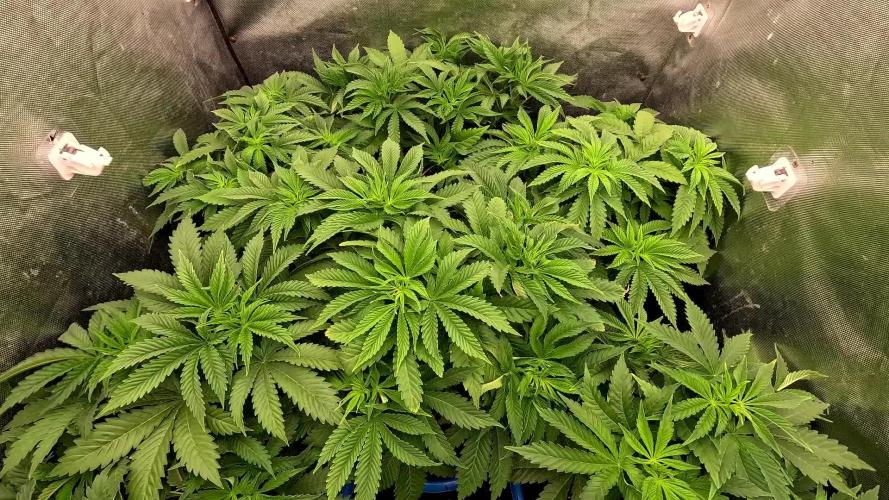
The Blackberry moonrocks plants are beasts. They're so thick and sturdy, and they're covered in buds. They're not stretching much, so it's gonna be a really tight bud on top. I'm excited to see how they turn out.
Well, it's Christmas again. This year feels a little different, though. Maybe it's the snow blanketing everything, or the way the tree lights up the whole living room. Either way, it's cozy and warm, even when it's freezing outside. I'm really looking forward to seeing what Santa brings. I hope I get that new video game I've been wanting. But most of all, I can't wait to spend time with my family. We always have so much fun
This past week was a good one for the plants. They started the first week of their stretch, and they've already grown a decent amount. I can really see them filling out. It's cool to watch them grow so fast. I can't wait to see how big they get by the end
I always get a little worried at this stage, like they're not gonna get as big as I want them to. But then I remember how they always end up surprising me. By the end, they're always perfect.

Processing
Likes
5
Share


@Tryhard1988
Follow
She doing well and starting to show some purple coming through gg4 all over this on smells fire can't wait to try her
Just feeding water for three week now

Likes
21
Share


@Backtotheroots2222
Follow
Day 52. The first seed-filled calyxes appear. I just got a new ph meter, this time also for the earth.. PH was neatly in the basement... well pH corrected. And now she can hopefully refuel properly... hope it makes a little more mass.. but the main thing is two or three seeds... Soil was freshly mixed and I didn't check it before using it... can happen👻😅.
Processing
Likes
225
Share


@The_Projexx
Follow
Almost 2 weeks into flower now and things are starting to look good . The ladies got a nice shape to them looking nice and healthy they have grow a little but not much this past week I can say thats likely due to formation of flowers and getting ready for her last big stretch . All in all things are looking up in the garden cant wait to see what the future holds for me
Thanks for reading !
-Happy Growing!


Likes
6
Share


@XoticGROW666
Follow
Last week of the sour zkittlez
Sorry y’all I lost the veg vids but here Is the last footage of some organic grown buds compost tea & sst tea

Likes
19
Share


@Selkot
Follow
this session is (already!) coming to an end 👌
as the buds were so advanced at the end of last week, I lowered the coconut feel and gave a little boost to the Super Boom.
At the end of the week, after checking the trichos, the rinsing seemed to be necessary.
I'm going to cut in 7-10 days 👍
see all my vids :) https://www.youtube.com/channel/UCtAGX0oCBY92aj3VJCG5q-Q/


