
Likes
Comments
Share


@AlbasDiary
Follow
Hola jardineros
Ya queda muy poco para poder cortar a las preciosas plantas
Que ganas de catarlas
Ya está la limpieza de raíces lista y solo queda esperar una semanita más

Likes
12
Share


@rickhaZe
Follow
debido a quemaduras que encontre en las plantas el dia 14/06, dia 29 desde germinacion, debi regar con cal max, ya que creo que hay falta de calcio - magnesio. aplique 1.2 ml por litro de agua.
no creo que sea exceso de ferti ya que todos riegos se han preparado con la dosis minima que indica.
se sigue regando con 0.4 L cada 48hrs
una tecnica que he hecho es ir acomodando o doblando las hojas hacia abajo dando prioridad a los bracitos de cada planta.
Dia 30: riego de agua 600 ml de agua
Dia 32: todas las plantas en floracion
Aplicamos solo tek groow ya que las manchas en las plantas se debian a falta de azúfre lo concluimos con un grupo de amigos todos growers y un agrónomo.
Por que queremos continuar con la tabla de grotek nutrients y el domingo dia 34 aplicar blossom blaster

Likes
14
Share


@GREENPHOENIX6262
Follow
03/22 - (M) - She is perfectly - Her numbers are spot on and the feeding schedule seems to be dialed in perfectly - I will increase her carbohydrate feeds with the Raw Cane Molasse to increase terpene production.
03/22 - (C) - Hit a little snag with the babies last week and through off their PH/EC/PPM's - Gave them a hard flush yesterday (Only distilled water) to stabilize the numbers and got all of them down to optimal levels. Did some defoliation on the yellowing leaves. I will upload both night and day shots for this week for the babies
03/23 -(C) - Flushed them out hard last night and in less then 24hrs WHABAMMMM!!! they are already bouncing back - Will stick to just clean water feeds for now - They will begin a low-dosage nutrient feed (Micro-dosing) in about a week.😎😎😎😎😎😎😎

Likes
11
Share


@BrigadeDesTerps
Follow
Jour 50 (17/11/24)
On va pouvoir passe en cycle de floraison, je mettrais ce soir en 13/11
Les deux beldia sont maintenant en floraison, c’est leur côté instinct de survie qui s’est activé
Tous le reste des plante se porte bien
J’ai fait un peux de garniture


Processing
Likes
32
Share


@Dunk_Junk
Follow
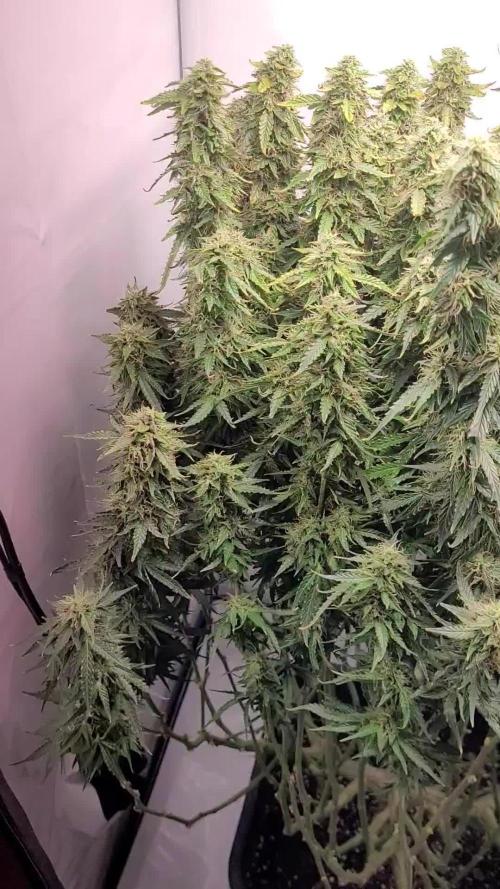
So she only grew 3cm in vertical height this week. But look at all the side branches she's pushed out!!!
The girl's doing well 😍

Likes
91
Share


@Greenwolvesfarmer
Follow
Me encantó la cepa y su facilidad de cultivo ! Aun que tuve muchos problemas ambientales y climáticos . Me atrasé unas 3 a 5 semanas con estas nenas , pero nos recuperamos bien ! Usamos malla scrog chilena #kanovicultivo , lo mejor que he usado en malla scrog , no se le comparan , su espacio preciso! .
Las 4 comenzaron en pequeños vasos , luego de 1 a 2 semanas , trasplanté a macetero de 5.8lts , finalizaron 3 en maceteros textil 19lts y 1 en macetero de 20lts AirPot !
Comencé a brindarle 20hrs de luz / 4 hrs oscuridad , a la 3era semana 19hrs de luz y a la 5ta semana bajé hasta el 18 / 6 .
Usé un panel QB de 480w regulables , chips marca Samsung de 3500k , chips epistar UV 660nm iR , el mix completo gracias a mi bro MKleds chile ! Se pasó ! De todas maneras recomiendo una potencia mínima de 600w ( QB LED ) para espacio de 120x ..
Usé un bio estimulante chileno , que a mi parecer fue uno de los mejores que he visto y usado ! El grande #trichomemania , te cuento que este producto activa un mecanismo de defensa en la planta (SAR) , haciendo que reaccione y se trate de defender con mayor producción de resina , terpenos y tricomas ! Es increíble ! A los 24hrs tienes resultados , un saludo grande a los hermanos ! El mejor producto 10000000%....
Grande eva seed , buenisima esta cepa , me dí cuenta que si se deja madurar un poco más , su sabor es más frutal candy , exquisita cepa !....
Estamos probando con un papel de blunt organico 100% libre de tabaco marca *jamaican buzz*...al fumarla su efecto es notorio , enseguida viene el efecto psicoactivo y cerebral , se viene a la vista un tanto distorsionado el entorno ...la vision un poco más brillante , y a la vez relajado ..
Hoy 18 de agosto estamos probando con un papel de celulosa organico marca lion rolling circus ( foto al final del album ) , quema bastante bien , al parecer ya está casi en su totalidad secado , combustión lenta , buen sabor afrutado citrico con toques candy diesel ...uuff efecto despues de 3 quemadas ya por los cielos , totalmente cerebral y estimulante , un gusto charlar con amigos !
Al manipular su fruto , la planta expele un olor afrutado con limon maduro y skunk , con finales de candy terra , una delicia , muy buena cepa , ahora mientras escribo me siento un tanto "mareado" con esa mitad de blunt ! Buenisinaaa!...
____
La verdad cuando comencé a cortar cada planta era como llenar "infinitamente" el armario donde dejaría secandola , se llenó casi la mitad y un poco más sólo con 1 planta cortada ! Increíble producción , yo estimo unos 90g por planta aprox , ya he consumido un buen peso además ...veremos en estos días que esté por completo su secado ! Esta riquísima , sus efectos fuertísimos ...100% ...
___
Una cosecha buenísima, muy parecido como obtengo resultados en comparación con el sodio , todo bien me gustó la experiencia !....
Además tuve la oportunidad de hacer extracción en seco de su materia vegetal . Obtuvimos entre un 18 a 20% de retorno ! Para mi primera vez , geniaaaal ! Su utilizó prensa de 12 toneladas , de apretó a 80°C por 4 minutos .
.
.
Usen lemon king ! Una delicia .

Likes
20
Share


@DrGanj
Follow
Bit of nute burn appeared on just one of these phenos overnight. I think this is as this plant flowers longer than my nute charts so did a bit of experimenting. Wil dial it back a bit at this stage next grow to avoid this and have dialled back a bit now, moving forwards. It's not too bad and still seems localised to certain parts of just one plant so not gonna stress about it.

Likes
4
Share


@Backyardnewbie
Follow
Auto pots are on. Reservoir is at EC 2.2 and ph 5.5 SF2000 light 24 inches above plants 100% added 1ml of calmag per litre on day 19
Day 13 - raised lights to 36 inches. At 100% PPFD of around 600. Plants started reacting very well.

Likes
5
Share

@Jungle_James_Grows
Follow
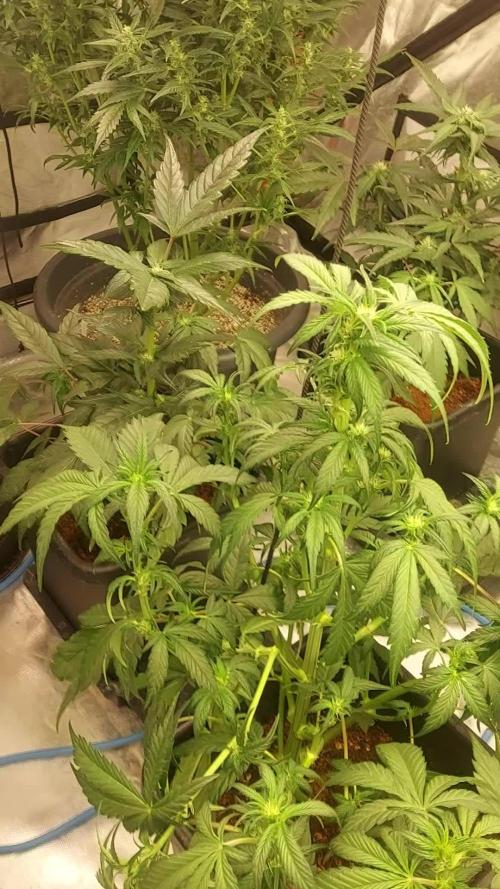
They're looking lovely, there is a variety of phenos, some are big and bushy and others are long and lanky. Went in today at took all the larf off the bottom and did some bending and tucking
Likes
17
Share

@StonedSteve
Follow
Today 24.3. finished 7th week of flowering (89 day)
Final watering 4 liters of clean water
1 day, max 2, and I'll start harvesting

Likes
25
Share


@BudHaks
Follow
She is now putting on weight - and still going tall! She looks like she has a while to go before harvest but she is doing magnificently. Little to no deficiencies!

Likes
7
Share


@Stickygreens420
Follow
3/13/2024 - Day 15 Flower: Ran into some issues after the last watering. The newest leaves have some severe curling going on, and I've had a few leaves with some minor brown spotting. I'm not 100% sure what caused it, but narrowed it down to either TeaCo Super Tea, Recharge, or the foliar spray I did with Dr. Zymes Eliminator. I did the foliar at lights out, but maybe there was still some residue when the light came back on. Either way, I'm taking it easy on this watering. Gave them 4 gallons of 6.5 ph water mixed with Jay Plantspeaker Quillaja, Coconut Powder, and a half dose of Rootwise Bio-Catalyst and Yah-Whey. The curling does not seem ro be getting worse, so hopefully they will grow out of this. Also, they have started to slow on rhe stretching, which is good, because they are getting close to the light.
3/14/2023 - Day 16 Flower: So I've been looking at some of the more deformed leaves and I'm pretty sure the leaf curl and brown is from the Dr. Zymes. The leaves with issues appear to have a slight glossy residue to them. I'm guessing when the Dr. Zymes dried on the leaves, it had a reaction when the light came back on. Now that I'm into week 3 of flower, I plan to cut out any foliar sprays, so hopefully I'm right an the issue won't get worse. I had some seeds that I sprouted and forgot to use yesterday, so I made a 2 gallon Sprouted Seed Tea (SST) and added some Jay Plantspeaker Quillaja, Rootwise Bio-Phos, and a half dose of Fermented Comfrey Extract and Fermented Peach Extract.
3/16/2023 - Day 18 Flower: plants are looking good. Flowers are starting to develop and I'm already seeing the beginning of some tricomes. Stretch appears to be just about done, so hopefully it will be smooth sailing from here. The curling from last week has not gotten any worse.
3/17/2023 - Day 19 Flower: watered about 6 gallons of worm tea I brewed for about 24 hours. Added some Jay Plantspeaker Quillaja, BuildASoil BuildABloom, and Rootwise Bio-Catalyst. Also, did some minor defoliation of some of the larger fan leaves blocking lower bud sights. Still need to do more, but I plan to spread it out over a few days.
3/18/2023 - Day 20 Flower: Cleaned them all up real good. Took off all the large fan leaves, except for the top two, and cut off basically anything on the lower half of the plant. May have gone a little higher than I would have liked, now that I'm seeing it done, but too late now. Normally, i only like to take off about 1/3, but i guess we will see what happens when the bottom half is stripped. Always learning around here, haha. Hopefully I should have very little popcorn buds.
Likes
69
Share


@DogDoctorOfficial
Follow
Eternity Grow Cup - Week 11 VEG Report
This is a pivotal week in our Eternity Grow Cup journey as we wrap up VEG and prepare to transition into FLOWER. Our goal has been to ensure that the plants are thriving and optimized for the next phase. This report will detail everything that took place during this crucial week.
Mass Defoliation & Structural Training
We began the week with an extensive defoliation session. Every leaf with a stem was removed to clear space for optimal light penetration and airflow. This process was done mostly by hand, clicking them off in the opposite direction of growth, while some stubborn ones were snipped with scissors. By the end, it felt like we had taken out nearly half a kilo of leaves! The room now looks clean, structured, and ready to fill out the ScroggNet.
To further enhance the plant structure, branches were attached to the pots, allowing for better horizontal growth. This technique helps maximize canopy exposure and prepares the plants for even light distribution once flowering begins. Defoliation before flowering is a key step as it reduces overcrowding, improves airflow, and sets the plants up for efficient energy use in the next phase.
Light Schedule & Adjustments
This week, we introduced a subtle but effective light adjustment. While still maintaining an 18-hour light cycle, we initiated a 15-minute delay with the whites, allowing the reds to start first. This gradual shift signals the plants that a change is coming. Similarly, at the end of the light cycle, the whites turn off 15 minutes earlier, leaving the reds on for an extended period. This strategy mimics natural sunrise and sunset, helping the plants transition more smoothly into flowering.
Additionally, at the end of the week, we will be implementing 48 hours of darkness before the official flip to flower. This method has worked exceptionally well in past grows, helping plants recognize the transition and encouraging a strong start to flowering. However, it's important to emphasize that this is a personal technique and not a universal rule. Every grower should experiment with different methods to find what works best for their specific environment.
Environmental Conditions & Challenges
Currently, our temperature is at 27°C with 60% humidity, resulting in a VPD of 1.50. While slightly higher than the ideal for VEG, our CO2 levels are over 1000 ppm, and the light intensity is at 570 PPFD, making it a manageable balance. The solution pH is 5.79 (essentially 5.8), EC is 1.38, and water temperature is 17.7°C.
One challenge we are facing is maintaining optimal reservoir temperatures. Currently, it's a bit low at 17.7°C, and we are exploring solutions to raise it slightly. However, the medium temperature sits at 22.2°C, which is a good range. The humidifier is still in use, though it struggles to increase humidity further, so we are working with what we have to keep the VPD in check.
ICL-300s Integration
The ICL-300 lights are now fully active. Unlike the last grow, where we introduced them later, this time they are on from the start of flowering prep. This adjustment is an experiment to see if the plants respond better to an early introduction. Learning is at the core of this journey, and each grow offers new insights. Whether this proves to be the optimal strategy or not, it will be a valuable lesson for future grows.
TrolMaster Hub & Data Monitoring
Throughout the week, we have been closely monitoring our grow using the TrolMaster App TM+. We are displaying some of the collected data for everyone to see the details. Stay tuned as we explore this further in the next report!
As always, we want to extend a huge thank you to our sponsors and the amazing community. Special thanks to Aptus, Groovebags, Cannakan, Promix, Ziggy Papers, TrolMaster,and Plagron, Zamnesia and Grow Diaries for making the Eternity Cup possible.
I apprecilove the support from all sides—lovers, haters, competitors, and fellow growers. The competition continues to push us to improve, and i am thrilled to see the incredible reports from others. This is a challenging yet rewarding experience, and i couldn’t be happier to be part of it.
For those following along, we invite you to check out our YouTube channel, where we upload full 4K episodes showcasing the entire journey. Some episodes are too large to be uploaded directly to Grow Diaries, so YouTube is the best place to catch everything in high definition.
This marks the end of VEG, and we are officially ready to flip to FLOWER. Next week, we will dive into the TrolMaster System in action, check the data insights, and monitor how the garden adapts to the shift. Stay tuned!
Growers Love to all, happy growing, and best of luck to all competitors!
See you all in the next update!
Genetics - Runtz https://www.zamnesia.com/6000-zamnesia-seeds-runtz-feminized.html
Nutrients - Plagron https://plagron.com/en/hobby
- Aptus Holland https://aptus-holland.com/
Controls - Trol Master https://www.trolmaster.eu/
LED - https://www.futureofgrow.com/en
LED - https://www.thinkgrowled.com
Soil - https://www.promixgardening.com/en
Germination - Cannakan https://cannakan.com/?srsltid=AfmBOopXr-inLXajXu3QFgKXCXXos4F1oEvScjMKIB5MR5dk8-GJ-F49
DOGDOCTOR 15% off
Smoking Papers - https://ziggioriginal.com/
Terpene saver - https://grovebags.com/
As always thank you all for stopping by, for the love and for it all , this journey of mine wold just not be the same without you guys, the love and support is very much appreciloved and i fell honored with you all in my life
With true love comes happiness Always believe in your self and always do things expecting nothing and with an open heart , be a giver and the universe will give back to you in ways you could not even imagine so
As always, this is shared for educational purposes, aiming to spread understanding and appreciation for this plant. The journey with nature is one of discovery, creativity, and respect. Let’s celebrate it responsibly and continue to learn and grow together!
Growers Love To you All 💚
#EternityGrowCup #RuntzHunt #GrowersLove #CannabisCommunity #AptusHolland #ProMixSoil #TrolMaster #Zamnesia #Plagron #ZiggiPapers #Grovebags

Likes
7
Share


@ShiftyGaijin
Follow
Day 43_________________________
- Decided to make the 12/12 shift due to my Caramelino growing enough to risk light burn if it doubles in size during flower. I have the light as high as I can safely put it in my tent with fans constantly on above the lights, and still only have 33” of space from the top leaves.
- That being said, lots of LST will be used to fan out instead of up.
- Flushed out the system completely this time. Before I would drain enough for the water pump to suck in air, but this time I filled with 50 gal of pH’ed water. Then I measured PPM. I stopped when the remainder of the water was 250PPM. Just a little richer than my tap water. Should have been doing this the entire time. Probably wouldn’t have had the nute burn spots that I was getting when I was 1400-1500 after half a week of the plant eating and drinking. Now is sitting just above 1000. I feel the plants will appreciate the break from over-nuting.
Day 48______________________________
- plants are all loving the lower PPM numbers and pushing through the trellis net.
- Plants are all drinking about 5 gallons every 3 or 4 days. Replenishing with pH’ed water when I notice a significant drop.
- Two main shoots are becoming a pain to try to keep at the same level of all the others. LOTS of LST.


Likes
25
Share


@Redupgrower253
Follow
Continued with the ripen only this week. Going to water with it one last time that would be 10 days using the ripen.
Going to start the flush with canna flush!
The blueberry has started fading out nicely. The smell coming from these plants are amazing.
Can't wait to chop the girls down. My anxiety is going crazy wait on this girls. Been keeping my eyes on the trichomes.
Peace growmies thanks for taking the time to look at my diary. 😁🌱


Likes
97
Share


@AsNoriu
Follow
Day 106. Trim jaiiiiiilllllllll !!!!
First done, think it could reach my record 240. Insane quality. 4 rows of solid buds hanging ....
Next one ....
Both finally finished and honestly, that's my plants to be proud of !!!
Day 114. All is done, no doubts its my best grow.
Happy Growing !!!


Likes
42
Share


@rhodes68
Follow
2/14 Week 14 and things get interesting from here
Hell of a journey so far, do not expect that to change now
Just taking care of them and enforcing a good neighbor policy with defoliation
Without going into a lot of detail we looking at a harvest every three days or so for six weeks starting next week, grow will end 4/4 with the harvest of the Green Crack clones at @63 days of flower.
So earlier is possible
2/15 FFT-7 Clones have hit 36 inches already but should not go too much further. famous last words
2/16 Trying all of it on the same feed see how it goes, clones pretty far along think its ok.
2/17 So far so good on the feed, some concern over FFT-7 stretch so what else is new
Had to adjust the Peak running out and deliveries are messed up from weather so stretching it out
2/20 Final update on the week:
Clones are doing well only the FFT-7 proved undependable on the flowering stretch LSD and Green Crack look on track for 36 inches or less, FFT-7 headed to 4 feet
Dropping Grow again on the main flowering feed , clones remain as is, less Nitrogen is needed
Ran out of Soul Peak so full dose of KoolBloom till we get more
Bambi on the block next looks like Monday followed by Chew Mee and Dink Thurs or Friday.
Clearing this tent out so more can come in.
And that was the week that was

