


Likes
Comments
Share


@Herbalist7
Follow
Running 4 autos in the same aeroponic system isnt ideal as 2 of my plants need to flush this week.. while the other 2 still have about 2 weeks again... its all good tho.. id take it out an flush them individually before harvesting.




Likes
75
Share


@Kitties_and_Colas
Follow
~_~_~_~_~_~_~_~_~_~_~_~_~_~_~_~_~_~_~_~_~_~_~_~_~_~_~_~_~_~_~_~_~_~_~_~_~_~_~_~_~_~_~_~_~_~_~_~_~_~_~_~_~_~_~_~_~_~_~_~_~_~_~_~_~_~_~_~_~_~_~_~_~_~_~_~_~_~_~_~_~_~_~_
❤️💡🌱😽💨
We got out times messed up somehow, our calendar puts the 24th of Sep as the 9th week of flower.. this makes sense, our Big Bud usually fades fast with a color show just before harvest week.. we couldn't understand why everything looked so mature lol..
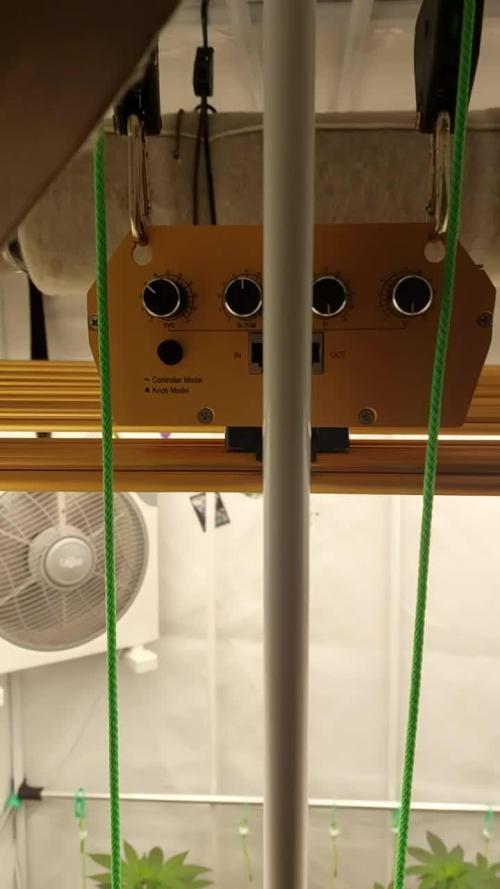
The buds on this strain are rock hard, the FC-E6500 was a great investment, this plant did great under it (A++ MarsHydro!!) ..we're really excited to chop this plant down. My husband has a trim job on his hands lol.. we'll be giving her water only (and lots of it) from now until we dry her out completely for harvest..
This was a great grow and should produce enough flower to get us (partly) through the Winter.. thanks as always for dropping by, our next upload will be harvest and dried buds in approx 17days..Happy harvests everyone!!
⚡Mars Hydro/FC-E6500⚡ Specifications ⚙️:
650 watt, full spectrum design, removable (and adjustable) light bars and driver 🔌
Diodes: BridgeLux chips (3978 count!)
Veg Coverage: 6x6 ft 🌱
Flowering Coverage: 5x5 ft 🌼
High-Efficiency
PPFD: 1200umol/m²/s ☢️
-IP65 waterproof ratings, tolerant to high humidity grow environments 💦 ..
-Can be daisy-chained together and all controlled from a single light! 💡~💡~💡~💡~💡
~_~_~_~_~_~_~_~_~_~_~_~_~_~_~_~_~_~_~_~_~_~_~_~_~_~_~_~_~_~_~_~_~_~_~_~_~_~_~_~_~_~_~_~_~_~_~_~_~_~_~_~_~_~_~_~_~_~_~_~_~_~_~_~_~_~_~_~_~_~_~_~_~_~_~_~_~_~_~_~_~_~_~_



Likes
27
Share


@Kloud9gardenz
Follow
Buds a still forming and looking good. I've cut the co2 going forward and will go wihout for the rest of the grow so the buds can rippen. Buds have a lot of frost so far so that's a great sign for the THC. Plants in the tents out of nowhere have spider mites but this plant didn't have much compared to others. Hopefully the last 3 weeks go by fast


Likes
36
Share


@BudXs
Follow
Just an absolute beast. Thank God it is the last week of veg, theres nowhere left to go but up. About 3 feet now and should finish around 6 feet. Will be quite a feat for a small space, its sharing a 2x4 with another mother slightly shorter.
Will defoliate heavy at the switch, and then again at week 3. Dont care what others do, this is what Ive always done
Thanks for looking

Likes
17
Share

@For2itous
Follow
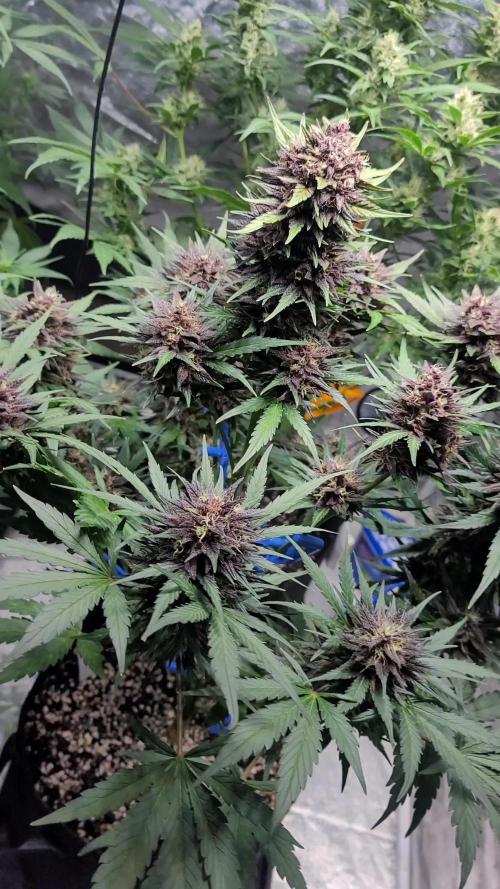
The smell is so amazing at the moment, diesel fruity, with a hint of wood. Cut out a few bud blocking leaves. Stopped giving nutes to the purple and starting to flush as I'm hoping it's done in a week or 2. The other plant definitely is bigger not purple at all and might not change. It actually looks more frosty than the purple but not gonna finish for a while after it. Happy growing 🌴

Likes
5
Share


@GrowPro3500
Follow
She stretchin’ hard and throwin’ out sites 🔥
Got her topped, light defol + lollipopped — airflow’s clean.
Might strip a bit more soon if she bulks up.
Stackin’ up nice so far… let’s see what she doin’ next 💪🌿

Likes
14
Share


@ThatoneAKguy
Follow
Not sure what more I can say that I didn’t say above. Patience, patience,patience! Veg longer with LED because they won’t stretch as much as you anticipate. They are very forgiving to a point and my nutes were organic until the end when I used kool bloom!to increase yield and made them a little unhappy. Cheers to dinafem for the best of the best when it comes to genetics!00

Likes
4
Share

@carlitoshaze44
Follow
30/3/26 🌴
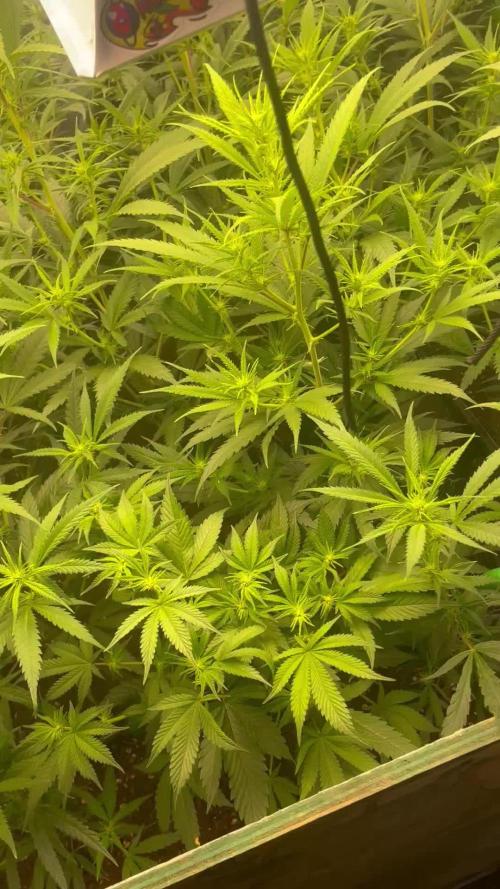
Seguimos añadiendo más bacterias concentradas en polvo para ayudar al desarrollo de más brotes!
Junto con el delta9 solo puedo esperar una producción de flores masivas
Están todas las plantas de una manera increíble con ese rezo que me encuentro en las mañanas antes de salir al curro y verlas todas trabajando a todo trapo!
Esta vez sé que vamos en el camino correcto solo puedo esperar a que siga así!
🥁🥁🥁saludos a todos

Likes
116
Share


@Tropicannibis_Todd
Follow
💩Holy Crap I Was Able To Get Them In The Ground💩
So super happy to be trying this one out , can't wait😝 .....The hope here is to do better then last summers outdoor grow ..👍
It's been a full week and she's doing great , very nice Growth, shes enjoying the sunny days 👌
No problems 😊 so far so good 👍
👉NutriNPK NUTRIENTS USED FOR FEEDING 👈rain water to be used entire growth👈
👉www.nutrinpk.com right now get 10% off using SPRING2022 as the coupon code👈
Likes
32
Share


@Top_Banana
Follow
Intense tropical rain all week so no chance of watering any feed in. Instead I used granular 15-15-15 and she perked right up 😊..
Seen predatory mites (black round bugs) on the plant now and it also appears I have less spidermites which is awesome. I have been brushing them off every morning/evening for months now so nice to finally get some help!
Likes
10
Share

@GERGrowDesigns
Follow
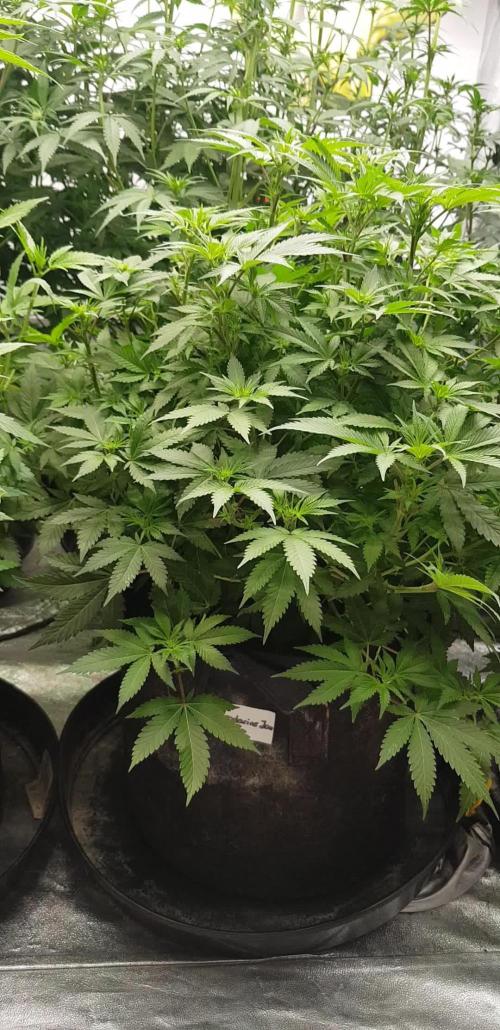
Welcome to Flower Week 2 of Sensi Seeds Mandarine Jam
I'm excited to share my grow journey with you from my
Sensi Seeds Project . It's going to be an incredible ride, full of learning, growing, and connecting with fellow growers from all around the world!
For this Project , I’ve chosen the Feminized Photo Strain Mandarine Jam:
Here’s what I’m working with:
• 🌱 Tent: 120x60x80
• 🧑🌾 Breeder Company: Sensi Seeds
• 💧Strain Info : 20-23%
• ⏳ Flowering Time: 7-8weeks
Processing
Likes
68
Share


@themartian911
Follow
hello some news on vegeation day 29, she has developed well,i put more RJ and BG,
and u can see on one pic the branch that had cracked got in shape now it's cool 💪😬
peace. 😀👍
Likes
10
Share


Likes
34
Share


@marihoochi
Follow
Oct 20 Starting Well Water 0.9EC or 450PPM (Hard Water) @ 19 Degrees
Inputs : EC 2.0. PH 6.4 Temp 19-21 2 Gallons each
Runoffs: EC 2.0, 2.1, 2.2 & 2.3
Goal is to Grow High Brix 12-15% better than the medical grade cannabis to help with a myeloproliferative neoplasm😧 as well as for fun😎.
Any tips, working knowledge or suggestions towards this goal is greatly welcomed and would be played forward.
Just read that if a plant has a BRIX of 12% or higher that some insects won't lunch on it! Loving this plant😀
Flavonoids and Cannaflavins are phytonutrients and along with carotenoids are responsible for colours. They are anti-mutagenic, anti-cancer, antioxidant, antiviral, anti-inflammatory, immuno-protective .. Maybe better than aspirin for inflammation trial is still out😉. Catechins are anti-proliferative, cardio-protective and reduce cholesterol. More medical studies need to be done on this plant😶
Some plants are showing signs of a deficiency. I believe I have locked out calcium. I watered yesterday with 2 Gal each of Dutch Nutrient Diamond which has amino acids, humic and fulvic ,kelp (has b vitamins and amino acids in it). Green Planet Terpinator for the 4% Sulphate of Potash (SOP) or potassium sulfate...I saw a Video with the awesome Dr. Harley Smith and wrote 7 pages of full scape and he mentions to use amino acids to help plants uptake calcium. These products contained them and I had them on hand...hope it helps.

Likes
12
Share

@ThatoneAKguy
Follow
First off I believe the strain name is wrong. It should be just FF03 but I’ll need to check with fastbuds. These are photo period test genetics from fastbuds and the FF stands for fast flower. They are supposed to be done in 50-60 days of flowering. I’m going to let them do their thing for a minimum of 40 days just to be sure they don’t have ruderalis. This is a brand new setup I built with floraflex 6” pot pro using coco and I’ll be testing their nutrients out as well. That being said they are about 10 days old but I’ve been so busy I haven’t had time to get the diary going.
Thanks for looking :)

Likes
9
Share


@NanoLeaf
Follow
End of Week 4
Trying to make sure the soil stays nice and moist to keep the microbes happy and letting the top 3 cm of the topsoil dry before each watering.
.
Turned the wattage up on my ballasts to 600W each.
The ladies have gained some strength and they can handle the extra wattage.
I also performed LST by tucking fan leaves and softly pinching and bending some of the bud sites also used some tie downs and topped here and there whilst keeping the stress at a minimal.
Likes
12
Share


@Medgrow93
Follow
7 Feb - Filled the reservoir with 1.5L each but looks like the water level thing doesn't work.
Update: just watered with the Yucca extract to see how the plants react. Also accidentally broke a branch :(
10 Feb - Top dress tasty flowers + 1L water + yucca
11 Feb - Flipped to 12/12

Likes
14
Share


@GoldenWeedGrower
Follow
D29/V25 - 29/04/23 - Benting
D30/V26 - 30/04/23 - EC 0.9 pH 6.5
D31/V27 - 01/05/23 - LST and Benting
D32/V28 - 02/05/23 - Some other LST
D33/V29 - 03/05/23 - Added water and nutes - EC=0,9 pH=6,5
D34/V30 - 04/05/23 - LST
D35/V31 - 05/05/23 - Nothing