
Likes
Comments
Share


@The_Bearded_Grower
Follow
Day 114 harvest has gone exceedingly well unfortunately the vids of the harvest wont post but i will keep trying thanks for following the grow and i hope to see all of you in the next grow
Update a finally got the vids !!!
well holy crap its a good harvest again for just 1 plant 9 oz baby

Processing
Likes
61
Share


@Cannibalgardens
Follow
Well the people at fastbuds have some amazing dam genetics . These things take stress, heat, water lack of and just general newbie mistakes . The smells coming from my tent are insane that carbon filter is being out in to good use . I never thought I would grow a auto flowering plant but after seeing so much positive feed back I had to try. To anyone looking for a tasty and frosty strain I would recommend the blackberry as she is just my absolute strain to have grown yet. The aroma the frosty buds and the colour (bag appeal is good ) . If I could have done one thing it's given the blooming additives sooner .4 days ago they all got there final nutrients and have begun to flush them . Can't wait to see how these babies look at harvest time .. cheers grow family .

Likes
8
Share


@JamaicanDream_420
Follow
La semana no fue mal, seguimos pero incrementando nutrientes,ya que entramos en la fase de que necesitan comer, he entutorado todas las ramas para proporcionar apoyo,he tenido que hacer lst a una Northern light porque se iva de altura

Likes
37
Share


@TheIceCreamParlour
Follow
Hey guys, it's been a great journey but I've finally hung my Stardawg out to dry! Yesterday was their last day totalling 8 weeks on flower. Realistically they could have benefited from a further week because the lower buds are somewhat underdeveloped but then I would risk losing the preferred sweet high smoke of the top buds. With this being my first attempt it's been a great learner not only for how to care for the plants but also the environment. As soon as these went into flower and started stretching I knew that putting 6 in a 2.4 x 1.2m tent was a bad idea. They just got so big which is the cause of the lower sites not being as good as the top colas. Despite that I'm really happy with the outcome and I'm hoping ive got 30oz+ of real good quality nugs. All of the top colas have turned a gorgeous violet colour too which you can see on the pictures and I absolutely love.
For my next grow I've gone with 6 fastbuds strains which hopefully will go under a scrog.
Check back next week for the harvest and weigh in!

Likes
22
Share

@MyLittleGarden
Follow
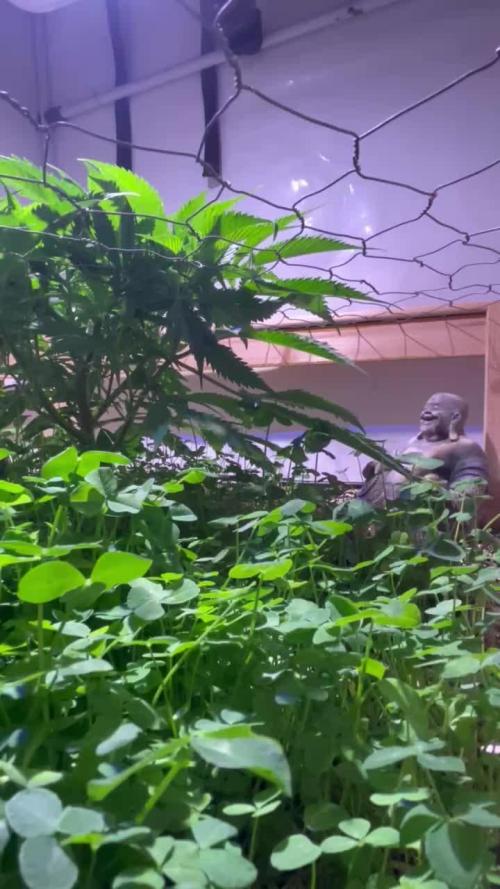
Vegetationswoche 8 - 30.05. – 05.06.2026
Diese Woche lief alles ziemlich entspannt. Einmal leicht entlaubt und die Triebe weiter unters Netz gespannt, damit sich die Utopia Haze langsam über die Fläche verteilt.
Die Pflanze wächst aktuell richtig gut, sieht gesund aus und hat schöne satte grüne Blätter. Der SCROG füllt sich langsam und das Cover Crop verwandelt das Beet mittlerweile in einen kleinen Dschungel.
Ansonsten habe ich nicht viel gemacht und der Pflanze einfach ihren Raum gegeben.
Blumat-System läuft stabil, Klima passt ebenfalls.

Likes
4
Share


@Crusty_Juggler
Follow
60x60 cm tent in a 1920's peek-in-closet
Oversized vent for silence
High power DIY LED
True SoG 12/12 from seed with 15 plants in 2L pots
Watering all plants in bottom tray with 30% of total pot size (10L)
WEEK 1
DAY 1 - Germinated in paper towel
DAY 3 - Planted into pots + Lights ON at 125w
DAY 5 - All plants have broken soil
DAY 7 - Slight stretch - Light at 185w
WEEK 2
Two of the Iced Out are lagging behind, others are on point - I'm trying to push light and nutes to the max.
Extraction fan (AC infinity Cloudline T6) on level 2.
DAY 13 - First full watering (10L) with 20 ml Canna Terra Vega
DAY 14 - Circulation fan turned on (low) during lights on
WEEK 3
Good growth, two Iced Out still lagging
DAY 18 - Light at 225w, Extraction fan on level 3 during lights on
DAY 20 - 2nd watering, 8L with 30ml Vega + Light at 250w
DAY 21 - On point, mostly :) Could've pushed nutes a bit more from the go
WEEK 4
DAY 24 - So far this week I'm just kicking back and watching them do their thing. The two lagging Iced Outs are trying to catch up.
DAY 26 - Watering 10L with 50 ml Vega (one day too late...) + light on 300w (max)
DAY 28 - 4 weeks from popping the seeds, looking good except for the two Iced Outs, one of them is trying to get with the program, the other... Well, some plants are just pricks.


Likes
14
Share


@Tried_and_Tested
Follow
This was a brilliant week for plant growth, with some side branches over doubling their height. I added the ScrOG net at the beginning of the week and began some more intensive training.
The LST only plants I pretty much just continued to bend. The topped & LST'd plants I removed some of the lower bud sites that were not getting any light. I also removed a few awkward fan leaves that could not be tucked away. The addition of the net has helped with this though, as keeping the canopy even is much easier with the support it gives.
I also decided not to try any further cuts on the (half) mainlined auto's. My reasoning is that they have developed strong, independent colas already, so cutting for more would not see much gain. The plants had also begun to flower on the night I went to perform the second cut, and my growing experience tells me not to mess with flowering plants too much so here we are.
I gave the plants one regular watering of 10L pH'd water, and a 20L nutrient mix using the ratios stated above. All volumes were split equally between the plants.
The scrawny looking blue critical has perked up a heck of a lot, so the weakest looking plant is the LST only on GSC. ZThe strongest plants by far are the ones that have been topped and LST'd, closely followed by the mainlined ones. LST only is definitely great, but it is clearly lagging behind the other two techniques.

Likes
3
Share
@4bpratt20
Follow
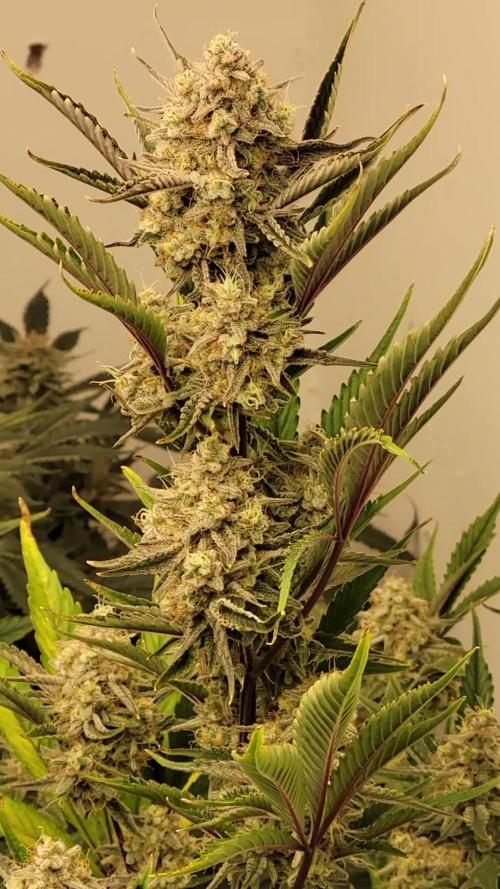
Another 7-14 days and theyll be getting chopped. So far couldnt be more impressed with how they turned out. Smell is absolutely amazing.

Likes
5
Share


@B4niTa
Follow
Z-Up is looking healthy and about to start stretching soon🌿
Doing some daily defoliation just 2–3 leaves a day to let the lower parts get more light☀️
Likes
6
Share


@GanjaDjarin
Follow
Days 15 to 17, varying by plant: My journey of experimentation, aiming to refine and perfect my cannabis cultivation methods, continues. This venture’s ultimate objective is to position myself as a preeminent cannabis cultivator in my locale. As I navigate through the labyrinth of regulatory licensing, I’m conducting a trial run with my seedlings under continuous lighting conditions and a minimal nutrient regime. My primary goal during this phase is to identify any potential hiccups that could hinder the growth process and ultimately impact the productivity of my intended commercial operation.
As I delve deeper into this exploratory phase, I draw invaluable insights from the thriving cannabis community, whose collective wisdom informs my decision-making process. Given my geographical location and available resources, I’ve opted for a strategic shift in my cultivation strategy.
Previously, I’ve been procuring seeds at an average cost of $10 to $22 per seed, with a relatively broad success rate variance, ranging from 70% to 85%. However, an alternative presents itself in the form of local cultivators. These businesses offer cannabis plants aged between 2 to 4 weeks, boasting an impressive variety of over 100 strains.
These juvenile plants are offered at a cost-effective rate: an average of $100 for eight plants. With a success rate hovering between 70% and 95%, these plants offer excellent value. Essentially, I can access pre-grown plants at a substantial discount, in turn significantly boosting my chances of success.
Consequently, I am poised to transition away from growing cannabis from seeds to harvesting. By sourcing my plants from local cultivators, I stand to significantly reduce overhead and production time—an undeniably smart move from a business standpoint. This strategic pivot signifies the end of an era and the exciting beginning of a more efficient and cost-effective chapter in my cannabis cultivation journey.
I am currently outlining a plan to expand my cultivation by acquiring several juvenile plants, which should be happening between July 1st and 3rd. The new additions to my garden will include Acapulco Gold, Gelato, White Truffle, and Runtz. These will be cultivated in harmony with the existing growth, which comprises God’s Gift, Northern Lights, and the final surviving F1 Epsilon.
My primary objective is to establish the most efficient and cost-effective supply chain possible. I aim to achieve this through the use of an off-grid system that runs solely on solar power, which will ensure complete sustainability and renewability. From a business standpoint, this approach is advantageous as it allows me to leverage the growth of high-quality plants that are already in the cultivation phase.
The new plants are expected to arrive in about a week. If the growth rate of the currently cultivated plants doesn’t meet expectations, I’ll be incorporating several of the newly arrived plants into the hydroponics systems. This methodical approach aims to ensure an optimal growth rate and the highest possible yield.
I also wish to address the cannabis grower community directly. I hope that my decision to skip the seed-to-plant stage does not cause any offense. My intentions are simply focused on maximizing quality and output, while minimizing our carbon footprint. I believe this approach is in the best interest of sustainability and efficiency, without compromising on the quality that our community values so highly.
As we proceed with this venture, we’re currently in the phase of collecting equipment and navigating through the licensing process. To help lower our overhead and assist with consulting fees, we would greatly appreciate any donations, especially in terms of lighting equipment. Your support in this endeavor will contribute significantly towards optimizing our operation and will be deeply appreciated.
Disclaimer:
Let it also be known I am completely abiding by all state laws, and do not plan on selling any of this current bud. This is for research to avoid future growing "potholes" in the growing part of the business as we have a very small team. My end goal is to help change the current stigma around cannabis and provide a useful service that can help localize and reduce the inflation on cannabis prices in socal by providing a logical supply system. Again I intend on doing all things through the legal route as there is no need to do other wise given the laws on personal use and growing.


Likes
23
Share


@Chi_K24
Follow
Hey guys, allot happened this week. Mid week on Wednesday I did a major heavy defoliation, she was very bush and allot of internode growth. I clean up everything and allowed more light pen. Also nipped any undesired off growths. Shaping how I want the plant to grow. Basically lollipoping.
As you can see I also started to install 4x 1/2 bamboo sticks to help support the plant once she gets bigger. I had problems last year late into flower and don't want to repeat same mistake.
I also amended the pots with 70/30 ratio of 444 to 284 @ 2tbs/gal.
Iv only water once in the past 7 days with the Aquabak. Not enough data to review the product. We will see.
Other than that we have had plentiful thunderstorms and have not required to water. Thanks to the felt pots, they did not get flooded with the amount of rain we got. Prolly 50-100mm worth of rain.
Thanks for updates. Enjoy the photos and vids
Likes
24
Share


@Daweed83
Follow
Girls look super healthy ! can’t wait for them to grow bigger buds but overall they looking great to me ! 🙏

Likes
112
Share


@PEAKYPLANTERS
Follow
hi to all, masters and beginners!
welcome to a new week of cultivation with the peaky queen
let's cook these flowers a little more to make sure they have more powerful effects and to make the lower part develop well
stay up to date!!
we will begin by removing some of the excess nutrients in the soil and then giving only water on the next round 😎👽

Likes
22
Share


@Slobasian
Follow
Love every plant each one is growing differently stacking different even the visual difference of one strain growin two different ways combined smells of diesel, pez candy and lemons


Likes
9
Share


@Dthebudguy
Follow
Moved into main grow tent with other flowers much cooler environment, on 12 /12 light schedule now and feeding kelp based Dutch science nutrients bloom

Likes
9
Share


@coucoulacreature
Follow
Another really wet week
The small one on the front right is not in a good shape
I tried to add more water and to let it dry more but she didn't change
The buds at in the center of the tent are growing crazy
It does not smell too much (and I have allergies haha)
Likes
43
Share


@MadeInGermany
Follow
Hey everyone 😊.
Today is the last week before the harvest 😍.
I don't even know where to start 😅.
I love this phenotype .
It smells extremely tasty 😃, and this time I'm very curious to see if the pheno tastes better in the aero than the last time it was grown on earth.
I would never have thought that it could taste better on aero than on earth, I always thought it was a Mhytos, but the last run with the Blue Gelato # 41 on aeroponic tasted even more intense than the same pheno on earth 😃.
I'm really looking forward to the harvest, and of course I will bring a harvest update before the last update 😇.
At the end there is also a detailed report 👍.
I wish you all a lot of fun with the update, stay healthy 🙏🏻 and let it grow ☘️🍀
You can buy This Strain at :
www.Zamnesia.com
☝️🏼☝️🏼☝️🏼☝️🏼☝️🏼☝️🏼
Strain
Gelato clone from mother (Zamnesia )
☝️
Genetics: Wedding Cake x Gelato x Gelato 33
👍
Vega lamp: 2 x Todogrow LED CXB3590 COB 55 W
1 x Sanlight S2W 62 W
💡
Flower lamp : 2 x Todogrow LED CXB3590 COB 55 W
1 x Sanlight S2W 62 W
💡 ☝️
Grow Aero System : Growtool 0.8
☝️
Fertilizer:
Canna Aqua Vega A + B , Canna Aqua Flores A + B , Rizotonic, Cannazym, CANNA Boost, Pk 13/14, Canna Cal / Mag, Canna Ph - Grow, Canna Ph-Bloom
☝️🌱
Water:
Osmosis water mixed with normal water (24 hours stale that the chlorine evaporates) to 0.2 EG. Add Cal / Mag to 0.4 Ec Ph with ph- to 5.5 - 5.8
💦 💧

Likes
76
Share


@Roberts
Follow
She has a strong sweet floral smell. This was a great grow with the Agrogardens nutrition under the Medic Grow Mini Sun-2. I didn't have any major growing issues during the grow. Everything looks great, and produced great. Thank you Medic Grow, Agrogardens, and Doctor's Choice. 🤜🏻🤛🏻🌱🌱🌱 the harvest video will be on my YouTube channel. 👍🏻🔥
Thank you grow diaries community for the 👇likes👇, follows, comments, and subscriptions on my YouTube channel👇. ❄️🌱🍻
Happy Growing 🌱🌱🌱
https://youtube.com/channel/UCAhN7yRzWLpcaRHhMIQ7X4g

Likes
56
Share

@PEAKYPLANTERS
Follow
welcome back, brothers of the old weed! we apologize for the interruption of services, but we went for a swim in the sea to recover stronger than before!our sprouts seem to be very happy and are gaining weight very well! I hope you enjoy our content! a kiss to all, see you soon
Likes
27
Share


@adam_pawloski87
Follow
First off I just want to say for some reason it’s not letting me change the right temperatures on my diaries ! Each time when I put it in they stay at 50. My day air stays 75 degrees an , night degrees is 70 !
Today is day 58 for all these ladies! This week has been really great ! Girls really progressed a lot , especially for one the Forbiddin Runtz, looks like is gonna finish up in a week or 2 ! Other then that they are coming along well! Keep those eyes peeled for next week! Cheers😶🌫️💨💨💨💨