
Likes
Comments
Share


@wascanna
Follow
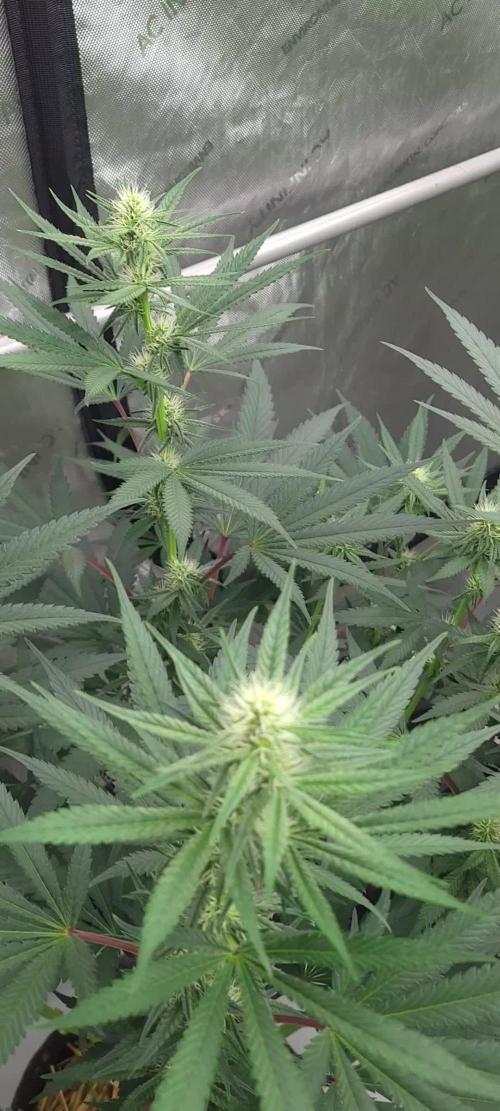
👹 Oni Seed Co.
🍭 Dub Trop BX1 // Dubble Trop x Tropicanna Cookie F1
🍓 Straw-Picanna // Strawberry Bananna x Tropicanna Cookies
🌿 Tropicanna Kush // SFV OG x Triangle Kush
🔥 Sunburn // TKT (Triangle Kush x Tangie) x Tropicanna Cookies
🍁 BLOOM WEEK 4
📅 Day 1
- Still drinking lots.
📅 Day 2
- Top dressed 3 tbsp of SW-Bloom each.
📅 Day 3
- 1 Gal/day each. Think I'll hold the PAR at this level.
📅 Day 4
📅 Day 5
📅 Day 6
📅 Day 7

Likes
56
Share


@Wicked_Stix
Follow
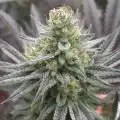
First week of flower is over and the stretch is on. Already started crushing and bending some branches on the taller plants to keep them as short as possible. They are really starting to fill out and the sour sorbet was fast to start popping pistils. I started some defoliation and cleaned up a few of the bottom branches. They need some more work over the next few days. I started them on a little maxibloom. I will increase it as I lower the maxigro over the next couple weeks. No water change this week and the ph is holding steady with no adjustments. Nutrients pumping 24 hours a day. Should see some nice fuzzy tops developing by the end of next week. I got some clones rooting from all but the twisted helix. They will be getting dusted with sugar cane pollen.


Likes
28
Share


@Pogosvk
Follow
dia 58 5 semana de floracion ,viendo otros cultivos de la gente de la cepa quick one a 16 horas me dan ganas de llorar al ver mis plantas q si saco15 g de cada una flipo.... una pena pero bueno y otro problema q tengo es que la feminizada la kritical gb esta estirando q flipas y mi armario solo tiene 1 . 40 de alto y creo q la voy a tener q sacar a la calle y se va a poner enorme y mis vecino van a flipar no se estoy to rayao gente ...
dia 59 los cogollos van engordando de momento aceptan bien la comida
DIA 60 siguen engordando de momento tienen un verde bonito sin deficit espero q todo siga asi
DIA 62 todo sigue bien la kritical gb sigue estirando mazo por dia y creando flores satelite y las quick one juntando cogollos en la cola principal debido al poko espacio del indoor los satelites intentan engordar pero van lentos sigo esperanzado y dandolas comidaaaaa jajajaj
dia 64 y siguen engordando tiene una pinta q flipas q ganas de fumar no se cuanto les quedara yo las miro y mucho pelo naranja pero los terpenos no consigo una foto clara ( no tengo pasta pa una lupa ahora mismo jhajjaja) asi que ando un poko perdido pero a las auto yo las echo un par de semanas mas creo
dia 70 por mas q las doy de comer no noto diferencia de crecimiento creo q ya todo llego a su fin en las quick one las dare de comer una semana mas y las pasare ya solo agua para q deskanses se limpien y al secadero ejjejeejje la kritical le quedan 3 semanas minimo

Likes
19
Share


@GoldenWeedGrower
Follow
Legend
Timestamp: 📅
EC - pH: ⚗️
Temp - Hum: 🌡️
Water: 🌊
Food: 🍗
pH Correction: 💧
Actions: 💼
Thoughts: 🧠
Events: 🚀
Media: 🎬
D: DAY, G: GERMINATION, V: VEGETATIVE, B: BLOOMING, R: RIPENING, D: DRYING, C: CURING
________________________________
📅 D63/B01 - 17/01/24
⚗️ EC: 0.1 pH: 7.4
🌡️ T: 23 °C H: 58%
🌊 Flushing
🍗
💧
💼 Added CO2 dispenser system
🧠
🚀
🎬 Added 1 pic
________________________________
📅 D64/B02 - 18/01/24
⚗️ EC: 0.9 pH: 7.2
🌡️ T: 21 °C H: 53%
🌊 Res changed
🍗 Added CalMag - Bloom A-B - B-52 - Bud Candy - Rhino Skin - Voodo Juice
💧
🧠 pH is still too high, I'm evaluating to use pH-
🚀
🎬 Added Timelapse video
________________________________
📅 D65/B03 - 19/01/24
⚗️ EC: 0.8 pH: 7.4
🌡️ T: 20 °C H: 45%
🌊 Added a little bit of pH-
🍗
💧
💼 LST
🧠
🚀
🎬 Added Timelapse video and 1 pic
______________________
📅 D66/B04 - 20/01/24
⚗️ EC: 0.8 pH: 7.4
🌡️ T: 21 °C H: 51%
🌊
🍗
💼 LST
🧠
🚀
🎬 Added Timelapse video
________________________________
📅 D67/B05 - 21/01/24
⚗️ EC: 1.2 pH: 7.4
🌡️ T: 21 °C H: 50%
🌊 Added 6L
🍗 Added Calmag - Bloom A-B - B52 - Bud Candy
💧
💼
🧠
🚀
🎬 Added Timelapse video and 2 pics
________________________________
📅 D68/B06 - 22/01/24
⚗️ EC: 1.2 pH: 5.9
🌡️ T: 21 °C H: 51%
🌊
🍗
💧 Added pH-
💼
🧠
🚀 As I would join this contest : https://growdiaries.com/giveaways/TrolMaster-Tent-X-Ultimate-Grow-Challenge I asked for a Tent-X device and they accepted to borrow it to me until the contest ends.
🎬 Added 1 pic
________________________________
📅 D69/B07 - 23/01/24
⚗️ EC: 1.2 pH: 5.2
🌡️ T: 22 °C H: 51%
🌊 Added 4L of water
🍗 Added Calmag - Big Bud - B52 - Bud Candy
💧
💼
🧠 pH is finally stable on the lower side (hopefully)
🚀
🎬 Added 4 pics

Likes
Comments
Share
@Thegrungegsx11
Follow
Day 19 of flower. I think we're done with the stretch. For the most part anyway. The Alien Icicle didn't really stretch all that much. The Guillotine Gas had a good stretch and is stacking nicely. Things are getting good and I'm anxious for these flowers. 😁 They have both been topped once. I don't think I mentioned that before.


Likes
7
Share


@Coughy
Follow
Now in veg tent for next 2 months.
TOPPING and FIMMING and LST and HST and more STUFFS coming soon.
First topping happened today already.
PPM 850
pH 6.0

Likes
20
Share

@CampExotic
Follow
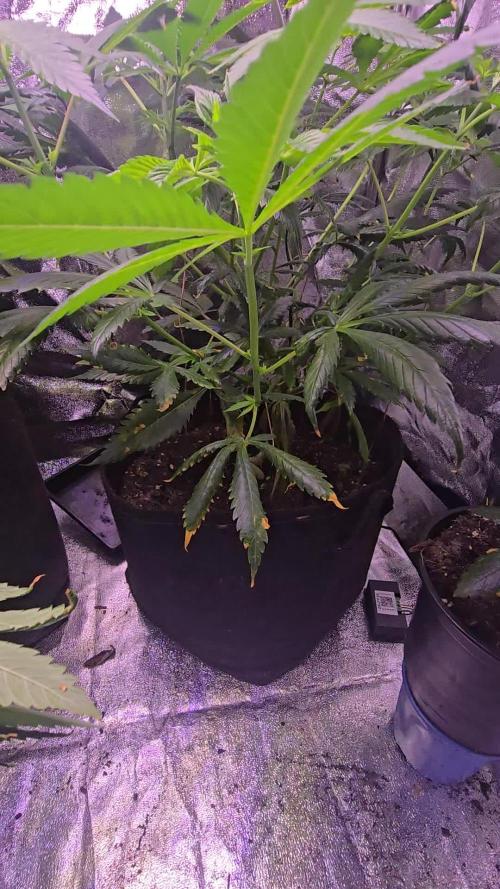
Nice fade coming. Looks kinda alien like and not the traditional buds. Maybe the light is too strong?
Likes
37
Share


@nonick123
Follow
Día 35 (26/05) Velocidad de crucero ON! Pequeñas pero preciosas! 😍
Día 36 (27/05) Riego con 500 ml H2O RO
Las señoritas siguen teniendo un color vibrante!
Día 37 (28/05) Se empieza a extender el color morado por las incipientes flores y las hojas 😍
Día 38 (29/05) Riego con 500 ml H2O RO
Empezamos a regar cada 2 días. Hace bastante calor por aquí! 30 - 32 ºC en la horas centrales del día
Día 39 (30/05) N/A
Día 40 (31/05) Riego con 500 ml H2O RO
Día 41 (01/06) Riego con 750 ml H2O RO solo la planta grande!
Hace muchísimo calor!
🚀 FastBuds 15% DISCOUNT code "NONICK" 2fast4buds.com @fastbuds.official
💦 BioTabs 15% DISCOUNT code "GDBT420" biotabs.nl/en/shop/ @biotabs_official
🌱Substrate PRO-MIX HP BACILLUS + MYCORRHIZAE @promixmitch @promixgrowers_unfiltered

Likes
59
Share

@wolfvb
Follow
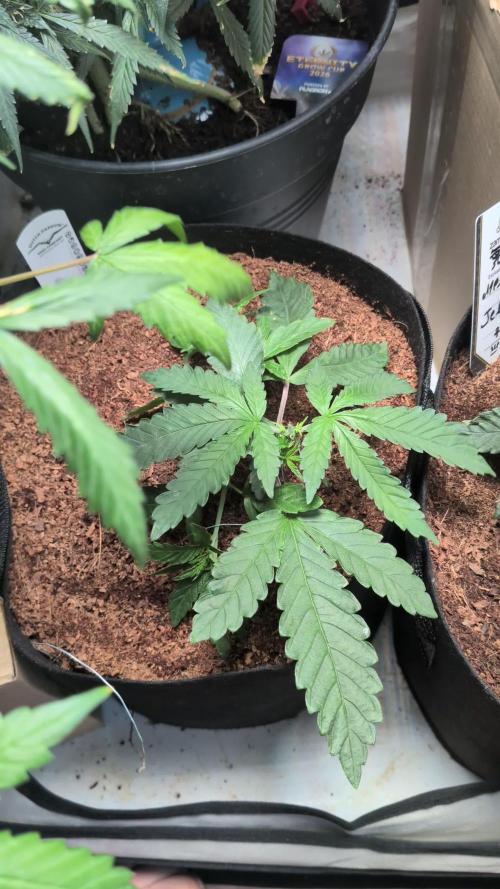
🐞 Week 4 Update: LST, A Little Helper, and a Funky Mutation!
🌿 Week Update: Shaping her up! 🐞
Welcome to Week 4! The plant is growing nicely and we are officially starting to shape her up. I had a little ladybug patrolling the coco and hanging out on the leaves always nice to have some natural pest control on duty! But the most interesting thing this week is a strange little leaf mutation on one of the new growths.
The Details:
Development:
She is vegging well and taking to the substrate nicely. The roots must be getting well established because the top growth is really starting to push out. There is a really funky leaf mutation happening on one side (check the close-up pics!) where the leaf looks twisted and almost double-layered. It doesn't seem to be slowing her down though, just a cool genetic quirk!
Structure:
I started some LST (Low Stress Training) this week! Using some wire ties to gently bend the main stem down and expose those lower nodes to the light. The goal is to keep the canopy nice and even before she gets too tall. She took the bending like a champ and is already turning her top back up towards the light.
Health:
Overall health is great! The leaves are holding a beautiful deep green, no signs of nutrient burn or deficiencies so far. The ladybug friend 🐞 is a very welcome sight to keep any unwanted pests away from the tent. I'm keeping a close eye on the mutated leaf to see what it does, but otherwise, she's perfectly healthy and happy.
Next Steps:
I'll continue to adjust the LST ties as she stretches and keep monitoring the moisture levels. I'll probably up the feed slightly next week if she keeps responding this well. Let's see how this mutation develops!
Happy Growing !!! 🥦☀️
Likes
19
Share


@Paultemp
Follow
Hi all! 👊😊
Another week started ohh yeaahhh
I do foliar 3 times this week and i see pistil white change in orange
Smell very good pine and citrus :)

Likes
37
Share


@DogDoctorOfficial
Follow
🌱 Week 10 Veg – The Final Stretch Before Flowering! 🌱
This might just be the last week of veg, and what a journey it’s been! The garden is thriving, each plant showing off its unique structure and character. But the big news this week? A nutrient program switch! 💧✨
I’ve transitioned from the Aptus Holland Organic-Mineral program to the Clean program, setting them up for a smooth ride into flower. This move is all about prepping the plants for peak efficiency in their next phase—getting them used to their long-term diet early.
💡 So, what’s in the mix now? Let’s break it down:
🔹 Regulator – The foundation. This ensures optimal nutrient uptake, strengthens cell walls, and helps plants handle environmental stress like a champ. Plus, it stabilizes pH from the get-go, which is why it always goes in first.
🔹 System Clean – Think of this as a reset button for the root zone. Keeps irrigation lines clear, prevents biofilm buildup, and ensures nutrients are delivered without obstruction. A must-have for maintaining a pristine growing environment.
🔹 RO Water Conditioner – With a mix of rainwater and dehumidifier-collected water, this ensures the right balance of minerals while neutralizing any potential issues. Hydration is key, but quality hydration is the real game-changer.
🔹 All-In-One Liquid – This is where the power punch comes in. A full-spectrum nutrient solution that keeps everything in balance, providing essential elements for vigorous growth as we near the flip.
💭 Why switch now?
The pellets that were feeding the soil are officially depleted, meaning the Clean program takes over full-time. This ensures a seamless transition into flower without any shocks or deficiencies. Smart planning makes for stronger plants and better yields! 🌿💪
🚀 Other highlights this week:
• One of the plants is getting some light bondage training—a little stress now means big rewards later. Let’s just hope she’s a female and not a sneaky male in disguise! 🤞
• Every plant is looking unique and fantastic, showing off their potential.
🌟 Next Up?
If all goes to plan, flower time is coming! Get ready for spectacular structure, stretching, and the next evolution of these beauties!
Big love to the community, growers, supporters, haters, and legends—we keep pushing forward! 🙌💚
Genetics - Mentha De Croco
https://terpyz.eu/products/menta-de-croco-fern-type?_pos=1&_sid=e9237cbcb&_ss=r
DogDoctorOfficial Discount Codes @ terpyz.eu - DOCTOR 15% off
Nutrition - @aptusholland
https://aptus-holland.com/
Led Power @ F.O.G. Future Of Grow
https://www.thefuturofgrow.com/en/online-store/BLACK-SERIES-600-p489093171
Controls @ TrolMaster
https://www.trolmaster.eu/tent-x
As always thank you all for stopping by, for the love and for it all , this journey of mine wold just not be the same without you guys, the love and support is very much appreciloved and i fell honored with you all in my life
With true love comes happiness Always believe in your self and always do things expecting nothing and with an open heart , be a giver and the universe will give back to you in ways you could not even imagine so
As always, this is shared for educational purposes, aiming to spread understanding and appreciation for this plant. The journey with nature is one of discovery, creativity, and respect. Let’s celebrate it responsibly and continue to learn and grow together!
Growers Love To you All 💚

Likes
1
Share

@Dendegrow
Follow
🍬 Sweet Mandarine Skittles – Week 6 Update 🌿
This beauty is really starting to shine! ✨ The Sweet Mandarine Skittles has filled out nicely over the last days, with strong branching and a sweet citrus aroma already in the air 🍊🌸.
She’s showing her candy side now – colorful vibes and a really healthy look 🌈💚. Week 6 feels like the turning point where everything comes together beautifully.
Can’t wait to see those buds fatten up in the coming weeks 🔥🌱.
Follow along if you want to catch the sweetest rainbow in the garden 🌈🍬.
---
🍬 Sweet Mandarine Skittles – Woche 6 Update 🌿
Diese Schönheit fängt jetzt richtig an zu glänzen! ✨ Die Sweet Mandarine Skittles hat sich in den letzten Tagen super entwickelt – kräftige Verzweigungen und schon ein zarter Citrusduft in der Luft 🍊🌸.
Man sieht jetzt schon ihren „Candy-Charakter“ – bunte Vibes und ein rundum gesunder Look 🌈💚. Woche 6 ist echt ein Wendepunkt, wo alles perfekt zusammenkommt.
Ich freue mich riesig auf die nächsten Wochen, wenn die Buds anfangen richtig aufzublühen 🔥🌱.
Bleibt dabei, wenn ihr das süßeste Rainbow im Garten erleben wollt 🌈🍬.


Likes
4
Share


@CannaChris
Follow
Week5 one plant is doing pretty good. Decided to go for topping then bending, I also cut the lowest branches. The other plant seems to have had too much heat stress and have not grown much..
Especially two of them are suffering so I put them back inside and trying now to make them recover by providing them some humidity with plastic bottles, should work hopefully

Likes
3
Share


@MicroHidroGrow
Follow
Día 36.
Estamos en 6ta semana. Los esquejes se atrasaron debido a que han sido días muy fríos y no he logrado enraizarlos. Decidí poner el extractor de aire junto con la bomba de aire, así solamente se prende 15 minutos cada hora. Así estoy logrando temperaturas mayores a 24°C en el indoor y así voy a lograr el enraizado. La planta ya tiene un tamaño que ocupa casi todo el indoor. Pero lo importante es que la voy guiando y ya estoy proyectando como va a ir cada rama. El tamaño va a exceder lo que esperaba, pero aún así creo que si logro lo que tengo en mente, voy a sacar muy buenos resultados. Igual no me voy a arriesgar demasiado, así que si contando 10 días desde ahora, no logro que los esquejes enraicen, voy a pasar la madre a floración sola. Cómo pueden ver, las ramas están bastante gruesas, y el la ramificaciones van ganando su lugar cada una. Las raíces son demasiado grandes, aunque sé que voy a poder poner la planta en el sistema de arriba igual, aunque me voy a tener que ayudar de algo para meterlas. Es importante no utilizar las manos, ya que se pueden transmitir muchos hongos.
Voy a seguir actualizando e ir viendo que pasa. Pero ya estamos en los últimos días de crecimiento, haya o no esquejes. Incluso puede que ya pase la planta al indoor de arriba para darle mayor libertad de crecimiento. Esto me va a servir para tlmar en cuenta en la próxima camada que se vendrá. La idea de esto es hacer las cosas rápido, y no en gran tamaño. Pero siendo que ya estoy en el baile, no me queda otra que bailar.
Día 40
Los esquejes no estaban enraizando, así que decidí cambiarlos de lugar y los puse arriba de la luz, donde les da calor y luz tenue. Espero que ahora si agarren.
Y hoy fue el gran día, pasé la planta madre al módulo de arriba. Pero lo voy a dejar una semana más creciendo. De esa forma veo si los esquejes llegan a agarrar a tiempo. Y además tuve un problema en el trasplante. Primero que la planta se hizo más grande que lo esperado, y la raíz también. Cuando la pasé, hubo contacto de la raiz con prácticamente todo lo que había cerca. Sumado a que se enredó en el oxigenador, así que quedó una pidra difusora en la raíz.
Dado el alto riesgo de haberla contaminado con algún hongo, le puse una solución de agua con agua oxigenada, recirculando continuamente, para lavar las raices y de paso bajar el stress de teansplante. Mañana veremos cómo arranca el día.
En el aprendizaje me llevo que en la madre, es mejor hacer un corte en el primer nudo, o dejar las ramas del segundo y quitar las del primero. Y así que queden sólo dos ramas, para luego dejar a los esquejes en el medio. Eso planeo hacer con la próxima variedad.
Entre tanto ahora sólo me preocupa que la raíz no se haya contaminado en el traspaso. Ya en 8 días estaré pasando a floración si no hay esquejes. Si llegan a agarrar, habrá que dar unos días de crecimiento hasta que alcancen a la madre en altura. Pero ya está todo en definición. Ahora sólo queda esperar y seguir guiando a la planta. Ya tengo ganas de poner la próxima, pero falta bastante para eso. Tengo 10 semanas de flora, así que recién en 5 semanas voy a poner la nueva madre.
Likes
14
Share


Likes
9
Share


@DeepRootsGrowTrees
Follow
KICKASS AUTO by KANNABIA
Week #13 Overall
Week #7 Flower
This week it got over 100° outside so it kinda took a little toll on her but she's still producing buds still growing and getting dense. Stay Growing!!
Kannabia.com KICKASS AUTO

Likes
29
Share


@Prilyfe13
Follow
April 26, 2024 Day 71
This week we focus on watering and nutrients. A secondary focus will be on a changing environment and light intensity changes.
Both ladies had their reservoirs cleaned out and have fresh nutrients. It's also the start of late flower, so things will be changing with the nutrient dosage. I'll most likely keep the nutrients the same for this week, but I may start to drop the dosage a little for each watering until the flush period starts. So depending on how they look, I may change the dosage for this week's last watering. I'll be bringing it down 25%. So 8 ml goes down to 6 ml and 4 ml goes down to 3 ml. I'll change this for the next 2 weeks until it's just plain water for 2 waterings and then Flawless Finish. It should play out quite well.
The lighting will also be changing a bit this week. I'll be dropping the DLI to 43 mol/m²/d mid week and will then lower it to 40 mol/m²/d beginning next week. I'll then drop it to 36 mol/m²/d the week after and finally 32 mol/m²/d for the final week.
The environment will also be dropped from 77° to 75° during the day and from 68° to 65° at night. The humidity is solid at 47% and I think that's the best I can do for the rest of the grow.
Both plants look great. They have tons of orange pistils and tons of trichomes. I'll be taking trichome pics every few days. One for each plant. I feel like it'll be a better comparison than daily pics. For the trichomes anyway. Anyway, they both still have time to swell their buds more. I'm not expecting big buds from these two. Medium sized maybe, but definitely not big. They just don't look like they will get that big.
Grow System Environment:
Temp: 74.2°
RH: 47.7%
VPD: 1.49 kPa
April 27, 2024
Almost all of the pistils are orange now on both plants, but the buds are still swelling. Interesting. I'll be taking trichome pics today at some point. I was going to yesterday, but got distracted with video games. Whoops. There's tons of trichomes. They are definitely frosty and continuing to get frostier.
Nothing much to do today. Each plant got an inspection and passed with flying colors. There were some loose tie downs as well. Mostly from the crowding in the tent. So those got removed.
Tropicana Cookies is looking super good now with her buds being everywhere and them swelling up finally. She could stand to get a few leaves taken off, but I'd rather just leave it alone now. No sense in undue stress.
Tropicana C also looks great. She has to be the biggest of the two. Not the tallest, but definitely the most girthy. Lots of buds and also starting to finally swell up.
I'd also like to mention the colors coming from both plants where the buds are nearly done. Lots of purple hues. You can't really see them from the small sugar leaves and frost covering it. But it's there.
The lighting as I said will stay the same for the first half of this week. Then I'll drop it. However, I may leave it to next week. We shall see.
The environment is looking pretty good. The temp is a bit high currently at 77.8°. the humidity is still at 47%, but I managed to get it down to 44% for most of yesterday afternoon.
The DLI is a bit high today at 1.66 kPa. Nothing a small adjustment won't fix.
Grow System Environment:
Temp: 74.5°
RH: 45.7%
VPD: 1.55 kPa
April 28, 2024
Not a lot going on today. I'll be refilling the reservoirs later this afternoon. That's about it.
I have a bit of a concern. Both ladies have really small buds, and I think they may have stopped swelling. I'm wondering if I have nutrient lockout or something. They are showing signs of stress. So I've already started dropping the nutrients down by cutting Overdrive in half as it seemed to have been the original cause of the nutrient burn. And the next watering will have all nutrients cut in half. Next week I'll drop it to 25% and leave it til flush, which may be next week anyway. We shall see.
Other than that, both plants are covered in trichomes. They smell wonderful as well. Like orange and some other light citrus and gas. Smells super good as well as sweet. There is also a hint of cookies.
The DLI will be dropped to 40 mol/m²/d tomorrow. I'm assuming it will only be a 10% drop on power, so I shouldn't lose much penetration.
The environment is off today. It's warm and super humid with bouts of rain. So naturally, the tent environment is all wonky. The temp is at 75.5° with the humidity way up at 60%. I turned the AC on and now it's just a matter of tweaking and waiting. I may have to crank it and sacrifice some temp for lower humidity. It should be fine that way, but the humidity is definitely too high.
Update: I ended up adding about a half gallon of plain water to both reservoirs. Just Incase I have nutrient lockout or something. They should go through that by tomorrow afternoon. Maybe late evening.
Grow System Environment:
Temp: 75.6°
RH: 52.8%
VPD: 1.39 kPa
April 29, 2024
No watering today. The plants are both still going through the half gallon of plain water from yesterday. Let's hope it clears up the nutrient burn.
They look great with their trichome coverage. The only thing I'm pretty disappointed about is the size of the buds for both plants. I wonder what I did wrong. I'm guessing the introduction to Overdrive was about 2 weeks too early. Removing the Big Bud was also a major mistake I think. It should have stayed in the mix for 2 more weeks. Lesson learned, make adjustments to any feeding schedule to match the plants growth stage. Maybe I'll ask that question.
The lighting was changed today. I dropped the power level down to 70% to get a DLI of 40 mol/m²/d. It's not perfect as the plants do not have level canopies, so some of the spots go all the way up to 45 mol/m²/d still. It's not a bad thing I think. The DLI was a bit high for those tops anyway.
The environment is still wonky. The temp is fine at 76° to 77°. A bit high from what I want, but not out of range. I'd still like it down to 75° or 74°. The humidity is what's out of whack at 60% and it doesn't seem to want to drop. I have a heater on to clear out the room humidity and a dehumidifier in the tent working it's hardest. Which isn't very hard. I believe the fans are going on it. It may be time for another one. Something the same size but more powerful.
Grow System Environment:
Temp: 74.2°
RH: 59.8%
VPD: 1.15 kPa
April 30, 2024
Watering day. Both ladies got their full gallon of nutrients. I'm going to cut it when it drains down some with plain water.
Both plants look good even though they have small buds. They are everywhere and seem pretty dense. So it's just a matter of time. Maybe another 2 weeks. Maybe less. Hopefully less. The nutrient burn was an issue, but now I think it's good. I dropped the Overdrive significantly, but I think I can plainly say, I have ruined my yield for these two plants. Lesson learned. Plain water at the first signs of stress.
The scent is super strong now and smells like oranges and candy. Or something like that. All I know is that it smells great.
The lighting is pretty good. No reaching yet, so it's definitely not too low. I may just leave it here for the rest of the grow. I read that lights don't need to be dimmed for autoflowers. It could be right. I've never dimmed the lights before. We shall see I guess.
The environment is still wonky with the humidity being high still at 57%. I can control the temp pretty easily, but the humidity will not budge. I'll keep trying.
Grow System Environment:
Temp: 75.5°
RH: 57.0%
VPD: 1.26 kPa
May 1, 2024
Nothing to do today with these two. No watering needed, no light changes, nothing.
I pulled them out, tooky pictures and checked them over. No issues pest or fungus or anything.
The only issue I have is the nutrient burn. Some of the leaves are getting yellow spots on them and frankly I have no idea what to do here. Keep the nutrients the same? Cut the nutrients down some over the next week or 2? Go with plain water? Not too sure. I still see many stresses. And I think that is the cause of my tiny buds. It seems that I did take the Big Bud out too early and added the Overdrive way too soon. Oops. Lesson learned with this run. I don't think it's a matter of an over abundance of nutrients, but the wrong ones at the wrong time when the plants weren't ready for it. I'm guessing that's what has happened here.
Both ladies smell fantastic. Super sweet and strong. Crisp, and not pungent. Refreshing even.
Tropicana Cookies has some pretty hard buds and lots of them. Of course, larger buds are preferred, but as long as these come out fire, I'll be happy. Her branches also seem to be holding up nicely.
Tropicana C on the other hand has weaker branches and the tallest top is starting to lean pretty heavily. A great sign for bud density.
Both plants have phenomenal trichome production. It's getting better everyday. Tons of clear with a mix of cloudy and amber, definitely not ready yet, but soon I think. Very soon. Maybe another week and a half? Maybe 2.
As I said before, I didn't change the lighting at all. It's current DLI is 40 mol/m²/d through most of the central canopy. The outside of the canopy is roughly 38 mol/m²/d. So it's all good now.
The environment is still wonky with the humidity being at 59%. It's maddening. The room is 49% and the temp is fine at 75°. I'll sacrifice up to 77° if I can get the humidity around 50%. Not ideal for this stage in life, but it will have to do of I can even get it there. I do have a large dehumidifier, but it doesn't work right. When the compressor shuts off, it blows are that humid air right back into the room. I need a new one.
Grow System Environment:
Temp: 75.2°
RH: 56.1%
VPD: 1.27 kPa
May 2, 2024
Not a lot going on today. No watering, no trimming, nothing.
I did change the light last night to 80% power.
Tropicana Cookies looks great! She has purple coming out all over her buds. No fade yet though. I can assume that will be coming through in the next week or so. Her tops buds are getting slightly fatter and heavier than before. I hope it will continue to do so over the next 2 weeks.
Tropicana C is slightly behind. She doesn't have nearly as many orange pistils and the purple is just starting to come through. However, she has tons of trichomes covering everything top to bottom. Her buds are about the same size as her sister, so they may end up swelling bigger than Tropicana Cookies when all is said and done. We shall see.
As I said earlier in today's post, I changed the light power from 70% back up to 80%. I think I dropped it too early and need to adjust it accordingly. I'll drop it again in a week or so. Maybe less. Now the DLI is at 43 mol/m²/d inside and 40 mol/m²/d on the outside.
The environment is still off, but not as much. The humidity continues to be high, but only at 55% verses the 60% it's been stuck at for the last few days. The temp is fine at 74.5°, but I think I can increase that a bit and hopefully drop the humidity down in turn.
Grow System Environment:
Temp: 73.7°
RH: 55.2%
VPD: 1.24 kPa
Likes
11
Share


@Andres
Follow
she seems happy outdoors .. without any problem just pat patience ... nothing more information for now......
Likes
24
Share


@eh_eh_eh_buds
Follow
so were almost at harvest, have begun flushing this last week and hopefully will be chopping beginning of next week, then the cure... CAN NOT WAIT TO BUST UP SOME OF THESE NUGS AND PACK THEM IN THE BON 😆