
Likes
Comments
Share


@JohnnyGrower
Follow
Es una buena cepa medicinal, tiene grandes niveles de cbd y casi nada de thc lo cual es ideal en algunas enfermedades, en la epilepsia es mas efectivo que los cogollos contengan thc tambien pero sin superar el ratio 1:1 thc cbd.. pronto iniciare un seguimiento de alguna variedad ratio 2:1 cbd thc amigos


Likes
114
Share

@squalino
Follow
🌿 Journal de Culture : Cherry Cola (Auto) - Plante #2
Date : 20/04/2026
Âge : 88 jours
taille: 43 cm
Phase : Fin de floraison / Début du rinçage
⛺ Environnement de la tente
Température : 25°C constante.
Humidité : Maintenue à 50% pour éviter tout risque de moisissure sur les têtes denses.
Éclairage : Pure LED toujours à 100%, maintenue à 60 cm de la canopée.
📏 État de la plante
Taille : Elle a pris 1 cm depuis la dernière fois, elle culmine donc à 43 cm. Elle est restée bien compacte sous le filet.
Nutrition :
Aujourd'hui, elle a reçu son dernier apport nutritif : 4 ml de PK dilués dans 1 litre d'eau avec un pH de 6,3. C'est le dernier "boost" avant de passer à l'eau claire.
Action :
J'ai décidé qu'elle partait en rinçage dès maintenant.
📝 Descriptif et observations
La plante est toujours aussi magnifique. Visuellement, on sent qu'elle arrive au bout de son voyage :
Sénescence :
Les grandes feuilles nourricières commencent à bien jaunir, signe qu'elle puise dans ses dernières réserves pour gonfler ses fleurs.
Trichomes et Résine :
Elle est littéralement recouverte d'une couche de résine collante et brillante qui lui donne un aspect givré incroyable.
Têtes :
Les buds sont bien formés et compacts. Les pistils ont bien bruni sur l'ensemble de la canopée.
Odeur :
C'est maintenant très puissant dans la tente. On sent une odeur forte, à la fois très sucrée et épicée. C'est beaucoup plus complexe que la première plante.
Le choix de passer au rinçage maintenant est judicieux. Avec le jaunissement prononcé des feuilles et la maturité visible des têtes ( trichomesmajoritairementlaiteux .trèspeux d'ambre), deux semaines à l'eau claire vont lui permettre de bien "se nettoyer" et de sublimer ses arômes sucrés et épicés. Contrairement à la plante #1 qui m'avait un peu déçu en production, celle-ci semble avoir des têtes plus denses et mieux réparties sur la structure.
La qualité de la résine sur cette génétique est vraiment son point fort, elle brille énormément sous la LED.
On patiente maintenant jusqu'au cut final !
merci a tous
MUSIQUE DIAPO FAST BUD

Likes
19
Share


@valiotoro
Follow
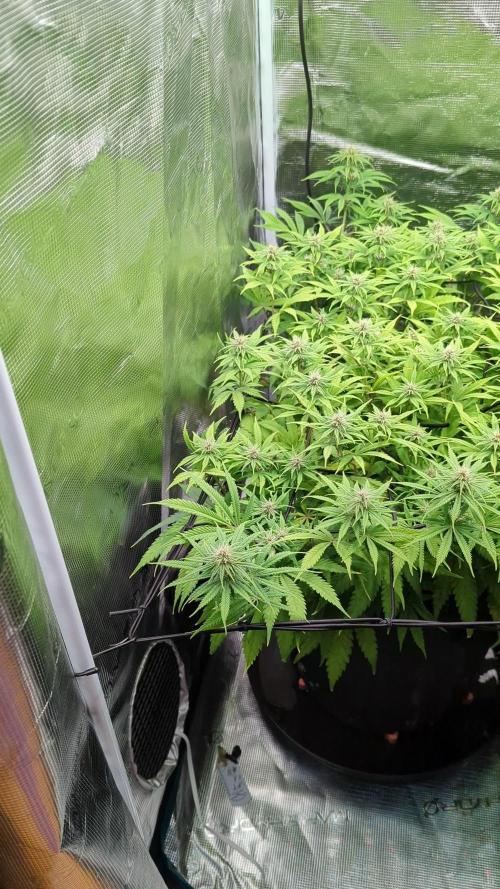
Hello everyone week 3 of flower has passed for this Cherry Cola auto 🍒
For the feeding schedule i stopped feeding Power Roots and Pure Zym and started feeding Green Sensation 0,5/l
Mars hydro FC-E6500 75%
have a great day and wish you all happy growing 😎👨🌾🏻
Likes
60
Share


@MrPlow
Follow
Hey everybody. Day 41. I have been really busy, the garden has gotten out of hands. Tomorrow I will start flowering stage. Just need to go get the flowering nutes. Still havent gotten the hydroguard, my creditcard is locked so cant order shit now. But they still growing and not dead so I take it so that they can still be saved. Hope that they wont freak at the lights swap and scrog training. All the best, yours truely, MrPlow!
Day 42. Today was a BUSY day. It was the last chance to clean the rez. I was a bit worried to put the net over them because it means there will not be a chance to clean them in any case, and there has been a battle with the algae and other root issues but if I want to grow them in scrog then now it is time. And I am a Scrog guy all the way, balls deep. And the shitty thing is that I still dont have the Hydroguard, BUT I bought every freaking root product Advanced Nutriets has ever made and added them to rez, hope that can keep them alive another 60 days. It has to work, I like the Scrog style so much im willing to take the risk of not cleaning the buckets until harvest. I think its a must when growing weed, if you are a commercial grower, it gives you the possibility to use every inch of the tent efficiently.
And today was the time to start the flower phase as well. 42 down, 60 to go. ;) thanks for reading. Please leave a comment if you got improvement ideas or advices or any questions! Have a great day fellas! Plow! ;)

Likes
10
Share


@Gruschel_Muschel
Follow
Purple Punch am 26.12.2024
Tag14 / 11.01.2025
Die Pflanze ist kompakt mit saftigen Blätter. Habe sie mir unter der Lupe angeschaut, es gibt nichts was mir Sorge bereitet.

Likes
74
Share


@Hou_Stone
Follow
👨🚀🍀❄️
👋C'est parti, la floraison commence ce 24/09. On dirait que mon topping se transforme en FIMing. La plus part des plantes ont des nœuds supérieurs supplémentaire qui pousse mais ils ont l'air faible. Je vais voir ce que ça donne 🤔.
Je fais un peu de défoliation sur les nœuds inférieur.🤔
J'ai ajouté environ 25gr de poudre BioBloom par pot de 8L soit environ 3gr/L.
J'arrose chaque pot avec environ 1.5L tout les 5 jours. J'ajoute du biohenhanceur 1 fois sur 2
Intensité de la FC3000: 90%
Ventilation : 2 ventilateur oscillant ( ON 12/24H) + Extracteur pouces mars hydro power : 2/10 (24h/24h)
Venez me voir sur Instagram ! 🤩
https://www.instagram.com/hou_stone420/

Likes
45
Share


@MadeInGermany
Follow
Info:
Unfortunately, I had to find out that my account is used for fake pages in social media.
I am only active here on growdiaries.
I am not on facebook instagram twitter etc All accounts except this one are fake.
Have fun with the update.
Hi everyone :-) .
This week she has continued to develop very well.
She reacts very well to the training :-).
It was poured twice with 1.2 liters each this week.
Everything was cleaned and refilled.
Stay healthy 🙏🏻
You can buy this Strain and Nutrients at :
https://greenhouseseeds.nl/
☝️🏼☝️🏼☝️🏼☝️🏼☝️🏼☝️🏼☝️🏼☝️🏼☝️🏼☝️🏼☝️🏼☝️🏼
Green House Seeds Company Cup Clone 🏆
Type:
Wonder Pie
☝️🏼
Genetics:
Wedding Cake x OG Kush
👍😍
Vega lamp: 2 x Todogrow Led
Quantum Board 100 W
💡
Flower Lamp : 2 x Todogrow Led
Cxb 3590 COB 3500 K 205 W
💡💡☝️🏼
Earth: Canna Coco
☝️🏼
Fertilizer: Bio Grow Feeding ( GHSC ) , Enhancer ( GHSC ) , Bio Bloom ( GHSC)
☝️🏼🌱
Water: Osmosis water mixed with normal water (24 hours stale that the chlorine evaporates) to 0.2 EC. Add Cal / Mag to 0.4 Ec Ph with Organic Ph - to 5.8
Likes
17
Share


@JurKush
Follow
it seems that the topping has slowed her down a bit but I hope everything goes well
day 28 I reduced the frequency with which I fed the nutrients a bit

Likes
27
Share


@adam_pawloski87
Follow
First off I just want to say for some reason it’s not letting me change the right temperatures on my diaries ! Each time when I put it in they stay at 50. My day air stays 75 degrees an , night degrees is 70 !
Today is day 58 for all these ladies! This week has been really great ! Girls really progressed a lot , especially for one the Forbiddin Runtz, looks like is gonna finish up in a week or 2 ! Other then that they are coming along well! Keep those eyes peeled for next week! Cheers😶🌫️💨💨💨💨
Likes
212
Share


@PEAKYPLANTERS
Follow
😎Happy day to all, my brothers!😎
We have reached the end of a wonderful journey...that of MY FIRST HYDROPONIC GROWING!!! I have obtained fantastic results from everything that accompanied me on this wonderful journey! starting from the bucket and the pump to finish with a wonderful AUTOFLOWERING genetics, each single component has played a fundamental role in the game, managing to give me extraordinary results....(let's hope it wasn't beginner's luck : )😁😁😁
on this special day, I send a greeting to all the people who unfortunately are no longer among us, but always live in our hearts!😇
LET ME KNOW IF YOU LIKED THE DIARY IN THE COMMENTS

Likes
15
Share


@HandsomeTerpz
Follow
Green Goblin had a bit of a rough start – unfortunately, one of the main stems snapped. 😕 Because of that, she’s grown a little wild and uneven. But overall, she’s doing well!
🌱 Her growth is slightly slower than the others, but she’s definitely holding her own.
🇺🇲 WEEK 7
--------------------------
🔧 This week included:
Lots of LST training
Defoliation to improve light penetration
Only watered with plain water, no pH adjustment strictly following the BioTabs schedule
💨 The smell is starting to develop nicely very promising!
💡 I’m planning to switch to 12/12 next week and send her into flowering as well. Curious to see how she performs in the next phase! 🌸🕛
🇩🇪 Woche 7
-------------------------
Die Green Goblin hatte es nicht ganz so leicht einer der Hauptriebe ist leider abgebrochen. 😕 Dadurch ist die Pflanze etwas ungleich und wild gewachsen. Trotzdem macht sie sich gut!
🌱 Das Wachstum ist minimal langsamer als bei den anderen, aber im Gesamtbild steht sie ihnen in nichts nach.
🔧 Diese Woche wurde einiges gemacht:
Viel LST-Training
Entlaubung zur besseren Lichtverteilung
Nur mit Wasser gegossen – ganz ohne Anpassung, streng nach dem BioTabs-Schema
💨 Der Geruch entwickelt sich ebenfalls sehr gut vielversprechend!
💡 Auch bei ihr werde ich voraussichtlich nächste Woche auf 12/12 umstellen und damit die Blüte einleiten. Bin gespannt, wie sie sich in der nächsten Phase schlägt! 🌸🕛
Likes
31
Share


@McBubatz
Follow
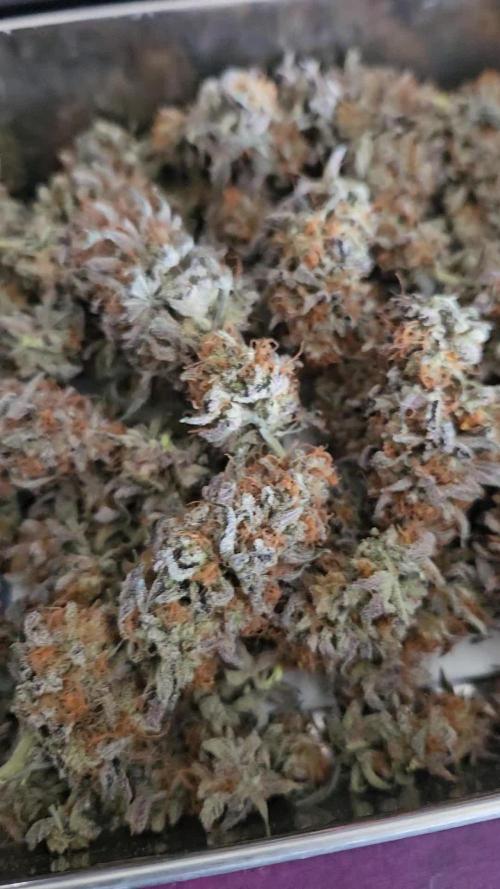
Soweit alles gut, hab sie jetzt zum trocknen aufgehängt. 400g nass ist ordentlich und bis jetzt das beste Ergebnis was ich hatte.
Geschmack usw wird nachgereicht wenn sie ins Glas kommen.
Sehr nice, 80g trocken (natürlich/leider den Überschuss zur aktuellen gesetzliche erlaubten Menge fachgerecht entsorgt).
Buds sind super, richtig fett sogar nach dem Trocknen, auch ordentlich fest und super harzig. Geschmack geht momentan leicht tropische und süße Geschmack mit nem heftigen cheese ton. Is lecker aber nicht ganz was ich erwartet hab 😅. Kommt jetzt erst mal in Gläser zum aushärten, denke da wird sich auch am Geschmack noch was tun.
Likes
7
Share


@OwlGang_Uk
Follow
Gorilla Glue #1 - Harvest Comment - I Am Very Satisfied With What I Got, I got 3 ounce 7 grams - I Uses Advance Nutrients PH perfect In veg then I switch to the iguana juice organic juice for the flowering stage. I notice a much more slower growth when I switch to organic nutrients.00
Likes
9
Share

@CannaArchive
Follow
Light intensity was increased to around 1000 PPFD under stable conditions.☀️
Temperature stayed at ~25°C with ~50% RH.
Both plants remained in their 20L final pots.
Watering was done every 2–3 days, based on pot weight, using RO water + CalMag.💧
Additionally, the plants received 1x BioTabs Bio PK during this week.
By the end of Week 6, the stretch was basically finished.🌿
Apricot #2 remained the tallest plant in the tent.
Apricot #1 stayed more compact but looked overall better structured and more balanced.
Bud sites were clearly forming, though still relatively small at this stage. A large number of pistils were visible, showing that the plants had fully transitioned into flower. 🌸
The first trichomes were already noticeable, but aroma was still subtle.
Leaf color remained a healthy green, and overall plant health looked stable and strong.


Likes
57
Share


@Igrowneil
Follow
The overall cycle had to deal with alot of heat issues and lighting so what they did product is certainly top quality flowers just short on there stretch period so will run again to make a certain opinion but as of now no hermis and all seeds flowered apart from one tiny plant 10 girls all to harvest shows stable genicitic traits from these girls also , height , bud structure colour shape smell all seem to be closer to a match of each other
Likes
107
Share


@XII_XII_MrGreen
Follow
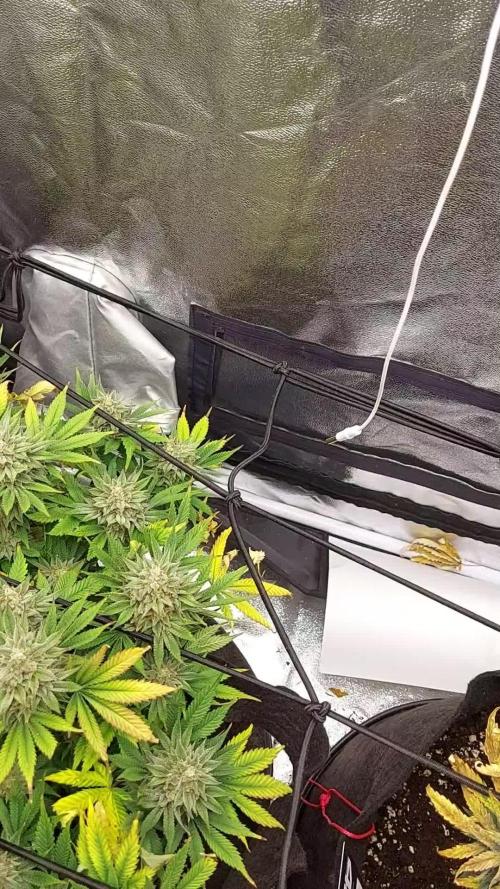
Fighting the crazy humidity 😵💫
It's really humid but the Candy didn't had mold yet but others did sadly enough. I'm running two dehumidifiers in a small room at the same time it still wasn't enough. So yeah little disappointed but it is what it isssss let's continue. I still have a lot beautiful ladies going on I think so let's just focus on the positives:)

Likes
16
Share

@BudsPerMinute
Follow
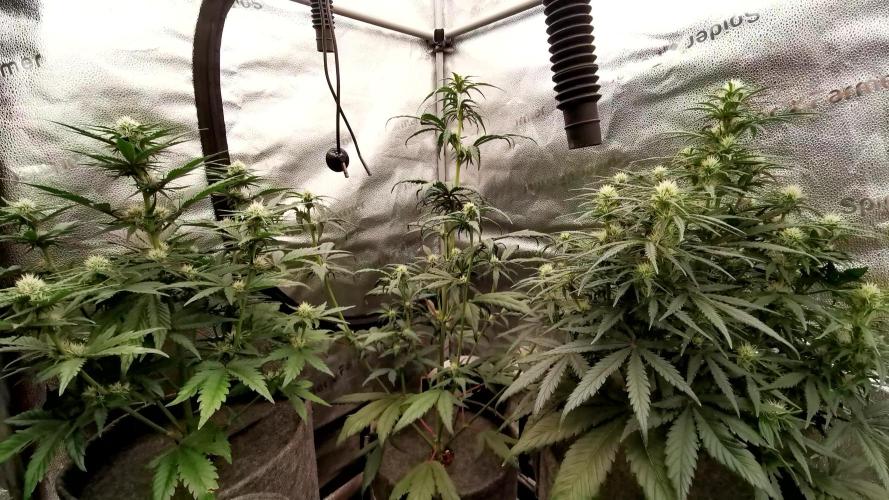
Woche 10
Diese Woche wurde wieder mit Nährstoffen gedüngt da die Pflanze anfangen hellgrün zu werden. Außerdem hab ich in der Mitte der Woche final Canopy Management betrieben indem ich mit Clips und Co paar ausbrecher triebe nach unten gebracht das wieder alles so eben wir möglich ist. #16 (rechts auf den Bildern) ist nennen wir es "Charakter stark" hier habe ich die meisten Triebe nochmal runter biegen müssen damit sie eben bleibt bei ihrer Schwester #8 musste ich bis jetzt am wenigsten anpassen trotzdem sind beide wunderschön auch wenn ich das Scrog im 90x90 Zelt nicht perfekt voll bekommen habe sind wir dennoch bei 90-95%. Tolles Ergebnis für das erste mal Scrog meiner Meinung nach.
Mitte der Woche gab es das erste mal PK Booster und ab jetzt gieße ich wieder mit deutlich mehr Regenwasser da ich vermute das die Salz Belastung wieder zu hoch wird in der Erde.


Likes
9
Share


@Kushizlez
Follow
Room is starting to yellow out too soon. Going to hit with a full strength feeding today. I’m still hoping for more swell by day 29. Although for my first indoor run I’m pretty happy. I know what to do for next round and got a sick game plan. The blackberry breath pheno is looking almost done already. I hope it continues to swell because it’s already thick as fuck. I found a small underdeveloped pollen sack on the slurricane #4 that scared the shit out of me. I chopped it off and inspected the whole plant but only found the 1.
