
Likes
Comments
Share


@GrowPassionItalyChris
Follow
Nate ad aprile queste 3 gorilla glue xl assieme ad altre varietà dutchfem in outdoor sono state magnifiche! Nonostante la temperatura notturna calata drasticamente fino ad 8 gradi più pioggia, vento e sbalzi di temperatura vari, comunque le gorilla sono cresciute nel migliore dei modi, più di 700 grammi essiccata una sola gorilla dico si può pretendere di più da un seme femminizzato outdoor? Dolci fruttate e forti, ottime per uso ricreativo e medico.. La particolarità della gorilla xl di dutchfem è che è specialmente dolce e fruttata a tratti ricorda la torta di ciliegia.. Si sente che sono alte di thc.. Facili da crescere outdoor con le giuste attenzioni resistono a freddo, muffa e pioggia e non subiscono invasioni da insetti come altre varietà.. 10 e lode di voto, provare per credere! Bravissima dutchfem seeds!

Likes
Comments
Share


@Leonweed10
Follow
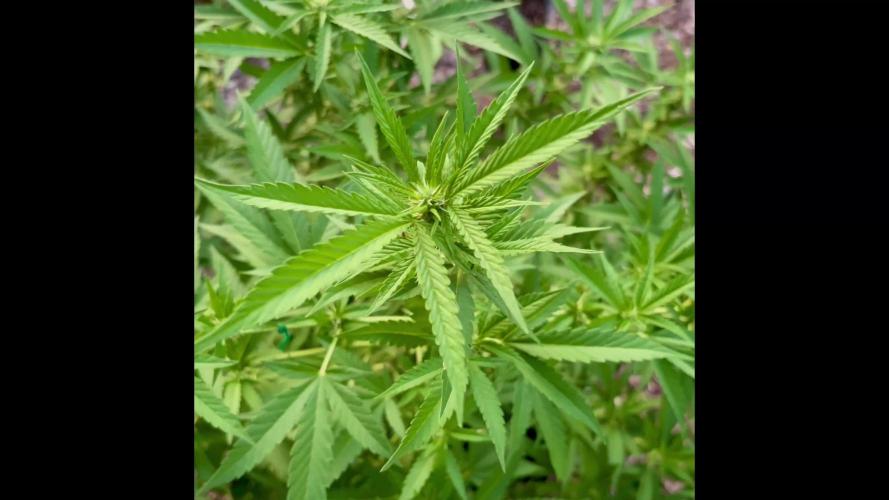
Cada dia,con mas fuerza es el crecimiento de estos clones,acostumbrandose mas a su nuevo espacio e iluminación!!!

Likes
21
Share


@OGTrauma
Follow
Now it’s our POST PANDEMIC VIRGO SEASON & as Spring and ‘Fiestas Patrias’ are coming here homies!!! Have Big Gas Puff on my Behalf! 👽
Declaring on September the First, Im Setting officialy the photopheriod as 20/04 hours resting too, they start in midnight as they will help to provide an ideal temperature at night, and thats the reason why stick with covering most of the day yet respecting some time off the grid, as for both mary jane plant processes like foliar feeding or the transplant depicted below and electronics used requires a bit of resting as lifespam testing and recomendations tend to stick on ‘calm your tits homie’ even on autoflowering scenarios, last consideration is the electricity bill as can become bothersome in some countries too.
Moving on plant growth , I personally consider up to this date , a healthy growth even when i changed the substrate it has quite a possitive impact and that’s on having a number of survivors above the mínimum of plants i want to be spread each on 11 lt of ’ Organic Life Light Mix’ for the most oustanding Killer Kush FV, by using the growth vigor & not stressed AF criteria , as it’s always good to do backups in case i had a strong damping-off or like a bad germination scenario. Notice the quirk of ‘Pot on Pot’ made the transplant a bit easier, and how can make some small upgrades if added in your grow , if its on your market and fits your style as well.
Regarding to feeding, new transplant soil was watered with Hesi boost, Top candy and BAC Calmag’s 2.0 (I chose this Brand specifically as it present other useful micronutrients on its composition ), as they first ones show to have quite a stimulant and refreshing effect on the babies, considering the size of more than decent root samples took before being moved on their final containers. This experience also introduced me the carencies i must attend usually on these type of soils, who also i do consider that being this deal of too light substrate, is a deal of a trade off too , like, im saying this this Organic Life Light Mix it’s not a bad product at all but consider is way more needy unlike traditional soils or even fuck, this shit is more airy than other light soils compositions hhahah, so, final words here, like at the same time the speed gained plus not a total damping off on germination phase & good interaction with fertilizers i use as plant interaction shows quite a good evolution, specially being keen on carencies and disbalances are faster to present and faster to attend , it requires more handling specially on feeding like all shit that is making this grow go at super fast speed , as i took some pics of root mass and it’s development shows it’s quite advanced yet on the optimal point to transplant.
PS: I will stay with the non finalists , the more pansy Killer Kush aren’t totally discarded as the point of having backups to have a better coverage regarding to uncertainity of germination and the fact that still fuck up things and shit my pants in the near future, as usual, im a shitty grower if not noticed ! 😂😂😂.
HAVE A BIG DICK ENERGY SEPTEMBER MFS !!!
// i'm uploading the photos asap as possible :P

Likes
2
Share


@HavelGrower
Follow
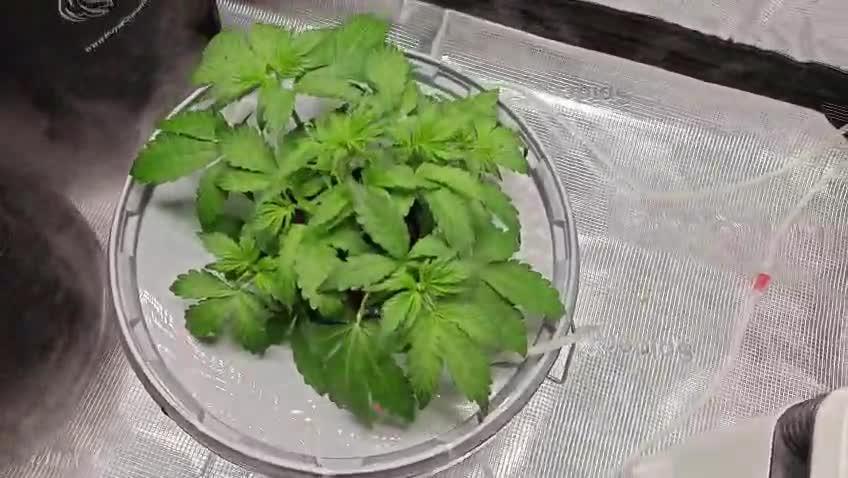
I stayed on the same conditions because I don’t want to accelerate growth right now. In 4-10 days they will move to the bigger space. So far so good … they are prey thirsty. 3 Liters per day. I hope the 2 small plants will catch up a bit.
Did nothing with the plants. Just keeping Nutrientsolution in the reservoir.
Right now I’m not sure if I keep all of them or if i dump 2 of them and just scrog the others bigger.
Conditions of the Grow:
💡 PPFD: 500 umol/m2/s
☀️ DLI: 32.4 mol/day
🌓 Lightcycle: 18/6 h
💨 Humidity: 55-60 %
🌡️ 🌞Daytime Temp.: 25-26 *C
🌡️ 🌙Nighttime Temp.: 21-22 *C
🌡️🌱Leaf Temperature: 23 *C
🌡️💧Water Temperature: 19-21 *C
Water TDS: 900ppm | EC: 1.8 us/cm
🚰Watersource: Rainwater (TDS: 15ppm | EC: 0.03 us/cm
Vegetation Equipment:
🔦 Lamp: Pro-Emit DIY-M-KIT 300W
📤Container: 2x DIY 63L Euro-Box with lid
Pot: Netpot 2 inch
💦Pump: M.R.S. Standard Whisper Powerpump 8.5 bar
🚿Nozzles: 12x 0.2mm
🫧Waterfilter: 150 microns
🌬️Fan: 2x Clipfan
🌪️Duct-Fan: AC Infinity 100 mm with Controller and no Filter
🍶Nutrient Brand: Terra Aquatica
🔬Sensors: Waterstation (EC, TDS, Temp, PH, Salt), CO2, Air Temp. & Humidity (VPD), Temperature-Sensor Root Container


Likes
35
Share


@McBubatz
Follow
2. Woche Wachstum beginnt ganz gut, sie wächst und ihr scheint es gut zu gehen 👌
Sie bekommt alle 2-3 Tage einen halben Liter Wasser, je nach Zustand.
13. Tag
Heute hat sie noch ca. 0,5 g Great White Mykorrhiza bekommen.

Likes
1
Share

@bavarian_original
Follow
Die Seeds mit SeedTreatment gecodet - danach in einen 1L Topf mit Seedtreatment und Boron von rootinn
Likes
92
Share


@DogDoctorOfficial
Follow
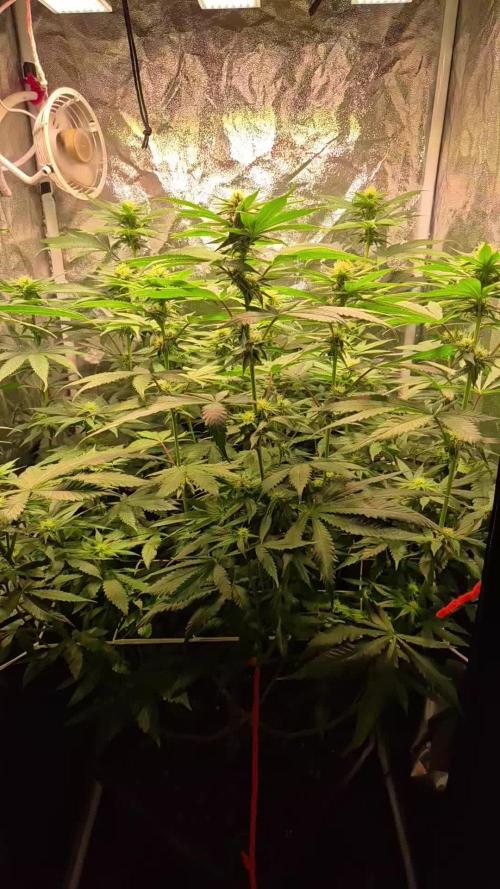
🌸 Week 3 Flower – Growing Strong, Tall, and Vibrant! 🌱
Hey Grow Fam! It’s already Week 3 in flower, and I’m thrilled to bring you this update because these plants are doing phenomenally well! Some are stretching up so tall that I might have to get creative in the coming weeks! Fruit production is well underway, and it’s absolutely amazing to watch the canopy fill out as these girls reach their potential.
Aptus Holland Pack Unboxing & New Additions
This week kicked off with a big arrival: the Aptus Holland nutrient pack! 🙌 I couldn’t wait to share the unboxing with you all; there’s a video up where I go through all the goodies, so check it out if you haven’t yet! Between the photos and videos, you’ll be able to see just how well these nutrients are already feeding these green beauties. Having a blast sharing more content lately—I’m in the zone with editing and creating, so get ready for even more shares!
🌡️ Environmental Control and Fine-Tuning the Reservoir pH
Temps this week have been holding around 27.2°C with RH at 65.2% and CO2 at 800 ppm, creating a VPD of 1.26 for ideal flower development. The lighting intensity is at 833 PPFD, and the solution in the reservoir is fine-tuned to a pH of 6.22, EC of 475, with a temp of 21.8°C.
Let’s talk pH in the reservoir: it’s a dynamic process, and I’m constantly adjusting it to keep everything at the right level. The pH tends to rise throughout the week, and each day, I work it back down, fine-tuning it to keep those plants happy and balanced. Managing pH is truly a hands-on job, and it’s worth every moment. I love staying on top of it for optimal nutrient uptake—it’s all about consistent effort and keeping that perfect range dialed in.
Leaf Maintenance & Selective Defoliation
These leaves are HUGE and gorgeous, creating a lush canopy that’s nearly too perfect! I’ve been taking a few leaves here and there, focusing on leaves that may be blocking light from reaching lower parts of the plant. Selective defoliation at this stage is key because it opens up airflow and allows light to penetrate deep, boosting energy distribution across the whole plant.
Big, healthy leaves mean we’re getting excellent photosynthesis, but a gentle, strategic defoliation can guide that energy toward those developing buds. Leaf removal is all about balance, giving the plant space to breathe and thrive while still maximizing growth in flower!
🌐 TrolMaster + App – Real-Time Precision
Huge shoutout to the TrolMaster system and the app—keeping everything in sync and at peak performance is honestly effortless with this ecosystem. The app provides a full overview of each environmental parameter, allowing me to make real-time adjustments as needed and track trends over time. The precision here is unbeatable, giving me complete control over temps, humidity, CO2, and VPD, ensuring my girls are in a controlled paradise 24/7.
What I love most is how the app records everything automatically, so I always know exactly where things stand without having to keep separate records. If you haven’t tried TrolMaster yet, it’s a total game-changer for any grow setup!
💥 Shoutouts & Gratitude
Massive shoutout to TrolMaster and Aptus Holland for powering this grow with tech and nutrition that’s second to none. And, of course, gratitude to Pro-Mix for the superb growing medium and to the seed banks behind the genetics. We’re running strong thanks to each of you.
And to the whole community—thank you, everyone, from new friends to seasoned followers, lovers to haters. Your energy, whatever form it comes in, is all part of this journey, and I’m so grateful for it all. Special shoutout this week to my brother Daggadna—head over to IG and give him a follow! And if you’re loving the journey, remember to like, comment, and subscribe—it really helps the channel grow and reach others who may also dig this content!
Discount Codes so you can save big on your next check out 💚💚💚
Kannabia - DOGDOCTOR 30% off
SeedsmanSeeds - DOGDOCTOR 10% off
CannaKan- DOGDOCTOR 15% off
terpyz.eu - DOCTOR 15% off
The Neutralizer - PORKIT5-DOG 15% off
As always thank you all for stopping by, for the love and for it all , this journey of mine wold just not be the same without you guys, the love and support is very much appreciated and i fell honored and so joyful with you all in my life 🙏
With true love comes happiness 💚🙏 Always believe in your self and always do things expecting nothing and with an open heart , be a giver and the universe will give back to you in ways you could not even imagine so 💚
Friendly reminder all you see here is pure research and for educational purposes only
Growers Love to you all 💚💚💚


Likes
13
Share


@Robeeriegenetics
Follow
Ooooooweeeeeee they’re all doing so good even the extras that I threw in flower with out cloning are doing great .. in just 2 more weeks I’ll throw the donor plants into flower
Likes
2
Share


@Strangelet
Follow
Bad weather, little direct sunlight, steched a bit, took a while to recover from topping but looking nice. Began LST, took out some fan leaves to give space to lower branches.
Began pre flowering also.
Likes
5
Share


@cookingwithninja
Follow
1oz per plant. Finished for Xmas. Finished all plants week 7. Everything great
Likes
3
Share

@Organic473
Follow
Flowering time for one of the girls…she is adjusting to her new 10 gallon pot very well
Likes
33
Share

@nonick123
Follow
Día 71 (24/03) La planta lo ha pasado mal tras 2 días sin riego (casi 3 ciclos completos de 12 horas de luz sin riego...)
A lo que se suma altas temperaturas en mi zona, han tenido 28 ºC durante las horas de luz...
Las hojas inferiores se encuentran caidas y alguna quebradiza...
Le hago un riego con 750 ml H2O EC 0,45 a ver si se recuperan....
Día 72 (25/03) Riego con 250 ml H2O EC 0,45
Elimino las hojas quebradizas que no se van a recuperar después de la "sequia" que han pasado
Se encuentra en buen estado general y formando nuevos pistilos! 😍💥
Día 73 (26/03) Riego con 250 ml H2O EC 0,45
Día 74 (27/03) Riego con 500 ml H2O EC 0,45 con BIO PK 5-8 a 10 ml / L (solo Limon Blanco)
Riego con 100 ml H2O EC 0,45 (el resto)
Reviso los tricomas, y GG4 Sherbet FF y Blueberry Pie F1 solo les faltan unos días! 😍💥
Día 75 (28/03) Riego con 400 ml H2O EC 0,45
Día 76 (29/03) Riego con 500 ml H2O EC 0,45
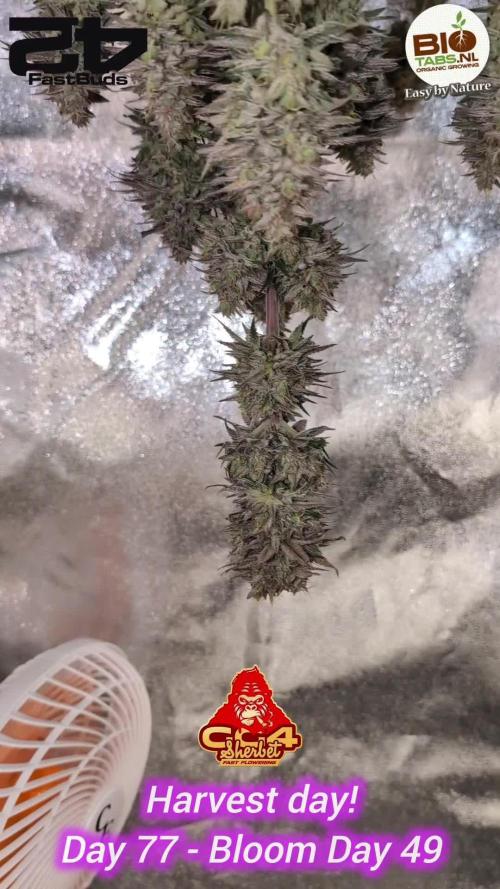
Día 77 (30/03) Fiesta de la Cosecha!
Reviso los tricomas y están un 10% ambar, 85% nublados y 5% transparentes
🚀 FastBuds 15% DISCOUNT code "NONICK" 2fast4buds.com @fastbuds.official
🚀 Khalifa Genetics - https://khalifagenetics.com/product/lemon-blanco-v3/ @khalifa.genetics
💦 BioTabs 15% DISCOUNT code "GDBT420" biotabs.nl/en/shop/ @biotabs_official
🌱Substrate PRO-MIX HP BACILLUS + MYCORRHIZAE @promixmitch @promixgrowers_unfiltered
💡2 x Mars Hydro FC1500 EVO Led Grow Light (2024 NEW FC 1500-EVO Samsung LM301H 150W LED) - https://marshydro.eu/products/fc1500-evo-led-grow-lights/ - https://www.amazon.de/dp/B0CSSGN5D8?ref=myi_title_dp
Processing
Likes
4
Share


@XoticGROW666
Follow
DAY 30 of flower 🌸🌼
Tall gelato41 pheno
Terps & nose comin of her is stupid Candy icecream lik 🍬🍭🍦🍧🍨🥜
Had a pheno lik this lik couple years ago bring
Most gelato strains I kno of got spicy & nutty herb lik terps but this pheno got that candy terps brings mi back to so much memories!! just the nose on her 🍬 yum yum can’t wait till see her fatting up

Likes
4
Share


@Random80
Follow
I applied too much pressure and main cola broke during final LST. I would call it super cropping if she wasn't in flowering faze already. She will recover but I doubt she will manage to reach full potential. Sprayed with boom boom spray. 20 ml orgatrex per plant and 10ml BIO P-K. Connected on auto-pot as I am gone for a week. Sun-Light EVO 80 grow light increased on 100% (Out of 4 levels I was increasing power every 2 weeks app). Light eight increased to 50 cm.
Likes
18
Share

@YourLocalGrowmie
Follow
Hi!
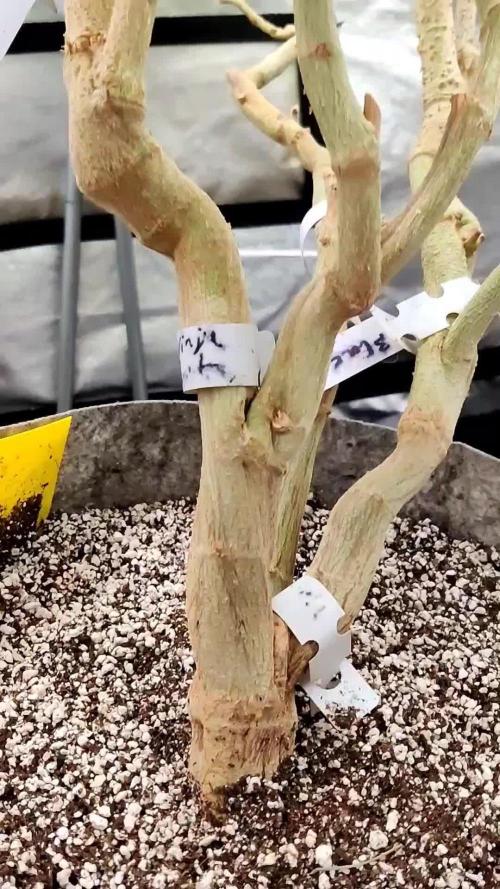
This is Franky the grafting plant again!
All you see here is just one single plant.
It's beginning of week 6 of flowering.
Right now things are going on autopilot.
I barely do anything besides giving water with a bit Epsom salt added once a week.
Every watering now gets green sensation added.
± allways a bit of run off.
Flowers are developing their own identitys now. The differences in the grafted strains are very visible and smell able.
I'm not sure but....it looks a bit like the Tropicana poison is taking longer than as a singular plant. It usually would take 7 weeks with this specific Pheno but it really looks like it will need as long as most of the other strains ATM...
I stopped picking small buds from the bttm half of the plant in preparation of the second defoil and lollipop in week 7.
That's all for now.
See ya next week :)


Likes
40
Share


@Zurban_Poison
Follow
my ardent hello to everyone!))
I generally have a weakness for color) and I am especially fascinated by varieties that change color. I really like this visual effect. I had to try to display it in the photo .. (a rather difficult task to convey the entire spectrum of color in the photo) the foxes began to change color not from the surface, but from the back side) and the color very slowly appears on the surface of the leaves .. I imagine what it will become in a few weeks ...

Likes
2
Share

@ChubbyBudBros
Follow
-
Day 22
Renewed all the water in the bucket today as we head into week 4 already. Gave everything a good cleanse with some hydrogen peroxide as well, got to keep those pathogens out! Seems like she's reacting well to me removing the 4 fan leaves yesterday as well.
Day 23
Upped the PPFD to 400 today. pH was at 6.3 to got it back down to 5.8.
Also seeing the first white pistils on the nodes of the stems now, so we're in pre flowering now!
Day 24
The upper fan leaves had a big growth spurt the past 2 days and were completely covering the lower nodes, so I chopped them off, also removed the lowest nodes of fan leaves to redirect energy to the new growth. pH was up to 6.1 today, will wait till tomorrow to ph down again.
Day 25
Yesterday I lowered the water a bit so that there is more space between the net pot and the surface of the water, I think I kept the gap a bit to small so the roots couldn't breathe enough, and today the leaves are finally a lot less droopy. I did also raise the light distance a bit but kept the same 400 PPFD. pH'd down to 5.8 again as well, even though it was still at 6.1 and added an 8ml of hydrogen peroxide dose.
Day 26
Removed the new set of fan leaves again, they keep growing so fast
Day 27
Stretch has definitely begun now. The side branches are starting to catch up with that main branch now as well. Trying to keep those lower nodes getting some direct light by trimming and tucking wherever possible.
Likes
16
Share


@Prototype0181
Follow
End of week 8 it's almost time for the chop. Really gonna mis this Vieuw


Likes
3
Share

@Max_Terpz
Follow
Die Pflanze befindet sich grade mitten im Blütestretch und verbraucht ordentlich Nährstoffe, der Wachstum ist Gesund und Stark und die Pflanze bildet schon sugar on the leafs!🔥🌱
