


Likes
Comments
Share


@Wizzel420
Follow
First feed of bloom nutes today at 577 PPM. Had to add a small mid week water to the schedule, only water PH’d at 6.5. Had a pretty good stretch this week, seeing lots of growth with a good amount of bud sites, smelling nice, warm cheese and a fruity berry sharpness.
LST going well, trying to spread out the lower branches

Likes
11
Share


@madlangs
Follow
All going extremely well in the room. No problems. Purple punch is just starting to fade
20.4.23
Filled tank with winter frost
23gal
Ec 0.8
Ph5.9
Outside pineapple chunk
Looking lovely.
17.4.23
3L watered on top with
15ml bio heaven
12ml top max
Then put 750ml plain water on top
21.4.23
Started feeding winter frost
Ec6.4 no ph down


Likes
21
Share


@Adriplnks
Follow
El día 31 de floracion cambio las 3 plantas traseras de posición para el moldeo lumínico.
El día 35 ya han dejado de crecer por lo tanto les hago la última defoliacion.
Han crecido y ramificado bien, veamos cómo engordan.
Empiezan a producir bastante resina/tricomas.
Han terminado todas entre 90-105cm, menos una que se ha quedado en 80cm, aunque no es problema.

Likes
40
Share


@MrJones
Follow
47th Parallel Crowly's Comet
╰⊰🔹Popped Seeds 03.10.24🔹╰⊰
🌞Environment - 78F / 50% RH
🌾Training - Defoliating the buds as needed, a little at a time; they should be pretty clean by the time harvest comes.
⚱️2-Gallon 📊6.2 PH
💧 Feeding - Using Horti Late Bloom 0-24-26, Cal 12-0-0
🌞Mars Hydro FC-4800
🕷️ IPM - CannControl from Mammoth and Mosquito Bits
╰⊰🔹WEEKLY REPORT🔹╰⊰
📝 Notes - I ran the High Fortified P&K of the Horti-Late Bloom 0-24-26 for 2.5 weeks; going forward, I will be watering with H20 PHed to 6.2. The flowers are becoming oily, frosty, and have a strong smell. The terpenes are producing a gassy citrus scent with notes of garlic and herbs. It's the strong, aging orange aroma - quite impressive!
🗓️06.08.24 Feeding 2x Dail with Horti Cal and Horti Late Bloom
🗓️06.09.24 Feeding 2x Dail with Horti Cal and Horti Late Bloom
🗓️06.10.24 Feeding 2x Dail with Horti Cal and Horti Late Bloom
🗓️06.11.24 Feeding 2x Dail with Horti Cal and Horti Late Bloom
🗓️06.12.24 Feeding 2x Dail with Horti Cal and Horti Late Bloom
🗓️06.13.24 Feeding 2x Dail with Horti Cal and Horti Late Bloom
🗓️06.14.24 Feeding 2x Dail with Horti Cal and Horti Late Bloom
📝Fertigation injects fertilizers into an irrigation system to supply dissolved nutrients and water to crops.
╰⊰🔹STRAIN INFO🔹⊱╮
Crowley's Comet / https://www.47thgenetics.com/product-page/crowley-s-comet-10-fem-birdseeds
It's everyone's favorite piece of space rock, Crowley's Comet! The culmination of reversing our Matterhorn cut off Mr. Crowley to Intergalactic Runtz, and the results were out of this world (I had to do it). These ladies were slow to start, but once they hit their stride, they put any worries we had to rest. Compact, short-framed, and robust. They pack beautifully boulder-like flowers that reek of garlic and sickly sweet cotton candy. Dark green to a mosaic of purples, yellows, and silvers. Frost production is off the charts, the internode spacing is tight, and they certainly will impress in their last few weeks of flower. This is one of our favorite crosses in the new fem lineup. If you're looking for your hype fix, here you go.
Yield: Heavy to XL
Flower Time: 63 days
Feeding Schedule: Heavy
Likes
1
Share


@Guerillafarm
Follow
Day 39 Die pflanzen stehen in ihrem endgültigen Zelt die seitliche Beleuchtung wird nur 3 stunden täglich angeschaltet
Die PurplePunch bekam 2 mal Vegan Phosphor Boost jetzt Wechsel ich zu Biobizz.
Bei der QuickOne mach ich das gleiche nur eine Woche später.
Die QuickOne geht auch in blühte und streckt sich in die Länge


Likes
124
Share


@SlowpokeFuegobud
Follow
Hello growmies, welcome to week 1! 🍪 💜
It's a beautiful baby! 😍 Perfect as can be, even more perfect! 😌
Thanks @Green_Buzz_Nutrients for sponsoring my grow, those products really do their job! 💚 If you want to give them a try, there's a generous discount code in my setup description. ⬇️
Thanks @SensiSeeds for the opportunity, let's do this!! 🚀 💚 🖤
_______________________________________________________________________________________
Purple Cookie Kush Feminized Seeds
[Girl Scout Cookies x Purple Kush]
Purple Cookie Kush Feminized seeds come from two well-known strains, Girl Scout Cookies and Purple Kush. The 60% indica / 40% sativa heritage leads to a well-balanced hybrid flower. Flavours range from grapes to sandalwood, and the terpene profile is a concoction of many complimentary aromas. Purple Cookie Kush Feminized is a short plant with good yields. Bud formation is dense, similar to many Kush strains.
About Purple Cookie Kush Feminized
Purple Cookie Kush Feminized takes the hottest GSC genetics and mashes them with a Purple Kush cultivar that was hand chosen for this project. No corners were cut in creating and selecting the right breeding stock for this fantastic strain. The result is a well-balanced hybrid that retains key qualities from its lineage.
The Purple Kush parent of Purple Cookie Kush Feminized has a lot to contribute, as evidenced by the plant morphology. The compact nature and sturdy branching can be attributed to those indica-dominant genetics. Another area that the indica influence is evident is in the terpene profile, which includes scents of spicy hashish and earthiness.
GSC contributes selected indica traits to Purple Cookie Kush Feminized, but the sativa side of the genes also had an impact. Complex, fruity expressions are detectable in both the mouth and nose of this strain. Before harvesting, during the last few weeks of flowering, growers will notice pleasant scents with floral notes lingering in the garden area.
Growth pattern of Purple Cookie Kush Feminized
Purple Cookie Kush Feminized seeds grow into a plant that represents in appearance both sativa and indica inheritance. Because this is a feminized strain, growers will not need to sex the plants at the early stages of flower and can accurately anticipate yields knowing that all plants will be flower-producing.
Purple Cookie Kush Feminized has sturdy branches, similar to its GSC parent. The strong branches can support the weight of flower growth through harvest. The plant itself is stocky with a compact stature. This is attributed more to the Purple Kush influence. Due to the lower profile and many branches, defoliation is beneficial at various stages of growth.
Indoor growers with a controlled climate report final heights in the 120 - 140 cm range. Purple Cookie Kush Feminized finishes flowering in a quick 50-60 day window, which is a distinctly indica quality. Outdoor growers in temperate / Mediterranean climates have seen plants reach over 160 cm with ideal weather.
The bud formation of Purple Cookie Kush Feminized is similar to the popular Kush structure. Flowers are dense and compact. The buds are a mixture of swollen, trichome-covered bracts with dark forest-green foliage below. During the last weeks of flowering, the GSC influence adds purple hues to the vegetation.
Purple Cookie Kush Feminized is a solid-performing, easy-to-maintain plant with good yields. It is not difficult to achieve the optimal indoor climate, and yields of 425 - 475 grams per m² are possible in these conditions.
The ideal outdoor environment will have moderately warm weather and a small percentage of rain within the growing season. Growers in those regions have reported yields reaching 550 grams per plant, sometimes even more!
Common plant training techniques are not crucial to the success of this robust, sturdy plant, but some growers looking to maximize yields will use them. Techniques that have been used with great success in canopy control include SOG, SCROG, Supercropping, and Lollipopping. Purple Cookie Kush Feminized handles them all without skipping a beat.
Effects, taste and smell of Purple Cookie Kush Feminized
The effects of Purple Cookie Kush Feminized usher in a more relaxed and easy-going day than most. It has the benefit of merging both indica and sativa attributes. Euphoric and uplifting effects are associated with sativa cultivars, and these effects are precisely how the Purple Cookie Kush Feminized experience begins.
Blissfully distracted from the fast-paced world, thoughts shift to creative endeavours and inspirational goals. As these feelings are front and centre, a mild buzz begins radiating from the inner core. Soon, the indica-leaning effects are felt. Effects turn towards the loosening of tense muscles, the easing of minor aches, and an embracing full-body stone.
The flavour profile of Purple Cookie Kush Feminized is almost like a full-course meal. The pairing of flavours is unique and somehow works perfectly. The taste of fresh peeled grapes sits well with the coffee and caramel elements. The indica genetics once again show their dominance with undertones of earthiness and spicy sandalwood to complete the flavour profile.
Purple Cookie Kush Feminized has an unmistakably loud grape smell. This trait is not commonly seen in cannabis, but it is fully displayed with this strain. The remainder of the terpene profile is what many would consider the finer aromatic qualities of the GSC strain.
Scents of spicy hashish float through the air, complementing the grape aroma whenever the jar is opened. Background notes of earth and sandalwood add another enjoyable layer to the terpene profile.
https://sensiseeds.com/en/research/purple-cookie-kush-feminized?sqr=purple%20cookie
_______________________________________________________________________________________
Setup:
140x70x200 cm Spiderfarmer tent
2x Monkey 16W fans (not oscillating)
1x Secret Jardin 30W
1x box fan 50W oscillating (on lowest level)
LED
Full Spectrum 320W AGLEX AGL-320W-MA
5,6 kg
foldable, dimmable
864 pieces Samsung LH301H
864umol/s
2,7umol/J
full spectrum white + RED 660nm + IR 740nm
wavelength range 380-780nm
covering 3x4ft
Green Buzz Nutrients https://greenbuzzliquids.com/
❗ Use code GD42025 for generous 25% discount (for orders of minimum 75€)
Biobizz Lightmix + coco + wormcastings + perlite
Carbon Active Granulate Filter 125/360 cm³/h
PrimaKlima exhaust EC 125-400/240 cm³/h


Likes
10
Share


@I_Identify_As_A_Dan
Follow
Week 2 of flower for White Widow
Shes really looking great!
Colour is spot on id say, stretched her out a bit so the light has better chance to penetrate to the lowers.
Really looking forward to what comes from this girl in the next 2 weeks or so.

Likes
2
Share


@DTHGenetics
Follow
Training main stems down to expose second ones looking good week 8 they are in 10 gallon now watering 2 cups or more if needed every 2-3 days


Likes
7
Share

@Mannirumpel420
Follow
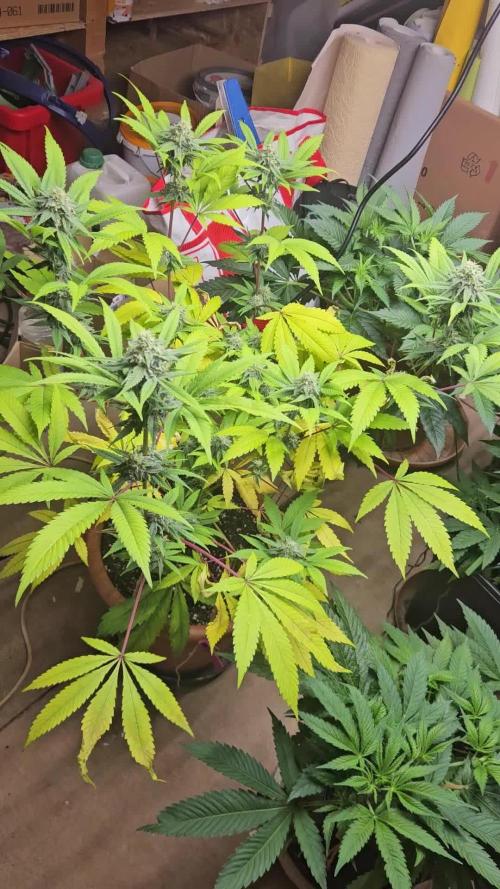
Sie zieht die Nährstoffe aus den Blättern heraus und pumpt alles in die buds.Dirse nehmen schon eine gute und dichte Struktur an.Leider kommt der Blüte Dünger wahrscheinlich erst morgen und ich kann ihn dann beim nächsten Gießen geben. Ich habe leider einen Samen bei ihr im head Bud entdeckt.Wahrscheinlich weil der Lichtzyklus durch einen Stromausfall durcheinander gekommen ist.


Likes
14
Share


@Targona
Follow
Fortunately, the girl is still healthy and strong, nothing has changed, she smells beautiful and creates beautiful flowers 😍.

Likes
19
Share

@TrickzGrowz
Follow
Servus Moin!
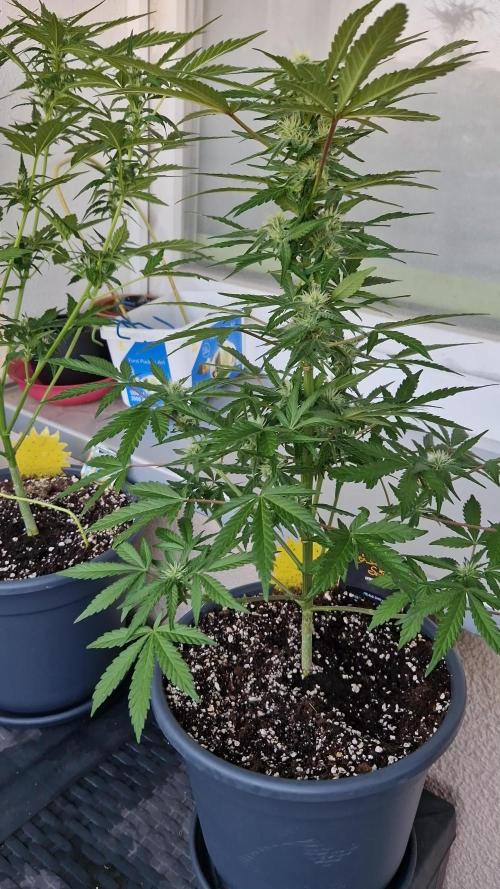
Die Chemical Candy ist bis jetzt am wenigsten gestretcht. Sie ist schon voll dabei, Blüten zu entwickeln.


Likes
25
Share


@pifflestikkz
Follow
Day 22
25/07/24 Thursday
Still no Feed/water since Tuesday.
Been a humid and overcast two days so not as much evaporation as normal.
All plants happy and healthy 💚
Video updates
Day 23
26/07/24 Friday
De-chlorinated watering pH 6 with 5ml calmag to 5L water.
Watered each with 250ml and had small run off.
I will continue to feed/water with small run offs to help prevent salt build ups.
Video update.
Day 26
29/07/24 Monday
Nice feed today, using de-chlorinated tap water pH 6.
They each had 300ml with small run off.
All looks incredibly happy and healthy!
The Auto Kabul that was mutated and twisted has pulled herself through and is just a bit shorter than the others.
Day 28
31/07/24 Wednesday
End of week😁
De-chlorinated water pH 6 today with Plagron pk13-14 5ml to 5L
Plagron power buds 5ml to 5L
Used 300ml of the 5L solution.
I will be using these on water days from now on as they are advised to be used every irrigation.
We'll see how they perform 💪💚


Likes
8
Share


@sativa_thc
Follow
esta semana hay ido mejor aun con unos saltamontes por ahi q habian aparecido y pulgones que ya soluciones facilmente con bag x5 y bang x3 de cannaboom la temperatura del tiempo aun gace calor y el frio no llega
Likes
12
Share


@cookingwithninja
Follow
day 14 added 1/2tbsp magnesium sulfate in 5gal water along with regular flower water amendments. 1gal of water per day average, bridal and thunder can take more water. Ph 6.8 today
day 15 I will defoliate in a few days :) day 15 video, you see some stem action
day 16 video
day 17 I added (4x20w daisy-chained)80w of poop purple ancient leds Keep adding soluble PK, organic booster etc. I see the stacks relax on defoliation for a few days, maybe tomorrow morning (skip day21) I feel like I will be able to chop week 6-7 as my last grow, push hard fast-continue everything is great, soon bridal and thunder will require 1gal water per day. I would like to see even more mass. I'm extremely happy, starting to see frost
day18. BIG UPDATE many short vids of final defoliation(ahead of "day 21"). Wild amendments appeared! Any recommendations for a lawnmower? Bridalparty stretched over an inch overnight, led touch diode burn on 1 spot. Raised lights slightly, Added new amendments into water. Bridal wants to drink more than 1gal per day, So I will be using almost 5gal-ish water per day not denying the plant needs-watering. I am very happy! defoliation took about 4h today.

Likes
53
Share


@xbrico
Follow
Day 8 - Girls starting to come on now. Looks like their roots have settled and starting to see some pokies coming out of the bottom of the root pouches so hopefully start to see some good growth beginning soon. Get them ready for training and the likes.
Not changed the water this week (really should have as temp has been up a bit...into the 25's in the tank but plenty of Great White in there and no roots in water yet but...) - topping up with plain water to keep the EC level and just pH adjusting. Last weeks solution was a bit hot for my liking but no burn signs so should be good for a couple more days yet.
Got some iceline procured so been cleaning/flushing/sterilising the Hailea for getting it installed (That's when the water change will happen...likely to last weeks strength & recipe). Cant wait to get that in to get tank temps down (as roots will be in the water in about 5 days by the looks of things...tops!!! Also have the Torus Hydro pH Perfect Inline run through for a couple of days so it will be ready to go in to keep the pH good for me (A grow off and my pH skills are out the window!!! 😜). Just waiting on a Sicce Syncra 3.0 to pump the chiller and the pH Perfect (Bit overkill @ 2700LpH but looking something for the URDWC I am building for next year...thought the extra pressure would help with the inline pH adjuster too).
Apart from that, will download the stills for the time lapse video and upload tomorrow.
Happy Growing all!!! 💪