
Likes
Comments
Share


@UKauto
Follow
Steady away for her.
Cut nutes down a touch getting some burn on her.
Hasn't had any sumo boost either.
She's doing good though, hopefully see her fatten up. Done better than I thought as it is anyway 😁

Likes
32
Share


@Belverde
Follow
Welcome growers
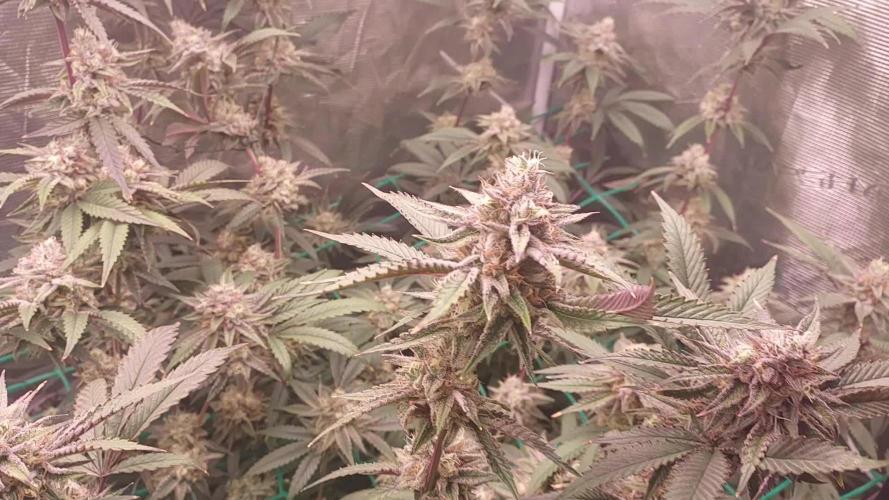
Firsth month in flowering for this beauty AYAHUASCA PURPLE 😈
It has reacted well to last week's "massive" defoliation.
The production of trichomes increases day by day and its colors are truly amazing 🔥
Leaves and buds are shimmering purple, not too dark..
And a sweet aroma is coming..
Anyway
In this seven days i have only put some sticks in the ground, where I will go to tie the branches, to mimic more solid branches in order to increase the biomass 🌳
About nutrients 👇
I still giving her organic/veganic nutrients at any watering 💧
A little bit of silicium (Bionova) / Crescita (Biomagno) / Activera (Biobizz) / Grow vegan (Bionova) / The Missing Link (Bionova) / X-Cell (Bionova) / Bioheaven (Biobizz) , a little bit of P-K 3-5 (Bionova) /Fioritura (Biomagno) / Bloom vegan (Bionova) / Biomassa (Biomagno) / Florastimo (Biomagno) and i started to use some enzymes present in the Sensizym (Advanced Nutrients)
And that's all guys..
See you in week n°5 🌻
Thanks for stopping by 😎👍👍
FC ✌️
🇮🇹

Likes
9
Share


@Franco123
Follow
this week the plant has grown well I'm being struck by the compactness of the plant which is very close between one internode and another I hope it continues like this and stays nice and compact, or started using the water produced by the dehumidifier which is basic ph 6.4/6.6 and an ec between 0.3 and 0.5 and however not with chlorine or other added things as it is water recovered from the air and allows me an error regime with a higher ec because it is based on a lower ec than the tap water which I used to use after decanting with this I hope I don't have problems but we'll see for now and ok, rating for the performance held this week and a nice 10 ahaha
unfortunately for me it's a male I'm right but I don't despair I'll use it to mix it with my don diablo and try to make it stay more compact between one internode and the other, since she has a very compact growth while easing a male.


Likes
2
Share


@Manitoba_Medical
Follow
Wow I am amazed at the growth in the last week. I did end up losing the one grease gun but I started a new seed and so far it is off to the races. This past week I have been running the rhize veg along with hygroben hygrozyme and hyshield. Plants are loving it! So tomorrow I am topping two and going to leave two just to see the difference in growth. All plants are attached to the same reservoir so they all have access to the same nutrients solution! I also have some exciting news I am getting a UVA light for this grow so I am really excited it should be here this week!

Likes
96
Share


@Tonino
Follow
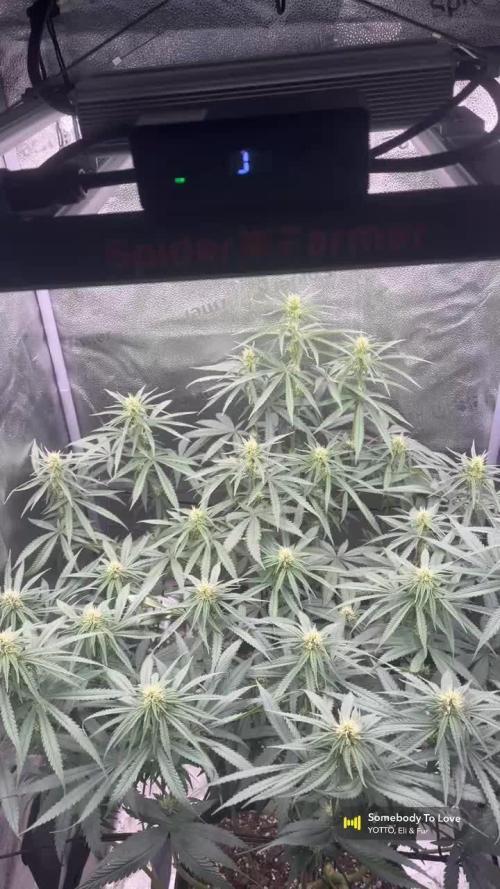
What can I say about this one she’s my pride and joy she’s got so much buds growing on her it’s amazing I just hope that in the next couple of weeks they will swell and fatten up besides that I couldn’t be happier she’s got a beautiful fruity smell and an amazing frosting I’m planning to feed her for another two weeks And then will start flushing
Description
Candida (CD-1) has the highest CBD and lowest THC content of any strain currently available on the seed market. It was named after the founder of Medical Marijuana Genetics’ late mother and means ‘bright light’ in Latin.
Our Laboratory results show CBD levels of between 20.6% and 10.9% CBD with THC levels rising with higher CBD levels - but never passing 1% THC. The balance between CBD and THC remains more consistent than any similar strain.
With these ratios of CBD to THC, the anti-psychotic capabilities of the higher levels of CBD outweigh the relatively small amounts of THC, and effectively remove the "high", psychological effect, ensuring a non-psychoactive cannabis plant.
Candida can be grown both indoors and outdoors. It is recommended for all environments and grow-media and has a unique lemon flavour and aroma that compliments its medicinal properties. CD-1 will flourish in any climate. It has impressed many with its highly vigorous early growth
Candida will noticeably produce two different phenotypes; a sativa and an indica. Initial research has suggested that the sativa phenotype will produce lower, whispier yields often associated with sativa strains. We have noticed to date that the sativa pheno produces higher CBD counts. In comparison, the indica pheno will produce bigger, denser yields with lower CBD levels but still with significant CBD content. It is recommended to give good care to the sativa phenos as these can be harder to manage and will have larger distances between the internodes making the plants more vulnerable.
Generally, the sativa pheno is better suited to making extractions than to smoking and vaping, whilst the indica pheno is suitable for all.
Characteristics
BREEDER/BRAND Medical Marijuana Genetics
GENETICS ACDC x Harlequin
VARIETY Indica / Sativa
FLOWERING TYPE Photoperiod
SEX Feminised
THC CONTENT 0.3%-0.9%
CBD CONTENT 10.6%-20.6%
YIELD 400 gr/m2
GROWS Greenhouse, Indoors, Outdoors
FLOWERING TIME 9 weeks
MEDICAL CONDITIONS ADD/ADHD, Anorexia, Anxiety, Autism, Depression, Epilepsy, Inflammation, Seizures, Stress
MEDICINAL PROPERTIES Depression, ADHD, Anorexia, Epilepsy, Autism, Anxiety, Inflammation, Seizures, Stress.
AWARDS 2nd place CBD category. Spannabis Champions Cup Madrid 2017

Likes
15
Share

@Meisterwulle
Follow
Moin Leute,
die Woche ist einiges passiert, habe aus Platzmangel #2 aus dem Zelt entfernt und nach draußen gestellt. Sie macht sich aber prächtig und hat sich sehr schnell an die Wetterbedingungen gewöhnt und wächst fleißig weiter. Hab außerdem ein wenig den Dünger umgestellt, allerdings einfach aus logistischen Gründen :D
Die anderen beiden machen sich ebenfalls hervorragend und füllen den ganzen Platz im Zelt, habe die etwas höher wachsenden Triebe noch etwas angepasst - sieht man dann in den Bildern nächste Woche. Ansonsten keine Auffälligkeiten die Woche, läuft alles nach Plan 🏻
Gruß Wulle

Likes
18
Share

@THcHunteR23
Follow
Il en reste 9 sur 11 assez stable j’ai éliminé une de façon volontaire parce que avait beaucoup de retard

Likes
30
Share


@SooSan
Follow
12/12 + 35 jours
1️⃣
🏠 90x60x90
☀️ FC-E 4800 => puissance a 75%
🍁
1x Black Bomb / Philosopher Seed
2x Amnesia Lemon / PEV Seeds
1x Blueberry / PEV Seeds
1x Blueberry / 00 Seeds
1x Wappa / Paradise Seed
1x Dark Phoenix / Green House Seed
1x Quick Sherbet / Exotic Seeds
1x Mango Cream / Exotic Seeds
1x Banana Frosting / Sensi Seed
1x Hindu Kush / Sensi Seed
4x Fast Mix / Sweet Seed
📎 https://growdiaries.com/diaries/122084-grow-journal-by-soosan
📎https://growdiaries.com/diaries/124052-grow-journal-by-soosan
2️⃣
🏠 30x60x50
☀️TS1000 => puissance a 100%
🍁 4x Quick Sherbet - Exotic Seed
📎 https://growdiaries.com/diaries/122080-grow-journal-by-soosan
Sponsorisé par Mars Hydro

Likes
1023
Share


@Grow3rPT
Follow
Cultivo Led The Jungle ( The Smith 150w 4000k ) - Não tem esta opção para colocar no diário.
Semana 8
Total Dias 50 - 30/05/2021
Total Dias 51 - 31/05/2021 / Rega 1L x 4 Plantas ( Nutrientes GROW e BLOOM) Estou com alguns problemas de nitrogénio. ( Talvez potássio também)
Desfolhamento de algumas folhas que não estavam a apanhar luz
Total Dias 52 - 01/06/2021
Total Dias 53 - 02/06/2021
Total Dias 54 - 03/06/2021 / Rega 1L x 4 Plantas ( Nutrientes BLOOM e BioBizz CalMag)
Total Dias 55 - 04/06/2021
Total Dias 56 - 05/06/2021

Likes
Comments
Share


@eldruida_lamota
Follow
Vamos familia, actualizamos la cuarta semana de vida de estas Frosty tooth de Seedstockers, salieron las 5 de 5, 100% ratio éxito.
Aplicamos varios productos de Agrobeta, que son increíbles para aportar una buena alimentación a las plantas.
Temperatura y humedad dentro de los rangos correctos dentro de la etapa de crecimiento.
La tierra utilizada es al mix top crop, por cambiar.
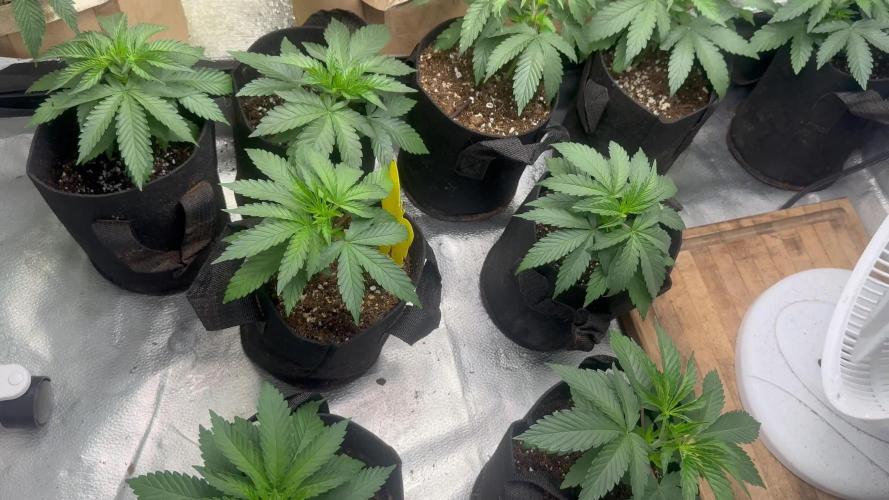
De 5 ejemplares seleccioné los 3 mejores para completar el indoor y trasplanté directamente a macetas de 7 litros y aplique de manera foliar tetra 9 se ven bien sanas las plantas, tienen un buen color y progresan a muy buen ritmo por el momento.
Agrobeta:
https://www.agrobeta.com/agrobetatiendaonline/36-abonos-canamo
Hasta aquí todo, Buenos humos 💨💨💨.

Likes
25
Share


@MadeInGermany
Follow
Hey everyone 😃.
First of all, many thanks to Zamnesia for the support 👏🏼👍.
I'll start germinating next week 😋.
Until then, I wish you all the best 😊 stay healthy 🙏🏻 and let it grow 🍀


Likes
51
Share


@nonick123
Follow
Día 15 (04/11) Las plantas se muestran esplendidas después del 1er riego e introducir la 1ª Bio Tab! 😍
Subo a DLI 35
Día 16 (05/11) Las plantas se muestran espectaculares y radiantes!
Un color verde intenso y sano! 😍
Día 17 (06/11) CBD Auto 20:1 #1 tiene un crecimiento increíble!
El resto tiene un desarrollo perfecto para sus días 17 días de vida!
Día 18 (07/11) Mudanza y riego!
Las plantas se mudan al armario definitivo de 60 x 120 cm por varios motivos:
- CBD Auto 20:1 #1 está empezando a tocar las paredes del armario pequeño
- CBD Auto 20:1 #2 ha tenido una ventilación menos adecuada que sus compañeras, ya que el ventilador quedaba justo encima de ella, y el flujo de aire era inadecuado
Esto ha provocado que la maceta de CBD Auto 20:1 #2 no se seque a la misma velocidad que el resto. Espero que no afecte a su crecimiento
- Las plantas pasan a tener dos lamparas a su disposición (230W + 100W) ajustadas con el regulador al 60%
- Mantenemos DLI 35 tras varios ajustes (tener 2 lamparas simultaneamente es más complicado de ajustar!)
- Colocamos dos ventiladores oscilantes para que el flujo de aire sea adecuado dentro de la carpa
Riego: 4 días después del 1er riego, las macetas se muestran "ligeras" excepto CBD Auto 20:1 #2 por la falta de ventilación comentada arriba
Riego con 750 ml de H2O RO excepto CBD Auto 20:1 #2
Día 19 (08/11) Las plantas se muestran esplendidas y creciendo mucho!
Día 20 (09/11) Macetas poco pesadas, pero no lo suficientemente ligeras para regar
Día 21 (10/11) Introduzco la 2ª Bio Tab a 5 cm de profundidad, lado izquierdo
Riego con 750 ml de H2O RO a todas excepto CBD Auto 20:1 #2 que se riega con 1 Litro
Aplicación foliar de Boom Boom Spray 5 ml/L. Aplicar justo después de encender la iluminación.
Aplico LST a CBD Auto 20:1 #2
💦Nutrients by Bio Tabs - www.biotabs.nl/en/
🌱Substrate PRO-MIX HP BACILLUS + MYCORRHIZAE - www.pthorticulture.com/en-us/products/pro-mix-hp-biofungicide-plus-mycorrhizae
"GDBT420" 15% DISCOUNT code for the BIOTABS Webshop https://biotabs.nl/en/shop/

Likes
28
Share


@SmokingTiki
Follow
- The trichomes photos have been taken just before the harvest.
- Drying was made between 22-23°C and at 55% of humidity (3 days).
- Curing before smoke test : 15 days
Veg time : 31 days
Flowering time : 42 days
Total time from seed to harvest : 77 days
Height : 26.5cm
Pot size : 1.5l
COMPARISON BETWEEN THE FOUR PLANTS :
--------------------------------------------------
The best plant : Pound Cake - biggest plant, roots and buds.
The best yield : Even if I didn't manage to trigger my scale, it's the Pound Cake.
The best smell : They all smell pretty good. But the strongest smells were Pound Cake and Orange Sherbet.
The best high : I can't tell, but I liked them all 😎
My favorite overall : Pound Cake👌


Processing
Likes
45
Share


@AsNoriu
Follow
Day 127. Oh boy it will be my longest grown plant indoors.
This bean is from bagweed, just wanted to show, that from shitty weed found seed you can produce good result, but i screw up with this girl by having no space for her, by giving her to wrong guy ... And now again, i checked temps during my holidays and lowest was 13 , highiest 33 ... Very bad, she is from leafy pheno and that didnt helped for buds and leafy i dont like already, hate triming .... ;)
Will do last hard training apart from everyday lst here and there , she will loose a bit of leaves tomorrow before watering just phed water. I never feed after training.
Tomorrow she will go to new tent and i start new diary, hands full ;)
Happy growing !
Day 128. Girl got small defoliation , up to 50 leaves, now more buds get light, have to prepare her for smaller , where i will fit only one light, otherwise its too hot inside ....
All movement postponed for a bit, have to leave town so only phed water for her after new look. She drinks now like 5 liters every 3 days.
Day 131 . She is stinky sticky b**ch ;)) Amazing plant, my mini bonza, would want to flaten her up, but in new tent fan has to have space aswel ;)
Her new fan is delayed an i quess it will take a week to be redelivered ...
Fingers crossed.
Heavy feed - done. ;)
Day 132. She starts to pack up a bit, maybe it will be something desent again.
Girl is under two lights ( quantum boards 2x240) and in a week will stay just under 240 , but in new tight house with better reflection from walls, hope it will even pars , despite power loss ....
I think i will smoke first joint on day 160, its almost half of the year, crazy adventure ...
Her leaves are too green, so no silica and red leaves stemps doesnt show up, so no cal mag .
Think she'll have like 2-3 feeds max in two weeks and then final strech ;)


Likes
35
Share


@XperencdGmanXG
Follow
Due to early germination issues this one missed the boat on grow space and is now waiting for room in the tent which is at least 3 weeks away. So I will be limiting it's pot size and nutrient uptake until I have some room for it. Will also be adding a hood upgrade to the seedling station to allow much larger plants allowing me keep plants there longer. Should resolve this particular issue
Likes
38
Share


@GMSgrows
Follow
The Ak2.0 are flowering up nice. Cycle nutrients seem to be feeding them nice. Girls are large, will give them more wattage next run. Cmd lights were just not cutting it. Will use the hid for vegging like I always did.
