
Likes
Comments
Share


@Arachnia
Follow
I've moved lights towards them, so now the lights are 15 cm above them. I've moved a fan a little bit higher, so the wind is not too strong for them now. Hope she will be well now.

Processing
Likes
31
Share


@GreenGoldGrower
Follow
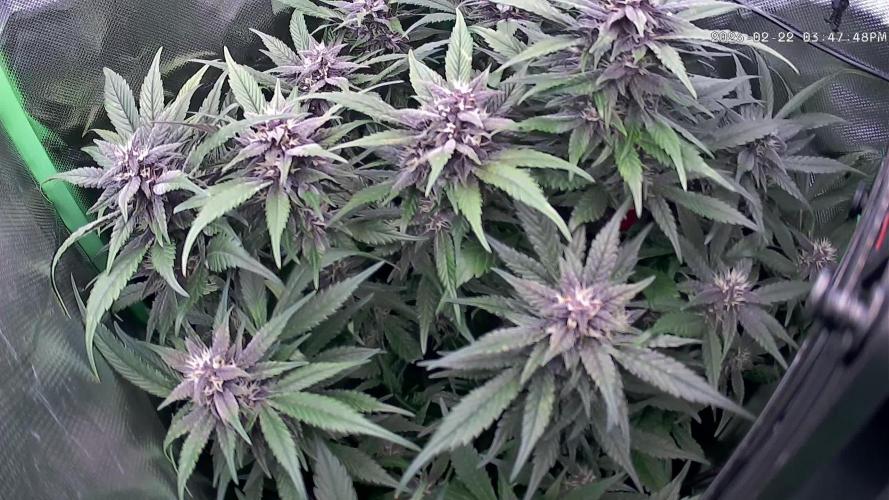
WEEK 7 (4 Bloom) DAY 43 ( 23 Bloom)
In the middle og 4th week of bloom my twins have stop to grow up in height and I can tell that they are in beautiful health. The buds start to become big and we can see a loto of trichomes and they relase a beauatiful smell.
Look at the video and enjoy with it!! 🙏
We will see what's happen in the end of this week to understand how far is the the goal!!
Happy growin g for all 🙏
GGG

Likes
17
Share


@ArtisticGrown
Follow
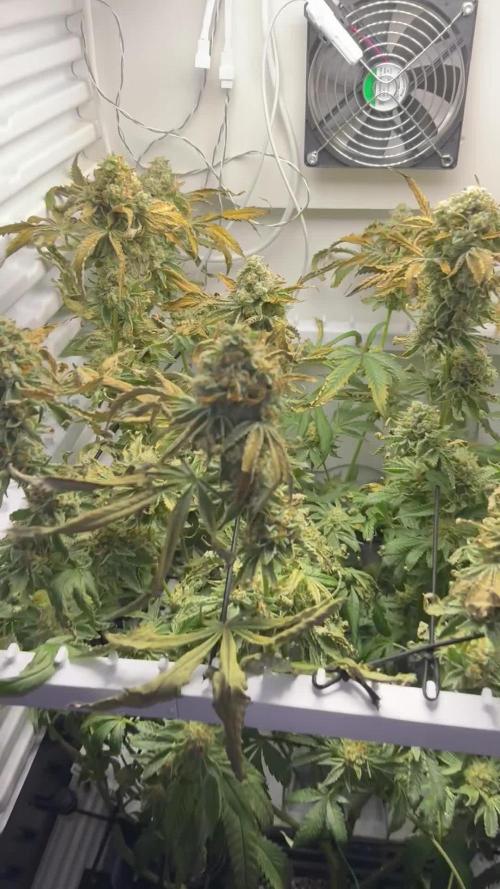
Yessss we are here in week 7 of flower. I BELIEVE we are on pur last week of flower tell harvest! I did another top soil feed during the first of last week. Then watering with pH water 💧 things are going well.
I have been oping up my tent during the day flowing cooler air and more air flow to keep the humidity down. Getting ready for Harvest!
Hoping for some more weight gain and maturity with these coals!
Loving how this plant is growing and really seeing the traing paying off
All the topping the
HST
SUPER CROPPING
Healing
Lst and directing the plant to grow to its full space all will being all organic in living soil. Awh I fucking love it .
Thanks for being here supporting family. Much appreciated 👏
Check out the thrichomes, let's thicken up one more week to go


Likes
2
Share


@Lautimi
Follow
segui regando demaciado y al tener mucha humedad se me genero moho, apesar de eso resistieron.
Processing
Likes
6
Share


@BestbudsPT
Follow
As you can see differenfe between mediums is huge..have to improve my solo grow bcs i think i might be doing something wrong..any tips??

Likes
91
Share


@Salokin
Follow
Hi Growmies,
I'm excited to share some big news today! Although there have been some unexpected twists, it's all part of the incredible journey of gardening.
I've just completed the harvest, a tad earlier than initially planned, due to finding a bit of mold in one of the buds. Despite this minor hiccup, the trichomes were already at a decent 10% to 15% amber. So, all things considered, the timing ended up being pretty spot-on. The harvested weight was a solid 609 grams after trimming, which is quite a feat!
A lesson learned for next time: perhaps I let her grow a few too many buds, leading to a denser canopy than ideal. But on the bright side, the aroma is absolutely divine. I sampled an airy bud that had dried a bit, and wow, it packs a stronger punch than its clone mother. And the flavor? Pure, unadulterated cheese – no hint of pineapple here!
Now, the anticipation builds for the final dry weight, which I should know in about 3-4 days. It's always exciting to see the fruits of our labor fully realized.
A huge thanks to everyone who's been following along on this journey. Your interest and support mean the world.
And now, the adventure continues! I've started on Epic Buzz by Anesia Seeds. The diary for this new chapter is up and running, and the seedlings have already sprouted, marking the beginning of another exciting phase.
(https://growdiaries.com/diaries/185718-grow-journal-by-salokin)
I can't wait to share more updates with you all. Here's to the continued growth and learning in our gardening adventures!
Likes
17
Share


@Herbz_Unkraut
Follow
Defoiled all overlaying leaves again
Increased lights to setting 3/4

Likes
4
Share


@MasterKush714
Follow
07/16/2024 Week 8 Update!!!!
Yoo gang update lessgooo!!!!!!
Sooo what's brackin gang, so we starting into week 8, officially I think it's week 6 of actual veg but that's here nor there, the girls are really coming into their own really great leaf structuring and coloration other then will keep y'all updated as the week goes on thanks for stopping by and LFG!!!!

Likes
14
Share

@Nillenium
Follow
Wir haben Woche 9 hinter uns und die Pflanze fängt ein bischen an zu zicken, aber ich ignoriere es einfach. Sie wird schon fertig werden und es wird etwas brauchbares bei rum kommen.

Likes
1
Share

@fridge
Follow
harvest after almost 9 weeks flower | insane permanent marker terps! love this cut

Processing
Likes
3
Share


@Simon_Says_Smoke
Follow
3 November
Sunset Sherbet
Well by the week this cupboard is just getting smellier, danker and bushier.
Vey good I’d say, most of all the branches had reached the scrog net and most of the branches has already been threaded through to maintain the same height.
While flipping to flower I noticed that the Sunset-Sherbet is making a lot more pistols due to this but not as fast as the Do-Si-Wine plant is making pistols.
( biggest leaf 17cm 😵 )
Do-Si-Wine
This lady while growing vigorously to the top has thin stems which it makes more prone to bending / snapping but luckily haven’t had that problem het of a side branch bending while threading it through the scrog, but I did notice that the branches are a bit more fragile.
This lady is making pistols like no tomorrow, every cola / node I can see is making pistols and this lady just wants to go full throttle. On the site it said that this is moderate growth difficulty and yes it is, thin branches, fragile and long lengthy branches.
( biggest leaf 14 cm )
Likes
1
Share


@BruWeed
Follow
Esta semana ya realice la poda. Se encuentra en estos momentos en etapa de secado dentro de una caja especial para secados de flores que uso siempre y nunca me falla.
En humedo hay 195g y utilice una lampara led de 150w en todas sus etapas.
Próximamente estaré publicando cuando este en curado.

Likes
46
Share


@Mr_Motalovah
Follow
Hello growers and tokers! 👋 👩🌾 🧑🌾.🔥💨
It's my first harvest on this community and I'm loving it.
Everyone always ready to help each other and have great feedback.
Tracking my grow on here has made it way easier.
There were times that I misplaced notes or forgot what I did or when with a certain strain and all I had to do was come on here and check it.
Also motivated me take more pictures and do more logs. All out great site. Don't know how I haven't found it earlier.
HIGHLY recommend for all growers.
The grow cycle went pretty smooth.
She's easy to grow and flowers early so you can't do much training. That being said it's great for beginners. 👌
Had no problems with pests on these, while on the other plants (none cannabis) in the balcony I had issues with spider mites.
They grew better than expected given the few hours of direct sunlight they received.
Results were good, I was expecting 10-15 grams per plant and ended up with a tad bit more.
Drying went a bit fast because there were few buds.
I probably could have took it down a few degrees as well.. my fault on that part.
They dried in 4 days, they've been curing for 10 days.
I normally test them after 15 days but they smelled so good I had to try them.
Smell: Lovely earthy, woody, slightly like diesel. Quite pungent for being autos.
Taste: Just as it smells.. leaving a nice after taste of diesel.
Touch: Very sticky, dense buds.
They break down finely in the grinder.
Cleaned the grinder before testing and after 4 joints ( 2 grams or so)
I already have a good amount of kief collected in the bottom. (Check photo)
Might grow this one again just to make some bubble hash.
The high is awesome nice uplifting, long lasting energetic but without a heavy euphoric rush.
Reminds me of a smooth haze high, although if you smoke a lot even being an experienced smoker, she'll get to you.
Only down side is dry mouth, very dry mouth!
Have some water on hand because your mouth will transform into a desert. 😂
Great strain to kick start the day.
Beginner smokers take it easy with this one. She hits hard! 👊


Likes
2
Share

@Oyziphar
Follow
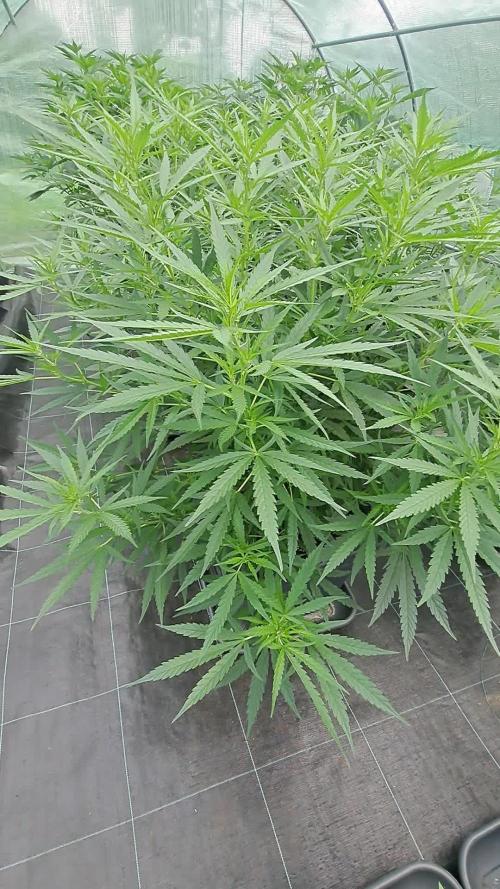
We had a week with lots of rain 🌧️; but also lots of sun 🌞
In the greenhouse the conditions were perfect 😍 So the plants have grown considerably 😗
Once a week I give the plants a liquid booster with OPF 7:2:3 ; Fulvic 25 ; Yuccah ; Biovin liquid ; Earthworm manure extract.
Big Thanks to Luc from Plant Health Solutions / Bioplantenvoeding dot nl 🙏🙏🙏


Likes
9
Share


@TheGreenGroomer
Follow
🌿 Grow Diary Update: Week 5 Check-In 🌿
Hey growers,
Can you believe it's Week 5 already? Time's flying, and so is our girl – she's a beast now! I've been itching to defoliate more, but I've maxed out the amount of defol i can do and i have now stopped completely to avoid stressing her out too much :/
Overall, she's looking happy, but I noticed some leaves getting darker than I'd like, so I dialed down the nitrogen a bit...
Remember my PPMS struggle? Well, good news – got them down to 1200ppm but could not get it any lower.. i could lower the ppm/ec of intake even more to hopefully drop it but in this stage of flower feeding lower than 800ppms is too low unless you need to flush to reset the medium so i am just gonna keep sticking to the 800ppm feed for now and measure run off each time hopefully i can get it around 900-1000, yes these high ppm/ec levels are fine for cannabis but mostly when your using co2 thats like 700ppm+ but at the end of the day SHE LOOKS GREAT!
Here's to another week of growth and learning!
Happy growing,
TheGreenGroomer🌱
ps - sorry for over exposed/out of focus images i will get better images for next update, also smells allot stronger when humidity is on the higher end, she smells so good!

Likes
1
Share

Likes
5
Share

