


Likes
Comments
Share


@PEAKYPLANTERS
Follow
HELLO TO ALL, MASTERS AND BEGINNERS
I AM PUSHING MY DOLL TO THE MAXIMUM !!!
I BEGAN WITH FLUSHING AND I BELIEVE THAT I WILL HAVE IT FOR A FEW WEEKS MORE ..... I BELIEVE IT WILL BE THE MOST ABUNDANT PLANT I HAVE EVER HARVESTED .... I AM EXCITED AND I HOPE THAT EVERYTHING WILL GO THE RIGHT TOWARD!
WE WILL UPDATE SOON ....
BEST REGARDS
PEAKYPLANTER

Likes
131
Share

@yan402
Follow
🌸🍊✨🍭🌸🍊✨🍭🌸🍊✨🍭🌸
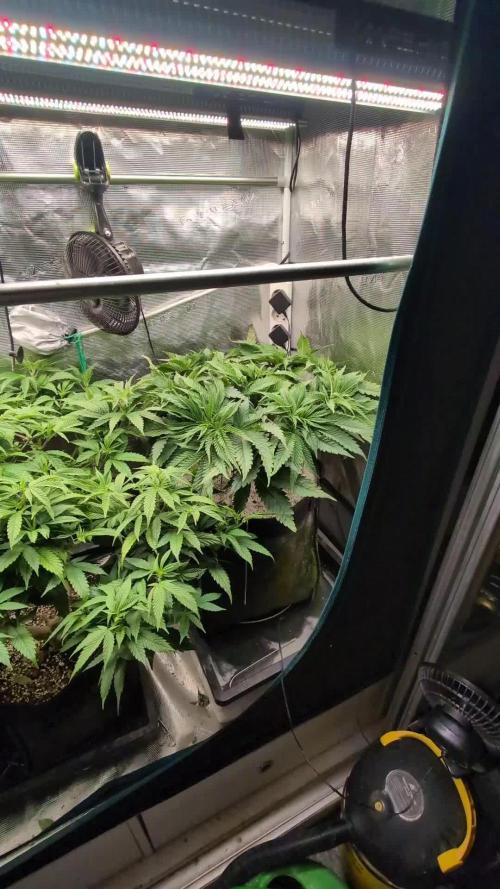
Back at it with Kannabia — huge thanks for the NEW EXCLUSIVE Upcoming Kannabia's seed Launch 🙏🍨🍊
Grateful for the trust and for everyone following along, I’ll run her clean and showcase what she can do.
Dessert-party goals: berry–citrus sherbet terps, creamy finish, tight stacks, easy trim, zero drama.
Veg 24/0, clean manifold + LST, flip on a happy, even canopy.
Coco’s fresh, seed goes in now. 🚀
Added on 12.10.2025
🌞 Light conditions: Limited direct light for the first 4 weeks — ~4 h/day on weekdays and ~10–11 h on weekends due to tent sharing and work schedule.
🌸🍊✨🍭🌸🍊✨🍭🌸🍊✨🍭🌸
💭❗💭❗💭❗💭❗💭❗💭❗💭
❗Events & thoughts worth noting❗
💭❗💭❗💭❗💭❗💭❗💭❗💭
10.08.25 GW1 Sowed seed, soaked starter pot with #1
12.08.25 GW1 Seed popped hip hip hurray
28.08.25 VW2 Stopped using GreenBuzzBloom, took it out of the schedule.
01.09.25 VW3 TriPartMicro 10→30ml, TriPart bloom 10→30ml
12.09.25 VW4 Applied nemadodes against thrips and fungus gnats.
20.09.25 VW6 topped and trained for first time, decided against a full manifold as I lost a few weeks already.
26.09.25 VW7 Topped her one more time for 8 mains
27.09.25 VW7 Topped up the pot with perlite instead of clay pebbles this time, just trying things out, TriPartMicro 30→40ml , TriPartBloom 30→20ml
10.10.25 VW9 have her a haircut, umm be trimming the side shoots tomorrow, rest in the video 📹
12.10.25 VW9 done some extra trimming to clean up a bit and chose two extra side shoots to nurture info mains, so kept the 8 original mains plus 2 rest in the video 📹
17.10.25 VW9 FfJ/fpj fish mix 30 → 60 ml
20.10.25 VW10 Feed tweak: added 3 g Calcium Nitrate/ 30 L (≈ 15 ppm N + 10 ppm Ca)
🌱💦🌱💦🌱💦🌱💦🌱💦🌱
🌿 Day to day tasks & actions 🌿
🌱💦🌱💦🌱💦🌱💦🌱💦🌱
17.10.25 VW9 – no water no feed
18.10.25 VW10 VW10 – Fed 5l of #1 → 2l runoff
19.10.25 VW10 VW10 – Fed 5l of #1 → 2l runoff
20.10.25 VW10 VW10 – Fed 5l of #1 → 2l runoff
21.10.25 VW10 VW10 – Fed 5l of #1 → 2l runoff
22.10.25 VW10 VW10 – Fed 5l of #1 → 2l runoff
23.10.25 VW10 VW10 – Fed 5l of #1 → 2l runoff
24.10.25 VW10 VW10 – Fed 5l of #1 → 2l runoff
(*RUNOFF reused for tomato plants)
🍶💧🍶💧🍶💧🍶💧🍶
💧 Nutrients in 30 L #1
🍶💧🍶💧🍶💧🍶💧🍶
💧 TriPart Micro: 10 → 30 → 40 ml
= 0.33 → 1.00 → 1.33 ml/L
🍶 TriPart Grow: 0 ml
= 0.00 ml/L
💧 TriPart Bloom: 10 → 30 → 20 ml
= 0.33 → 1.00 → 0.67 ml/L
💧 Cal-Mag: 60 ml
= 2.00 ml/L
🍶 Home-made FFJ/FPJ (new batch): 30 → 60 ml
= 1.00 → 2.00 ml/L
🍶 Calcium Nitrate (Calcinit): 3 g ≈ 15 ppm N + 10 ppm Ca
💧 pH Down: Citric acid (BuxXtrade) — adjust to ~pH 6.0
📦 TOTAL: ≈ 160 ml liquids + 3 g solids per 30 L
= ~6.0 ml/L active mix
🍶💧🍶💧🍶💧🍶💧🍶
⚙️✂️⚙️✂️⚙️✂️⚙️✂️⚙️
✂️ Tools & equipment ✂️
⚙️✂️⚙️✂️⚙️✂️⚙️✂️⚙️
✂️ 2× MarsHydro SP3000
⚙️ MarsHydro 150mm ACF Ventilator
✂️ Trotec dehumidifier (big unit)
⚙️ Mini no-name dehumidifier
✂️ Kebab skewers (LST – stainless)
⚙️ Wire + roast skewers (LST assist)
✂️ Scissors (HST)
⚙️ Vacuum (for spills & cleanup)
✂️⚙️✂️⚙️✂️⚙️⚙️✂️⚙️✂️⚙️✂️⚙️
---
🍊🍧🌬️🍬🍊🍧🌬️🍬🍊🍧🌬️🍬 Mystery seed (Kannabia Seeds) — NEW EXCLUSIVE
🍊🍧🌬️🍬🍊🍧🌬️🍬🍊🍧🌬️🍬
Species: Hybrid (GF / swift-flowering line)
Genetics: TBA (breeder sheet pending)
THC: TBA
Effect: Euphoric, relaxed, creative (target profile)
Flavor: Berry–citrus sherbet, sweet candy, creamy finish
Flowering (indoors): ~6–7 weeks target (GF)
Resistance: High (aim: no drama)
Indoor yield: TBA
Outdoor yield: TBA
Structure: TBA
Notes: Brand-new exclusive from Kannabia’s GF line — I’ll update specs when the breeder card drops. Goal is rich sherbet terps (berry–citrus + cream), low leaf-to-calyx, easy trim. Stage harvest stays on the table if tops finish early.
YouTube Link: https://youtube.com/@yan402-m8h?si=A7x4Zlr2kj-_ga31





Likes
8
Share


@Growin_Ish
Follow
Day 50 overdue feeding and watering. 5g SimPro Bloom half gallon of 6.5PH spring water each.
I'll never choose this fertigation method again. So much easier to amend the medium then top dress every 30 days.
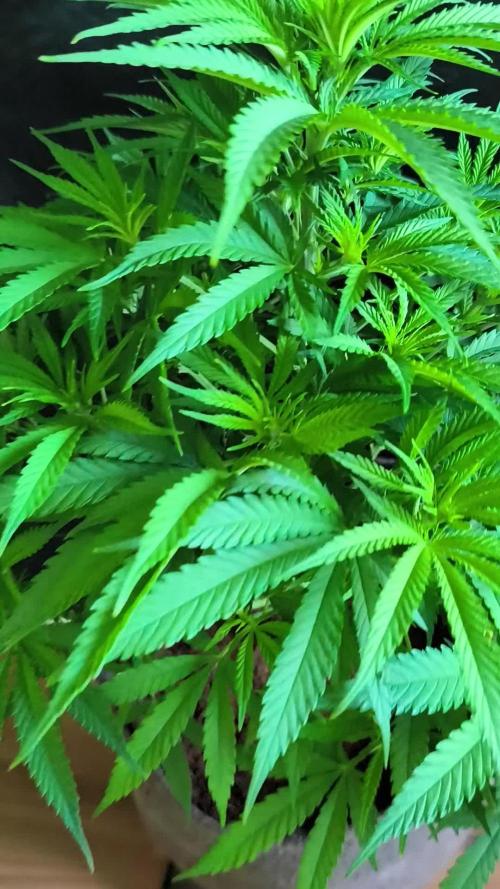
The plants seem normal for 50 days from seed, but not normal for a plant that is supposed to be harvest ready 60 days from seed. A few people here on GDs ran this strain way passed 60 days and maybe this is why. It's possible some phenotypes just take longer. No smell and no trichomes at this point. I would guess they need another 25 to 30 days to nug up.
Day 52 they are both praying but still cannibalizing themselves. 5g isn't enough. Considering a top dressing.
Day 54 - pulling 5 yellow leaves per day. This is not nutrient deficiency, these plants are fading. SMH I am behind pissed! Wasted 2 months of tent space and nutrients. I didn't do everything right, but the lesson for me is to stay away from fast strains. This is actually motivation to switch to photos. More forgiving of the small mistakes.
In this case I overwatered in early veg. I should have tossed them both then.
My preamendment ratios were off and I switched to water feeding during preflower. All of this has resulted in a plant that looks to be done in a week with marble sized fluffy buds that have zero trichomes and no smell. PISSED OFF!!!!!
I'm learning through my failure but it still sucks!
Day 55
Watered both with rain water, CalMag, and SimPro Bloom. I know CalMag isn't recommended in flower but I don't care about this bull crap plant anymore. I'm popping new beans and am gonna run these two as far as possible to see if I can get a decent top cola at least. Still pretty pissed.
Day 56
Pics show how they respond to watering. Sheryl is praying, Candace leaves are up, but not praying like Sheryl. The only smell on either is from a stem rub. No visible trichomes. Not when I even zoom in. So odd!
Day 58
Finally have some odor! These plants are growing like a regular auto-flower. I've been freaking out because the breeder says it's a fast strain (60 days). The lesson here is to always listen to the plant. Scrap the website crap and pay attention to pistils, leaves, and trichomes.
They look and smell good for day 58. The yellow leaves are likely due to me adopting an abbreviated / hybrid feed schedule to suit 60 day seed to harvest. The day 55 feeding was 6g of SimPro Bloom in 51oz of water and that seemed to hit the spot.
I need a good loupe so I can have a strong finish.
Day 61
Fed Candace 1tbl of Terp Tea with Azos & Mykos, plus Fish Sh!t. Half gallon of Spring water.
Bottom fed Sheryl Azos, mykos, & half tbls of SimPro Veg in 16oz of Spring water.

Likes
35
Share


@Hashy
Follow
Most of this week I was away so the tent was on autopilot.
When i got back i was pleased to see all 4 strains where still around the same on development. The strawberry pie is the smaller of the 2 fastbuds autos. She is starting to throw out some nice colours now. I'm confident this one is going to hit my 13 weeks scheduled for it, so not long left.
Notes
Day 64 nothing away
Day 65 autofeed last weeks nutes
Day 66 Got back, everything's fine
Day 67 manually water
Day 68 light strength from 75% to 87%
PPFD was 527 Dli was 34.2 now its 716Ppfd 46.4Dli.
Day 69 autofeed this weeks nutes
Day 70 653Ppfd 42.3Dli
Back in a week
Take it easy.
Likes
6
Share


@Krautbauern
Follow
The chimera has grown extremely large. It has perfect internodal spacing so that the light can penetrate deep into the plant. Now the flowering starts, we increase the addition of Prosper the flowering fertiliser.
Likes
4
Share

@PPFDaddy
Follow
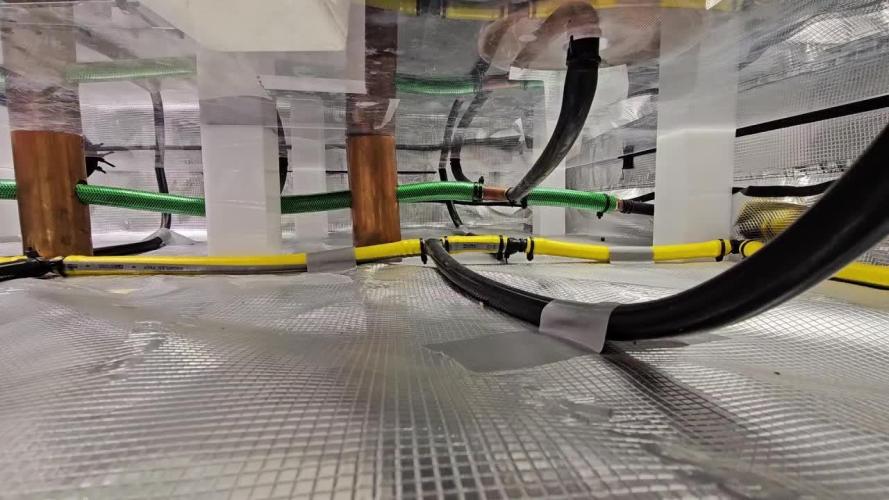
Hey growers, another week done and dusted! Since moving the girls into their new home, they’ve taken off like rockets. I’ve been training them day by day, managing to even out the canopy nicely. After all, I am a personal trainer too..lol.
On the nutrition side, I haven’t changed much, just bumped the total EC up by 0.1. What did change was the watering schedule though: I switched to a multi-frequency irrigation system, splitting feedings into 7 times a day. As you can see, everything’s looking pretty much perfect right now.
The only thing left to do is flip the light cycle over to flowering, before things get out of hand like they did in the previous run. That’s all for now. Critiques and advice are always welcome, happy growing everyone!

Processing
Likes
14
Share


@SunshineBud
Follow
Week just starting off and the one baby has still not broken thru so I take matters into my own hands and attempt emergency surgery!!!
I sanitized a Raw loader stick and gently pulled the sprout up. It laid over after and I'm going to give it a few hours before I try to put something to hold it up if it doesn't manage to orient properly. Any advice would be appreciated, This week just started so will edit it throughout the week..
11/18 Transplanted into 1ga pots and gave first n00tz FF 3tsp/GA Big Bloom.
11/19 Ok so my humidy has been plumiting to 33-36% so I tried putting a rag over a fan, putting a rag in a bowl over the inlet and nothing helped so I went to amazon and bought this! https://www.amazon.com/gp/product/B08GQZDS9J It has a gallon or so tank and a humidity sensor so it cycles to maintain humidity.
11/20 Anyways humidifier shows up today and I kicked it up to 80% and its about 70% after 4 hours.. I'll drop it down once the babies get to growing a bit more. I'm actually worried I transplanted too soon. Shout out to my boy Jeff! And a smaller shout out to James!
11/22 So no real changes the last few days, the plants still aren't thirsty so holding off on that. I did rearrange grow tent to allow me to set up a camera to capture time lapse of the process and I had to get some power to it so it doesn't cut off when the lights go out hehe. I mean all is well I guess, I'm still concerned bout my little plants and the one with the crooked stem. Although I'm thinking the more I keep hands off right now the better chance they'll have! Wish me (and my babies) luck!
11/24 So everything looks smooth, today I uploaded a time lapse of the last couple days which if you speed thru it can see movement of the plants which is cool, but I'm stressing that my 3 way meter isn't correct. Its reading like 6-7 on moisture scale after about 7 days of being on the same water/feeding. I am anxious to water again but don't want to overwater...I mean I do feel some moistness if I press down on the soil. I'm quickly learning this is a great means to work on your patience!!! Oh and I'm rapidly losing hope for the bent girl, so sad.


Likes
13
Share


@STAYINGONMYMAINCBATORUNTWO
Follow
Doing amazingly! Actually started flush literally today! So stay tuned to see how chunky these flowers are going to get! They smell delicious! Candy shop in my tent with all these flavours!
Likes
17
Share


@RakonGrow
Follow
**** HAARVEST ZOE ****
Nice Strain ,
My little Zoe really made all the mistakes you could possibly make. No matter when I give light or want water or fertilizer. It grows and grows and grows, the main thing is that there is light. It was one of my free seeds from Zamnesia. So far all seeds have germinated. I store my seeds in a dark, airtight container at 6°C. Tastes kind of sweet after curing.
Greenhouse Feeding is a really easy fertilizer to use. I used the BioEnhancer again and again. My little Zoe thanked me. The BioGrow was used as topdressing and is doing its job. The BioBloom also does its job at the right time.
And that's really great and easy if you don't have an autoflower. Of course there is a corresponding product. But I was happy to get anything here at all. Legalization has wiped out the market. But for next time I have an appropriate soluble fertilizer for fast-flowering plants. It doesn't work for 8 weeks :))
I use a Sanlight Evo 3-60 1.5 with Bluetooth dimmer. There's nothing to complain about there. Set daily cycle via app. Helpful if the weather or environment is so bad that you have to regulate the light intensity.
33g after 5 days dry . 24.5 °C to 22°C with 50%-60% .
curing in a vaccum box at 18°C .
It looks like I'm drying too long. // It tastes a bit crunchy.
Day 79:
trim , slow vacuum box to cure 22°C and 61%rH .
Day 76:
videostuff: been drying for 4 days (res 640x480) ( optical zoom x200 - x250 )
Day 72:
DLI usage total this Plant : 2236.6 DLI in 70 Days .
wet trimmed, cut off, hung upside down. see you after 14 days
Day 71:
preparing for harvest . 24h long night session .
DLI : 0
Day 70:
- Sanlight DaylightCycle
- + ON 200PPFD (00:00) - 800PPFD (03:30) - 800PPFD (16:30) - 200PPFD (18:00) OFF
video and photo tryouts with the digimicro mobil x300 optical zoom , mostly freehand
Day 69:
- Sanlight DaylightCycle
- + ON 200PPFD (00:00) - 1000PPFD (03:30) - 1000PPFD (14:30) - 200PPFD (18:00) OFF
incredibly hot and rain. lost some terpene :)) Well, summer is coming,
Day 68:
- Sanlight DaylightCycle
- + ON 200PPFD (00:00) - 600PPFD (00:30) - 800PPFD (03:30) - 800PPFD (14:30) - 600PPFD (17:30) - 200PPFD (18:00) OFF
- Added 1L bottle of water
It's hot, hot, hot, Zoe would like more water.
changed daylight cycle so it match the weather problems. tent is open until my real night comes.
103 flowers (including popcorn) counted, due to an accident about 15 flowers are missing.
Day 67:
- Sanlight DaylightCycle
- + ON 200PPFD (00:00) - 600PPFD (00:30) - 900PPFD (03:30) - 900PPFD (14:30) - 600PPFD (17:30) - 200PPFD (18:00) OFF
- watering bottle water 1.75L
weather to hot , changed daylight start time and daylight cycle so it match the weather problems.
I'm lucky, buds are still growing :)))
Day 66 (we are on the road with maximum sanlight )
- analyse some trichome .
- make some Zoom Pics and Video stuff .
- Sanlight DaylightCycle :
- + ON 200PPFD (00:00) - 1000PPFD (00:30) - 1000PPFD (13:30) - 800PPFD (17:30) - 200PPFD (18:00) OFF
- DLI will stress alot ...
Anyway, it's too hot in my room... I open the tent and now everything is fine with the temperatures and I increase the Sanlight to 100% for the first time. May Zoe love it or leave it :)) We'll see what happens
Day 65 :
Sanlight DaylightCycle : ON 200PPFD (00:00) - 800PPFD (00:30) - 850PPFD (13:30) - 800PPFD (17:30) - 200PPFD (18:00) OFF
It will soon be ready for harvest.

Likes
4
Share

@Sensemillia
Follow
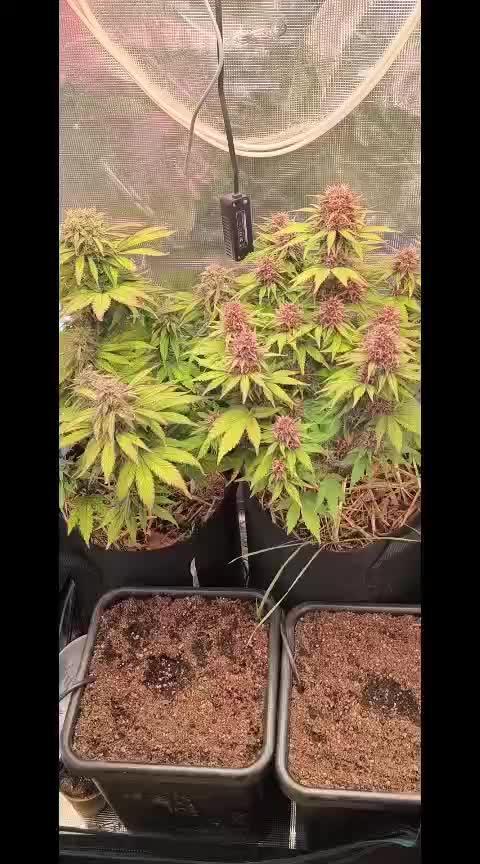
Day 58 from seed.
They looking good.
Thinking about 2 weeks more.
Mostly cloudy trichomes with a few starting te yellow.
Pistils are turning brown.
They are drinking less or taking longer to drink the amount given.
Its crazy to me how i gave these girls 4L each and never had any runoff.
Reducing the nutes to 50%.
Really noticing fast grow cycles to harvest when using the deepred 660nm light.
The smells are very fresh and sweet. Its like the smell of a just peeled orange.
Buds are super heavy and dense, alot of mass. They are like golfballs.
Planning to harvest on day 73.
Already planted 2 blueberry autos for my next grow in autopots.
Likes
38
Share

@Brujha77
Follow
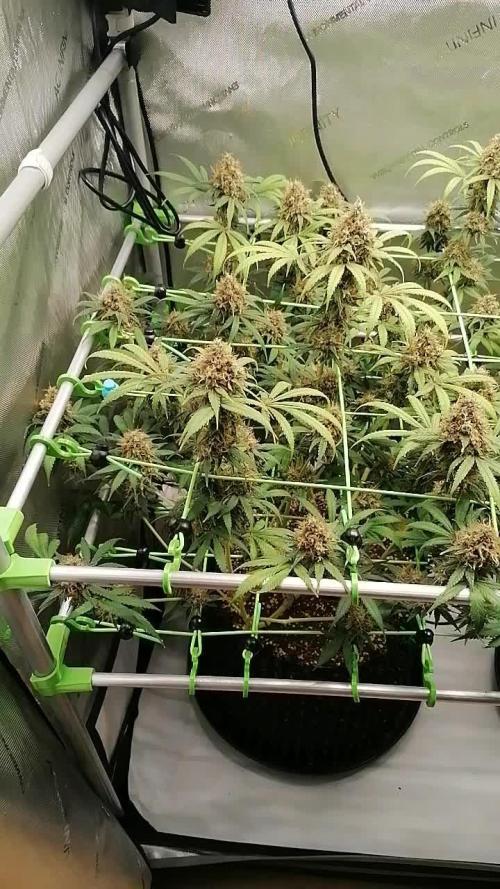
Start Woche 9. Blüte
Endspurt...
Ausser warten und Trichome anschaun ist nichts zu tun👍
Schätze mal noch eine oder zwei Wochen
Tag106
Ok, geht nun doch schneller als gedacht. Die Damen sind Ende der Woche def. Soweit.
Tag109
Die letzten Tage brechen an. Sie bekommen noch bis Dienstag. Dann ist 🍾🍾🍾😜

Likes
68
Share


@Theia
Follow
Hi all
Another week blagged. No rot lots of frost..
Fingers crossed for next few weeks.
Thanks for stopping by..Rather boring update,sorry..
Stay safe 😷😷
Grow well 🌿🌱🌼
Likes
5
Share


@OnlyTomatoes
Follow
[ Information ]
For all information on this grow, including strain and grow room details, please see Week 1 of Veg.
[ Updates ]
Day 10 - Topped at the end of Day 9. Foliar sprayed with neem at lights on today. C02 has been increased to 800 ppm average, humidity lowered to 70%. Light power has been increased, now running at 35%. Amazing growth, finally removed all the rogue sunflowers as I didn't notice any significant gains having them. They're getting thirsty today but I'm going to give them another day, possibly 2, before I feed again. I'd like one last heavy wet/dry period for root stretch and then I'll go heavy with some organic nitrogen into flip. I can't use the same net as previous harvests because of the new room design so I'll have to create a new frame to start building the final even canopy. I'm fairly happy with how both groups of plants are growing into an even canopy within their expected timelines.
Day 12 - Light intensity increased to 40%. Fed today, 1.05ec (6.8ph) with 10-15% runoff. No signs of light bleaching or stress, their leaves are almost always praying upwards. They could use a lollipopping, but with how quick they're growing I'll most likely wait until a couple days before flip to clean them up now.

Likes
13
Share

@Springtime
Follow
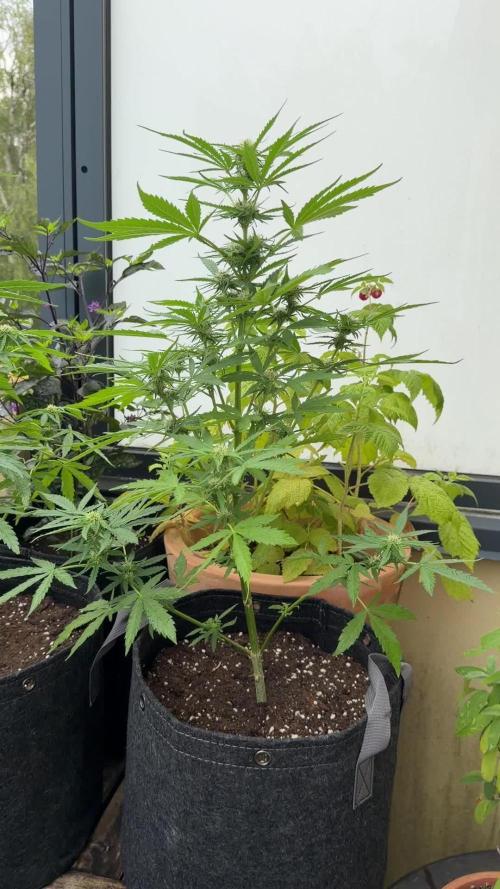
Hallo zusammen. Hier mal ein paar Bilder von dieser Woche.
Alles in allem sieht es trotz 3 Tagen Regen noch gut aus finde ich.
Habe ein paar Blätter weggeräumt damit mehr Licht die Blüten erreicht und mehr Luft zirkulieren kann. Hoffe es hilft und ich habe nicht zu viel ausgeräumt. Weil eigentlich brauche ich jedes Blatt aufgrund der Lage. Bei milky way hab ich mehr dran gelassen einfach weil sie nicht so stark aussieht wie epsilon.
Die zuckerblätter sehen auch schon gut gefüllt aus. Bei epsilon aber deutlich besser. Denke die wird als fertig werden in vermutlich 2 -3 Wochen.
Alles in allem: läuft gut soweit- bitte so weitermachen.


Likes
5
Share


@RastaRick
Follow
Coming on well. Turing into monsters... I need a bigger light. Day 45 got second dose of bio pk 5-8. I have a bad feeling i will have to do 3 separate harvest days hahaha



Likes
23
Share

@RockoCalenberg
Follow
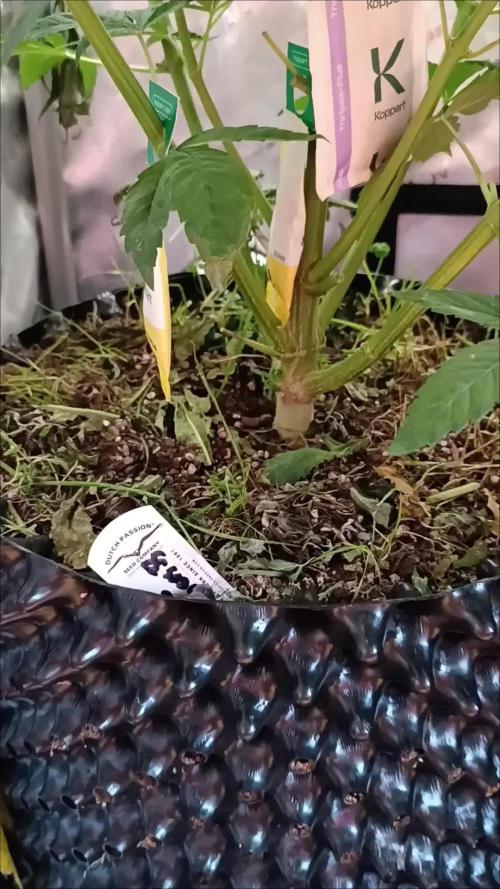
Am Tag 60 wurde auf 12 / 12 umgestellt, also gehen wir jetzt in die erste volle Blüte Woche 😄
Beide machen sich gut und sind jetzt 70 cm groß.
Die Kush ist etwas pflegeleichter und genügsamer als die Gushers, die etwas zickiger zu sein scheint.
Mal schauen wer sich jetzt mehr streckt 📏😁✌️
