


Likes
30
Share


@Nebula420
Follow
I realy love this amazing purple strain, amazing smell of strawberries...Strawberry Fields Forever xD=))
I got 21 grams because use 2 gal pot, and in outdoor daylight is 12-11.8 hours. I will grow indoor too.


Likes
19
Share


@adam_pawloski87
Follow
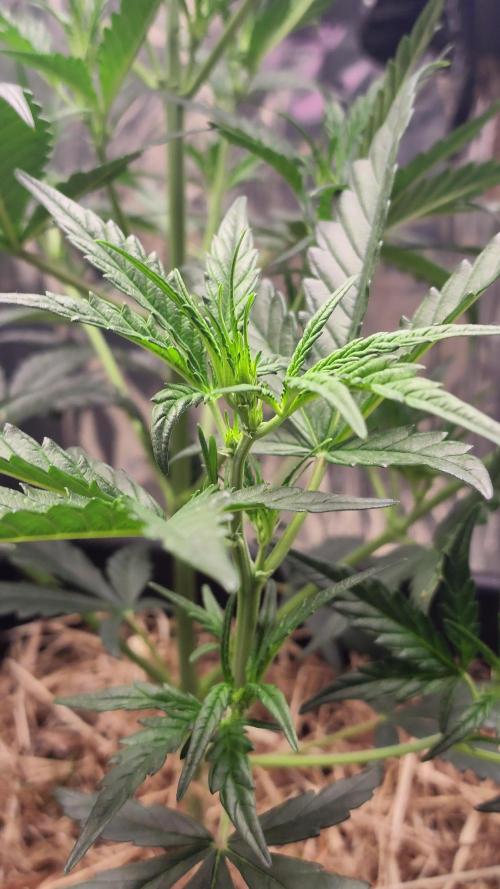
Let’s Go!! Today is day 31 from seed an these lil baby girls are shooting pistols an showing female productions!! Over the past couple weeks these girls been feasting up an building nice thick structures,building themselves up to get ready for pre flower pretty soon !! Everything is going just how we want it, everything is working properly, our air temp an humidity is stayin on point around 70-75 degrees trough the day and a humidity of 55 - 62% ! Always great! I hope you all enjoy an y’all have an amazing productive day! Peace , love an positive vibes to y’all Cheers 😶🌫️💨💨💨💨🤙🏻Keep them eyes peeled for next week !!🤘🏻🔥💯

Likes
23
Share


@DeepRootsGrowTrees
Follow
MATARO BLUE by KANNABIA
Week #21 Overall
Week #7 Flower
This week been a good week for this lady she's doing good no issues to report buds are looking good so far.
Stay Growing!!
Kannabia.com MATARO BLUE

Likes
1
Share

@SpliffDoc
Follow
Day 29 - What an absolute beauty she is. No need to defoliate or train this plant she does everything herself, she is growing at an incredible rate. Couldn't be happier with it.
Day 31- received 2-8-10 top dress. She's ready to take on the 🌎 now, can't wait for this one😋
Update Day 33-This beautiful girl is getting big. Love the way shes growing, not one single dot of a problem. Bud sites are forming, soon the buttons will appear. ✌️
Likes
26
Share


@Arcadium
Follow
Still HOT and dry! Full sun almost every day, and she's loving it. Pistils are wildly long, and buds surprisingly fat for this early, maybe she will be a early October harvest? Hoping the weather holds out!
Did another compost tea (Epsom, Kelp, Molases and Compost, aerrate 24hrs), wildly foamy this time, tons of microbes ready to get to work.
Will squeeze in a final top dress of Gaia Green Power Bloom next week. All in all looking great, haven't done any more defoliating, buds are spaced nice, may snip a few fan leaves here and there covering bud sites, but it's hard to get to them being so tall, so hoping for the best.
Getting some rain, maybe thundershowers over the next week, still spray link LCPT for PM, and BT for Caterpillars. Did find a ton of eggs on the underside of a fan leaf, so BT is necessary.

Likes
Comments
Share


@LokalGrenz
Follow
Did some trimming
Looking good so far this week going be testing the self water pot going on trip for few days humidity going be funky but hopefully well watered
Processing
Likes
67
Share


@GreenZealand
Follow
Starting week 3 today, with a challenge ahead with this little bad girl!
It seems to be a lack of Nitrogen, and I'm pretty afraid of burning the plant.
I'm feeding the plant once each two days, with Seaweed Tonic, 150ml with the suggested dilution from the bottle.
Now I have also a bottle of Canna Terra Vega, with NPKS 3-0-3-0.
Is it a good idea to start feeding the plant, with also this nutrient?
The soil is a mixture of 80% organic soil + 20% of coco coir.
Could be a lack of nutrients from the soil? What is the best agenda to follow with nutrients?
(:
Cheers!!
UPDATE (17/02 - Day 17): based on the suggestions made by many members, I've tried to gather the best of all and decided to make some moves in an effort to save this plant, and to avoid the same situation to the other 2 plants:
#1 - Lifted the LED panel to double of the height, so the distance to the plants went from 50cm to 100cm
#2 - This change with the distance from LED panel helped to low down the highest temperature achieved during the day from 27.5°C to 24°C
#3 - Since day 15, the plants haven't been watered, in a move to try to dry a little bit the soil, once I was watering every day with something close to 250ml a day. Now I'll return with water in a few days, while I wait for some signals from the plants that they are needing water
#4 - Pushed forward the idea to start feeding them this week, and maybe I give just a little bit of seaweed solution to root development when I come back with watering.
Hope it works fine!

Likes
15
Share


@Waveform
Follow
Day 53 has broken for the ladies, and I am very pleased with their progress. The buds are visibly getting stronger every day. A few brown leaf tips appeared, but at this stage I don’t care much for them. Overall, they still look very much alive.
Day 57: Uppermost leaves are curling up. Could be they are saturated with light and I should reduce the lighting period a bit, could be that the water drop installment provided them with a bit too much water, although they don’t show any more fresh signs of over-watering or fertilisation. But I had to remove water that flooded the bottom of the tank … I’ll reduce their lighting period to 14 hours. Rest of the ladies looks very healthy so I don’t want to stress them too much. It would be better to raise the left light a bit but I cannot. So, although the label says they would grow taller, I can be glad they did not gain more height.
Day 58: Buds are really getting massive, and they started to smell a bit more. They even gained 1 cm and tallest bud is now at 89.
It’s a very sweet but deep odour, really enjoyable. Lady #2, while being a bit smaller, looks like being in winter. Sugar leaves are enormous on her.
I added a detail photo from timelapse video showing some of the curled and slightly burnt leaves. They are not many, and damage does not seem to progress. Anyway, ladies are already late in the game and I am rather surprised they still look very healthy.

Likes
9
Share


@Xabii
Follow
Light is set to 80% from now on.
Starting this week Haifa Grow Clean is added as a helper, it contains Polyphosphates which are supposed to make nutrient that have fallen out of the solution available again and clean tubes/sprinklers.
Haifa Grow Clean is NPK 5/31/40, I use it once a week.
The ORP probe is not calibrated and values are to be taken with a grain of salt.
Values are average of the day.
DATE - °C - RH% (Tent Temp/RH)
20240801 25.9 70.1
20240802 25.3 69.0
20240803 26.3 66.0
20240804 25.3 68.7
20240805 25.4 61.1
20240806 25.6 66.0
20240807 25.4 69.2
DATE - PH
20240801 5.94
20240802 5.90
20240803 5.89
20240804 5.80
20240805 5.83
20240806 6.09
20240807 6.09
DATE - ORP (mV)
20240801 15
20240802 12
20240803 104
20240804 247
20240805 150
20240806 202
20240807 375
DATE - EC(us/cm)
20240801 2246
20240802 2133
20240803 2156
20240804 2212
20240805 2294
20240806 2275
20240807 2274
DATE - CF
20240801 22.45
20240802 21.33
20240803 21.56
20240804 22.12
20240805 22.94
20240806 22.75
20240807 22.74
DATE - °C (Reservoir)
20240801 23.2
20240802 22.3
20240803 21.9
20240804 22.0
20240805 22.3
20240806 22.2
20240807 22.6

Likes
15
Share


@Growshh
Follow
Things are going smoothly, still stretching but keeping them under the screen.


Likes
17
Share


@GreenHouseLab
Follow
Going into 48hr darkness at day 60, plants are sticky asf very strong sweet smells looking fwd smoke testing all 3 phenos.


Likes
4
Share


@civillianwalking420
Follow
Hella great strain , imma go head n start another 2 of these rite away , love the growth , love d buds d high ohmagahdd well done Royal Queen Seeds , will repeat wit yall cheers
Likes
8
Share


@Hippity
Follow
They had an hour drive roadtrip today, I hope they didn't get stressed. Moved them to their new home where they are under a 825W Gavita HPS. Today I stopped the Botanium's nutrients and started the Advanced Nutrient's PH Perfect Micro/Grow/Bloom, 1ml of each, inside their 1lt tank. Overall so far they look really healthy, happy, and smell good.
This is basically an attempt to grow weed the easiest way possible... I started this grow under my desk with fluorescent tubes ducktaped on it... It's also an experiment to see if it's possible to grow Cannabis with a Botanium.
This is an almost completely automatic grow using a simple automatic hydroponic system pot that has an inside timer and waters the plants every 3 hours, and they also claim that it's impossible to overwater the plant with this system. Let's see through this test...
The capacity of the pot is kinda small to grow a big juicy tree, so I'm trying to get just a few nugs the simplest way possible...
The strain is Green-O-Matic which is one of the smallest cannabis strains ever bred. It consists of some really interesting parents which are White Dwarf, Low Rider, a short Moroccan landrace and a short Ruderalis landrace
I hope you enjoy this simple experiment...


Likes
5
Share


@Chucklebrother1
Follow
Still stretching but also flowering nicely, started her on advanced nutrients big bud today at full strength along with Ionic grow just for the last stretch. Bit worried about the EC so might drop BigBud down to half if there's any burning tomorrow fingers crossed she's fine.


Likes
23
Share


@lemonairlines
Follow
Bloom 71 and flush day. I use just 10L water for that. I think thats enough :) 1-2 dark day and I can finally reap my harvest , tricoms are really fine and almost full. I think I can get the harvest date right . I hope i can get 200💪 😎👍
Bloom 75 . Soil is drying and tricoms are almost full. Colas are trying to stand right but they cant . I hope it doesnt break . Last 2 days and after darknesss.. 😈


