
Likes
Comments
Share


@Jujuvass
Follow
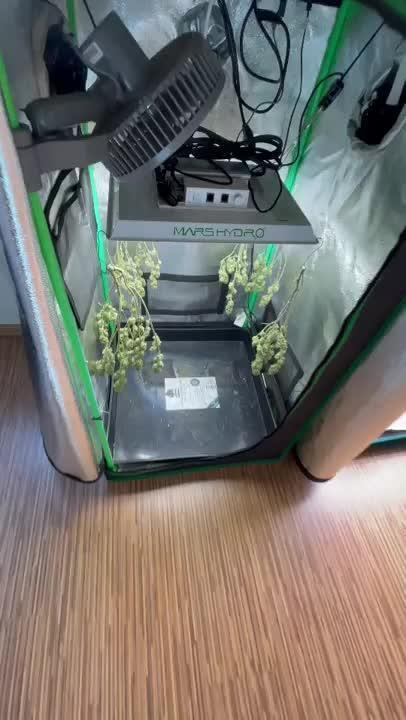
Seems all good. Not using any growth technique, just letting the bushes to take form (yield not the biggest objective here). Also not adding nutrients as so far the growth is ok. Added a dehumidifier as the grow room was mad humid. Now stabilizing to 50% RH. Looking forward for the auto to starting flower so I can enjoy some nice high in a 4 weeks!


Likes
15
Share


@SirBudAlotts
Follow
Complete! 💚
So the BPP produced some exceptional sized buds..She didn't really stink up the place on the downside..
I mean her visuals were outstanding, but did lack a little *Uhmp in the end..
Guess will have to wait for the cure to tell if she was worth the grow..
As a grower I want to smell the flowers all around me but unfortunately with this grow that was not the case.
Don't get me wrong she is outstanding 👏 👌 😉..Just wished I could have all the smells.

Likes
49
Share


@masterofsmeagol
Follow
7/18 Plants are looking great. I was able to rearrange the plants so they have a little bit more space and so I can get around every plant. I have small random pest damage (i.e. I caught a four lined plant bug while hunting jpn beetles) but not enough h to warrant treatment. I will probably spray before flower. Sun's out amd plants were praying. I rotated a couple and it only took a few hours for them to "straighten out." I went to look again rhis morning and made the final determination to expand the cage. I'm looking for the 2x4's and the wire in the next couple days. The work that ive done now will but me sometime. I wonder how this rain impacted my soil.
7/19 Plants are looking fantastic. The stretch is starting. One purple punch looks like it's beginning to flower. I think I'm entering the transition period. Jpn beetle damage is evident but not significant. I defoliated a leaf with a a leafminwr or something in it. It's so much easier to get around the plants now. I'm seeing some chunks missing sporadically though. Went to the roses out back and found TONS of jpn beetleson top of each other reproducing. They destroyed that rose bush. I'm going to keep it as a trap plant. My dad's girlfriend wanted to spray it but that doesn't make sense as theflowers are all gone. Dad's grabbing the materials to extend the cage today I think. Right now I can get around every plant but the two big ones in the back. I just cant get to the backs of them and they are huge. Almost reaching the top of the cage. A 4'-6' extension will do wonders in flower. Can't wait.
UPDATE: Dad got the 2x4's and we assembled the extension and attached it. He's grabbing the wire as I type this. This worked out beautifully. I had no idea how big the blueberry cheese in the 50 gallon was! This extension (4ft i think) is PERFECT! Then I can get a little extra wire and pull it out if I wanted to. I think I have another 2x4 that I'm going to use in the middle. Lots of great pics and a video I'll upload tomorrow. Hot af today and humidity still super high. Even the commercial dudes was surprised I don't have wpm l and that judging by some of my plants structure that I may do better than I think. I certainly hope so. I WATERED 3 GALLONS OVER THE WHOLE GARDEN. The blueberry cheese in smart pots were drooping. They drink far more water than tje others. I would've given more but we are supposed to have thunderstorms. I left my back tarp off for the night. It will increase airflow and wind is down. I feel like this is going to be my year.
7/20 I updated and loaded everything on the app but notjing would save. Did it again in the website hopfully this saves
i didnt put it all up. Didn't water the plants today. Bags seemed okay weight wise. Good thing I did the extension yesterday because those three plants were drooping they were so thirsty. I focused most of the water yesterday on those plants that needed it. The others were somewhat dry but still had some weight. Like i said the blc drinks much more water than any of the other plants. I'm impressed with the growth I'm seeing. Especially since I have been being very stingy with the water and I've only fed like twice and that was just the kelp me/you and big bloom in negligible amounts. I'm watching for deficiencies. I'm just not seeing them. I'm picking up the wire and finishing the extension and then rearranging things. I'll update.
UPDATE: WATERED 4 GALLONS CONCENTRATING ON THE PLANTS THAT WERE DROOPING THE MOST. FINISHED ENCLOSURE AND INCREASED PLANT SPACE. TRELLIS WILL GO UP THIS WEEK. VIDEOS WILL BE UPLOADED TOMORROW.
7/21 I should've watered more volume last night. I noticed two plants that seemed much lighter than the rest. After some deliberation I gave them each a half gallon of water. One was the purple punch in the 10 that's huge amd the other was that huge blueberry cheese. I think I'm going to swap places with them, take out a pallet and get some other way to elevate that ONE plant and I'll have even more room. Then I'll add my supports. It's a dream working in there now. I noticed some small interior leaves being used up and dieing. I defoliated them but it was only a couple. I'll need to start nutes at some point. Doesn't need it yet though. I'm going to add some kelp me/you for the heat stress. I need to get the watering down better but it's more difficult when they each have different needs. I kinda have to read the plant. I'd rather be overwatered than underwatered. I tried to upload what I could but some won't.
UPDATE: I went over to clip off some fencing that was doubled up AND just to check on tge girls. Found two caterpillars (small but hairy so they were older not the inch worms and possibly what has been contributing to damage on those plants. Things are spread out so it will be harder for insects to move from plant to plant and I have better air flow. I worry that leaving my tarp off might lead to high winds and plants not able to take it buf I digress. I'll add supports later. Plants are huge and drinking far more water than I've been giving them. When I got there several were drooped right over and dry as a bone. The bags are essentially all roots now. I mixed up 8 gallons of water and split it between the plants. I gave less to the two Co trainer plants that weren't drooping and the 10 I watered yesterday that wasn't drooping but for the most part the ones that needed if got at least a gallon or more. The others a little under a gallon. It might rain A LITTLE tonight too. Oh, and since it's been so hot I added 1/2 tsp per gallon of kelp me kelp you to help the plants deal with heat stress. I also noticed that some of the very bottom interior leaves are being used up. I have a feeling ill need to switch to nutes pretty soon. Plus I need to suppirt those plants if I'm going to leave that tarp off and Gove them air. Took a video. But it won't upload here. I'll have to wait till tomm.
7/22 Didn't have much timevthis morning bit I dod a video. Boy those plants loved that water and that kelp. This morning everyone was standing straight up at attention. Supposed to get rain last night but didn't. Good thing I watered. I think I'm going to up the water next watering and then again to the 10% mark if necessary. Especially with the Blueberry cheeses. I'm noticing that a FEW INTERIOR leaves are showing nute deficiencies so I'm probably going to have to start feeding soon. I'll update later.
UPDATE: Went back over and cut off the extra wire. I'm going to need to water more volume. Specifically on two plants. The two huge blueberry cheese in 20 gallon smart bags dries out much faster than the rest. I'll have to out that on a different schedule or increase the amount given. Next watering will be 1.5 or 2 gallons a plant and it might be tomorrow from what I was seeing. It's super hot and with the added airflow the bags dry out faster. I also went through EACH plant looking for pests and defoliating old leaves that needed it. Plants are still nice and green but a VERY few older interior leaves are showing deficiencies. I know this is Normal especially since they are trying n g to transition to flower. I also saw pest damage on a couple plants. Four lined plant bug. I already found the one on the other plant and killed it but I'm considering doing a spray before flower. I'm thinking either captain Jack as a "catch all", BT which works great but mostly just on pillars or the organocide bee safe 3 in one pesticide. I also have pyrethium and other things. Thus far picking things off manually has been good enough. At the very least they will get an application of BT very soon.
7/23 Held off on watering this morning. Supposed to get thunder storms I DID split a gallon with two blueberry cheese that were the lightest in the 20 gallon smart pots. Thet drink way more. My water volume is going to need to increase. We haven't had nearly enough rain. I'm going to bump it up to 1.5 to 2 gallons each plant which will be 10% for the 20s and a little less for the others. I'm still seeing various pest damage. Nothing bad but I found another couples leaves that were chomped on by a four lined plant bug so I'm debating applying something tonight when I water. I'm also noticing old leaves being used up and some interior leaves showing slight deficiencies. It will be time to start nutes soon. I'll update as I go.
UPDATE: GOT THE FEELING I NEEDED TO CHECK THE PLANTS. SOMETHING DODNT LOOK RIGHT ON THE CAMS. WENT OVER AND EVERY PLANT BUT THE TWO I SPLIT A GALLON WITH AND THE PLANT IN THE 50 WERE DROOPED RIGHT OVER. LIFELESS. I SHOULD'VE WATERED THIS MORNING BUT I DIDNT HAVE TIME. I FIGURED THEY COULD WAIT UNTIL NIGHT. EACH PLANT GOT 1.5 GALLONS AT LEAST. I USED SIXTEEN OR SEVENTEEN GALLONS ON THE GARDEN. I GAVE EACH CONTAINER PLANT ONE GALLON AND GOT RUN OFF FROM BOTH. IM NOTICING SKIGHT FADING IN LEAVES BUT IM NOT INTRODUCING NUTES TO UNDERWATERED PLANTS. I THINK 10% IS GONNA BE TGE MAGIC NUMBER. 2 GALLONS EACH. EVEN THE 10 GALLON SMART POT. ALMLST AS BIG AS THE 30S BUT DRIES OUT QUICKER.
7/24 Plants looked fantastic this morning. Defoliated a few leaves that needed it. Showed my commercial buddy and he said things looked fantastic. Since the soils still holding nutes and I'm not seeing many deficiencies I may hold off on feeding. I'm starting early flower now. I will be using nutes soon. I think ive got the watering schedule pretty much down.


Likes
44
Share


@Prototype0181
Follow
The lady's are a bit shocked after the ✂️ decapitation (topping) on 10-05. going for 6/8 cola's per plant👌
Stay tuned growmies 💚
Likes
10
Share


@InnerCityGardens
Follow
Day 15, 1st day of week 3 since sprouting out of the peat plugs. Haven’t been fed yet but will be getting a light feed this week. Hopefully the weather will pick up again soon and they’ll start to flourish!


Likes
3
Share


@doglas
Follow
Just continue to use canna nutritions and seems like biobizz all mix and canna have a lot of leaf growth other than light mix soil but all growing nicely some leafs yellowing at the bottom but might be light issues its only 2x 150w ts1000 and cant penetrat through the top leaves
Ph 6.2-6.5
Ppm 1100
Humidity during rainy days 70% dry days 60%
Temps not going over 26 and below 17


Processing
Likes
9
Share


@H473crew
Follow
HST - heavy feeding - defoliation this week. Should of been done last week *shameface* now some of them are very top heavy and are starting to bend, this is also due to having my clones way to long to begin with. They should have been a lot shorter. 😤
Very happy they have finally picked up from such a bad start in the beginning.
loving how short and bushy they are. 😃
Next week will be changing to Flower Cycle 👽

Likes
33
Share


@deFharo
Follow
Hola y bienvenidos cultivadores de marihuana, la cosecha está aquí después de 15 semanas desde semilla y 10 de floración, esta es una cepa auto floreciente con dominancia sativa que no ha defraudado.💁♂️🌲
He cultivado esta planta con atención y esmero, ataduras LST en las ramas y el tallo, en una maceta air-pot de 6l, con una mezcla de sustratos ligeros y minerales, sustrato activado con microbiología autóctona recogida en los bosques vírgenes de mi región y la he regado siempre con agua estructurada de manantial de montaña.
La he alimentado con macro y micro nutrientes solubles, creados con fermentados anaeróbicos e hidrolizados propios, creados con Microbiología, elementos orgánicos y minerales, mantengo mucha y buena luz en las carpas de cultivo, cultivo esta planta con 10h de luz interior, más otras 10 horas de luz exterior y cuatro de sueño, esta planta siempre ha usado sombrero (mulch), con mucha materia seca para dar de comer a la microbiología y mantener niveles de humedad óptimos en superficie, para facilitar la creación de raíces adventicias desde el primer centímetro de tierra.... 💧🌞👨🌾 todo para conseguir un pastel de bodas, digno de reyes! 🤴👸
Planta muy compacta con grandes y gruesas colas, bañadas de tricomas, el cultivo fue fácil, la planta recibió todos los nutrientes con ganas, sus gruesas hojas impidieron la entrada de araña roja, el tiempo de cultivo ha sido razonable y la producción decente.
No así la potencia, es una hierba de humo delicado y suaves efectos sativa, que te mantienen despierto y creativo durante todo el día... hierba para el día a día, y mientras me la fumo, otras hierbas más potentes mejoran su calidad en los botes de curado.
👨🌾 DATOS EXTRA SOBRE EL CULTIVO (Estadísticas sacadas de mi seguimiento diario.)
Peso en seco: 82g.
Altura: 45cm.
Maceta air-pot de 6l
Días de cultivo: 105
Semanas de crecimiento: 5
Semanas de floración: 10
Espacio en la carpa de cultivo: 35x35cm (0,12m2)
💦 Estadísticas de riegos:
Número de riegos: 37
Total de litros de agua: 35,3L
Media de EC: 0.96
Media de PH: 6.62
🌾 DATOS DE PRODUCCIÓN:
El cálculo por gramo/vatio de GD, para mi modo de cultivo no es exacto, porque cultivo cepas diferentes en un mismo espacio y en diarios individuales, esta planta la he cultivado junto a otras tres en una carpa con 296w de luces y ventiladores, si divido esta potencia por el número de plantas me da un valor de 74w por planta, siendo entonces que el porcentaje gramo/vatio aumenta.
🏛️ CONFIGURACIÓN DE LA CARPA DE CULTIVO:
- Carpa de cultivo: Mars Hydro GT 70
🕐 Horario de luz: 10/10/4h
La planta ha recibido 1050h de luz artificial y 1155h de luz solar.
🌞 DOSEL:
Mars Hydro TS1000 (150w)
Panel Samsung LB301B 2700/660nm (47w)
💡 LATERAL:
Panel led 3000K/660nm (36w)
Panel Led 2000K/2800K (30w)
UVA-B - 280-315-400nm (12w)
🔄 Extractor ventiladores x2 (21w).
📈 TOTAL W: 296W /4 = 74W POR PLANTA.
Consumo total aproximado: 72,52 kWh
Por vatios reales (74w): 1,10g/w 💡
Por Kilovátio hora (72,52): 1,13g/kWh
Por altura (45cm): 1,82g por cada centímetro de altura.
Por capacidad de maceta (6l): 13,66g por cada litro de tierra.
Por metro cuadrado: 683g/m2.
Por tiempo de cultivo (15 semanas): 5,46g por semana.📆
Por semanas de floración (10 semanas): 8,2g por semana.🌺
Por volumen de riego (35,3l): 2,32g por cada litro de riego.
Por riegos (37): 2,21g por cada riego realizado.🚿
Por manos: 41g con cada mano ✋🤚
Hasta un próximo cultivo....
SALUDOS Y GRACIAS POR SEGUIR ESTE DIARIO... ✋👨🌾
================================= 🙄☮️👇🙏👌🤛👉👉👉❤️💜❤️👈👈👈🤜👌🙏👇☮️🤩🖐️🏻 ===============================
Likes
1
Share

@Whodeletti
Follow
Ernte an Tag 66, weil genug Trichome Bernsteinfarben waren.
Nach 5 Tagen waren die Buds durchgetrocknet und kam in Terplockbags.
80,6 g Dryweight
Likes
16
Share


@Mr420
Follow
Day 85 not yet maybe three more days
Day 86 thrichoms look good 80% cloudy I see some amber but lots of amber hairs not many white hairs. Two more days chop time.
Day 87 couple more days looking good.
Day 88 she's done thrichoms are way cloudy and some yellow pistils but my scope says she done.
Likes
7
Share


@GhostByte
Follow
Did some defoliation and lst this week. Spread out the branches a little better because they were too close together.
I lollipopped them a couple days ago.
Theyre growing very wide, bushy and fast.
Budlets will form any day now.
Giving her one last shot of sugar royal. Only one of them isnt getting it because she looked quite packed with nitrogen. Dont want the same like my last grow to happen this time. :)

Processing
Likes
67
Share


@GreenZealand
Follow
This is the week 2!
Well, the plant looks really healthy, and she kept growing up, straight to the light!
Good to see that even after the strange beginning, with the stem crooked, she recover her path!
This week, I'm also planning to start feeding them with some NPK.
Just need to read a little bit more about it and buy nutrients.
Probably I'll try Canna stuff. Anyone know if it's good?

Likes
19
Share


@Chubbs
Follow
420Fastbuds
TrainWreckAuto
Week 5
What up grow fam. Hopefully everyone had a great 420. These 2 beautiful ladies are growing amazing. Started there transition into flower this past week. So where starting to get some great growth and all in all the plants look super healthy. Happy Growing


Likes
8
Share


@IrieOrganicVibes
Follow
January 2 - 8
01/02
A lot of growth in the two days since the last tea
01/03
Topped the smaller one and watered
01/08
Watered & started LST training on the big one
smaller one did not need water


Likes
3
Share


@I_Identify_As_A_Dan
Follow
Week 5 for Fuel D.OG by seedsman,
She's doing so well in her 5L pot she's drinking water with FPJ & some aptus regulator for better nutrition uptake, about 3 times a week. Atm she will be staying in this 5L pot until i have another 25L pot available.
She was also topped again a 2nd time. 😛

Likes
24
Share


@FlynnRyder
Follow
So These girls are doing great in my unprofessional opinion lol. they all look like they could use a cleanup but man if I come at them again like Sweeny Todd I don't think they will make it haha. This is rolling into week 3 so I'm going to wait just a couple of days and then I'm going to hard Lolipop and defoliate just a wee tad more. I'm just worried I could herm one out and I don't really know what to do with that situation. I've been playing around with Great White and that's been fun but aside from that, I'm just weaving these tops through squares. those corners could be a problem but let me know in the comments if you think I need additional light in the center or your thoughts. OH, I ALMOST FRGT LOL! so I mixed microflora and aqua flakes B together and the plants might have sat in that while I cried for an hour over the hundreds in nutrients I just ruined lol. I dumped the system and redid it though so we gucci

Likes
53
Share


@SativaSteve88
Follow
7 weeks of flower now complete my tent smells lovely and gettin even closer to harvest now i cant wait, flowers looking nice and dense and the mimosa and tropicanna are looking really well never smoked either strain so im looking forward to testing that out in a couple of weeks when its ready, thanks for stopping by and ill see you next week for my latest update ✌️👊
Shout out to barneys again to big thanks for sending me these new strains out to run i appreciate it 👍
Likes
153
Share


@Ju_Bps
Follow
Hello growmies 👩🌾👨🌾🌲🌲,
👋 Here we are my friend, the last week, she's very beautiful for the last days, with all this colors 💚💜😍
🌲Buds keep maturation 🍊 ❄️
I've given flash cleaner and harvested the plant day 69,
Buds look delicious 😋,
I'll publish harvest asap.
💧 Give water each 2/3 days.
1,5l Water + Flash Cleaner
PH @6
💡Mars Hydro - SP 3000
100% 57 cm.
🔥 Thanks community for follow, likes, comments, always a pleasure 👩🌾👨🌾💚🌲.
Mars Hydro - SP 3000 💡💡
https://www.mars-hydro.com/sp-3000-samsung-lm301b-greenhouse-led-grow-light
RQS - Epsilon F1🌲🌲
https://www.royalqueenseeds.com/f1-hybrid-cannabis-seeds/620-epsilon-f1.html