
Likes
Comments
Share


@Santica_Garden
Follow
Once again guys sorry for the lack of content, been extremely busy, also had to merge both diaries together due to poor germination. But I'm back on track and will be doing regular updates....... Well not regular because this is a weekly things but whenever it's time I'll be sure to post up. Happy Growing guys


Likes
11
Share

@Greenys
Follow
Week6 today an not impressed but there’s still time, slightly over fed but pushed back on
EC to 1.7 run off 1.8
Ph 5.8 run off 6
VPD close to in range just waiting for the new dehumidifier to turn up today.
There a little behind but I’m guessing they will catch up 3 weeks to go. Smelling strong really strong for the stage there at.
I do see the benefits to day 21 heavy fan leave strip. But never done it at day 42.
What’s people’s thoughts around day 42 fan leave strip?
I know there’s a lot of nitrogen stored in them fan leaves as I pushed the EC. Now I’m thinking to strip for better penetration and lower the stored nitrogen to help the finish better..
Hit me up with advice around day 42 strip
Cheers ok


Likes
17
Share


@smoking_hills9
Follow
Great lemon strain. Grew and smoke it before, very nice smell and dence buds, weight update soon. Ok can't be happier 🤩🌴 total weight from 3 trees are 316 gr of rock solid top quality bud. Didn't weight all the bottom trim but that's another 70gr on top of that at least. So almost 400gr 🤩😶🌫️ Seedsman genetics rocks hard💚🔥
Total harvest weight of 54 trees is 5kg, of solid quality buds, around 2kg of small bottom buds

Likes
12
Share

@carlitospiratahaze
Follow
Seguimos otra semana más de avance de este rincón de amnesias!
Todo se ve en orden alguna que otra saturada de abono otras perfectas y otras un poco estresadas,por qué las mantuve cerca del foco pensando que al ser pequeños y de 100 w necesitarían estar más cerca pero de todo eso equivocado.. en el siguiente ya sabemos.
Estamos ya con 58 días de floración y estimo que estaré con ella hasta el día 78.
Está vez la dejaré madurar al punto de conseguir el mejor sabor posible y un efecto relajante nada paranoico.
Seguimos metiendo abonos esta semana pero vamos a combinar un riego libre de solo agua y azúcares.

Likes
47
Share


@Northern_Ent
Follow
July 13: perfect cannabis weather after last week’s heat wave. Another heat wave next week, but for now it’s perfect.
Added a third scrog layer and tied it off to some water bottles. This type of scrogging works, is easy, cheap, and it’s easy to still move the plant around the yard as needed.
July 14: re-did the scrog net using a larger piece with more squares. Supercropped some ends to keep the growth tips at the same elevation. We’ll see how many colas I can make of this.
July 16: looks happy enough but I need to up the water volume in this heat.
July 18: really hot the last few days (33 C) so lots of watering and misting to keep them a bit cooler. Look really green and robust. 👍👍 Also wetting outside of grow bags to get some evaporative cooling for the soil.
Added malted barley and Power Bloom to some soil and added it as a soil layer. Added plain soil on the top to deter birds from stealing the barley kernels. A bit less than 1 tbsp of Power Bloom per 1 gallon of soil with a bit more than 1 tbsp of malted barley per gallon of soil.
#seedsman420growoff
#seedsmanseeds


Likes
4
Share


@Herbz_Unkraut
Follow
everything's looking good 😀
check www.sr-organics.com for some topnotch 5 in 1 fertilizer!
root, growth, bloom, micro-organisms, enzymes & vitamins all in one!
CODE: "Unkraut10" for 10% Discount! 😊

Likes
9
Share


@Hypnogrow
Follow
Recovery week. Last week everything went to hell this week everything is looking up. Squanch Queen is turning into my favorite one of the bunch. She is super resilient and bounced back quickly, the Skywalker and Quarter Pounder are both going to finish early due to all the stresses and stunting early on in the grow. Squanch Queen looks to be going 9 to 10 weeks inspite of all the issues. Definitely a good strain from Night Owl to pick up if your a beginner, much more forgiving. I definitely want to try the Skywalker again with a better setup. Ph runoff is looking much much better.


Likes
44
Share


@SooSan
Follow
12/12 + 130 jours
Vu qu’il y a 16 plantes mais que sur growdiaries on ne peut mettre que 8 variétés j'ai divisé en 2 diaries pour le bas de la tente
1️⃣
🏠 90x60x90
☀️ FC-E 4800 => puissance a 60%
🍁
Black Bomb / Philosopher Seed
Amnesia Lemon / PEV Seeds
Amnesia Lemon /PEV Seeds
Blueberry / PEV Seeds
Blueberry / 00 Seeds = 17g
Wappa / Paradise Seed = 11g
Dark Phoenix / Green House Seed
Quick Sherbet / Exotic Seeds = 14,5
Mango Cream / Exotic Seeds
Banana Frosting / Sensi Seed = 11g
Hindu Kush / Sensi Seed 10,5g
Mix 1 / Sweet Seed = 26,5g
Mix 2 / Sweet Seed = 15g
Mix 3 / Sweet Seed = 22,5g
Mix 4 / Sweet Seed =
📎 https://growdiaries.com/diaries/122084-grow-journal-by-soosan
📎https://growdiaries.com/diaries/124052-grow-journal-by-soosan
2️⃣
🏠 30x60x50
☀️TS1000 => 100w = 54g
🍁
Quick Sherbet - Exotic Seed = 12g
Quick Sherbet - Exotic Seed = 12g
Quick Sherbet - Exotic Seed = 17,5g
Quick Sherbet - Exotic Seed = 12,5g
📎 https://growdiaries.com/diaries/122080-grow-journal-by-soosan


Likes
4
Share

@Oldwied
Follow
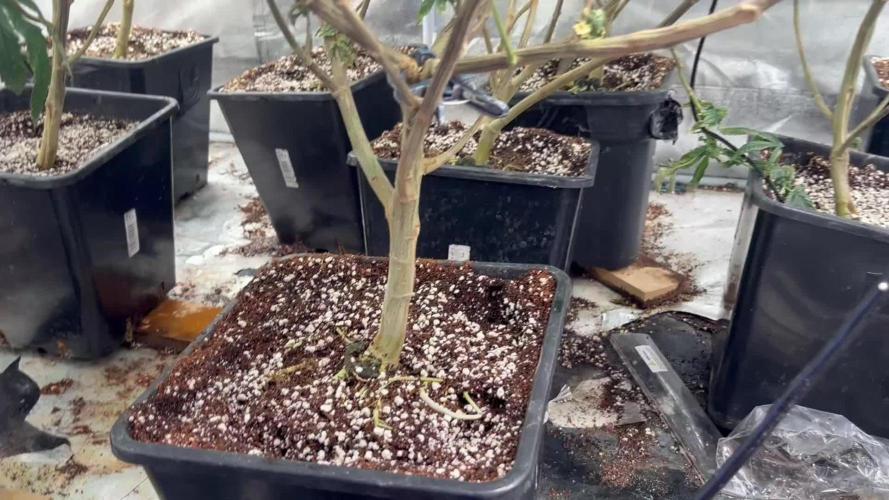
The little one doesn't bend easily in one direction. After massaging it for a few minutes, it loosened up. But the next day, it braced itself against it again with all its strength. Unfortunately, a branch broke in the process. It recovered quite quickly, but unfortunately one of the two heads is lagging behind in development.
Shit happens
15,5 main branches are still 16 when rounded. So the goal is achieved
Light Power: 60%
Day 34
Photoshooting
Topping
Day 38
Photoshooting
Defoliation


Likes
5
Share


@Mr_nugs_lover_David
Follow
Beautiful autoflowering strain, she had developed a very fat single main cola, very sticky and heavy.
Likes
2
Share


@Aleks555
Follow
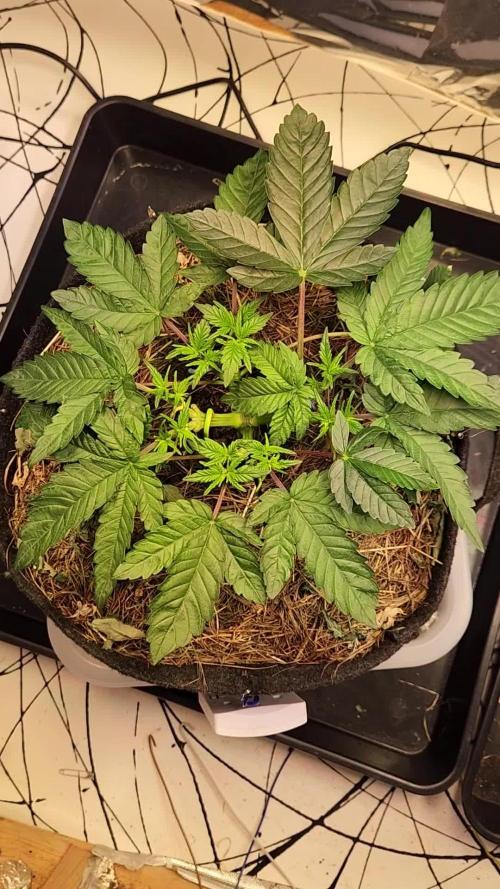
Our beauty is now 3 weeks old and has grown to nearly 18 cm tall, continuing to develop strong and healthy. We’ve decided to enhance her nutrition by continuing to feed her with Xpert Nutrients fertilizers, which provide everything she needs for balanced growth.
Additionally, we’ve started using CO2 to further stimulate active growth. The daytime temperature remains at 28°C, nighttime at 21°C, and the humidity is maintained at 65%. We are still keeping the light schedule at 12/12, closely monitoring how the plant responds to these conditions.
A big thank you to Xpert Nutrients for their high-quality fertilizers, and our CO2 experiment promises to be exciting!
Likes
14
Share


@RakonGrow
Follow
Tag 82:
Hab mich nun doch entschieden , da die Trichome wirklich zu 90% Milchig sind , die Dame am Stamm abzuhacken . (Extra ein kleines Beil gekauft (scherz)) . Dann im Stück einfach Kopfüber . Abluft ist an , Ventilator unter der Spitze . Jetzt noch 4-5 Tage warten (je nach Temp und Feuchte) . Und dann schauen wir mal was es wird .Für mich wichtig , viel Feuchtigkeit im Raum , ich will das sie auch nach dem Trocknen noch kleben . Ergo hab ich den Stoftopf drinne stehen gelassen .
Tag 82-88:
Kopfübertrocknung
+ Temperatur : 21°C - 23°C)
+ Lüftfeuchtigkeit : 52%rH-60%rH
+ VPD kleiner gleich 1.2
+ 4 bis 5 Tage
Ich versuche maximal einen VPD von 1.2 zu halten für ca 4-5 Tage.
Tag 85:
Ein Video hinzugefühgt wo ihr das Trockenzelt sehen könnt. Die LED hab ich genau unter der Abluft angebracht damit kein einseitiger Luftzug entsteht, dafür mit mehr Power .
Tag 86:
Video von der Kopfüberhängenden hinzugefühgt.
Tag 88:
5 Tage lang getrocknet , Blüten vom Stiel getrennt und in Schalen in den Weinkühlschrank mit Silikatgel für die Feuchteregelung.
Tag 90:
Trichome aufgenommen.
CureBoxen geschlossen nach 2 Tagen im Weinkühler
Next Step:
Bouveda 58% , Sauerstoffabsorbierer

Likes
3
Share


@Takeaims
Follow
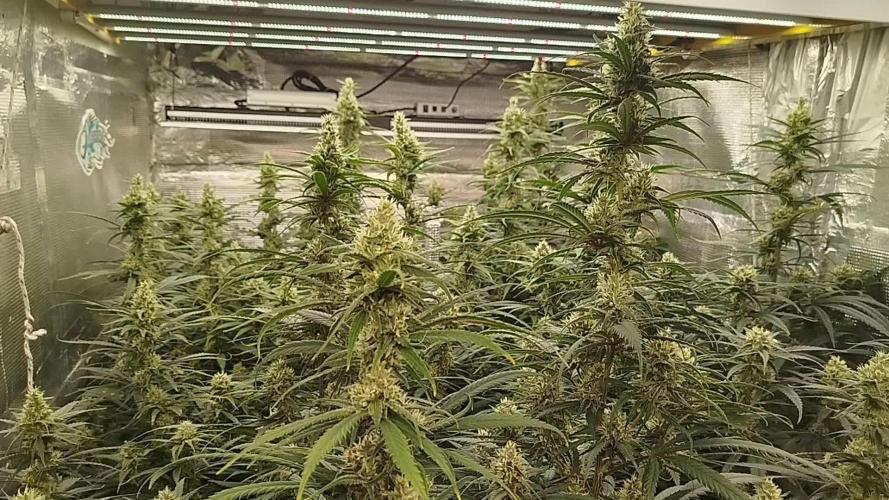
Here we see the full Mars hydro set up got another larger tent in the wings waiting on more seeds
Likes
23
Share


@NSCanna
Follow
Buds are fattening up pretty well and I've had to use more rubber garden wire and clips to keep the branches from bending over. Smell is increasing on the Northern Light but still a mild skunk on the Black Devil. Also gave the very last feeding on the plants this week so they will get nothing but water until the chop.
I'm very happy with the microbe populations so I stopped feeding the sugars (molasses/agave) as the plants themselves don't get much out of them; that stuff is just for feeding the soil beasties. I had added some predatory mites several weeks ago to deal with some springtails, and the mites annihilated the population. I did find a developing larva though so there are still some around. Posted lots of microscope videos today.


Likes
11
Share


@Coughy
Follow
Good stretch this week, I haven’t lollipopped at all, not even in veg. It’s fairly leafy everywhere and I want to get in there and defoliate bottom 1/3 soon.
A lot of dead leaves I imagine, just been so busy and been neglecting the grow. Funny, how when you first start out and you’re overly micro-managing and then as the months go by, it starts to become a chore.
I ordered a light from China, a Meijiu (HLG)550 V3. HLG Canada didn’t want to give me a decent discount so, unfortunately had to ship my money outside the country. Saved 50% for a quality light though. Might take a bit to get here, been processing in Hong Kong for 4 days.
So far the leaves are healthy but last run they started to turn deficient after the stretch. In my defence, with the last grow, I was just starting on the dry nutrient regimen and made mistakes. Hopefully it stays healthy throughout bloom cycle with new changes and knowledge.
New reservoir this week as follows:
Partial drain, most of it gone, but 100mL RO added and;
40 gram cal nit
30 jacks
30 mag sulph.
100mL mighty bloom enhancer
100mL head masta
300 mL h2o2
25 mL Fulvic
40mL Humic
pH ended up high with addition of bloom enhancer, added pH down to 5.8.
PPM 1360.
Wednesday-Day 10
Added water and some nutes.
PPM 1200
pH 6.0
Started a small section of lower 1/3 defoliation
Day 11
Did some more defoliation, added a video to show progress.
Day 12
Finished lollipop on right plant. Moved some branches around. Added 20 liters and 20g cal nit, 10g of both jacks and magnesium sulphate.

Likes
18
Share


@DaddyPrime
Follow
3/24 start of wk 3 of flowering. This strain has decent internodal spacing. About 1 or so inches in between each bud spot. Looking forward to how the buds progress. There hasnt been too much of a stretch since flowering has started
3/29 starting to produce some smell
Likes
4
Share


@MoneyMorris
Follow
Looking like 3 more weeks until harvest. I’m going to start flushing in about 10-12 days
