
Likes
Comments
Share


@Elcoquigrow
Follow
Saludos a quienes visitan mis diarios ✌️🏾 Me pueden seguir en IG: @elcoquigrow para compartir más contenido e información del mundo cannabico 🙌🏾

Likes
18
Share


@thenotillwizard
Follow
At day 34, I can see more changes in the terpene profiles.
The big winner at this stage is the pheno #2.
Everything from her is superior: structure, bud size and consistency, resin production...
The pheno #3 is my second favorite one for the same characteristics, except for the terpene profile which is the more favorable one among the 5.
The girls still share that same tropical funk back ground (myrcene/terpinolene).
The sour lemon punch is still present in the phenos #2 and 4.
Pheno #1
Sweet/Gassy
Pheno #2
Sweet/tropical/Sour citrus
Pheno #3
The more interesting terpene profile.
She kept ALL the banana aroma from the tropical funk 😋
Sweet/tropical/skunk
Pheno #4
The less interesting terpene profile.
The aroma carries weird hints of soap.
Sweet/tropical/Sour citrus/Chemical/Soapy
Pheno #5
The terpene profile is very close from pheno #3.
Very tropical and sweet, with less of the banana aroma.
Sweet/tropical

Likes
7
Share

@GREENPHOENIX6262
Follow
01/26 - (Clone mother) - She got a little funky last week and was in recovery mode for about 2 days - She has since then recovered (24hrs) and is performing amazingly - Running high temps High humidity - 2 part feed (Clean/Nute) on micro-dose program.
01/31 - Applied HST to lay her out - she is rebounding accordingly - Increased her feeds to once every other day alternating from nute to clean water - picked up the lights a little (19 inches above canopy) to clear room for SOG

Likes
3
Share


@OldskoolHed
Follow
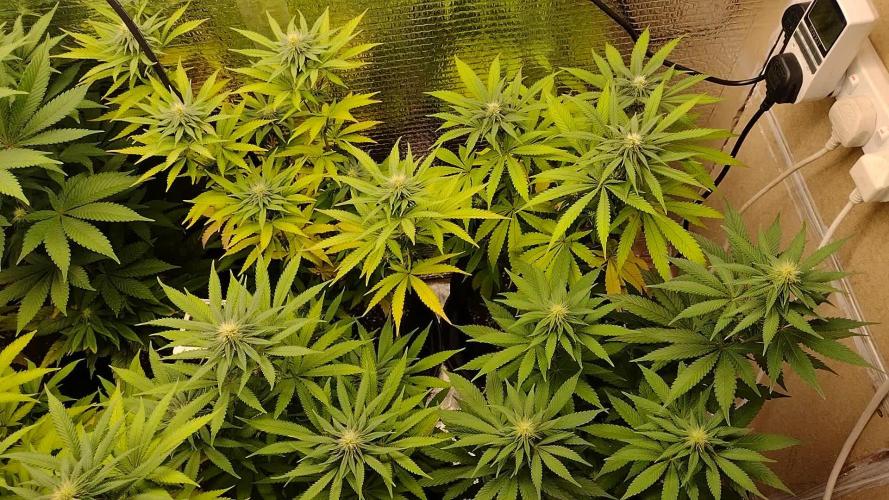
Doing well, flipped to flower, looking forward to watching her fill up the 3x3. She's a heavy feeder so I'll need to stay ahead of that.
Likes
42
Share


@DogDoctorOfficial
Follow
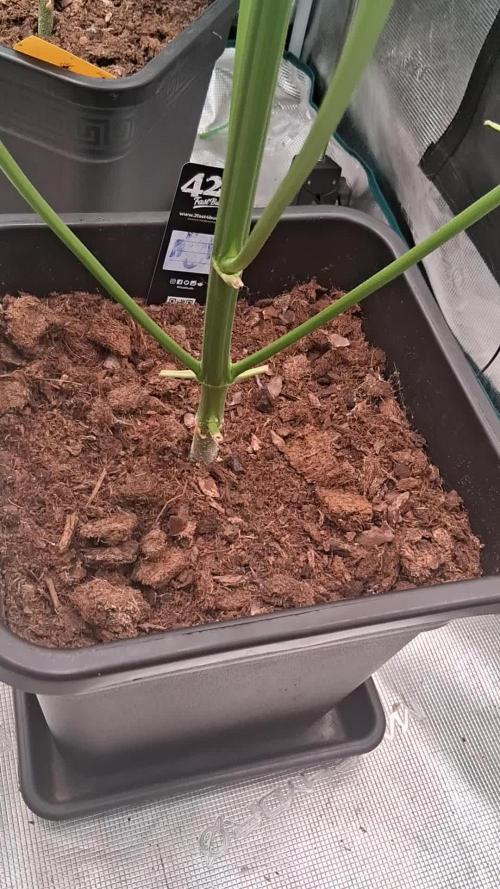
I am absolutely over the moon with excitement to finally be at this stage in my journey with my beautiful cutie pie. The time has finally come to transplant her and I couldn't be happier to do it with the help of Aptus Mycormix. This mix is truly amazing and I know it will do wonders for my Gitl.
One of the things that I love most about Aptus Mycormix is the way it supports root development. I mean, let's face it, strong roots are the foundation for a healthy and thriving plant. With Aptus Mycormix, I know that my plant's roots will be able to absorb nutrients more efficiently and grow even faster. This is particularly exciting since we are entering the third week of the vegetative phase where growth tends to really take off.
But the benefits of Aptus Mycormix go beyond just the roots. This mix is designed to support the growth of beneficial microorganisms which can help protect my plant from disease and improve soil health. It's like a whole ecosystem of goodness!
but I'm also mixing in some Aptus All-in-One pellets. These pellets are truly amazing and offer so many benefits to my plant.
For starters, Aptus All-in-One pellets are a slow-release fertilizer that is designed to provide my plant with all the nutrients it needs throughout the vegetative phase. This is such a great feature because it means that I don't have to worry about overfeeding or underfeeding my plant. With the Aptus All-in-One pellets, my plant will get exactly what it needs, when it needs it.
Another benefit of the Aptus All-in-One pellets is that they help to improve soil structure and texture. This is so important because it means that my plant's roots will be able to grow more easily and efficiently through the soil. When the soil is healthy and well-structured, it also allows for better water retention, which is critical for the health and growth of my plant.One of the things that I love most about Aptus All-in-One pellets is that they are made with organic and natural ingredients. This means that I can feel good about what I'm feeding my plant, knowing that I'm not exposing her to harmful chemicals or synthetic fertilizers.
Of course, what I'm really excited about is the potential of this plant's genetics. I don't want to get my hopes up too high, but I am hoping for a taste that takes me back to the 90s. I can't wait to see how she develops <3 <3 <3
As always thank you all for stopping by and for supporting me on this journey, i am super passion about growing and fell blessed to have you all with me on this new journey <3 <3 <3
Genetics -Seeds Mafia Lavender Automatic
Light - LUMATEK ZEUS 465 COMPACT PRO
Food - APTUS HOLLAND
All info and full product details can be find in can find @
https://seedsmafia.com
https://aptus-holland.com/
https://autopot.co.uk/
https://lumatek-lighting.com/
<3 <3 <3 Growers love to you all <3 <3 <3
Auto Lavender Feminized is a very popular type of cannabis, whose strong therapeutic effects are highly appreciated. It has a flowering period of approximately 9-10 weeks and can be grown both indoors and outdoors. It is a resistant variety which can be cared for easily.
This variety is mostly appreciated because it produces strong, durable and resistant plants. Its branches and stem usually grow vertically rather than horizontally. It reaches heights of 120 cm and the harvests amount to 90 grams/plant. In addition, it contains high levels of THC- up to 20%.
As their name suggests, the plants that grow from Auto Lavender Feminized seeds have a smell and taste similar to those of lavender, also comprising mint and rosemary tones. This is a variety of cannabis that is usually appreciated for its pleasant fragrance and high productivity, seeing as its buds and stem produce an impressive quantity of resin. If you’re looking for another kind of feminized, autoflowering variety, Auto Lavender Feminized will not disappoint you for sure!
auto Lavender Feminized is a feminized, autoflowering variety, obtained by crossing the Lavender and Lowryder 2 species. The plants that grow from this variety have a very specific structure: they are tall, vigorous, and have large branches. At the end of the flowering period, the plants acquire an orange-gold shade.

Likes
28
Share


@TheHighentist
Follow
Start of week 4 of flower!
Off to a troubling start, as the light switched on over 1 hour ealiere than scheduled.
I took a spare timer, and set it up to continue it's 12/12 schedule, but now moved one hour back.
I cross my fingers they forgive me for this error.🙏
👽👉31/10 The day after watering and the day my timer messed up my 12/12 schedule. But hope it brings no problems.
I defoliated lightly and only removed most under the SCROG line.
Even a couple of underdevoloped branches that stretched below SCROG-net got cut.
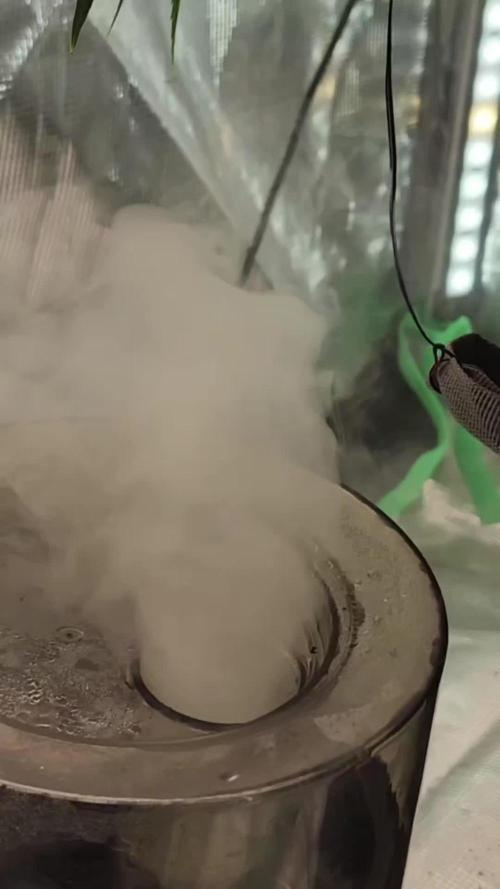
👽👉 1/11 Been having a battle with humidity after watering, but upped my air circulation to help.
👽👉 2/11 Waterday*
Upped my nutes on BioHeaven, BioGrow and BioBloom.
👽👉 3/11 They seem to be responding good to the upped nutrients.
👽👉 4/11 Humidity under control.
👽👉 5/11 The VPD on point, has really speed up the trichome production.
👽👉 6/11 Waterday*
Stayed on the same schedule, as last watering. They seem very satisfied and no signs of mistreatment.
Likes
27
Share


@Mookzer
Follow
Elle fleurissent bien malgré un manque de chaleur et et lumière elle tienne bon au grand froid :)

Likes
4
Share


@Diy_autoflowers
Follow
Flush week! It has not been 7 days since my last update. But I wanted to share these photos with everyone that won't see them. haha
Soo I will be harvesting with my new machine! Will past about that in my harvest update

Likes
Comments
Share


@Robom069
Follow
had to change nutrients bc i didnt had enough so i had to buy a good bloom fertilizer in panic
i chose hesi bc its relieable
left side acid dough
right side black domina

Likes
10
Share


@PurelySly
Follow
1/22/24 day 24 flower. Growing good, one pheno is growing into the light and into the fan but not too worried about it.
1/25/24 day 27 flower. Added another trellis because one pheno grew past it and is getting some burned hairs.

Likes
23
Share


@adam_pawloski87
Follow
This grow was pretty simple ! They went a total of 103 days from seed! Very trichomy dense buds with the smell of Berries vanilla and skunk ! This is a must try for you all Fastbuds has the greats!!!


Processing
Likes
14
Share


@TheDankofScotland
Follow
I have bought different nutrients to use in this grow and honestly I must say terpinator , W-8 and massive as flower boosters along with coco a and b as the base nutrients is fucking class I have never seen bud growth like this in 2 weeks of flower and the smell is so much stronger and sweeter usually buds won't smell like that till the 3rd week
Likes
4
Share


@AutoCrazy
Follow
This sweet seeds lady smells really good at this point. Some of the bigger fan leaves are starting to fade a bit so she must be starting to ripen up.
I am finding the bud structure is not overly dense. It’s very foxtailish. But we will see if she fattens up as she swells up in her final weeks.
😎🍿🍻🌱
Likes
2
Share


@ItalGrow506
Follow
Así cumple su 11va semana de vida y 7ma semana en Floración, esta semana han habido cambios en el jardín ya que al fin pude adquirir un tent, muy contento puesto a que es lo suficientemente espacioso como para meter 6 planta. La Amnesia luce preciosa en el tent, los capullos están bien pesados y llenos de resina, tuve que amarrar los capullos principales dado a que el peso de los mismos se llevaban las ramas para abajo. En esta semana se regó una vez con fertilizantes, en la solución de riego se utilizó: 3ml Flora Gro, 4.5ml Flora Bloom, 3ml Flora Micro y 3ml MagiCal. La solución de riego marcó 515ppm y 6.0 PH.

Likes
4
Share

@Beastmaster
Follow
12 Nov 11 weeks and 3 days. Flowers are coming along well, nice and hairy.

Likes
Comments
Share


@Dankmark420
Follow
Now it just a waiting game..😍
Girls are looking better and better for each goddamn day only thing I’m kinda meh about is they haven’t showed colour yet.. but we hope it will come in the next couple weeks
O.m.g is getting FROOSTY🤯
Likes
Comments
Share

@BlaKX
Follow
Mit so einer riesigen Monster Automatic habe ich nicht gerechnet!
Normalerweise entlaube ich später aber hier ist es schon so früh nötig. Habe noch nie so riesige Fächer Blätter entfernt bei Autoflower Sorten!
Likes
9
Share


@OGbros
Follow
ITA: topping a tutte le piante compresa la strawberry lemonade. Piccolo deficit della LSD probabilmente dovuto a una carenza di calcio/magnesio, ho quindi tamponato la soluzione con 0.5ml/l di cal-mag della biobizz. In seguito ho piegato i rami più grossi verso il basso i modo da far passare più luce, anche negli intenodi più bassi. La prossima settimana conto di toppare nuovamente gli apicali e fare una nuova LST
ENG: topping to all plants including strawberry lemonade. Small LSD deficiency probably due to a calcium / magnesium deficiency, so I dabbed the solution with 0.5ml / l of biobizz cal-mag. Then I folded the thicker branches downwards to let more light through, even in the lower areas. Next week I plan to patch the top management again and do a new LST
Likes
Comments
Share

@Dankmark420
Follow
Unfortunately I forgot to take pictures from this point on.. I only saved some videos..