


Likes
Comments
Share


Likes
86
Share


@DogDoctorOfficial
Follow
Apolo F1 Mission Diary - Week 3: The Ballet of Bend, Blossom, and Root Rhapsody
Greetings, fellow cultivators and guardians of the green frontier! Week 3 of our Apolo F1's botanical saga has unfurled with a kaleidoscope of growth and a symphony of roots that dance beneath the surface. Join me as we explore the verdant ballet of bending, the flourishing foliage, and the hidden root rhapsody.
This week has been a crescendo of controlled chaos, with the delicate art of bending taking center stage. Each branch gracefully sways and contorts, responding to the gentle nudges like a botanical ballerina in an intricate dance. Our Apolo F1 is not just growing; she's performing a choreography of resilience and elegance.
And here's the thrilling revelation - roots! Yes, beneath the soil surface, a clandestine world is unfurling. Root tendrils are popping up like eager spectators in the front row, reaching out to absorb the nutrients and anchor our green virtuoso. It's a root rhapsody, a silent applause to the nutrient-rich symphony we've orchestrated.
As I continue to guide the botanical ballet, the TDS in the watering regimen maintains a harmonious 390 ppm, providing our plant with a nutrient-rich libretto. The pH, the conductor of this aqueous symphony, remains a steady 6.0, ensuring optimal nutrient absorption and a thriving performance.
Temperature-wise, our Apolo F1 revels in the cozy embrace of a 26-degree Celsius environment. It's like providing the ideal backstage conditions for our botanical star, ensuring she performs at her peak.
Now, let's talk about the behind-the-scenes technique – the bottom feeding spectacle. Water is tossed into the plate, and our green companion sips from this botanical wellspring. It's a refined and controlled drinking session, a sophisticated soirée for our growing virtuoso.
And as always, a tip of the hat to Aptus Holland, the maestros of our nutrient symphony. Their meticulous regimen ensures our Apolo F1 gets the VIP treatment from the roots to the tips of her flourishing foliage.
As we marvel at the ongoing dance of growth and the flourishing of our green virtuoso, I extend my gratitude to the digital coliseum, Grow Diaries, for being the stage where our horticultural epic unfolds. And to Royal Queen Seeds, whose Apolo F1 has become the star of this green opera.
In the next enthralling chapter of our Apolo F1 Mission Diary, we'll witness the continued ballet of growth and the root rhapsody beneath the surface. Until then, may your gardens flourish and your green endeavors be ever bountiful!
As always thank you all for stopping by and for supporting me on this journey, i am super passion about growing and fell blessed to have you all with me on this new journey

Likes
1
Share

@gse314
Follow
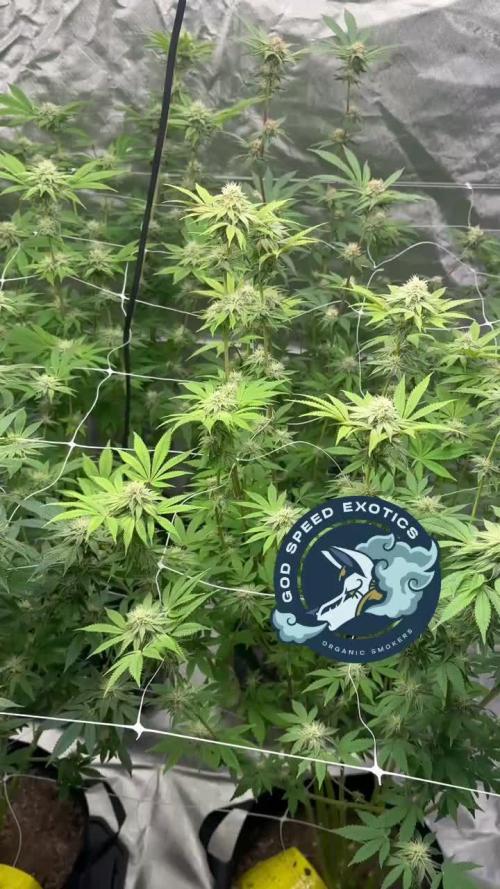
1st day of week 6, Did my last defoliation for this grow, see yall next week

Likes
8
Share


@Chubbs
Follow
420Fastbuds
FBT2312/Week5
What up grow fam. Sorry for the late weekly update but was having some technical difficulties. This week has been eventful to say the least. My heater went out letting my Temps drop to high 40'f for a night or two and wow did the plants tell me they're angry. Definitely starting to bounce back but just goes to show the reselants of Fastbuds genetics. I lollipoped and did one more defoliation this week so hopefully flower stage will be smooth sailing. All in all Happy Growing
Likes
11
Share


@Lazuli
Follow
I think 12 liter airpot was too small, i opened the pot and was one rootball
Likes
14
Share


@OutdoorUK
Follow
Been busy so didn’t get any photos of just before it went in flower but here’s where we are up to

Likes
28
Share


@Bongman
Follow
Week 8 of Flowering, pistils are turning brown. Will check tricolms next week. Since I am doing hydro, flushing can commence the final week.
*finally got my co2 meter to work so boosting co2 to 1000 ppm and increased light output but 20%. The rent increased 30% in humidity and raised 4 degrees F so manageable for sure.
Happy growing
BM
4TweentY

Processing
Likes
18
Share


@Silverback_Guerilla
Follow
11/30:
I harvested the first 6 today, flushed 5 more for the second time, and fed everybody else for the last time.
I washed all the branches using the 4-step method ascribed by Doc Bud at High Times/420magazine and many other notable cannabis connoisseurs, with slight modifications:
4 x big plastic totes/bins
8 x ounces of 12% hydrogen peroxide (or 32 ounces of 3%)
2 x cups of concentrated lemon juice
2 x cups of baking soda
10 x gallons of water in each bin
Unless your tap water stinks, you're safe to use tap water for the procedure, but I used an inline carbon hose filter to fill my buckets.
Bin #1 - 10 gallons of water mixed with the hydrogen peroxide
Bin #2 - 10 gallons of water mixed with the lemon juice and baking soda
Bin #3 - 10 gallons of water as hot tap water
Bin #4 - 10 gallons of cold tap water
I was mainly concerned about removing as much lint and cat/dog hair as possible, but also rinsing off any residue left from all the various foliar applications of humic/fulvic acid, kelp, axiom, big bloom, and tiger bloom I did. First, I put my leaf blower on low speed and blasted my plants thoroughly, one at a time, replicating 50-60mph winds for about 10 seconds and watched as a whirlwind of debris and hair flew out the back door.
Bud-washing:
Pluck any necrotic plant material and any old fan leaves off while they're still on the plant. Then, take a handful of branches and submerge them in Bin #1 for about 30 seconds, agitating it, removing from water, submerging again, agitating, etc...then remove it and let it drip out for a few seconds...then repeat the process with Bins #2-4. Let it drip dry overnight with a little bit of airflow, then dry as you normally would...baskets, boxes, etc..
I hadn't watered these plants in a few days, so they were almost in draught, but after doing this procedure, they were fully hydrated(turgid) and seemed to have brighter colors than before. Nice!😍
12/1:
The bottom part of the closet seems empty with only 9 plants in there.. 😟
I cut the harvested plants up and put them into drying baskets in the top of my closet with a small oscillating fan on. I've got the temperature fluctuating between 68f and 75f and the RH is staying between 48% and 52%.
To do that, I had to take down the small light in the top of the closet to fit the drying baskets up there. So, I moved the 3 shorter plants still up there down to the bottom and put them on top of buckets. Now the bottom of the closet looks full again!😃
I'm anxious to finish up this grow so I can get busy growing the Fastbuds Fast Flowering Photo Testers!!! When I harvest the next 5, I'll flush the remaining plants really well and that will be all the flushing they'll get..I'll let them dry back out for a few days and harvest them. I've got to make some minor improvements to the garden (adding UV, blue and red/far red booster panels and intake fans) That should put me on track to start germinating them by mid-December if all goes well.
12/3:
...early a.m...
The harvested plants are already dry!?!?? And have excellent texture??? Wow..bud washing is for real..roughly 48 hours after I hung them to drip dry, and 40 hours after I put them in baskets in 50% RH/70f conditions with moderate airflow...usually takes 4 or 5 days to get a good slow-dry in the same conditions, so I'm convinced that this must be attributed to the bud-washing procedure. I'm sold!
Here's the talley so far:
plant #1 - 115g (plus 13g larf) - Candy Cane [F2]
plant #2 - 108g (plus 18g larf) - Candy Cane [F2]
plant #3 - 119g (plus 15g larf) - C4ndycaine [Candy Cane x C4]
plant #4 - 92g (plus 6g larf) - Candy Cane [F2] - the smallest plant in the main area
plant #5 - 112g (plus 22g larf) - Candesia [Candy Cane x Amnesia]
plant #6 - 75g (no larf) - Candesia [Candy Cane x Amnesia] - grown in upper area under 200w
...afternoon:
I flushed 6 of the last 7 plants for the first time today and harvested 4 more of them. I washed them and hung them to dry.....my dripping wet bathing beauties!😍
Likes
56
Share

@SwabianMadness
Follow
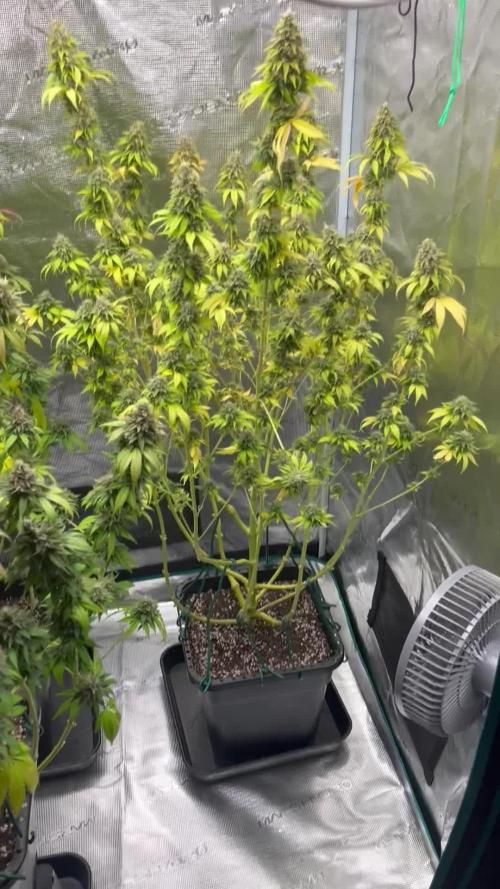
Get down to 1L daily. And end of week every 2 Day 1l. To prevent to high Humidity in the Setup
I‘m happy about that they soak out the Nutrients out of the Soil and started to bring out some Colours.
The Strain are a big Taker of Nutes but i want green Plants so i don’t give much at the Last Weeks. Hope i get as Reward a Nice smooth smoke
Make an longer Cycle out of it as Genehtik said with the harvest Date. Maybe they get a little bigger


Likes
23
Share


@HideAndFly420
Follow
Day 43 (15 of flowering)
stopped top max. Added 2 ml more of bio grow, Let’s see what’s going to change.
Stretching is visible every day more. Now just waiting to big bud increasing.
Next week i’ll add Carbon Filter to ventilation set up.
I think other 6 weeks left.
Day 45, added Rhino skin, let’see next change.
Day 46, i think streching is finish. Now just waiting to get that bud big and fat.
Removed top max 4 days ago, and added 2 ml of rhino yesterday just to improve stem and branches, i added cause i tought to a nutrients déficience but at thé end after reading answers to my question i fixed air ventilation that was increasing too much the temperature in the up per side of the grow.
Soil Ph is 6,8.
Day 48, i just moved my ventilation that was causing some issue to the highest bud of orange. Rhino by adv increasing stem health is visible now and color are great. I think orange will take at least 2/3 weeks more than Blue dream auto
Any suggestion is accepted :)
Let’s go.
Likes
11
Share


@CreatureCreator
Follow
Day 70- 2nd day of flush. Plant 1 is pretty much done, just waiting for trichs to amber up a bit. Plant 2 has a ways to go, but I’m flushing anyway.
Wifey complained about the choking smell, but realized my in tent filter was off because a branch lifted the plug out of the socket 🙄🙄
Day 75 - past few days been feeding PK at 0.7 EC, waiting for the trichs to turn. Going back to plain water tonight. #2 plant has much larger buds, but is waaayyy behind #1 - still tons of white pistils.


Likes
67
Share


@AsNoriu
Follow
Day 63. She is going down, my fastest ever big healthy plant. Looking at first waves 3 numbers, I think it's not even 2 ounces plant, it's f@cking THREE !!! ;))))))))))))
Day 71. One to jars another for trim jail. Busy day ...
Day 72. After small delay, she went down ;)
Day 82. Straight to vacuum sacs, but she was really great !
Happy Growing !!!
Likes
41
Share


@Kush_queen
Follow
So I had to trim these ladies they desperately needed it
These ladies are getting nice and smelly fruity smell filling the tent there are plenty of crystals coming and the buds are bulking out filling up the stick
I am looking forward to these 🌱💚💨💯🙏
Likes
2
Share

@GracelessGardens
Follow
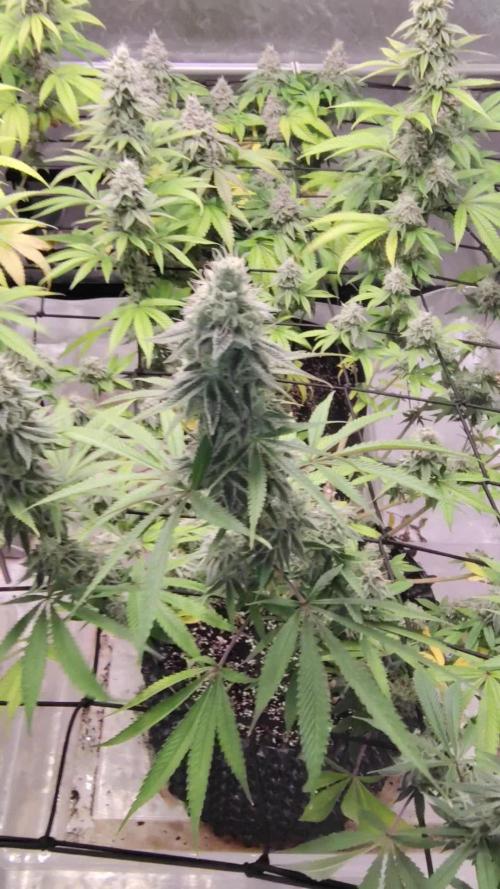
The tent smells crazy right now! The mix of gas/skunk/citrus and earthy tones is crazy. The turning point really started to take on purple color in the bud and sugar leaves. The frost is still stacking like it's going out of style.
The buds are getting dense on all the plants, starting to keep a close eye on the colors and trichs, looking like harvest in the next week or 2, at least for the blood diamond.

Likes
4
Share


@Ninjabuds
Follow
A good little plant with small buds but they seem to half almost no leaf to calex. And a high tricomb content. Would be a good one to breed with a plant that has large buds

Likes
2
Share


@Cannatech
Follow
The plant is literraly touching the ground now and the buds are not only big now they are getting a lot of density to them and the smell is getting very strong a lot like widow but with almost a sour twist. Mouth watering for sure.

Likes
7
Share


@ClosetBuds
Follow
There were alot of super small fruitflies in the soil, Anyone tips? Right now i am just killing them all.

Likes
99
Share


@BudXs
Follow
Coming down to the last few weeks to final harvests. Bruce banner and slurricane mothers remain as do 2 x slurry daughters, 4 x bb daughters, and 2 x FFT testers. The season has been good to me, the Scroggernaut has been good to me. Once these buds are in jars, the room will be cleaned, and I will break for the winter. Improvements next year:
mini split AC
new strains
under belly lighting


Likes
99
Share

@BudXs
Follow
Huge surprise in the mail today. Big shout out to @BeanswithPork and all the good people oit here being real in a crazy world.