


Likes
Comments
Share


@CampExotic
Follow
Finishing up this run. Two plants have been chopped and I’m waiting on the final three. Pulled the two earlier than I wanted but it’ll just allow me to learn more. Hoping to chop these next week. All about the fade.


Likes
6
Share

@goatpharms
Follow
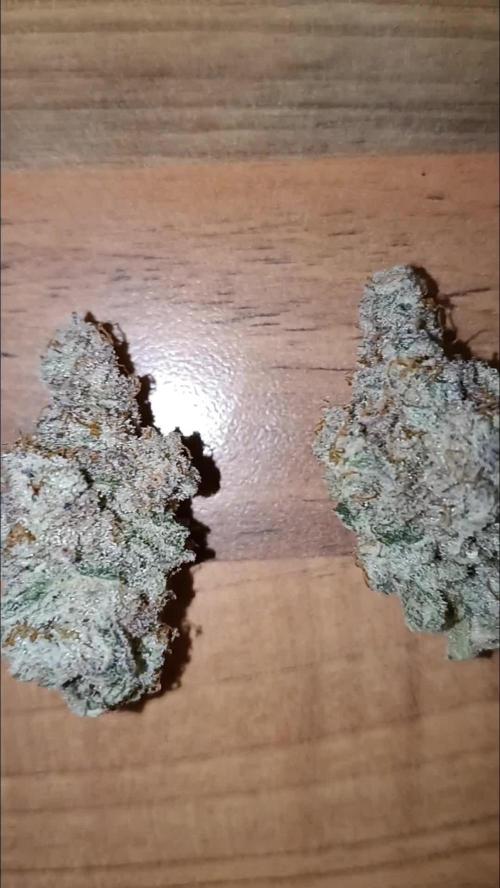
Sorry guys, I'm pretty bad at these diaries, too busy enjoying the bud!
Epic strain, certy caps cut, drop a message 9f you have any questions 💚


Likes
30
Share


@BudXs
Follow
We are an update away from the results. Both control plants chopped by way of spin trimmer. Non defo has the biggest cola, defo plant has the most mains and seems a bit heavier when wet. Results in a week or so
Sbg.com


Likes
9
Share


@rhodes68
Follow
9/4 Day 135 of the grow, wow 20 weeks
Plants doing well all depends on weather now I guess
9/4 Keeping tabs from here out in terms of day of flower, total grow length has no bearing.
Poly Day 55 of Flower 9-14 days remain
Zona Day 45 of Flower 19-24 days remain
9/7 Re-adding Big Bloom (Fox Farms) to nuet mix, plants seem to be missing it and I agree. Once a week at 3 tps/gal

Likes
6
Share


@MG2009
Follow
06/16/2019
Start of week 3 flowering,stretching seems to have stopped,nicely formed buds and pistils popping out of everywhere! Top dressed with Happy Frog 0-5-0 bat guano, some defoiliating but sailing along nicely this week.
More pics soon.
Processing
Likes
15
Share


@LongJohn420
Follow
12.9 4th veg week done.. Healthy girls now. Blue fire's showed some signs that root space was running low and also nitrogen def. but got it under control and girls are now in final homes. Blue Fires are in 11L plastic pots and the New's in 16L root pouches.
They got used to new homes pretty fast and were growing more the next day moved 👌 No hussle there. This is where sometimes I have burned extra time when messing with trasplanting. Maybe rhizotonic had something to do with this. Using it for the first time now.
I mixed my soil 75% soil and 25% coco.. usually it's 50/50 but I like to tweak thing a little to see what's up 😉😎🙏
I topped all girls yesterday. Aiming for 6-8 tops in every plant and gonna insert netting there and also use stakes to part that space.
Ok happy growing to everyone and thanks for stopping by! 🙏👽

Likes
300
Share


@Ju_Bps
Follow
Hello growmies 👩🌾👨🌾🌲🌲,
👋 Beatifull buds and girl, smeel so strong 😱😱
End is close, need few days 😁😁
Flush Started
💧 Give water each 2/3 day
2l Water + Flash Cleaner (3 ml/l)
2l Water + Flash Cleaner (3 ml/l)
PH @6
💡Mars Hydro - FC 3000
50% 26 cm
Mars Hydro Fan kit
Setting 9
Have a good week and see you next week 👋
Thanks community for follow, likes, comments, always a pleasure 👩🌾👨🌾❤️🌲
Mars Hydro - Smart FC3000 300W Samsung LM301B LED Grow Light💡💡
https://www.mars-hydro.com/fc-3000-samsung-lm301b-led-grow-light
Mars Hydro - 6 Inch Inline Fan And Carbon Filter Combo With Thermostat Controller 💨💨
https://www.mars-hydro.com/6-inch-inline-duct-fan-and-carbon-filter-combo-with-thermostat-controller
Fast Buds - Tropicana Cookies FF🌲🌲
https://2fast4buds.com/us/seeds/tropicana-cookies-fast-flowering


Likes
53
Share


@SativaSteve88
Follow
2 weeks into flower and looking well so far, plants are nice and healthy, added boost to my feed this week started at a low feed and will up it over the next couple of weeks


Likes
15
Share

@Stoney_Stark
Follow
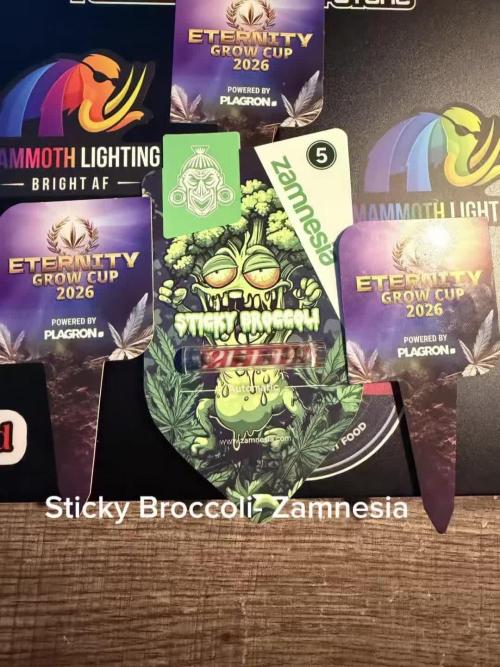
Sticky Broccoli Auto – Harvest Update
Strain: Sticky Broccoli Auto
Breeder: Zamnesia Seeds
Grower: Little Lilly Farms
Overall Outcome
This run didn’t hit the mark. The genetics felt unstable and inconsistent across all four plants—each one expressed very differently in structure, growth, and final bud development.
Bud quality leaned airy and loose, lacking density, but was heavily coated in resin and trichomes. Visually appealing frost, but the overall structure didn’t back it up.
Terpene profile was underwhelming—nothing loud or complex. Mostly a sweet gas aroma, but lacking depth and punch.
⸻
Harvest & Final Week Timeline
4/1
Fed one plant ½ gallon of previous nutrient mix. Very minimal runoff.
4/2
* 1 gallon of premade feed (from 3/31) used
* Small runoff achieved
* Other 2 plants received straight RO water (not pH’d)
* No noticeable change in color or fade on water-only plants
4/3
¼ gallon of premade feed mix applied
4/4 – Harvest Begins
* Cut down 2 plants
* Fit both into the Cannatrol for drying
* Buds extremely resinous and sticky
* Heavy trichome coverage across both plants
* Switched remaining plants to straight RO water moving forward
Final Feed Mix (per gallon):
* 0.5 ml Silicium Bloom
* 2 ml MagCal
* 4 ml Green Sensation
* 2 ml Cocos A
* 8 ml Cocos B
* 4 ml Pure Zym
4/6
* Purple coloration showing on sugar leaf edges
* ¾ gallon RO water (not pH’d)
* ~5% runoff
4/7
* ¾ gallon RO water
* Minimal runoff
4/8
* 1 gallon RO water
* ~15% runoff
4/9
* ¾ gallon RO water
* ~20% runoff
4/10
* 1 gallon RO water
* ~15% runoff
⸻
Drying & Cure
All 4 plants have been harvested, dried, and are currently being trimmed. Final weight will be recorded once trimming is complete.
⸻
Final Thoughts
* Pros:
* Extremely resinous buds
* Heavy trichome production
* Good visual frost
* Cons:
* Airy, low-density buds
* Weak terpene expression
* Highly inconsistent phenotypes across all plants
Overall, this run felt like a genetic gamble that didn’t fully pay off. While the resin production was impressive, the lack of density and terp complexity made this one fall short of expectations.

Likes
46
Share


@Roberts
Follow
Drunken Bitch Slap has gotten pretty big. She is bulking now under the Hortibloom Solux 350. Her colas are looking dense at the moment. Everything is looking strong are the moment. I may do a solution change tomorrow for last bit of bulking. Thank you Hortibloom, and Aeque genetics. 🤜🏻🤛🏻🌱🌱🌱
Thank you grow diaries community for the 👇likes👇, follows, comments, and subscriptions on my YouTube channel👇. ❄️🌱🍻
Happy Growing 🌱🌱🌱
https://youtube.com/channel/UCAhN7yRzWLpcaRHhMIQ7X4g

Likes
2
Share

@Bear_Grows_Green
Follow
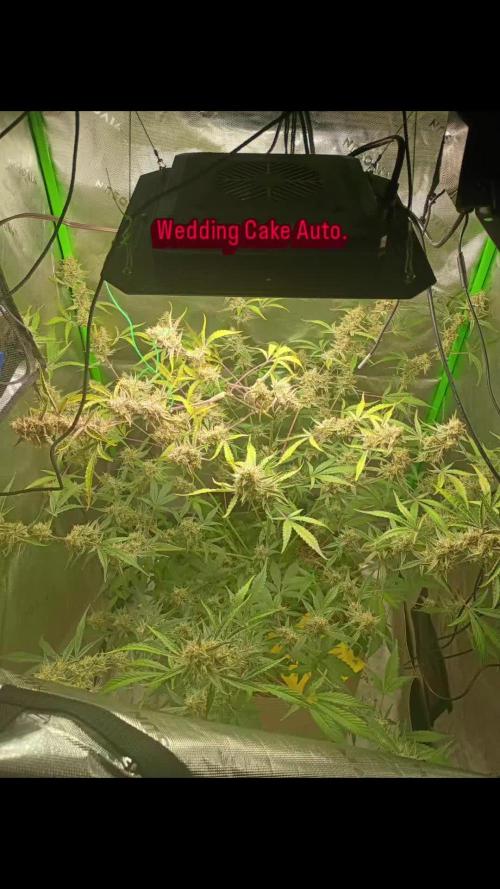
12/11Might be a day early but I'm calling it the start of a new week. The ladies have been looking super unhappy last couple days determined they were root bound so got em put into their final home this morning. Chop and dropped cover crop put thin layer of mixture of BAD worm castings and Coast of Maine lobster compost and watered in with goodies. Set the ppfd to 300 and vpd closer to 1.0
12/13 everyone is looking happier but a bit hungry mixed up light foliar mainly for one girl but gave it to all of em. Inoculated the bed with BB+, Gnarly barley, and Kashi Gold, put down straw layer and watered in some wdg3000.
12/16 top dressed around each plant with craft blend and ocean blend and a mixture of castings and compost. Then watered in a quart each with all the goodies


Likes
6
Share


@masterofsmeagol
Follow
5/25 Some pics may be repeated because I forgot to add a new week. Waited until about 11 to bring the girls outside. They were definately dry on top so I used the rest of the gallon to water them. When going outside I noticed a specific kush plant that's lighter than the rest. I really need to up my water volume on these big plants. They are also getting close to not liking it in the 1 gal. and are ready for a transplant. I cleaned the cage so as soon as the weather permits these girls will be outside in the direct sunlight. Basking in the sun in the cage to finish hardening before going into their final homes which will be 20-30 gal smart pots and a 50 gal grow pot. Well SOME of them are ready for transplant. The link kush seems to take its time but it looks extremely indica-E. Weather looks like it will be amazing this week so I'm obviously stoked. Wouldn't suprise me if these girls were outdoors be the end of the week!
EDIT: THE GIRLS STAYED OUT FOR 3.5 HOURS AND LOOKED FANTASTIC. TUEY GOT SOME INTENSE SUN, EXPOSIRE TO THE HIGH RH AND A LITTLE EXPISURE TO THE HIGH WINDS. SPECIAL KUSH SEEMS TO BE THRIVING. I THINK IT WILL DO WELL IN THIS CLIMATE. THAT ONE MK ULTRA IS GROWING AT A RIDICULOUS RATE. I WATERED THE PIBK KUSH THAT WAS LIGHT. I CANT WAIT FOR THE UPCOMING WEATHER. I CAN EXPOSE THE PLANTS TO SOME DIRECT SUNLIGHT AND SEE HOW THEY HANDLE IT. I CAN ALSO GET THE GROW BAGS READY WITH SOIL MOXED AND THEM IN THE RIGHT LOCATION THE DAY BEFORE THE TRWNSPLANT TO FINAL HOME BUT IM GETTING AHEAD OF MYSELF. IM HAPPY THUS FAR. I also added another half hour of darkness so the plants will be closer to actual daylight times. They're down to 16.5. I'd like to have them lower by now but it is what it is. If some reveg I'll deal with it.
5/26 Plants seem to grow an inch I'm a day. MOST are getting to the point where they want to stretch their feet out. Good thing they'll be going in their final homes as soon as they are hardened off completely. I brought them out around 8 this morning. I have to be back at noon but I'm uncertain if leaving them out that long is a good idea. I'll probably have to check them in an hour or so. They're in the lean-to but THAT gets direct sun until the sun rises high enough in the sky to block it. I put them in here rather than the cage so they can build a tolerance to these harsh winds. Topsoil was dry as fuck. I watered everything. I focused on those that SEEMED the lightest and the largest plants. That MK Ultra plant I fimmed is going to be MASSIVE. I'll update what I do as I do it. Oh I also cleaned the bags twice and they are hanging inside the cage with the direct uv rays hitting any part that's discolored. I MIGHT do one more cleaning but I doubt it. Twice is enough. Technically three times but still. I want things to go right. It looks like I've got some pretty good phenos.
EDIT: I PULLED IN (BLOCKING VIEW FROM PART OF THE DRIVEWAY OFF) BECAUSE THAT WAS CLOSER TO MY PLANTS. I GET OUT AND START ADMIRING MY PLANTS AND LOOK ACROSS THE STREET TO SEE TWO STATE TROOPERS AND SOME DETECTIVE ACROSS THE STREET. DAD SAID AN AMBULANCE CAME BUT LEFT WITH NO LIGHTS ON. THEY WERE TALKIMG TO THE COUPLE SEPERATELY. I ATE LUNCH AND THEY WERE STILL THERE. MY HOT WIFE WENT OUT AND THE ALL STARTED FUCKING RUBBER NECKING. MEANWHILE I BROUGHT THE PLANTS INSIDE WITH THE SMALL COVER MY S.U.V PROVIDES LOL. PLANTS WERE LEFT IN DIRECT LIGHT UNTIL IT ROSE HIGH ENOUGH TO CUT IT OFF TO THE LEAN TO. PLANTS SEEM LIGHT. WELL SOME DO. I NEED TO GET A GOOD WATERING SCHEDULE DOWN. JUDGING BY HOW THESE PLANTS TOOK IT TODAY I THINK THEYLL BE OUTSIDE IN FOREVER HOMES WITHIN A WEEK.
5/27 Just poked my head in and checked on them real quick. NO damage whatsoever from all that time in the sun. I left them inside this morning so I can bring them out later in the day to see what happens. I'll add pics later and update what I do.
EDIT: BROUGHT THE PLANTS OUT TO THE CAGE AT A LITTLE BEFORE 10AM AND LET THEM BASK IN THE 85° SUN. THE WIND WAS A LITTLE ROUGH ON THEM. IT WAS ACTUALLY THRASHING THEM BUT MY INTUITION SAID 'LEAVE THEM BE' SO I DID. I DID MORE CLEANING AND FIGURED OUT SPACING IN THE CAGE AND I MIXED A 30GAL GROW BAG AND 2 20GAL GROW BAGS WITH A 50/50 MIX OF FOX FARM OCEAN FOREST AND HAPPY FROG. SOUL WAS MIXED WITH A GRADE STAKE AFTER BEING PUT IN A GALLON AT A TIME (TO ENSURE EQUAL PARTS) AND FINALLY MISED BY HAND. TAKES A LOT OF WORK. IM NOT GOING TO BE AS PICKING WITH THE OTHER ONES. I STILL HAVE MY 50 WITH SOIL IN IT. MAINLY DUE TO LAZINESS AND THE PAIN IN THE ASS IT IS TO MOCE THE FUCKER. PLUS IF IM LOW ON SOIL (WHICH IM NOT) THAT WAS GOOD SOIL AND THE PLANT HAD NO PROBLEMS SO I GUESS IF NEEDED IT FOULD BE REUSED. I NORMALLY JUST EMPTY THAT FIRST AND MIX A SHIT TON OF SOIL IN THERE AND SHOVEL IT IN THE BAGS. THIS WAS MUCH HARDER. PLANTS GOT CLOSER TO 2 HOURS OF DIRECT SUNLIGHT BEFORE I MOVED THEM TO THE LEAN TO. I WILL UPDATE WHEN I HRING THEN IN BUT DESPITE THE HARSH SUN AND WIND THEY SEEM FINE.
EDIT: BROUGHT THE GIRLS IN AT TWO BECAUSE MY WIFE HAD AN APPOINTMENT. NO DAMAGE WHATSOEVER. I THINK IF I USE THIS WEEK TO INCREASE DAYLIGHT HOURS AND UP THE WATERING THESE PLANTS WILL BE READY TO GO IN THEIR HOMES. A FEW ARE BIG AND DEF READY TO STRETCH THEIR FEET.
5/28 With the increased sun some these plants are out growing their containers. PLANTS SPENT APPROX AN HOUR AND A HALF IN DIRECT 85° SUN. EVERYTHING SEEMED FINE AND I WAS GOING TO LEAVE THEM FOR THE DAY IN THE CAGE. THEN I NOTICED THE BIG MK ULTRA'S MAIN STEM (IT GOT FIMMED BUT THE MAIN ONE) WAS STARTING TO DROOP A LITTLE. I PICKED THE PIT UP AND DESPITE A LITTLE BIT OF MOUSTURE ON THE TOP THE PIY WAS LIGHT AS A FEATHER. PLUS SETTING ON THE THEM ON THE TAR WASN'T THE BEST IDEA EITHER. I MISED UP SOME WATER AND WATERED THE PLANTS THAT SEEMED LIGHT. I NEED TO PICK UP LIKE ONE MORE BAG OF OCEAN FOREST FOR MY 50 GAL. I'M GOING TO TRY TO FINISH MY OTHER TWO 20'S AND THE TWO 10'S TONIGHT SO I'LL KNOW WHAT IM LACKING. ITS BASICALLY JUST THE 50. IF MY INTUITION SAYS ITS OK ILL TALE THE "COOLER" DAY TOMORROW AND TRANSPLANT THE THREE PLANTS TGAT ARE GETTING TO BIG FOR THERE POT. ÌF NEEDED I MIGHT GET SOME SCREENS TO USE AS A "BLIND" SO THE PLANTS DONT GO STRAIGHT TO FULL SUN ALL DAY.
EDIT: TJAT HUGE MK ULTRA REVOVETED NOCELY ONCE WATERED AND PUT IN THE SHADE. IT NEEDS TO BE TRANSPLANTED. I MAY DO ITCTOMORROW. PLANTS HAVE GOT TO BE CLOSE TO HARDENED. I MIXED ALL MY SOIL AND FILLED ALL THE GROW BAGS WITH THE MIX. I FINISHED CLEANING THE CAGE AND REMOVED BAMBOO AND TRELLISING. TOMORROW IS GOING TO BE A MILD DAY AND PERFECT FOR TRANSPLANT. SOME OF THESE GIRLS ARE GETTING VERY BIG. I RAN OUT OF SOIL AFTER THE LAST 10GAL GROW BAG. ITS NOT FILLED "ALL" THE WAY AND I GAVENT FILLED MY 50 GAL. I'LL GET THE REST OF THE SOIL I NEED FOR THAT 50 TOMORROW.


Likes
92
Share


@DogDoctorOfficial
Follow
Week 4 Veg Report - TrolMaster Chronicles 🌱
What a week it’s been in the garden! We finally transplanted the Papaya Zoap into its final Autopot, and let me tell you, this plant is something special. Though her roots weren’t quite where I wanted them to be yet, the move was needed to help her catch up with the rest of the crew. She’s already looking fantastic in her new home, and I have no doubt she’s about to explode with growth in the coming days. Sometimes, you just have to trust the process, and I’m feeling like this is one of those moments. It’s almost as if the room itself is taking on a life of its own. 🌿
In fact, I’m starting to believe that what we’re building here is something greater than ourselves—there’s this energy in the room, a feeling of everything coming together perfectly. I can’t wait to see how this journey unfolds!
Dialing in the VPD with TrolMaster’s Tech
Now, let’s talk VPD (Vapor Pressure Deficit) and how I’ve been keeping everything in check with the Tend-X and the incredible (DSH-2U) Humidity Station. VPD is crucial to plant health—it’s all about finding that perfect balance between humidity and temperature to optimize transpiration and nutrient uptake. The (DSH-2U) Humidity Station, connected directly to my humidifier, has been an absolute game-changer in this regard. With its real-time data and automation, it allows me to monitor and adjust the RH with pinpoint accuracy.
Simple yet brilliant, the (DSH-2U) Humidity Station is keeping my room at the sweet spot I need. Whether I’m tweaking the settings from my phone while I’m out and about or just fine-tuning things while relaxing at home, this machine does it all. It’s like having an extra pair of hands in the grow room—and when you’re managing something as complex as VPD, that’s invaluable!
And yes, the TM+ Pro App—let’s not forget how awesome it is. I’m adjusting my grow room from the couch, the car, or even the bathroom 😜. I’ve said it before, but this app is making growing easier than ever.
Feeding the Girls: The Perfect Blend 🌱
We’ve upped the game by adding CaMg-Boost at 0.25 ml/L to the feeding schedule. Along with the 1 ml/L of the all-in-one liquid, this brings the TDS up to 320 ppm, with a pH of 5.99 and solution temperature of 24.8°C. In the soil, readings are around 415 ppm, with temperatures hovering around 25°C The plants are absolutely thriving, and I can already see the difference this new feed is making.
I can’t help but have a bit of fun with this process—it feels like I’m spoiling them with the best of the best. And they’re rewarding me with beautiful growth and vibrant green color. You know how it is, with the right care and attention, these plants are truly becoming a masterpiece in the making. 🌱
Shoutouts 💚
Big shoutout to TrolMaster and ThinkGrow LED for the phenomenal gear that’s making this grow smoother than ever. Also, massive thanks to Aptus Holland for their top-notch nutrition, and of course, to the community here on GrowDiaries—you guys keep the energy alive! 🌱
Last but definitely not least, shoutout to all the seed banks supporting this journey. You’ve been a huge part of this process, and I couldn’t do it without you!
Remember, for exclusive behind-the-scenes content and updates in real time, head over to my Instagram and YouTube channels @DogDoctorOfficial. We’ve got tons of epic content lined up, and you won’t want to miss it!
P.S.
Let’s talk about the new Model One LED Bars—these beauties are not only powerful but super efficient. I’ve been able to dim them down, save on electricity costs, and still maintain an incredible PAR and spectrum. It’s all about fine-tuning the balance of power and performance, and these lights make it easy to get the best results while being eco-friendly. Whether you’re running them full throttle or dialing it back, you’re still getting optimal growth conditions for your plants. That’s the kind of innovation that takes your grow to the next level. 💡
Growers Love to all 🌿💚


