
Likes
Comments
Share


@concentrate_on_coco
Follow
1/19 - RO ONLY 7gal at 6.2/6.3ph and 73*
PM fed remaining gal
1/20 - Feeding nutrients, 4gal at 6.1ph and 76*
1/21 - Feeding nutrients, 5gal at 6.1/6.2ph and 76*
1/22 - Feeding nutrients, 4gal at 6.1ph and 76* as well as RO at 6.2ph
1/23 - RO ONLY 4 gal at 6.1ph and 74*
1/24 - RO ONLY 6.2ph
1/25 - Feeding nutrients, 4 gal at 6.1ph and 77*


Likes
3
Share

@PhinolaGreen
Follow
5. Woche
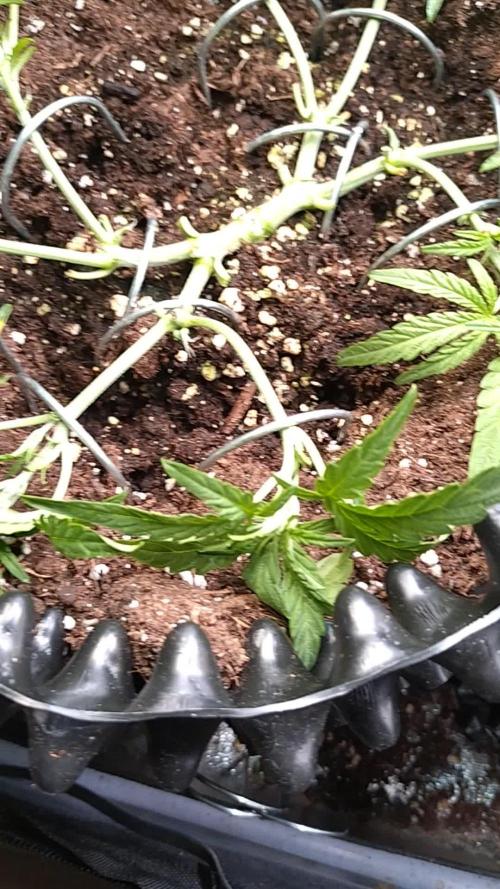
Befinde mich mit ihr auf der Zielgeraden was das Mainlining angeht, im nächsten Schritt kommt nur noch LST. Sie wurde jetzt 3x getoppt und sieht soweit gut aus, sie hat sich gut von den Strapazen erholt würde ich sagen 😊

Likes
36
Share


@AutoCrazy
Follow
These plants were great. I messed things up a bit but they still turned out a half decent yield. The taste and smell of the final product are great.
I am growing one of these plants in my greenhouse and I can’t wait to see what it produces as I don’t have the small space to confine the plant.
I love Humboldt genetics and can’t wait to grow more.

Likes
81
Share


@DrGruen
Follow
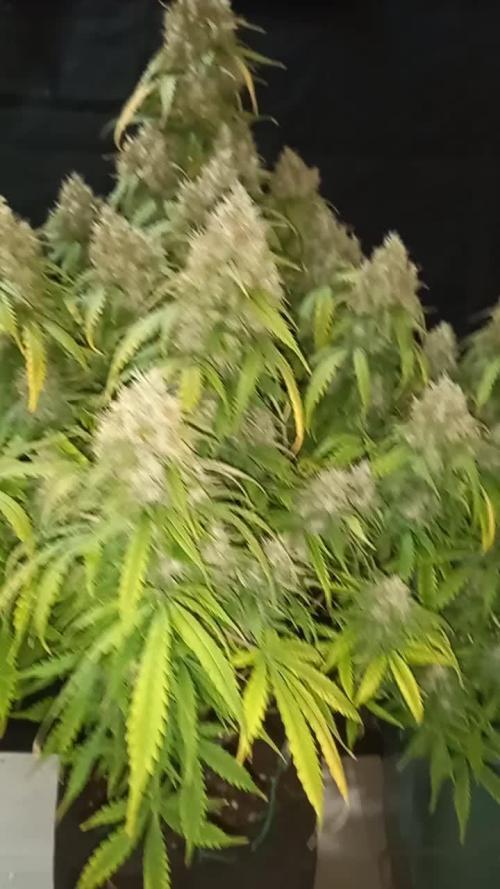
Mittlerweile haben sich schon recht schöne Buds gebildet, die stätig an Volumen und Grösse zunehmen 😀
Die ersten Härchen haben sich jetzt auch braun gefärbt und die beiden sind auch schon total harzig 😘
Der Duft nimmt jetzt auch ordentlich zu und es riecht angenehm nach Zitrone 😉
---------------------------------------------------------------------------------------------
ein kleines update.........😉
an der Qualität des Videos muss ich noch ein bisschen arbeiten😂😂

Likes
41
Share


@Santica_Garden
Follow
So we have reached the end of Week 8 of Flower for the Alien OG, I have uploaded a video showing how the Trichomes are looking just before Harvest. Any questions just ask away guys 👍🏾🌱💚


Likes
34
Share


@JonnyKush
Follow
Day 65
past nutrition problems I believe have slowed growth. unfortunately on a plant I think I have problems with the compaction of the soil which has caused too much irrigation. the plant does not eat and a little slower than the others. now after 4 days to dry i will give only datpo water which seems to burn for nutrients, i believe brought about by the fact that they are deposited in the soil. all in all they continue to grow and hope for the best! 💚🌱


Likes
34
Share


@PEAKYPLANTERS
Follow
hi to all, brothers of the weed!
my orange juice is nice and ready to be harvested!this beautiful plant was really very strong and resistant, in a short time it dominated all the cousins that were in the room! as always we will perform a dry trim and we will do a lot of good content and other reviews on the smoke so stay up to date!

Likes
1
Share


@KannaGrowing
Follow
Ya estamos casi listos para cosechar.
Estamos regando con agua y solo lo estrictamente necesario para mantener hidratadas nuestras plantas.
Tambien hemos reducido al 50% la potencia de nuestras luminarias LazerLite Pro 720w.

Likes
2
Share

@BabyBilly
Follow
She’s stretching a good amount… I did lollipop before I flipped and it’s grown back aggressively which I’m happy about. Hoping slows down on stretch. I’m just over 2 weeks of flower so I’m hoping she doesn’t stretch much more.
She’s very healthy and the growth is fantastic. A lot of new branches. She really filled out. I’ll have my work cut out for me on day 21 for defoliation. Very happy with the growth so far. I did supercrop some of the taller aux branches cause they’re getting up there. Just don’t want them getting out of control. This pheno is supposed to to be able to handle stress.

Likes
23
Share


@Canadian
Follow
I end up super cropping all the branches because they grow weight too big the good thing is that the plant has recover very well and starting to build up all those flowers.
I stopped recording their height at 71 inches but for sure if left alone she will continue to grow even more for now it looks like her flowering stretch has ended. I'm definitely looking forward to see how this girl is going to end up and at the end how much weight it is going to be able tohave.
thank you for reading I will continue to update have a happy grow.


Likes
19
Share

@Suemchen
Follow
Outside all the time
Day 64: looking good and watered again, it's really warm outside during the day 🌞I let the soil dry out completely. Watered with rain water and 2 ml/l Powerzyme, 2 ml/l Bloom Complex, 1 ml/l Cal Mag and 1 ml/l Green Sensation. EC at 1.6 and a pH of 6.4 👌🏻
Day 66: developing nicely 👌🏻 smells exactly the Same as Last Time🤗 smells really yummy: fruity and sweet 👌🏻
Day 69: looking good 👌🏻Watered with rain water and 1 ml/l Powerzyme, 1 ml/l Cal Mag 1 ml/l Alg a Mic. EC at 1.0 and a pH of 6.4 👌🏻
Likes
33
Share


@EeyoreTheHomie
Follow
DAY 65: Whelp, 8 weeks of shaming, abuse, experimentation, more shaming, and neglect-- the Lucky Charms plant is a f***ing female! Absolutely in-shock. I was so happy to learn she's a girl, but at the same moment was filled with so much regret, for how much better I could have treated this plant/how much larger I could have grown it. Just wow. So I took a clone cutting. It was a little small, but hopefully she takes because this plant is more resilient than a cockroach!!
The White Widow plant is steady bushin' in the veg area with the little ones. I really love how short and stocky I've managed to get this plant through all the LST. Its starting to feel. like a bonsai tree. It has certainly earned its adulthood after the catastrophe it endured in Week-5.
DAY 68: The re-potting of the Lucky Charms stunted its growth as expected, but its got a long way to stretch, so it should be able to utilize most of the new space. Itching to repot the White Widow. She's ready. Im just short on medium and space at the moment :/


Likes
82
Share


@WhiteEdge
Follow
26.02.2024
Clean tanks and filters with h2o2+vinegar acid +bleach
Mix fresh nutrient solution with 1.7ml AN connoisseur AB + Silica @ 1% H2o2 - total 30l
Donne one pass off long misting 2m with diluted nutrient solution 0.7EC. Flush buckets with diluted solution
PAR 350 PPFD, VPD 0,8, RH 60-62%, Temp Night-21c, Day-24/25c, Leaf temperature 22c, Light distance 75cm, CO2 650+ppm
340w@75cm distance
45s ON time 15min OFF time
PT-Pressurized tank - PH- 5.9 , EC -1.05, Temp-21c
NT-Nutrient Tank - PH -5.85, EC -1.0, Temp-19c
27.02.2024
Topping on all girls, 4 cut par plant
Detailly clean grow room floor, benches and main room floor,
From this week start feeding more, runoff is lower than input
Lower humidity to 58-60%
Girls looking great so far
PAR 380 PPFD, VPD 0.9, RH 58-60%, Temp Night-21c, Day-25c, Leaf temperature 22c, Light distance 75cm, CO2 650+ ppm
360w@75cm distance
NT-Nutrient Tank - PH -5.95, EC -0.9, Temp-19c
28.02.2024
Have timer malfunction, watering didn't work for some time, not affected by roots, still wet when realize defect
Replace all filters, great condition so far, no need for changing
After topping girls looking healthy,
PAR 360 PPFD, VPD 0.9, RH 58-60%, Temp Night-21c, Day-25c, Leaf temperature 22c, Light distance 75cm, CO2 650+ ppm
380w@75cm distance
NT-Nutrient Tank - PH -6.02, EC -0.84, Temp-19c
Nutrient strength still drooping, next top-up will be a higher strength, around 1.1EC
29.02.2024
PAR 410 PPFD, VPD 0.9, RH 58-60%, Temp Night-21c, Day-25c, Leaf temperature 22c, Light distance 75cm, CO2 650+ ppm
Nutrient Tank - PH -6.04, EC -0.81, Temp-20c
400w@70cm distance
Increasing light intensity slowly every day, Tropicana in center love it, still at the end off day have leaves point up
One Weeding Cheesecake is not so light hangry, it drip every day before light out, but stay up one hour after light is on
Humidifier running less and less time, girls make humidity in room
01.03.2024
Again have issue with watering timers (DH48S-S), stop working again, noticed that early so no damage
Will need to invest in better timer for misting, this one is start to malfunction😡
Girls growing fast this week, no problem at all😇 Every day their progress can be seen 😀
Like that girls are almost same height and structure, very uniform growth by any mean👏
Hope differences will be marginal between cultivars, Weeding Cheesecake is taller so far but not much
Tropicana Cookies still have most byshy and tight internodal spacing from all three cultivars
Replace all filters and clean UV-c bulb
PAR 460 PPFD, VPD 0.9, RH 58-60%, Temp Night-21c, Day-25/26c, Leaf temperature 22c, Light distance 70cm, CO2 650+ ppm
Nutrient Tank - PH -6.05, EC -0.86, Temp-22c
414w@70cm
02.03.2021
Girls start to drink noticeable more water and nutrients, EC drop in tanks by 0.2 in last two days, PH is stabile, going on base side by little
Replace all filters , set Diablo to 440w without changing light height, let it shine 😀
Start to manipulate branches and tucking big fan leaves, recovery from topping is apparent, two new shoots are larger and larger every day
If growth continue with this speed, flowering probably in middle off next week, probably don't want to wait more than that
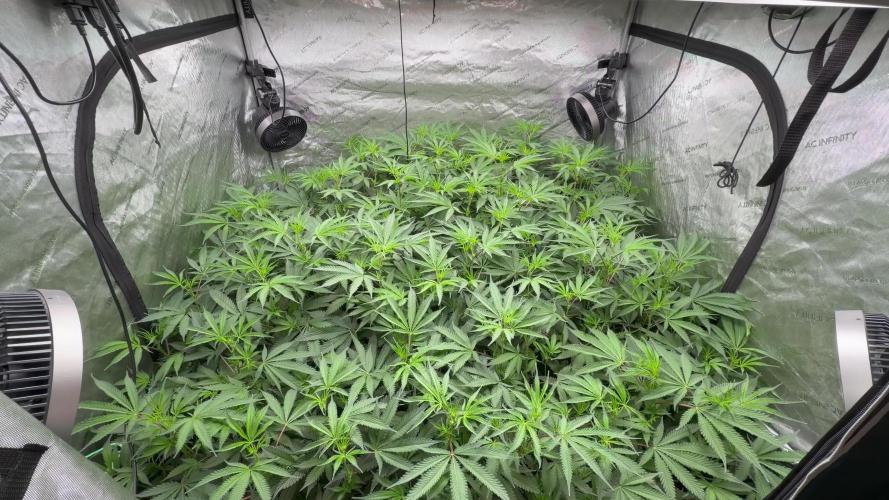
All girls from same strain looking very similar, really great genetic , very uniform growth and structure
Tropicana still most bushy, Weeding Cheesecake is taller , minor deferences so far
Hot and humid outside condition, thin this year we hit several HIGH Temp Record!
PAR 490 PPFD, VPD 0.9, RH 58-61%, Temp Night-21c, Day-25/26c, Leaf temperature 22c, Light distance 70cm, CO2 650+ ppm
Nutrient Tank - PH -6.07, EC -0.80, Temp-22c
Likes
Comments
Share


@J_Law
Follow
coming along wonderful, what looks like to be nearly 2ft of colas!
the GG4 is now officially the same height as the SS!
SS has about 20 colas, with at least 5 nodes on each cola, which means I'll have around 100 bud sites.
GG4 has about 10 colas, with at least 3-5 nodes on each cola, which means I'll have around 30-50 bud sites.
defol if needed


Processing
Likes
6
Share


@Mr_nugs_lover_David
Follow
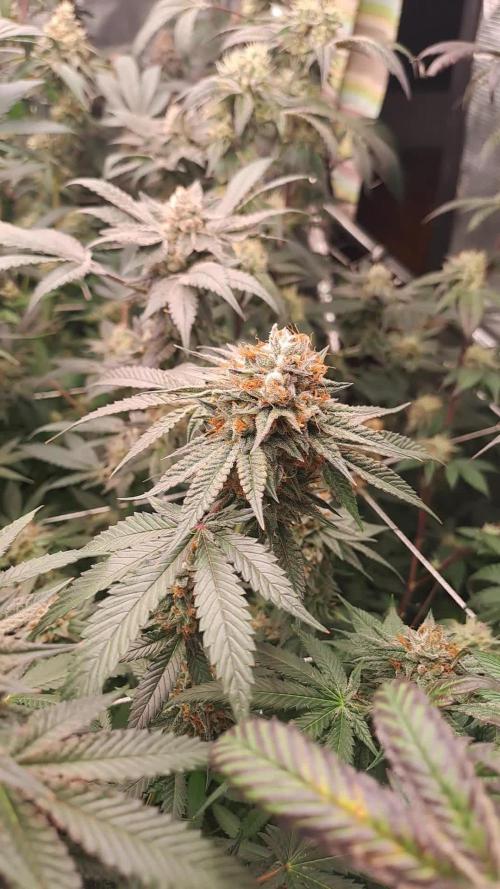
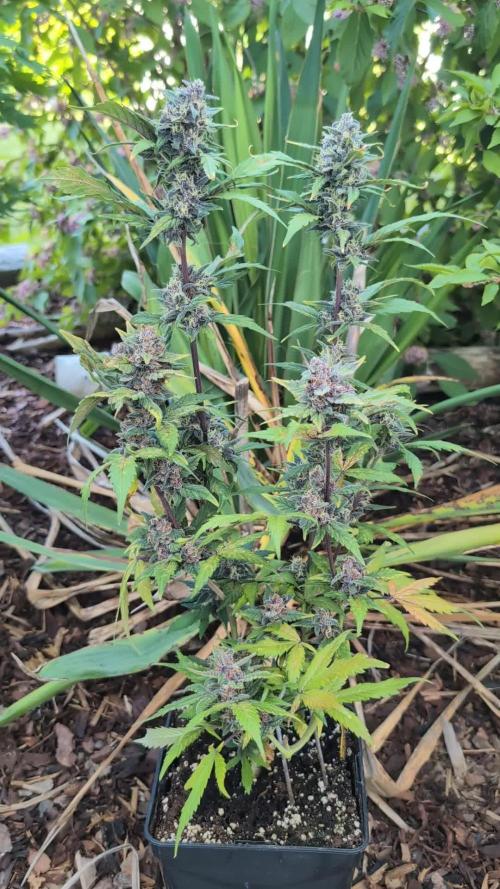
What a pleasure to see, to smell, and to grow, wonderful and magic strain, absolutely in love with the pure OG aroma, very strong, absolute gassy very powerful aroma, flowers completely covered in resin, super sticky, I just love tjis genetic man, always gotta have some OG in the garden this is the prove 💎❄️ peace guys ✌️💚
Likes
4
Share


@Jabbamo
Follow
_______________________________________________________
Mi. 25.3.
- 3,5 Liter pro Pflanze gegossen (ca. 300ml Drain)
- Rainpoint Bewässerungssystem eingesetzt
- 1L auf 3 Pflanzen Nährlösung per Hand angegossen
- Programm: 3min. ON / 3min. PAUSE / 3min. ON
- 2L pro Zyklus.
- 1L klar spülen zur Systemreinigung
1,2 ml / Liter "Calmag"
1,5 ml / Liter "Bio Grow"
4,0 ml / Liter "Bio Bloom"
4,0 ml / Liter "Top Max"
Ph 6,2 / 790 ppm
_______________________________________________________
So. 29.3.
- 3,2 Liter pro Pflanze gegossen (ca. 200ml Drain)
- 1L Nährlösung per Hand angegossen
- 8L Nährlösung per Gießsystem
- 0,5L klar spülen zur Systemreinigung
1,2 ml / Liter "Calmag"
1,5 ml / Liter "Bio Grow"
4,0 ml / Liter "Bio Bloom"
4,0 ml / Liter "Top Max"
Ph 6,2 / 770 ppm

Likes
2
Share


@Hypnogrow
Follow
I busted myself up so havent been able to get into the grow much for a couple weeks. They are definitely thirsty and not getting enough water so will water more deeply next time around a gallon per tote a day.

